Sakura Samsara
Last updated 2026-06-14







Sakura Samsara is a special area where Captains can fight Honkai Beasts and accomplish missions in an open world setting. Similar to a typical adventure game, there is no loading after entering, as the entire map is seamless. Enemies and collection nodes will spawn randomly and main storyline quests (as well as side Adventure Tasks) can be accomplished.
Monsters encountered in the storyline and roaming the open world use Dynamic Difficulty.
Overview
Welcome to the Sakura Samsara!
You may try your hand at different game modes in the Sakura Samsara, including:
- Higokumaru Training
- Storyline Missions which include the touching backstory to Yae Sakura and Kallen's relationship. View a playlist of all cutscenes here!
- Adventure Tasks
- Gourmet Fest
- Shrine Exchange
- Adventure Rating (including Elite Monsters, Secret Events, and Material Gathering)
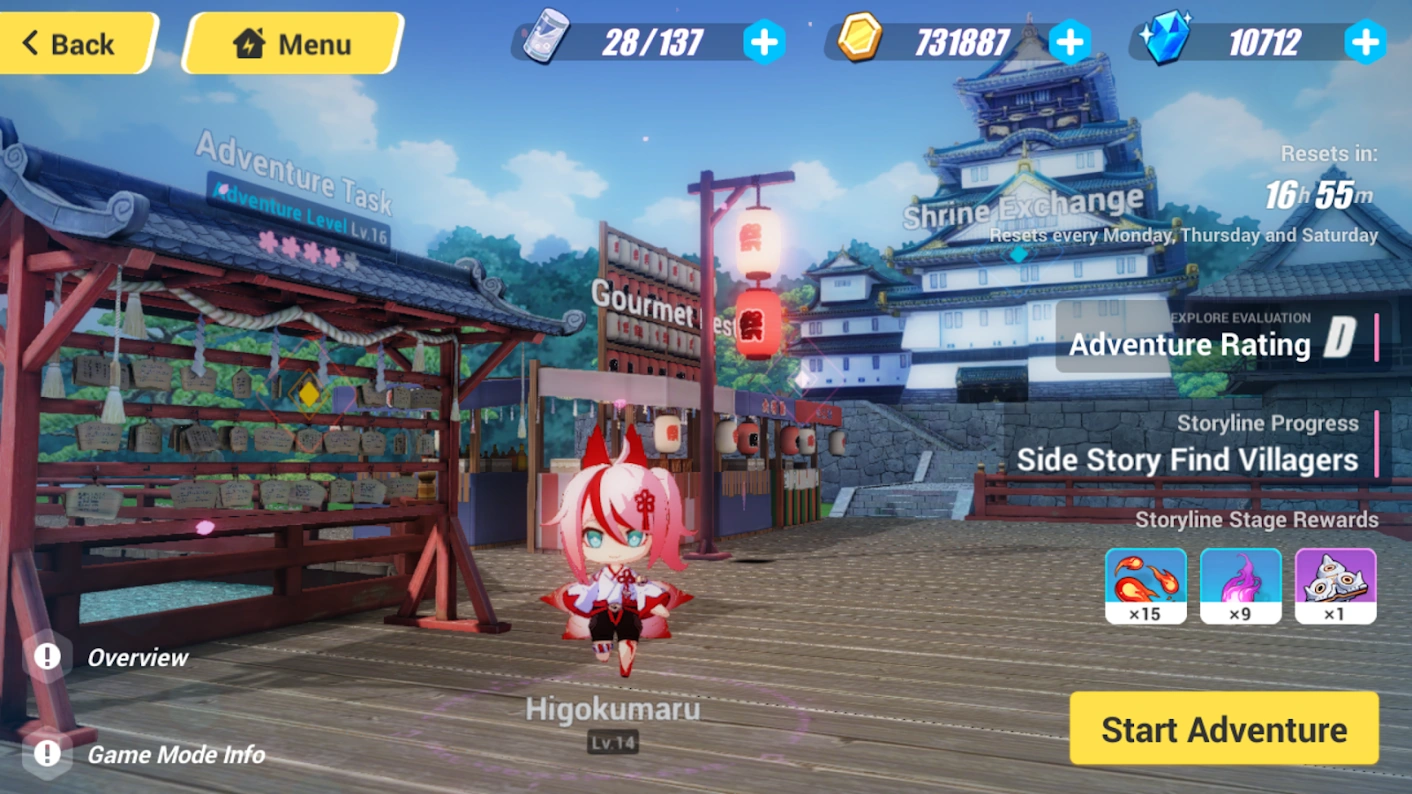
The hub screen of Samsara, after unlocking all modes. Clockwise from center: Higokumaru, Adventure Tasks, Gourmet Fest, Shrine Exchange, Reset timer, Adventure Rating, Storyline Progress, Storyline Rewards, and the Start Button.
About Adventure Map Reset
The Adventure Map will reset at 04:00 every Monday, Thursday, and Saturday. Collection points in the wild will be reset and refreshed on Monday only, and a new round of Adventure Tasks will become available, and you will be given an Adventure Rating based on your performance.
If you've already cleared the storyline for one round, the collection points in the wild will be refreshed only after the next time the Adventure Map is reset. During the one hour before the Adventure Map is reset (03:00-04:00), you will not be able to enter the Sakura Samsara map.
Adventure Rating
Every time the Adventure Map resets, an Adventure Rating will be given to you based on all the actions you have completed including Adventure Tasks, Material Gathering, Elite Monsters, and Secret Events. Once Adventure has reset, the next time you enter the Open World, you will be given your Rating Rewards.
Higokumaru Training

She claims to be a human but sports ears and multiple tails. She's also a complete glutton and loves inari-age (fried tofu). She's a fox if you ask me.
Higokumaru is the adorable partner that unlocks after unlocking Samsara EX. Higokumaru serves Captains by attacking enemies in Open World and utilizing helpful Partner skills. Higokumaru only appears in Samsara.
Partner Skills

Higokumaru learns a number of useful skills to assist Captains while they traverse the Open World. Skills are learned upon reaching certain levels, and  Higokumaru EXP are used to level up Higokumaru. Higokumaru EXP can be gained from Storyline Stage rewards and Adventure Task rewards.

| |||
 |
Red Jade Bakudan | Lvl. 0 | |
|---|---|---|---|
| Higokumaru's Basic Ranged ATK. | |||
| Description | |||
| Hurls a small fireball towards the enemy, dealing 100% ATK of Fire DMG. | |||

| |||
|
Diagonal Slash | Lvl. 0 | |
| Higokumaru's Basic Melee ATK. | |||
| Description | |||
| She scratches the enemy with her claw to deal 200% ATK of Fire DMG. | |||

| |||
 |
True Sight | Lvl. 2 | |
| Awaken Higokumaru's True Sight. | |||
| Description | |||
| Cast True Sight to enter True Sight status, helping her find hidden chests and monsters easily. | |||

| |||
|
Decisive Blow | Lvl. 4 | |
| Higokumaru's True Sight skill has been awakened; | |||
| Description | |||
| Cast True Sight to enter True Sight status, where stealth kills can be performed on monsters. | |||

| |||
 |
Fox Night | Lvl. 6 | |
| Higokumaru teleports her master to various map areas. | |||
| Description | |||
| Enter the Stigmata Space in spirit form to teleport through the real world. This ability is still imperfect, though. | |||

| |||
|
Flame Cannon | Lvl. 10 | |
| Higokumaru's Ultimate Ranged ATK. | |||
| Description | |||
| Unleash a continuous stream of fire to deal up to 16 hits, each hit inflicting 100% ATK of Fire DMG. | |||

| |||
|
Spirited Away | Lvl. 12 | |
| Higokumaru's True Sight skill has been awakened; | |||
| Description | |||
| All monsters have a reduced detection radius | |||

| |||
|
Ghost Parade | Lvl. 14 | |
| Higokumaru swiftly teleports her master to Exorcism Request Points. | |||
| Description | |||
| Assume spirit form to travel through the Stigmata Space and teleport across the real world. This skill is still rather fickle... | |||

| |||
|
Crimson Blossom | Lvl. 16 | |
| Higokumaru's Ultimate Melee ATK. | |||
| Description | |||
| Unleashes a burst of energy that deals 500% ATK of Fire DMG to all nearby enemies. | |||

| |||
 |
Fox Possession | Lvl. 18 | |
| Higokumaru casts her blessing on her master; | |||
| Description | |||
| Master's attacks will deal 50 additional Fire DMG; | |||

| |||
|
Ignite (Higokumaru) | Lvl. 20 | |
| Higokumaru's passive skill. | |||
| Description | |||
| Attacks have a chance of igniting the enemy for 3s, dealing 80 Fire DMG every 0.5s. | |||

| |||
|
Fox Shield | Lvl. 23 | |
| Inari (Fox God) blessings from Higokumaru. | |||
| Description | |||
| Gains Fox Shield when entering battle. This Shield can block DMG 1 time. Shield also deals 25 Fire DMG to nearby enemies every 0.25s. | |||

| |||
|
Burst (Higokumaru) | Lvl. 26 | |
| Higokumaru's passive skill. | |||
| Description | |||
| Attacks have a chance of igniting the enemy for 3s, dealing 80 Fire DMG every 0.5s. | |||
Storyline Missions
Storyline missions can only be cleared once. After all Storyline mission are cleared for a Samsara, the next Samsara will be unlocked.
Depending on which storyline Samsara you're on, new gameplay elements will be unlocked in the Adventure Map.
- First Samsara: Captains Lv. 50 and above may enter.
- Second Samsara: Unlocks after completing [First Samsara]. Adventure Tasks, material gathering, elite enemies, and hidden events unlock.
- Third Samsara: Unlocks after completing [Second Samsara].
- Side Story: The new Celestial Castle Map will be unlocked along with the Extra Story stages and Sakura Samsara's exclusive partner.
- Open World area: Only after completing the Extra Story stages will the new area be unlocked, you must first assign 2 Valkyries to infiltrate the Village Area and the Celestial Castle, and will be unable to go into another area once they are in battle.
Adventure Tasks
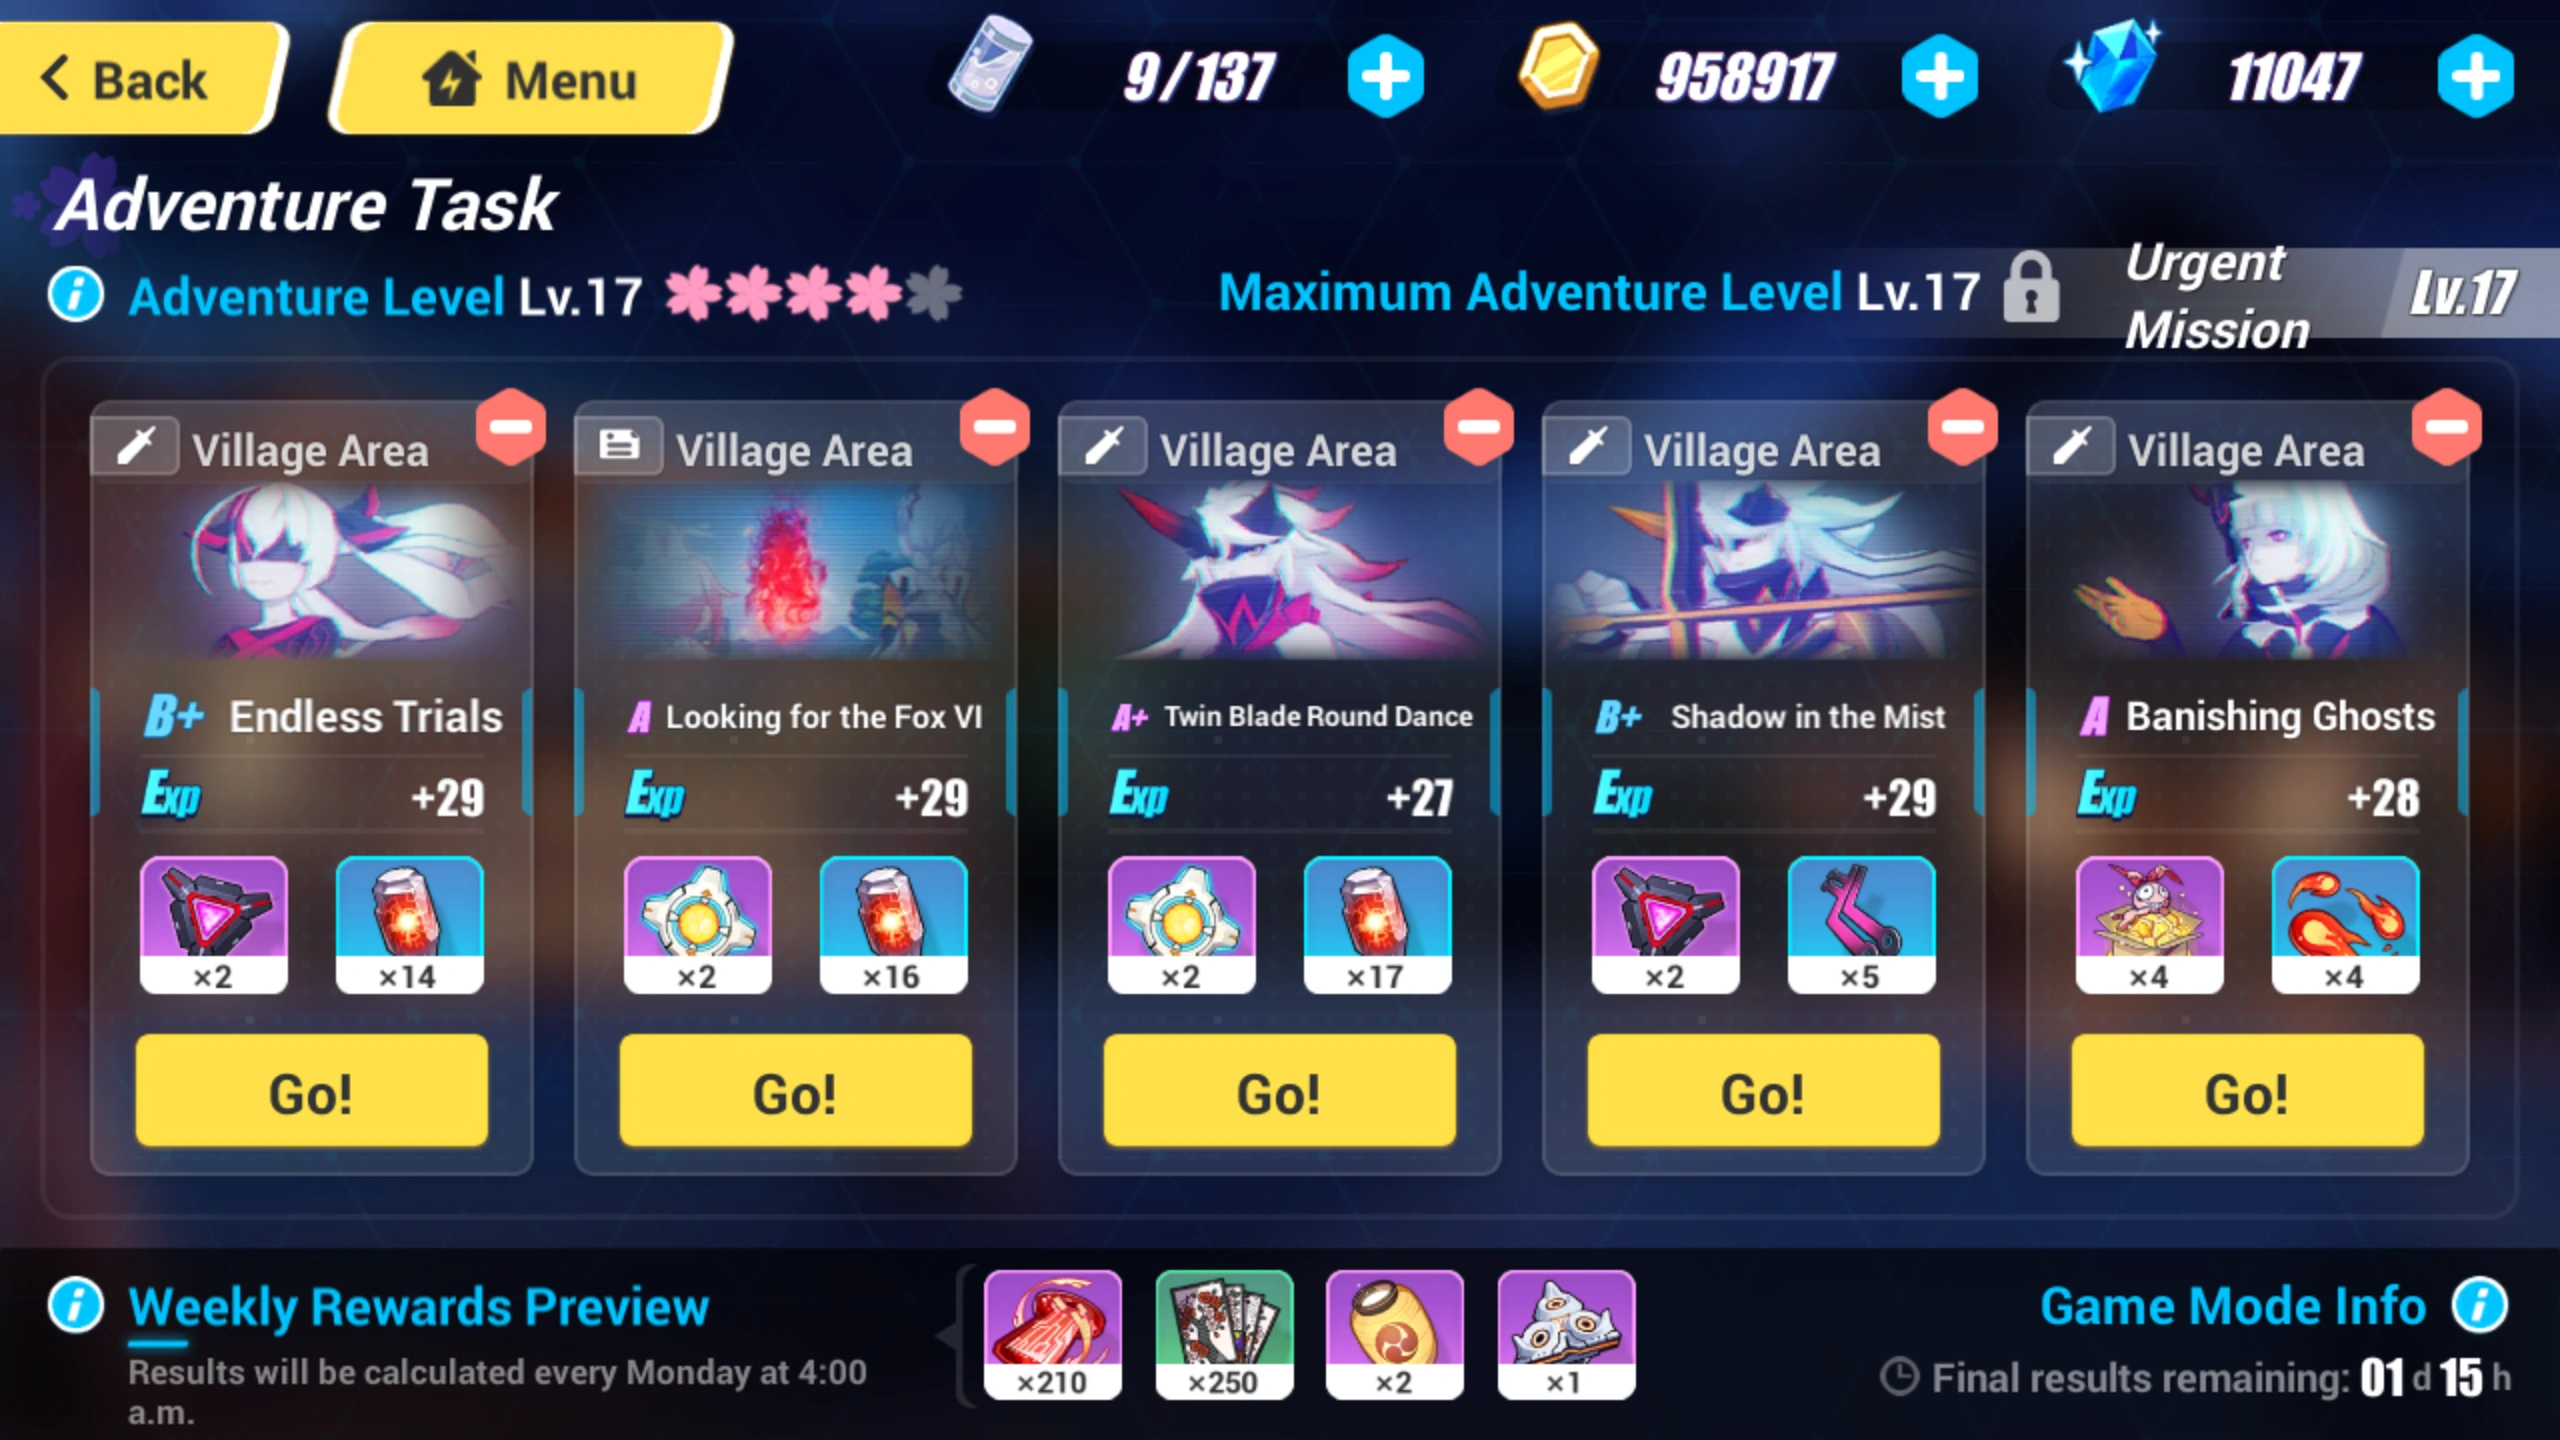
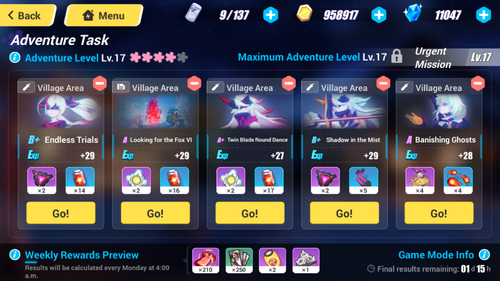
The Adventure Task screen, with all 5 available Adventure Task slots filled.
Adventure Tasks can be taken and cleared once every Sakura Samsara reset period. Captains can take up to 4 adventure tasks at once. 5 if they have cleared Side Samsara at level 42. Each time a new task is chosen, players will be given an option between 3 different tasks to choose. If they wish, Captains can refresh these options up to 7 times for free every reset. This will cost an additional  Crystals ×5 each time after all free attempts are depleted. After choosing their adventure tasks, Captains can go into Sakura Samsara and complete the tasks chosen. They will be marked and tracked on the ground via a line of arrows.
Adventure tasks can be any range of activities such as defeating enemies, securing stealth kills, finding lost spirits, using bombs or spirit cannons, or fighting previous Familiar's Request bosses.
- New Adventure Task rounds are unlocked every Monday, Thursday, and Saturday. After the 2nd map is unlocked at Captain Lv.30, you'll need to activate map access before entering the Open World.
- You can accept up to 5 tasks each round.
- You can choose 1 out of the 3 randomly generated Adventure Tasks for each Task Order.
- You get 15 free refresh attempts for each round. Additional attempts will cost Crystals.
- You can cancel 1 accepted Adventure Task per day.
- Adventure Task targets have Monster Weakness. So be sure to form your team wisely~
- Each Adventure Task gives task rewards and
 Adventure Completion x1.
- Round Finalization Rewards will be issued every Monday, Thursday and Saturday based on Adventure Level.
- Finish all 5 Adventure Tasks for the rewards.
- Finalization Rewards will be issued every Monday based on Adventure Level.
- Higher Adventure Level provides better rewards.
- Weekly Finalization is only initiated when you have completed at least 1 round of Adventure Tasks in that week.
Familiar's Request
Familiar's Request unlock after reaching Adventure Lv. 14. from clearing Adventure Tasks (in the screenshot above, only 4 of the required 5  are filled). The bosses are typically much more difficult than typical enemies, and come with enhanced abilities, may run away when dropping below a certain amount of health, and will enrage after 90 seconds of battle. Once enraged, Familiar's Request bosses will be immune to all crowd control, gain enhanced attack speed and damage, and eventually begin to do extreme amounts of fire damage to surrounding enemies. Ensure that you're ready to take them on before your first strike!
|
Familiar's Request Boss: Stormgale | LV.11 |
|---|---|---|
 Suggested LV.56 Suggested LV.56
| ||
| Hunt: Target has appeared! Defeat it ASAP! | ||
 Weakness: Blade Vulnerability Weakness: Blade VulnerabilityTakes 50% more DMG from attacks dealt by blade wielders. | ||
| Rewards: | ||
   | ||
|
Familiar's Request Boss: Titan Prime | LV.12 |
|---|---|---|
 Suggested LV.57 Suggested LV.57
| ||
| Hunt: Target has appeared! Defeat it ASAP! | ||
| Weakness: 2-Handed Vulnerability Takes 50% more DMG from attacks dealt by 2-handed weapon wielders. | ||
| Rewards: | ||
| ||
|
Familiar's Request Boss: Universalis | LV.13 |
|---|---|---|
 Suggested LV.58 Suggested LV.58
| ||
| Hunt: Target has appeared! Defeat it ASAP! | ||
| Weakness: Pistols Vulnerability Takes 50% more DMG from attacks dealt by pistol wielders. | ||
| Rewards: | ||
| ||
|
Familiar's Request Boss: Skirmisher | LV.14 |
|---|---|---|
 Suggested LV.59 Suggested LV.59
| ||
| Hunt: Target has appeared! Defeat it ASAP! | ||
| Weakness: Heavy Vulnerability Takes 50% more DMG from attacks dealt by heavy weapon wielders. | ||
| Rewards: | ||
| ||
|
Familiar's Request Boss: Polar Halo | LV.15 |
|---|---|---|
 Suggested LV.62 Suggested LV.62
| ||
| Hunt: Target has appeared! Defeat it ASAP! | ||
| Weakness: Airborne Vulnerability Takes 50% more DMG after being knocked airborne. | ||
| Rewards: | ||
| ||
|
Familiar's Request Boss: Totenritter | LV.16 |
|---|---|---|
 Suggested LV.67 Suggested LV.67
| ||
| Hunt: Target has appeared! Defeat it ASAP! | ||
| Weakness: Temporal Vulnerability Takes 200% more DMG during Time Fracture. | ||
| Rewards: | ||
| ||
|
Familiar's Request Boss: Guisarmier | LV.17 |
|---|---|---|
| Suggested LV.69
| ||
| Hunt: Target retreats to another location at below 50% HP. | ||
| Weakness: Charged ATK Vulnerability Takes 75% more DMG from Charged ATKs. | ||
| Rewards: | ||
| ||
|
Familiar's Request Boss: Glacier Armor | LV.18 |
|---|---|---|
 Suggested LV.72 Suggested LV.72
| ||
| Hunt: Target retreats to another location at below 50% HP. | ||
| Weakness: Melee Vulnerability Takes 50% more melee Physical DMG. | ||
| Rewards: | ||
| ||
|
Familiar's Request Boss: Big Universe | LV.19 |
|---|---|---|
 Suggested LV.73 Suggested LV.73
| ||
| Hunt: Target retreats to another location at below 50% HP. | ||
| Weakness: Ranged Vulnerability Takes 50% more ranged Physical DMG. | ||
| Rewards: | ||
| ||
|
Familiar's Request Boss: Jo-Ninja | LV.20 |
|---|---|---|
 Suggested LV.78 Suggested LV.78
| ||
| Hunt: Target retreats to another location at below 50% HP. | ||
| Weakness: Cross Vulnerability Takes 50% more DMG from attacks dealt by cross wielders. | ||
| Rewards: | ||
| ||
|
Familiar's Request Boss: Storm Mech | LV.21 |
|---|---|---|
 Suggested LV.80 Suggested LV.80
| ||
| Hunt: Target retreats to another location at below 50% HP. | ||
| Weakness: Combo ATK Vulnerability Takes 75% more DMG from Combo ATKs. | ||
| Rewards: | ||
| ||
|
Familiar's Request Boss: Frosthell Knight | LV.22 |
|---|---|---|
 Suggested LV.80 Suggested LV.80
| ||
| Hunt: Target retreats to another location at below 50% HP. | ||
| Weakness: Fire Vulnerability Takes 75% more Fire DMG. | ||
| Rewards: | ||
| ||
|
Familiar's Request Boss: Bandit | LV.23 |
|---|---|---|
 Suggested LV.80 Suggested LV.80
| ||
| Hunt: Target retreats to another location at below 50% HP. | ||
| Weakness: Lightning Vulnerability Takes 75% more Lightning DMG. | ||
| Rewards: | ||
| ||
|
Familiar's Request Boss: A-OMEGA | LV.24 |
|---|---|---|
 Suggested LV.80 Suggested LV.80
| ||
| Hunt: Target retreats to another location at below 50% HP. | ||
| Weakness: Ice Vulnerability Takes 75% more Ice DMG. | ||
| Rewards: | ||
| ||
|
Familiar's Request Boss: Hunter | LV.25 |
|---|---|---|
 Suggested LV.80 Suggested LV.80
| ||
| Hunt: Target retreats to another location at below 50% HP. | ||
| Weakness: QTE Vulnerability Takes 500% more DMG from QTE attacks and effects. | ||
| Rewards: | ||
| ||
|
Familiar's Request Boss: Serval | LV.26 |
|---|---|---|
 Suggested LV.80 Suggested LV.80
| ||
| Hunt: Target retreats to another location at below 66% and 33% HP. | ||
| Weakness: Ice Vulnerability Takes 75% more Ice DMG. | ||
| Rewards: | ||
| ||
|
Familiar's Request Boss: Padrino | LV.27 |
|---|---|---|
 Suggested LV.80 Suggested LV.80
| ||
| Hunt: Target retreats to another location at below 66% and 33% HP. | ||
| Weakness: Lightning Vulnerability Takes 75% more Lightning DMG. | ||
| Rewards: | ||
 | ||
|
Familiar's Request Boss: Kallen | LV.28 |
|---|---|---|
 Suggested LV.80 Suggested LV.80
| ||
| Hunt: Target retreats to another location at below 66% and 33% HP. | ||
| Weakness: Temporal Vulnerability Takes 200% more DMG during Time Fracture. | ||
| Rewards: | ||
 | ||
| Level 28 is quite a large difficulty spike compared to the previous Familiar's Requests. If you're having trouble, take a look at the clear below for some tips, or check the official Discord for help! | ||
|
Familiar's Request Boss: Quick-Handed Titan | LV.29 |
|---|---|---|
 Suggested LV.80 Suggested LV.80
| ||
| Hunt: Target retreats to another location at below 66% and 33% HP. | ||
| Weakness: Combo ATK Vulnerability Takes 75% more DMG from Combo ATKs. | ||
| Rewards: | ||
| ||
|
Familiar's Request Boss: Gemini | LV.30 |
|---|---|---|
 Suggested LV.80 Suggested LV.80
| ||
| Hunt: Target retreats to another location at below 66% and 33% HP. | ||
| Weakness: Ranged Vulnerability Takes 50% more ranged Physical DMG. | ||
| Rewards: | ||
| ||
Gourmet Fest
Gourmet Fest, or Gourmet Festival, can be used by Captains to craft food items that power-up battlesuits, recover HP/SP, or help with gathering items on the map.
Crafting food costs  Ingredients and, usually,
  Coins. Food takes effect immediately upon crafting and cannot be made once the daily limit is reached.
Only three[citation needed] items are craftable from the start with the rest requiring a higher Adventure Lv.


Req. Lvl: 7+

Req. Lvl: 5+

Req. Lvl: 14+

Req. Lvl: 18+

Req. Lvl: 1+

Req. Lvl: 1+

Req. Lvl: 5+

Req. Lvl: 1+
Shrine Exchange
The Shrine Exchange is a shortcut to access the  Coin Shop,
  Asterite Shop, and
  War Treasury from the Open World's menu.
Adventure Rating
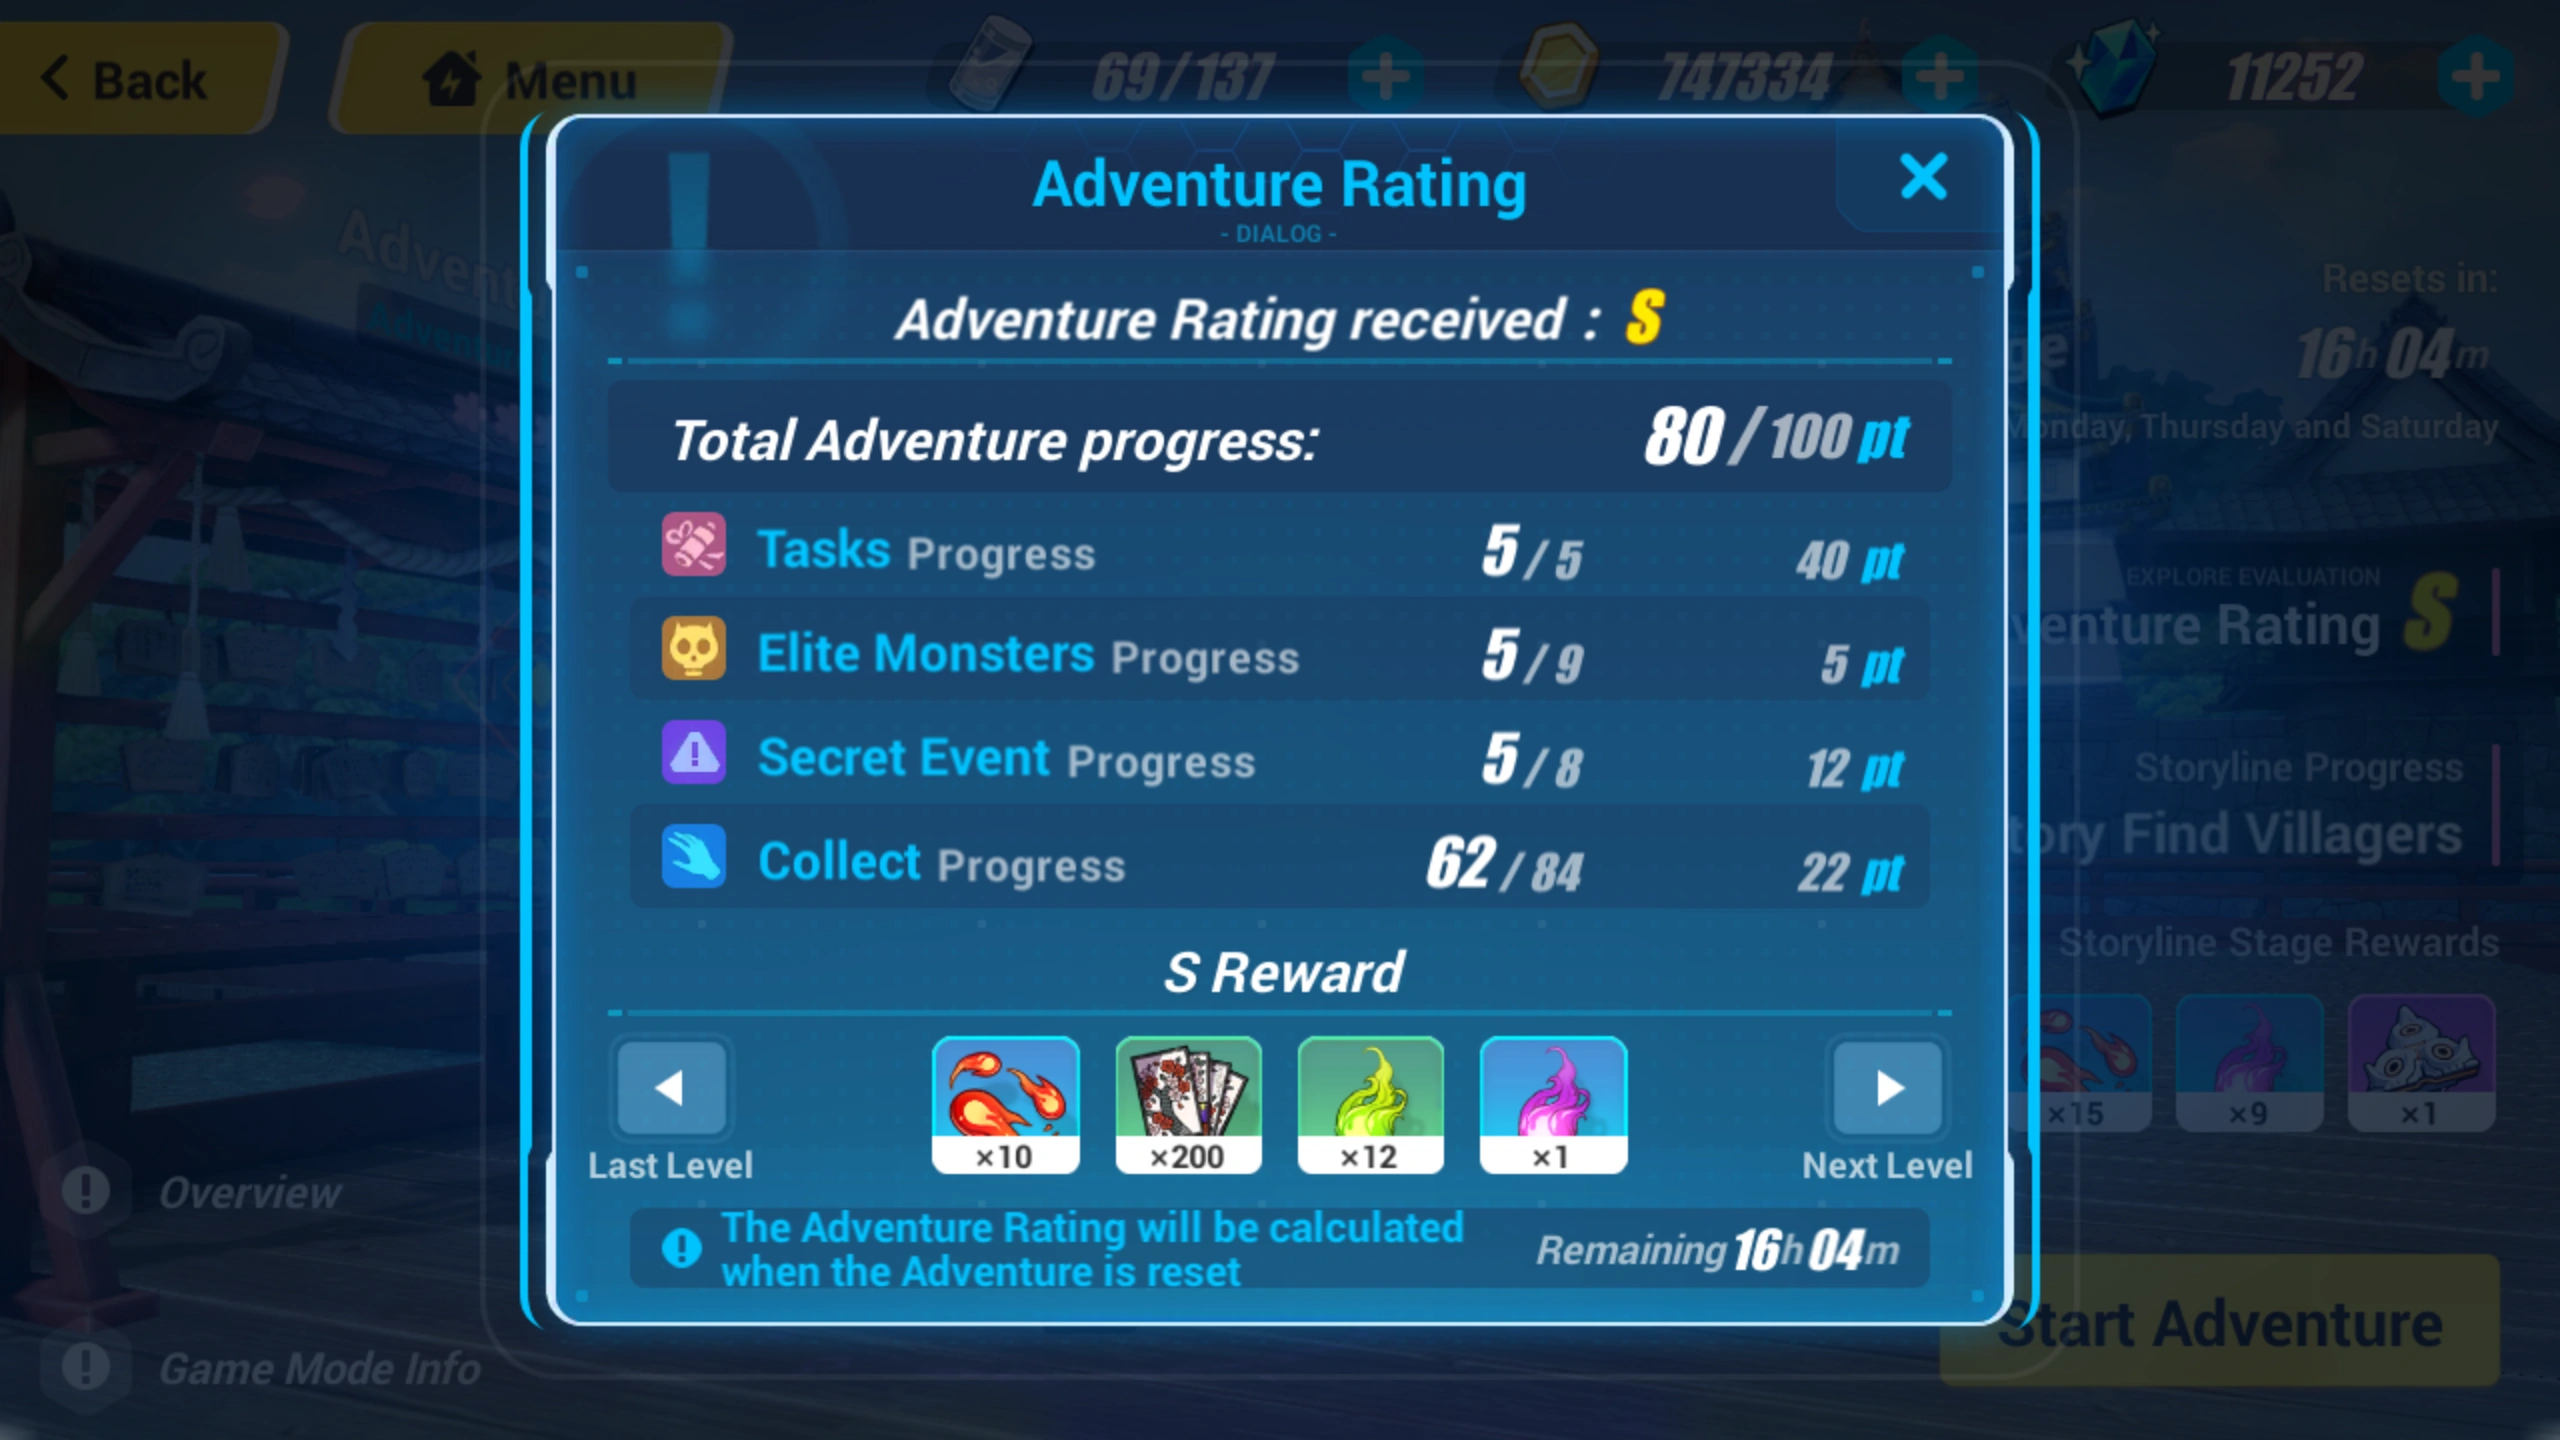
The Adventure Rating summary from the home Samsara screen.
- Each reset Captains have a change to gain rewards by increasing their Adventure Rating.
- A Captain's Adventure Rating is decided from 4 factors:
Rewards are distributed on a D -> S scale, with increasingly better rewards. Try to complete as many objectives as possible to reach S rank each Samsara reset!
Progress can be checked from the main Samsara screen, but also from the pause menu while playing the Open World.
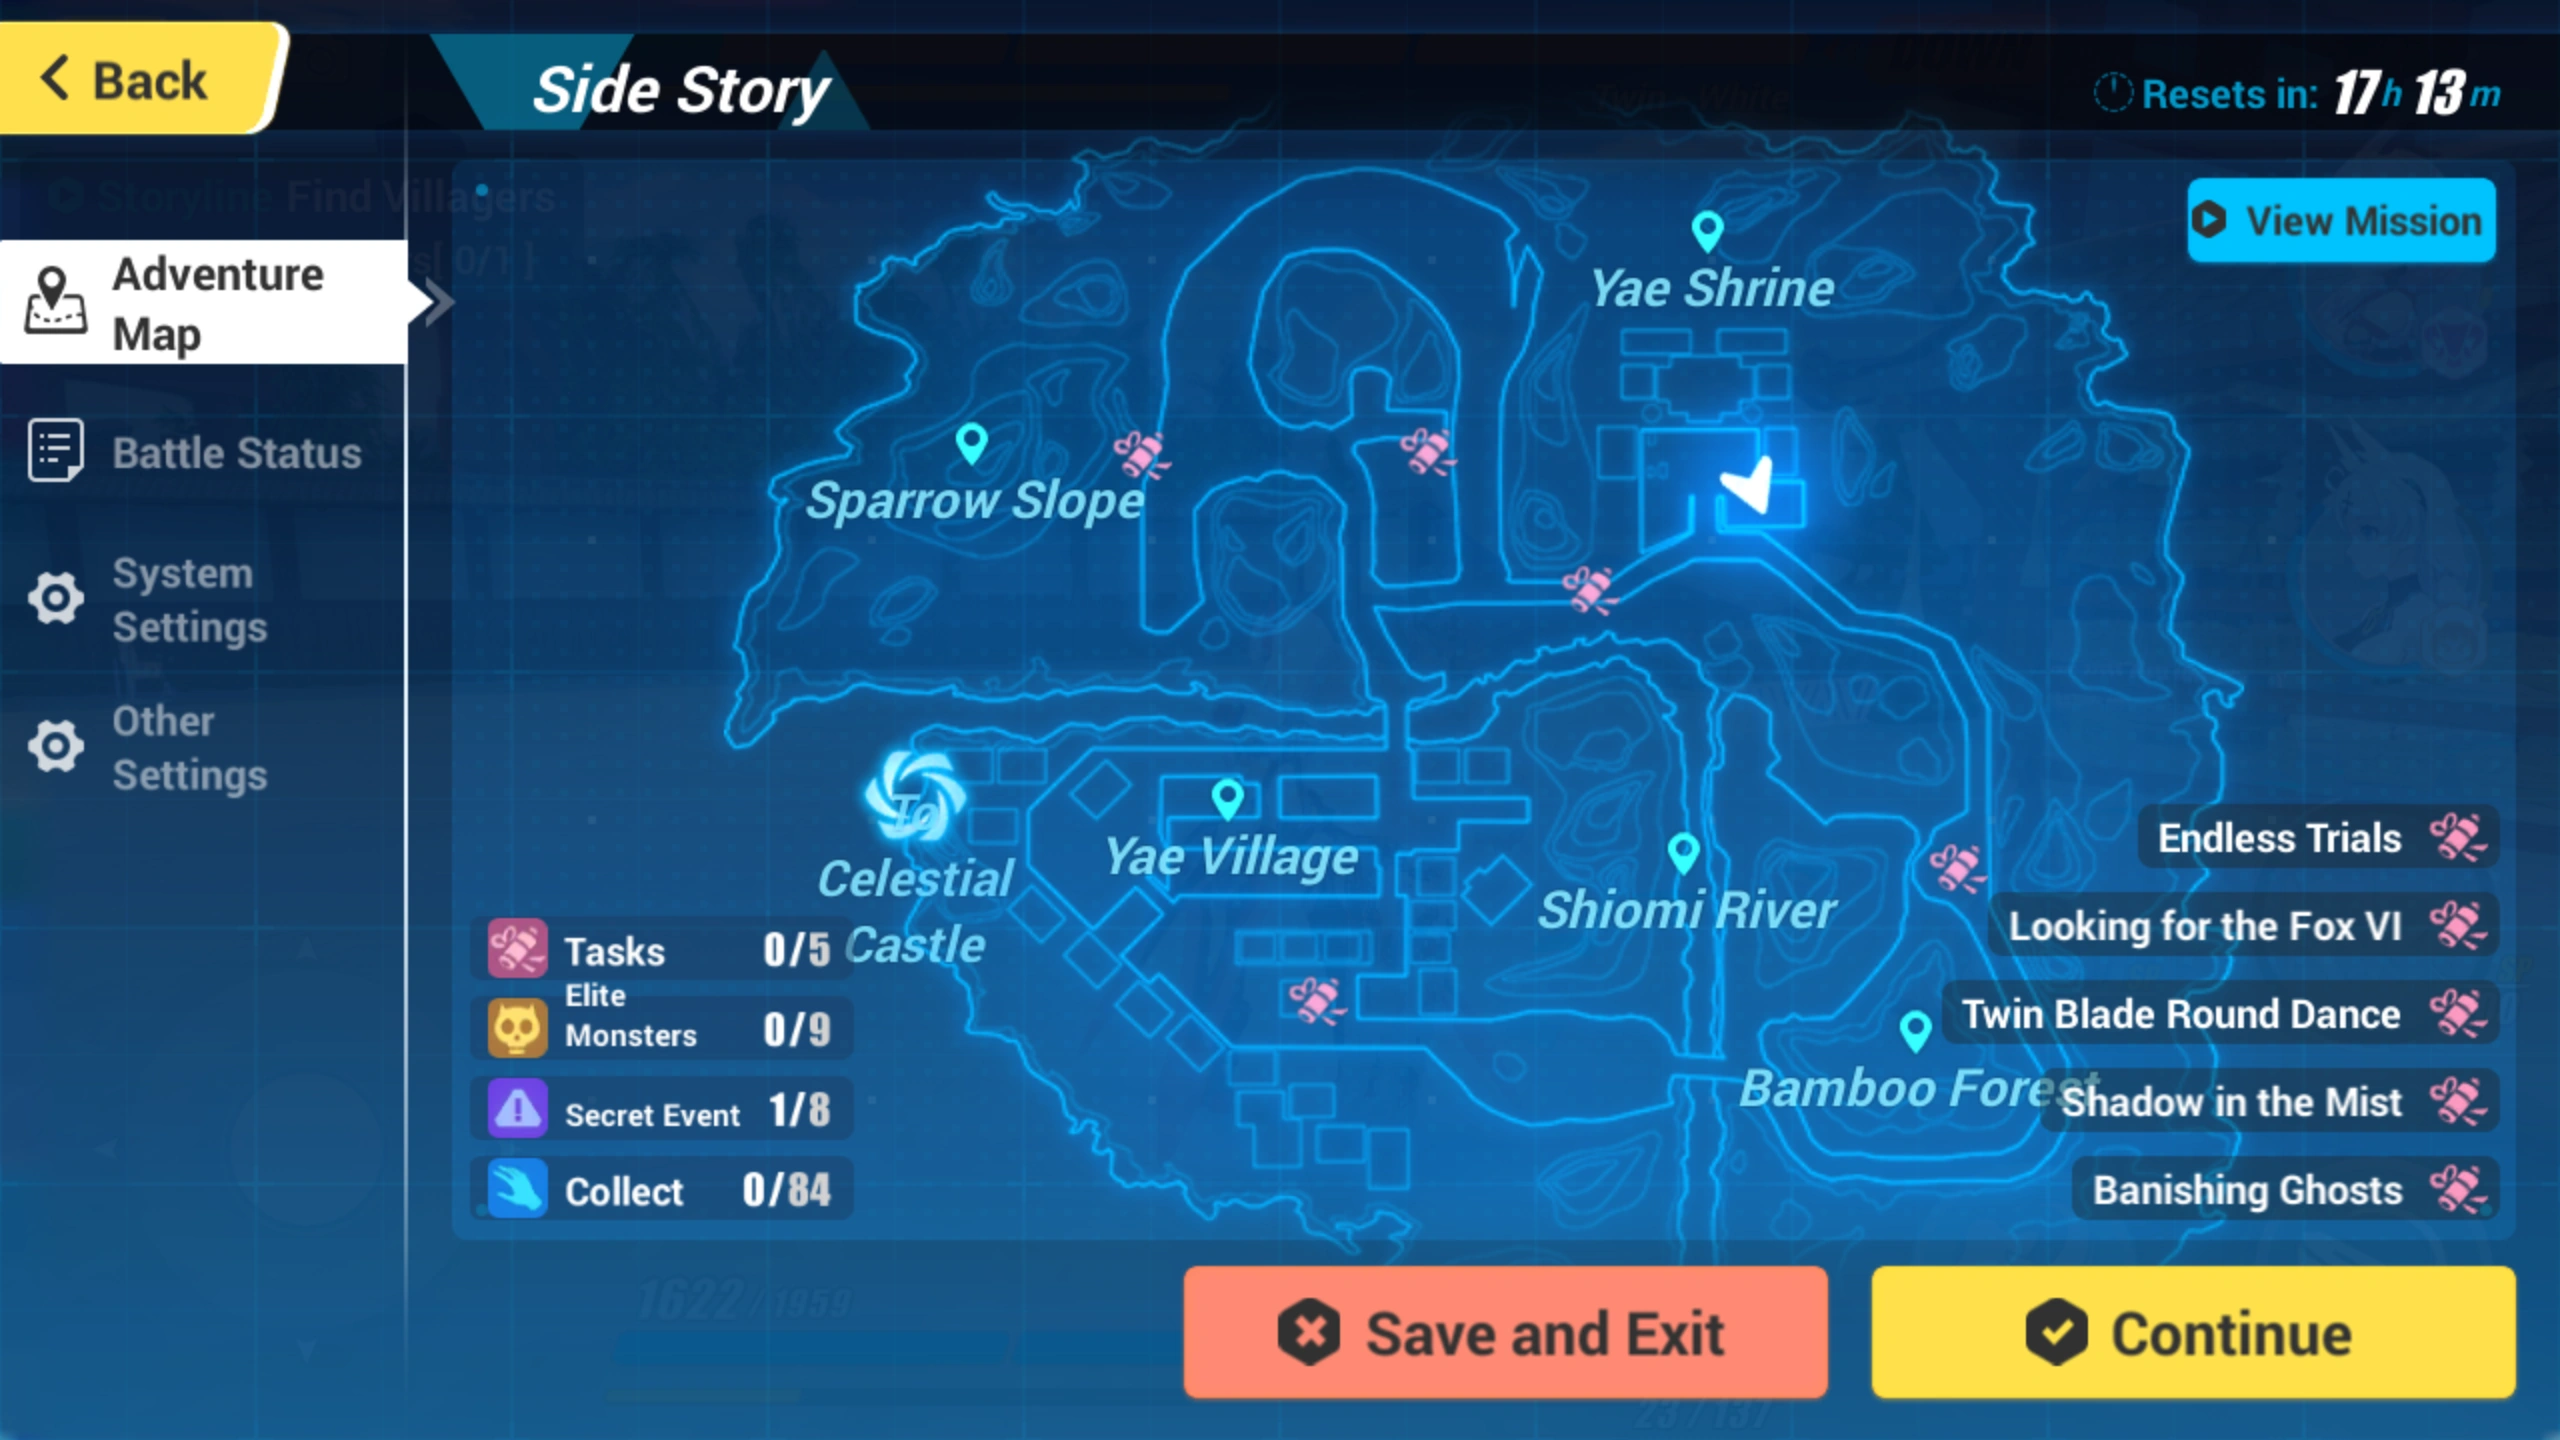
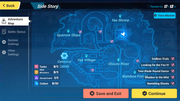
The Adventure Map shown when pausing in Open World. Overall progress is shown on the lower left of the map, Adventure Tasks are shown on the lower right.
Elite Monsters
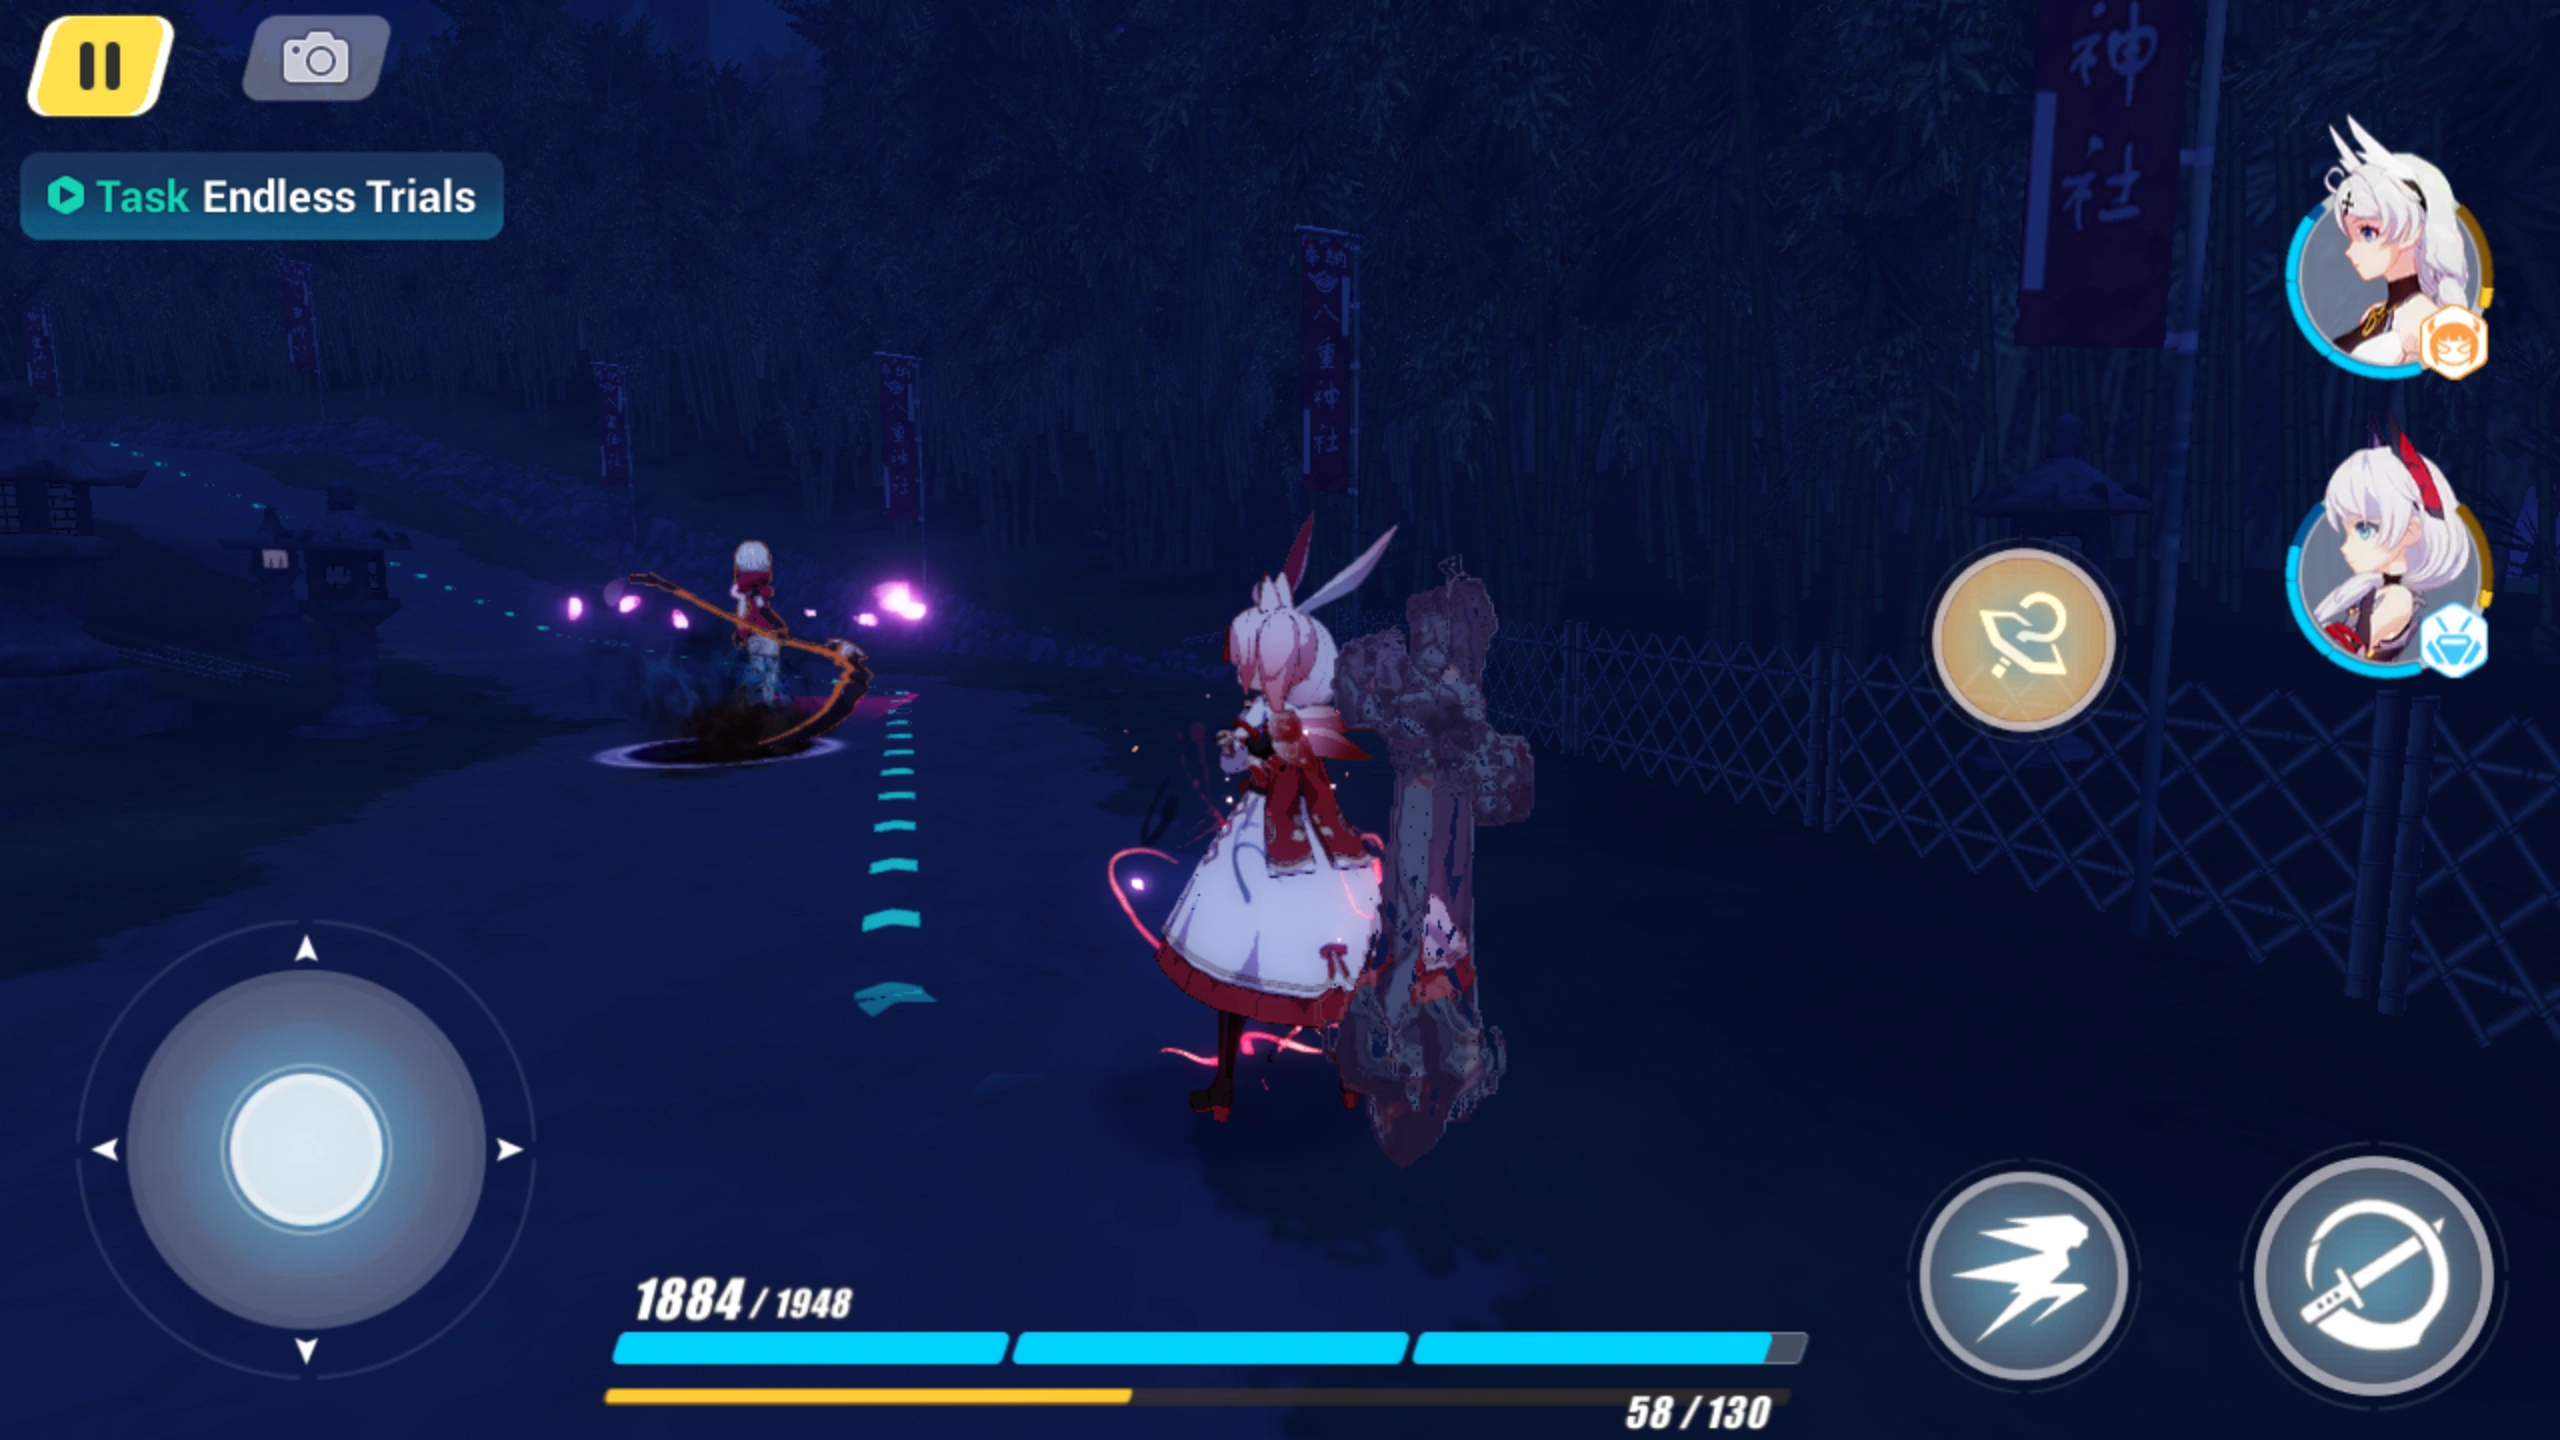
The scythe-wielding Honkai to the left of Sakuno Rondo is an Elite Monster. Note the pink petal ring.
Elite monsters lurk randomly around the Open World, but are easy to identify by the glowing pink ring of petals that swirl around them. While they are more difficult than the normal monsters that roam the Open World (and are harder to kill with a stealth assassination), they aren't a bigger threat than Familiar's Request bosses.
Secret Events
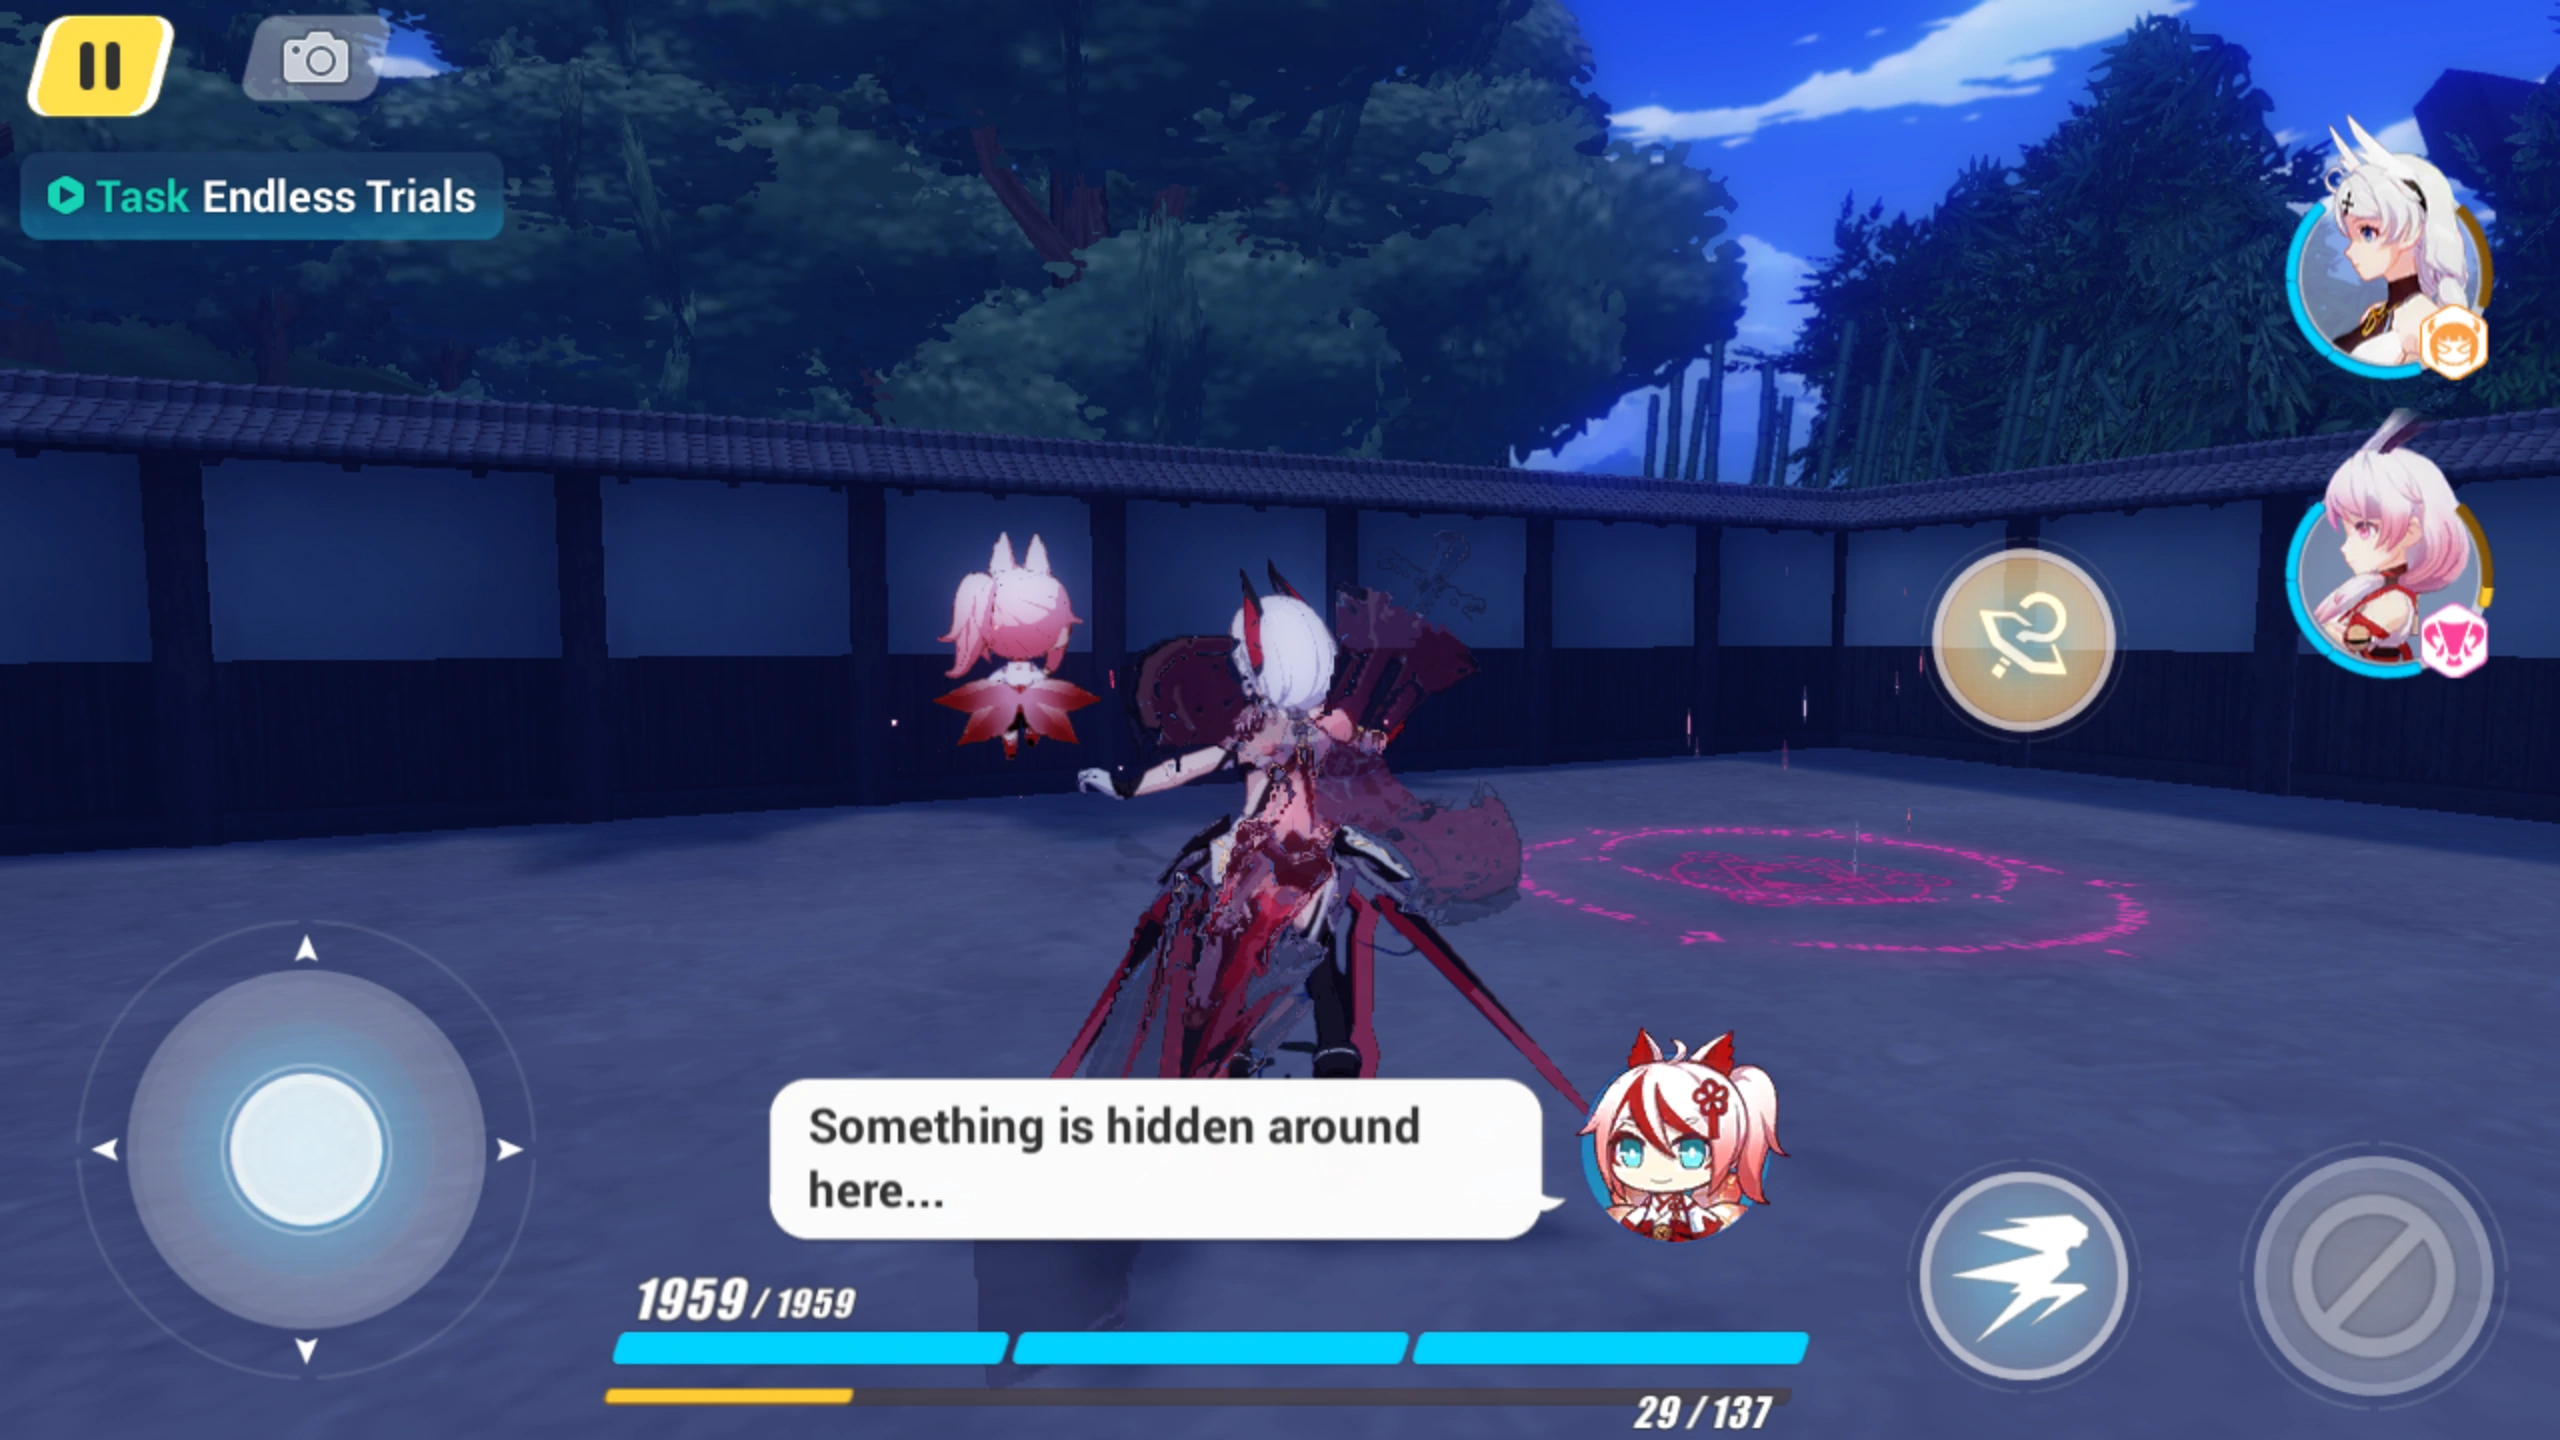
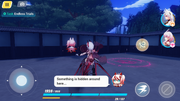
Notice the purple glyph on the ground just to the right of Violet Executer. Higokumaru also warns the player of the nearby glyph.
Secret Events are randomly placed enemy battles in the Open World. Before gaining Higokumaru's True Sight partner skill, the trigger for Secret Events appears random, but after unlocking the skill the glyph to initiate is shown while stealthed. Higokumaru will also provide a warning by saying "Something is hidden around here...". The enemies that come out of a Secret Event glyph are similar to normal wandering enemies, but they cannot be stealth assassinated nor avoided once the Secret Event has been triggered.
Material Gathering
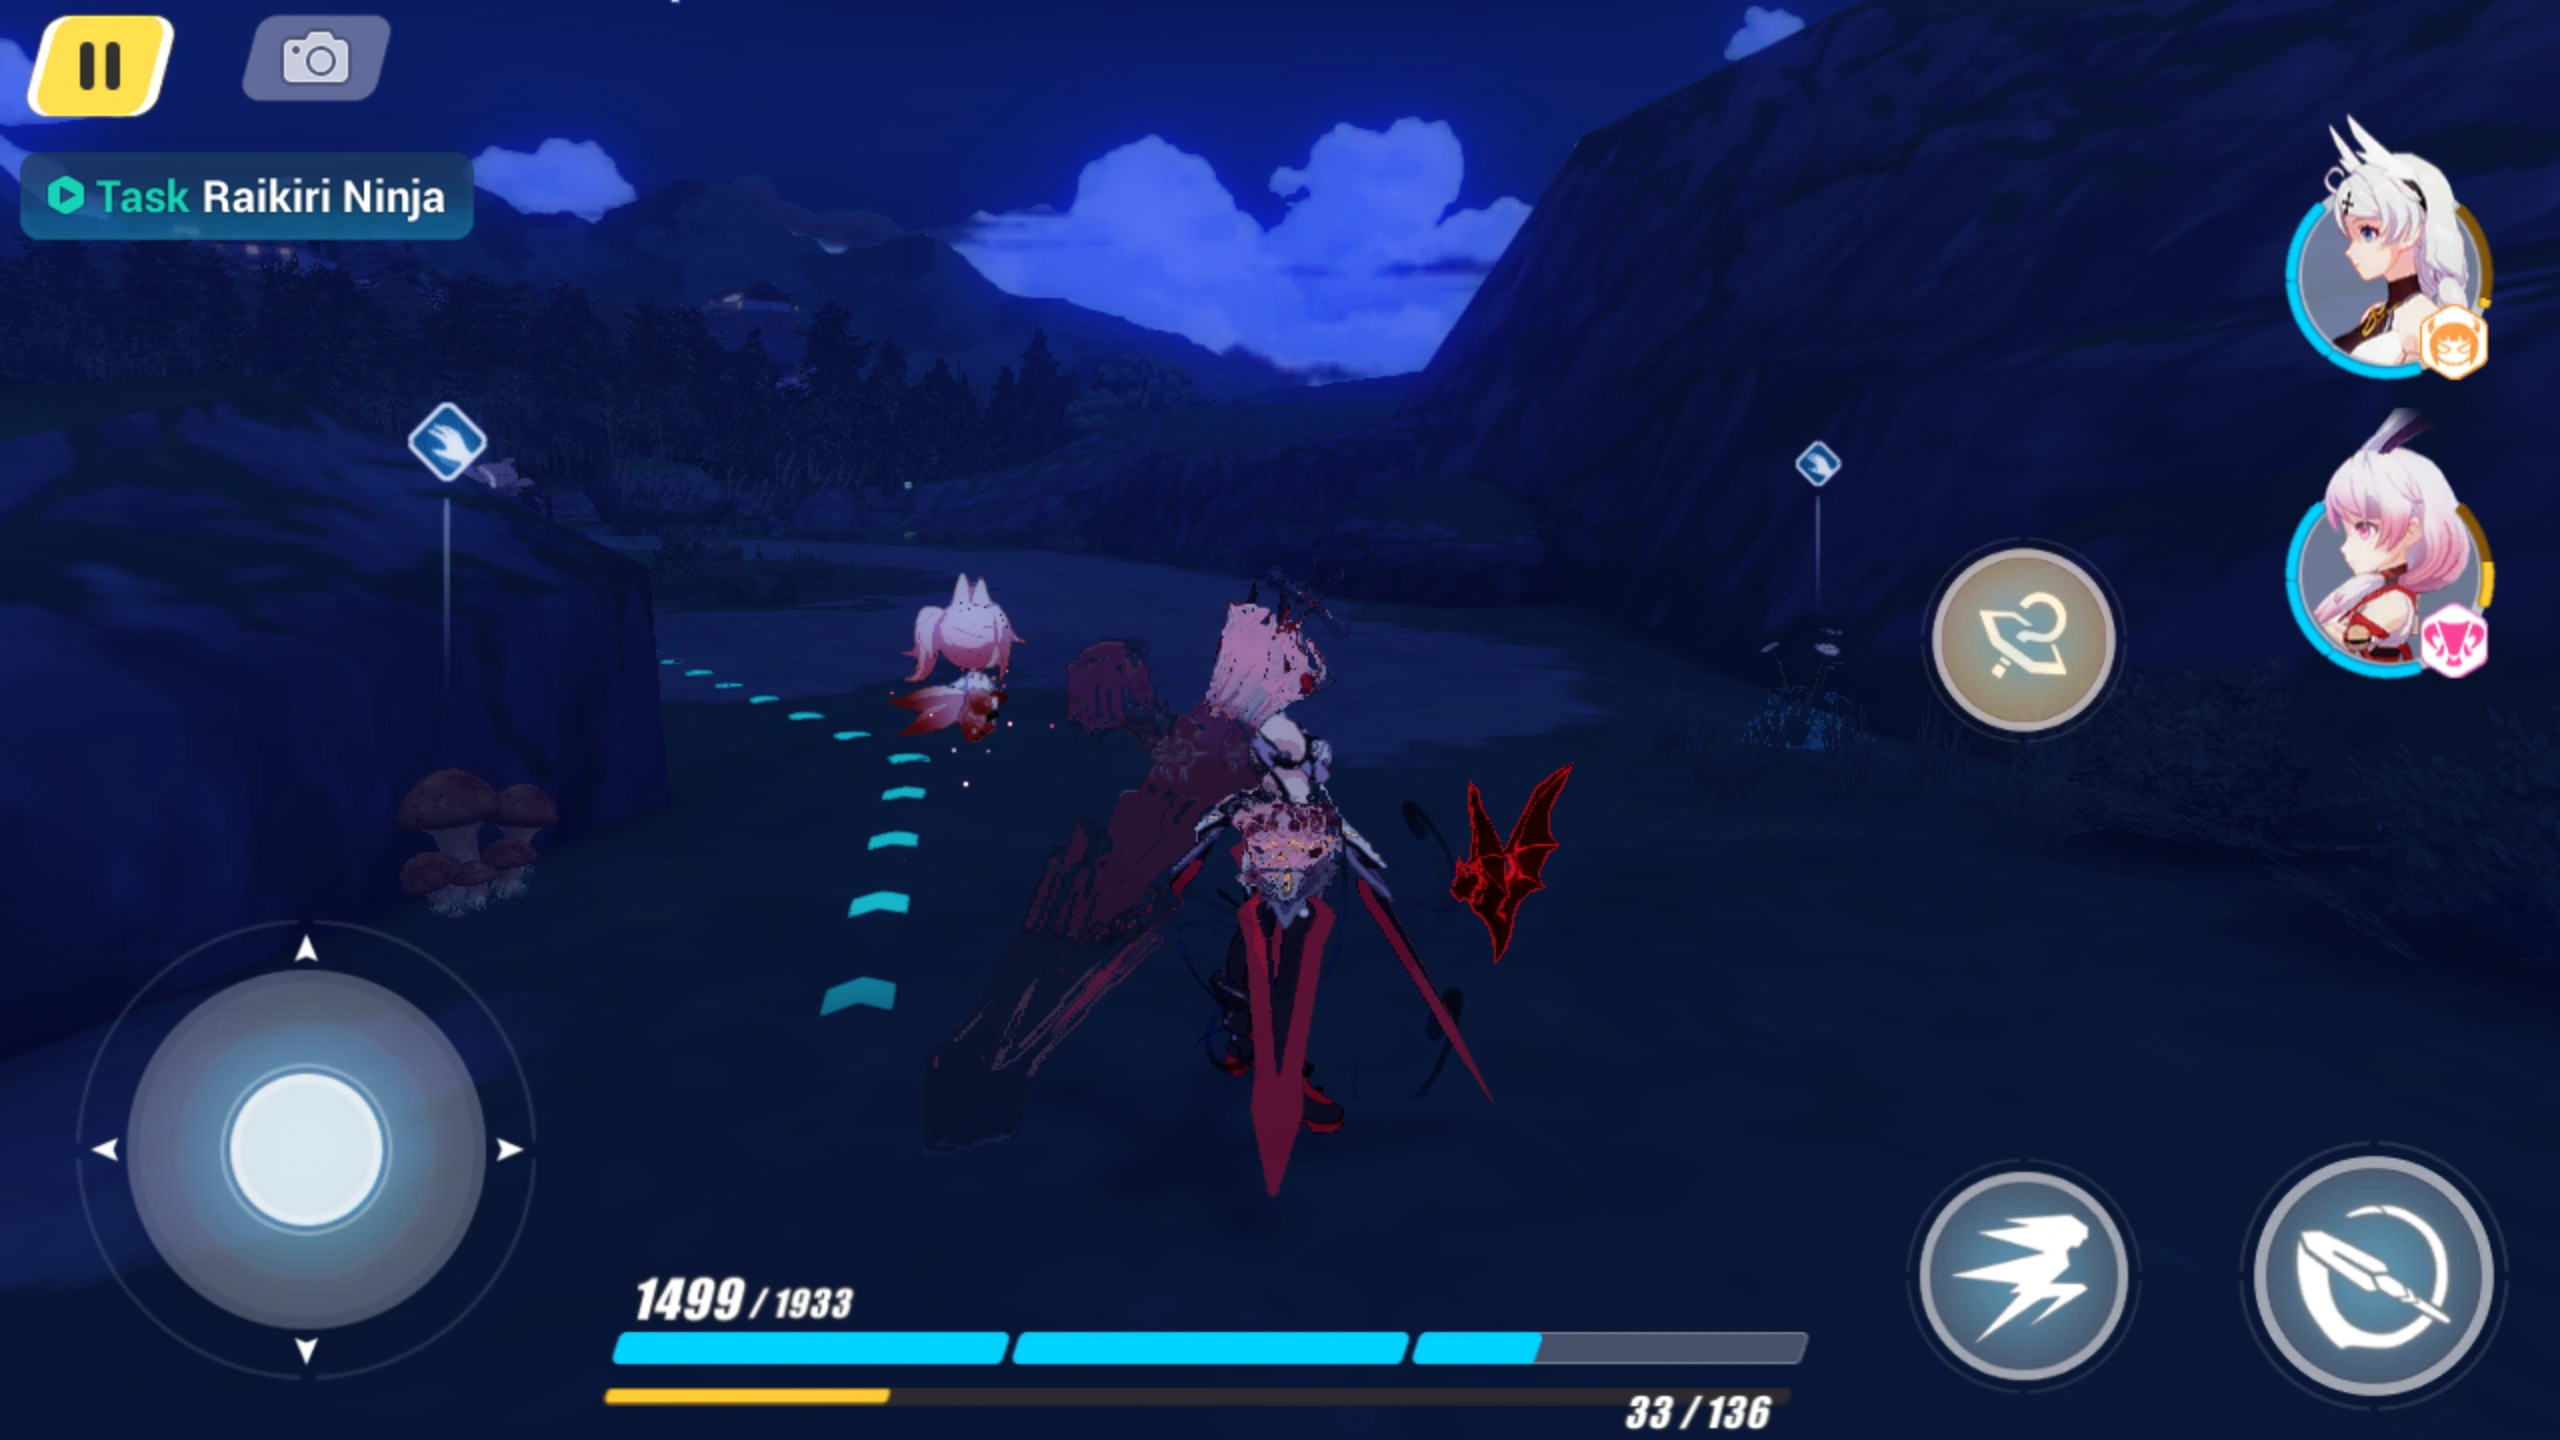

Note the mushrooms and the bush on the left and right of Violet Executer with the Collection icon (hand) above them.
Material Gathering allows Captains to collect the materials needed for creating Shrine Exchange and Gourmet Fest recipes. Collection nodes are scattered all over the map and are relocated and replenished every Monday. Some nodes appear during daytime or nighttime specifically, while other nodes (commonly Lost Fire nodes) only appear while stealthed with Higokumaru's True Sight partner skill. There are also rare boxes that contain rare materials that only reveal themselves when very close, however Higokumaru will notify that they're nearby with the phrase, "Something is hidden around here...". Some items are also in the Celestial Castle, so be sure to check there if a few are missing!
Legacy
- In Version 3.0[citation needed] many items unique to the open world were removed.
 Fish,
Fish,  Grains,
  Raw Meat and Vegetables were combined into Ingredients. Ingredients would then become the sole OW item needed to craft food items.
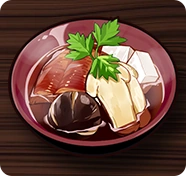
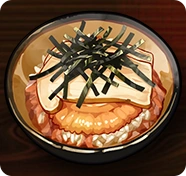
- There exist food items that were not added to the mode upon its debut on the GLB server or any point in time afterwards, but existed on the CN server for a brief while.
-
 Strawberry Daifuku
 -
 Char-grilled Pork Belly
 -
 Blanched Soba
 -
 Salmon Sushi
 -
 Eel Matsutake Soup
 -
 Egg Udon
 -
 Tempura Ramen
 -
 Abalone Mushroom Rice

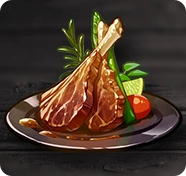
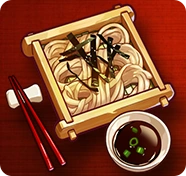



- Shrine Exchange used to be its own unique shop featuring two sections, Fusion and Forge. Forge let Captains purchase valuable items and a Fusion was used to merge common items into rarer ones.
- The Shrine would reset every Monday, Thursday, and Saturday, allowing some of the items to be purchased again.
| Fusion Recipes | |||||||||||||||||||
|---|---|---|---|---|---|---|---|---|---|---|---|---|---|---|---|---|---|---|---|
 |
 |
 |
 |
 |
 |
 |
 | ||||||||||||
 x 3 x 3 x 3 x 3 x 100 x 100
|
 x 3 x 2 x 100 x 3 x 2 x 100
|
 x 5 x 4 x 180 x 5 x 4 x 180
|
 x 15 x 15 x 15 x 15
|
 x 15 x 15 x 15 x 15
|
 x 15 x 15 x 15 x 15
|
 x 10 x 15 x 10 x 15
|
x 10 x 10 x 40
| ||||||||||||
| 10 per reset | 20 per reset | 10 per reset | |||||||||||||||||
| Forge Recipes | |||||||||||||||||||
|---|---|---|---|---|---|---|---|---|---|---|---|---|---|---|---|---|---|---|---|
 |
 |
 |
 |
 |
 |
 |
  ⨯1  |
 ⨯1  |
 ⨯1 | ||||||||||
 x 1 x 1 x 1 x 7 x 1 x 7
|
x 1 x 1000 x 9
|
x 1 x 800 x 10
|
x 1 x 1 x 8
|
x 1 x 1100 x 1100 x 9 x 9
|
x 1 x 1 x 9
|
x 1 x 1 x 1
|
 x 2 x 3 x 2000 x 2 x 3 x 2000
|
x 2 x 3 x 30
|
x 2 x 3 x 30
| ||||||||||
| 1 per reset | 1 per event | 1 total | |||||||||||||||||
 ⨯1  |
  ⨯1 |
 ⨯1 |
 ⨯1 |
 ⨯1 |
 ⨯1 |
 ⨯1 |
 ⨯1 | ||||||||||||
| x 2 x 3 x 30
|
x 40 x 35 x 200
|
x 30 x 28 x 130
|
x 30 x 28 x 130
|
x 27 x 25 x 120
|
x 10 x 20 x 20
|
x 27 x 25 x 120
|
x 27 x 25 x 120
|
x 27 x 25 x 120
|
x 27 x 25 x 120
| ||||||||||
| 1 total | 1 per reset | 1 total | 1 per event | 1 total | 1 per event | ||||||||||||||


