Treasure Compass
Last updated 2026-09-09
Treasure Compasses are reusable gadgets that can be used to find nearby chests and are obtained through forging. There is currently one compass for each of the following regions: Mondstadt, Liyue, Inazuma, Sumeru, Fontaine, Natlan, Nod-Krai, and the Temple of Space. Most of their diagrams are obtainable from Reputation rewards in their respective nations: at reputation level 6 for Mondstadt and Liyue, at reputation level 9 for Inazuma, Sumeru, and Fontaine, and at max reputation level with 3 different tribes for Natlan. Nod-Krai's treasure compass is directly obtained by raising any Meeting Point to level 1, and it additionally marks Oculi. Similarly, the Temple of Space's compass is directly obtained by raising the Memory Core to level 1, and it additionally marks Mnemonic Clusters. Both of the aforementioned compasses can also be leveled up to improve their functionality.
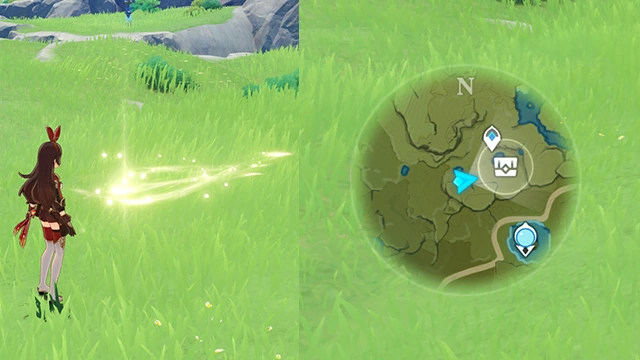
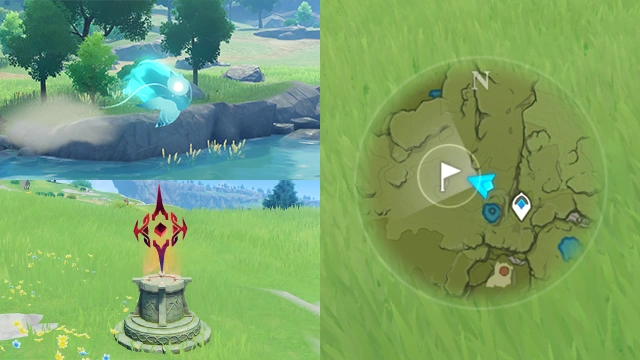
Treasure compasses can be equipped through the Inventory and can be used after pressing the appropriate control. After using a treasure compass, light that streams toward the nearest chest, Mora Chest (after area's exploration progress reaches 90%), Time Trial Challenge, Seelie, or Monetoo in the vicinity will briefly appear, and said chest will be marked on the Map with an icon  , or
, or  for the others. Only one thing can be marked at a time. The gadget then goes on cooldown for 30 seconds if something was detected, or 5 seconds if not. This cooldown is shared among all treasure compasses, and if something was detected, will be reset upon opening the marked chest or approaching the challenge/Seelie/Monetoo. If the compass is unequipped, the mark on the Map will be removed.
Unlike Oculus Resonance Stones, treasure compasses have unlimited uses.
Types
 Anemo Treasure Compass
 Cryo Treasure Compass
 Dendro Treasure Compass
 Electro Treasure Compass
 Geo Treasure Compass
 Hydro Treasure Compass
 Luna Treasure Compass
 Pyro Treasure Compass
 Segment-Domain Treasure Compass
Gameplay Notes
- The Anemo Treasure Compass cannot be used in Dragonspine, and the Dendro Treasure Compass cannot be used in The Orchard of Pairidaeza.
- Treasure Compass gadgets can only be used in their corresponding regions. However, they may find chests located in neighboring regions if they are used in their regions while the closest detectable chest is in another region.
- This may be used to detect chests in Dragonspine close to Dragonspine's borders, as the Anemo Treasure Compass does not function there.
- Most areas that have a different map tab from the overworld can still have their region's corresponding compass work inside it:
- The Geo Treasure Compass can be used in the The Chasm: Underground Mines map.
- The Electro Treasure Compass can be used in the Enkanomiya map.
- The Hydro Treasure Compass can be used in the Sea of Bygone Eras map.
- The Pyro Treasure Compass can be used in the Ancient Sacred Mountain map.
- The Anemo Treasure Compass cannot be used in the Temple of Space map, which instead requires the Segment-Domain Treasure Compass.
- The gadget range is not the entire range of the minimap; it is a sphere that has a fixed radius of detection. The radius of detection possibly changes depending on the rarity of the chest.
- In Nod-Krai, the range of the Luna Treasure Compass is much larger, covering most of the area that the player is in.[Specific details?]
- This gadget cannot be used during combat, while gliding or climbing, while jumping or falling, while being staggered, while using an alternate sprint (such as Mona's Illusory Torrent), or in Domains.
- In general, this Gadget cannot track chests that only spawn after completing a puzzle or defeating enemies. Common puzzles of this type include:
- Activating Elemental Monuments
- Harvesting carrots
- Breaking Small Rock Piles (and defeating the enemies that spawn)
- Lighting fires or Ruins Torches
- Popping Bloatty Floatties or Anemo Slimes
- Digging out buried chests
- Puzzles that appear after a Seelie reaches its Seelie Court
- This Gadget can track chests that are:
- Hidden behind Rock Piles
- Wrapped in brambles
- Encased in stone
- Locked inside Shrines of Depths
- A Bake-Danuki in disguise
- Located in areas that cannot be accessed without further quest progress
Settings
| Setting | Options |
|---|---|
| Enable Quick Swap | On, Off |
*After enabling Quick Swap, when using the Treasure Compass, it will automatically be swapped for the Treasure Compass of the region you are currently in
Tutorial
Descriptions
Treasure detected nearby! Where the Compass PointsTrivia
- Treasure Compass needles spin according to the energy of Ley Lines rather than the world's magnetic field.[1]
Change History
- Added:
- Updated to mark Mora Chests with the icon on the map after reaching 90% Exploration Progress.
- Added a Quick Swap feature that changes the currently equipped Treasure Compass to the one corresponding with the region the player is currently in.
- Updated to mark nearby Time Trial Challenges, Seelie, and Monetoo with the icon on the map.
- Updated message upon use when there are no chests, Time Trial Challenges, Seelie, or Monetoo nearby:
- Old: The Treasure Compass did not detect any chest(s) nearby
- New: The Treasure Compass did not detect any chest(s) or relevant clues nearby
- Added:
- Updated to mark Chests with the icon on the map and reset the Cooldown upon opening the marked chest.
- Added:
- Added:
- Added:
- Added sound effect upon use.
- Treasure Compasses were released with:
References
- ↑ Gadget: Anemo Treasure Compass (Description)
| |||||||||||||||||


