Puzzle
Last updated 2025-08-05

"The galaxy is vast beyond compare, containing an infinite number of possibilities."
Our community needs more information on this page! Can you help out? Click here to add more. The reason provided was:
Missing puzzles and page links
This article is about the game mechanic. For #77 of the Genius Society, see Puzzle (Genius Society).
Puzzles are overworld objects that can be encountered during exploration. Upon being solved, they may spawn a chest, unlock a mechanism, provide the player with a collectable, or progress part of a larger puzzle.
 Herta Space Station
The following puzzles are only found in Herta Space Station:
Repulsion Bridge
Main article: Repulsion Bridge
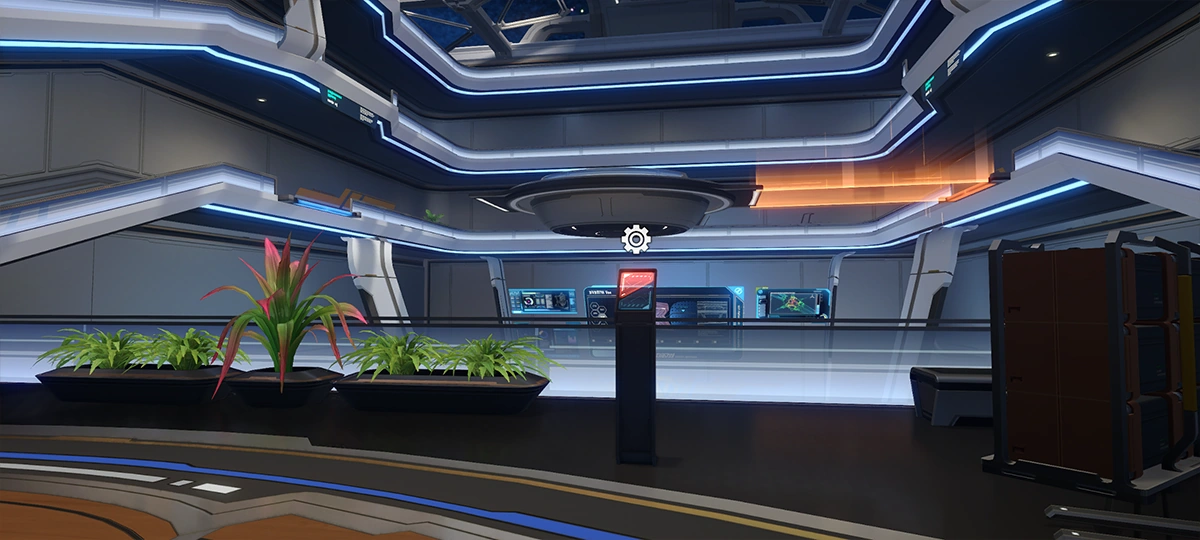 A repulsion bridge can either be orange or blue. Using the control device to change the active bridge will lead you to unexpected destinations.
A repulsion bridge can either be orange or blue. Using the control device to change the active bridge will lead you to unexpected destinations.
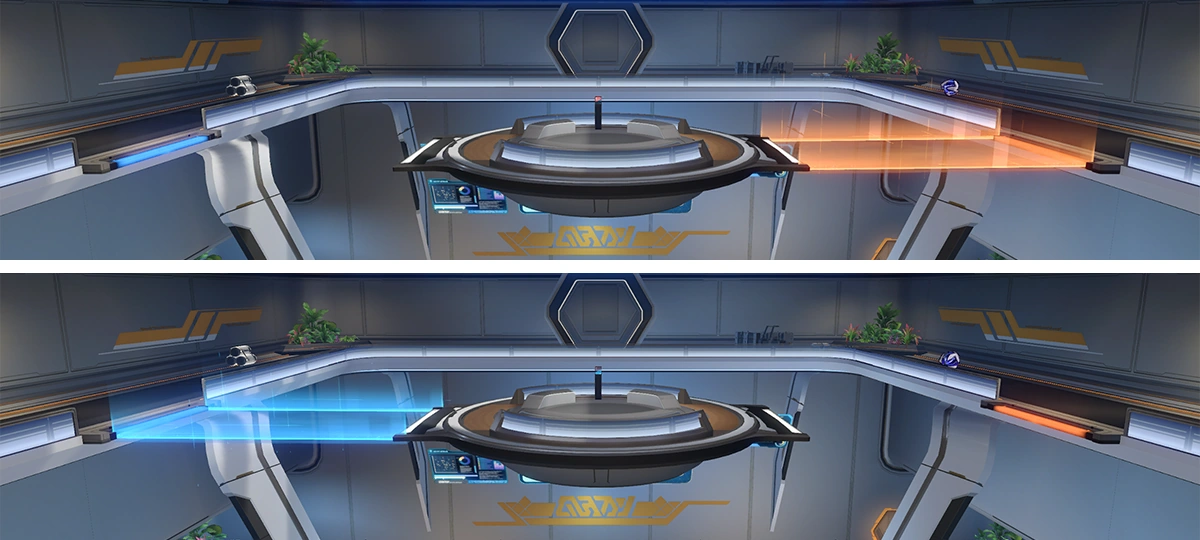 Only one color can be turned on at any given time. When the switch on the control device lights up, the repulsion bridge of the same color will appear.
Only one color can be turned on at any given time. When the switch on the control device lights up, the repulsion bridge of the same color will appear.
Unearthly Marvel
Main article: Unearthly Marvel
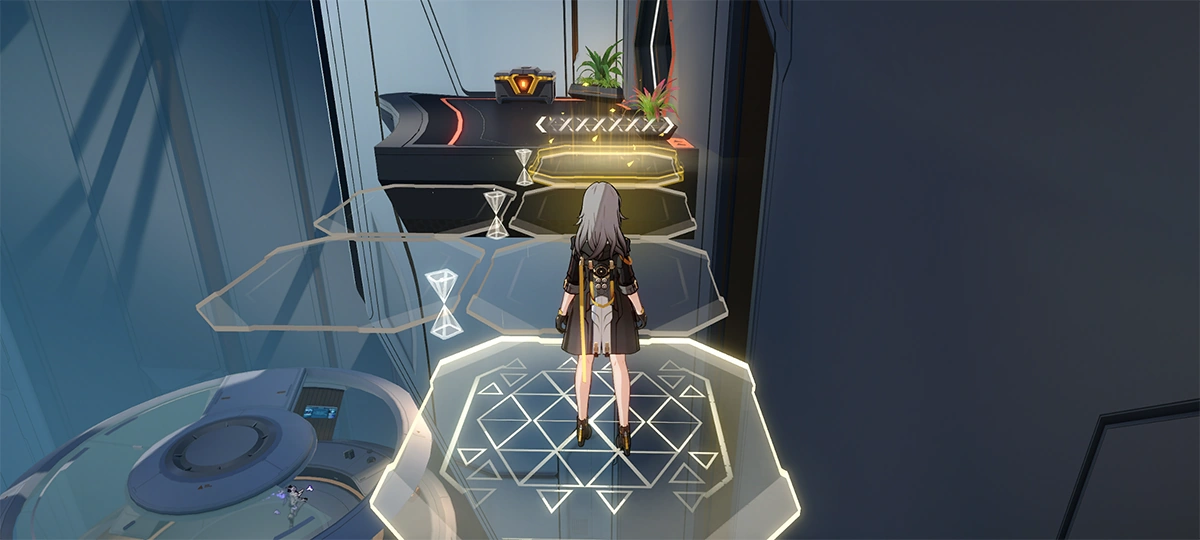 Unearthly Marvel is made from special optical materials. When put in direct contact with life forms, the touched blocks will be illuminated. Light up all the blocks to turn them into a physical path.
Unearthly Marvel is made from special optical materials. When put in direct contact with life forms, the touched blocks will be illuminated. Light up all the blocks to turn them into a physical path.
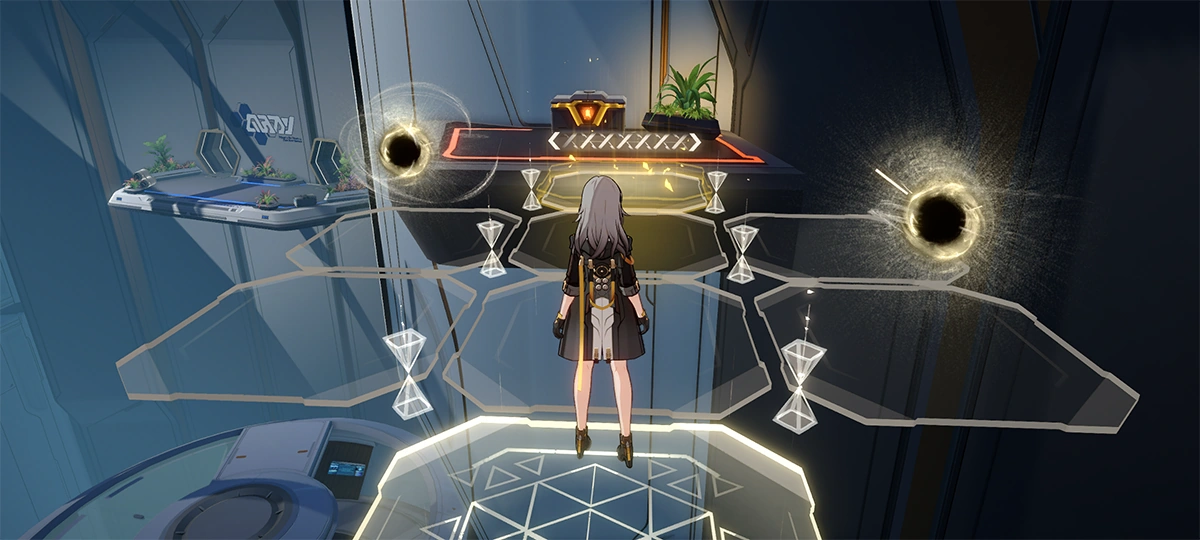 You can use certain blocks to teleport. When you tread on one such block, you will be teleported to another one of the same color. Be careful how you use them.
You can use certain blocks to teleport. When you tread on one such block, you will be teleported to another one of the same color. Be careful how you use them.
 Jarilo-VI
The following puzzles are only found in Jarilo-VI:
Magnetorheological Fluid Threshold
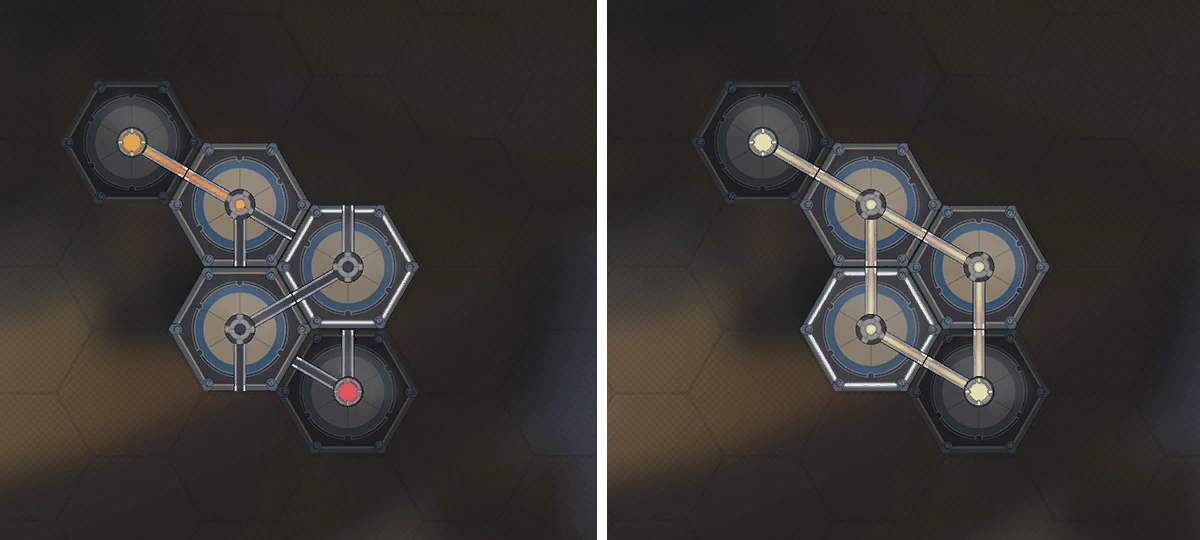 Rotate the modules to adjust the circuit and direct the electrical current from the power supply to the end point. Repairs are complete when all end point circuits are connected to the current.
Rotate the modules to adjust the circuit and direct the electrical current from the power supply to the end point. Repairs are complete when all end point circuits are connected to the current.
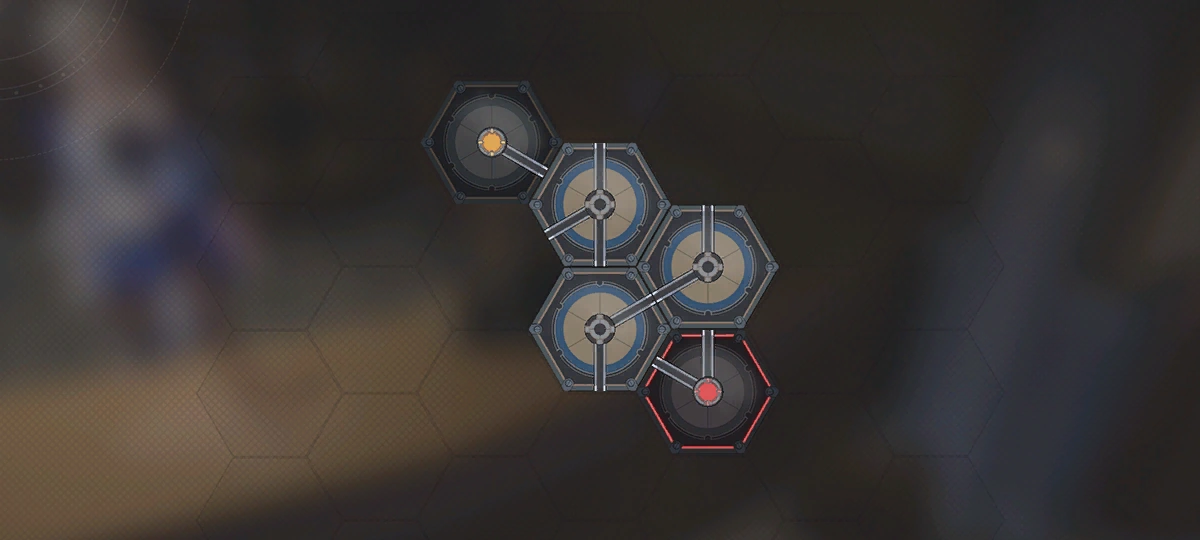 The edges of fixed modules will appear red when selected.
The edges of fixed modules will appear red when selected.
Mine Cart Test
 A mine cart operator and his apprentice seem to be having a bit of trouble in the Great Mine... Help them push the mine carts to the designated blockers, and you may find something of interest.
A mine cart operator and his apprentice seem to be having a bit of trouble in the Great Mine... Help them push the mine carts to the designated blockers, and you may find something of interest.
 The goal is to move the empty mine carts to the blue blockers, and move the loaded ones to the yellow blockers. You can load or empty mine carts at the ore piles.
The goal is to move the empty mine carts to the blue blockers, and move the loaded ones to the yellow blockers. You can load or empty mine carts at the ore piles.
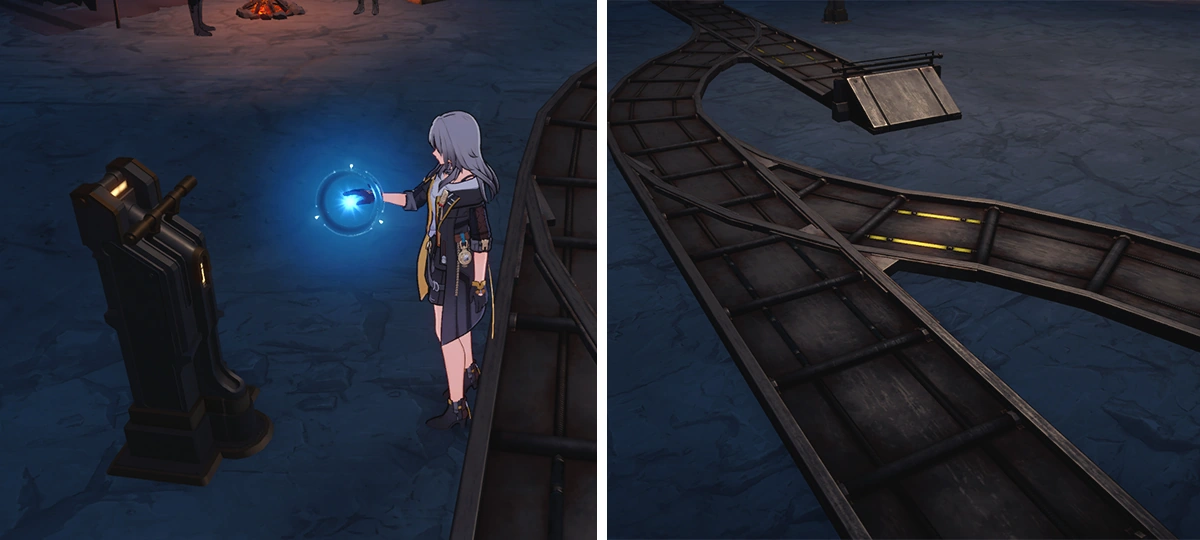 If the mine carts won't move, you'll need to use the turnout to change the direction of the track to continue moving.
If the mine carts won't move, you'll need to use the turnout to change the direction of the track to continue moving.
Home-Use Object Finder
Main article: Home-Use Object Finder
 An object finder produced by the Interastral Peace Corporation, lovingly known as Findie. You can find treasures by following the direction indicated by Findie. However, it won't find things that are too far away.
An object finder produced by the Interastral Peace Corporation, lovingly known as Findie. You can find treasures by following the direction indicated by Findie. However, it won't find things that are too far away.
 Home-Use Object Finder's guidance light color can show the distance to the target. Red light indicates a longer distance, while green light indicates a close distance.
Home-Use Object Finder's guidance light color can show the distance to the target. Red light indicates a longer distance, while green light indicates a close distance.
 By using the intersection points where multiple guiding light beams meet, you can deduce the target's location. At that location, use the Home-Use Object Finder again to locate the target.
By using the intersection points where multiple guiding light beams meet, you can deduce the target's location. At that location, use the Home-Use Object Finder again to locate the target.
Snowshine Lamp
Main article: Snowshine Lamp
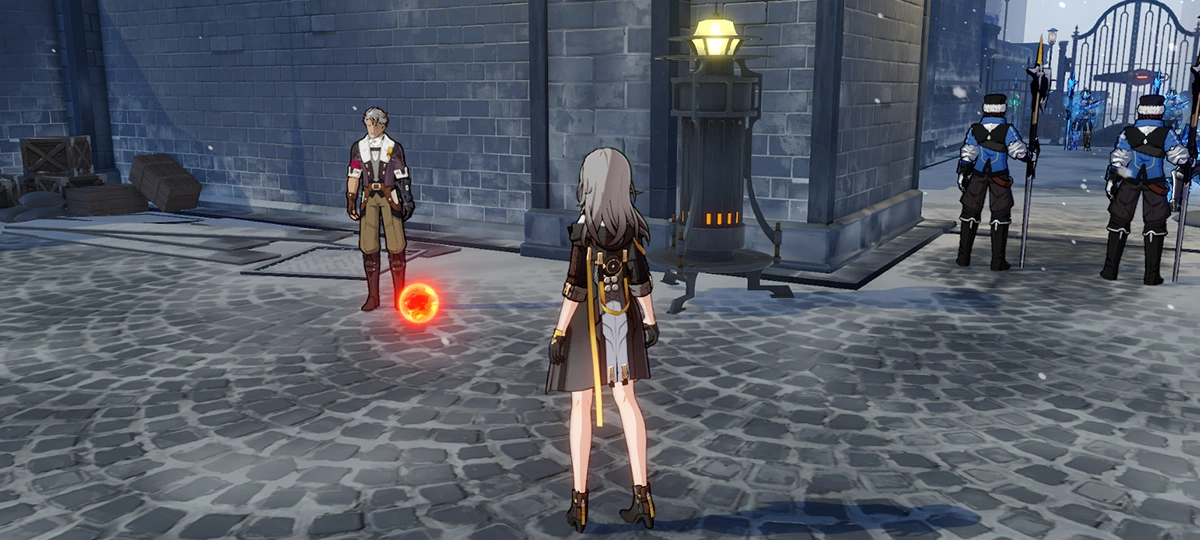 Snowshine Lamp is a combat support device invented by the Silvermane Guard Technology Division. It consists of two parts: The base of the lamp and the thermic core.
Snowshine Lamp is a combat support device invented by the Silvermane Guard Technology Division. It consists of two parts: The base of the lamp and the thermic core.
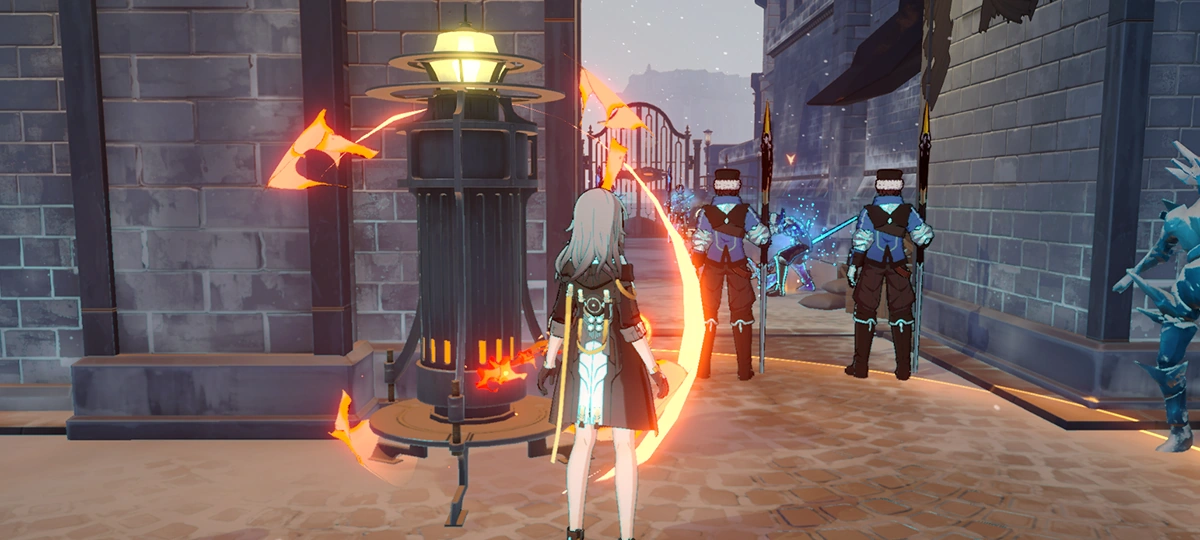 After picking up the thermic core, approach the lamp base to activate the Snowshine Lamp, generating a thermal energy field around the lamp.
After picking up the thermic core, approach the lamp base to activate the Snowshine Lamp, generating a thermal energy field around the lamp.
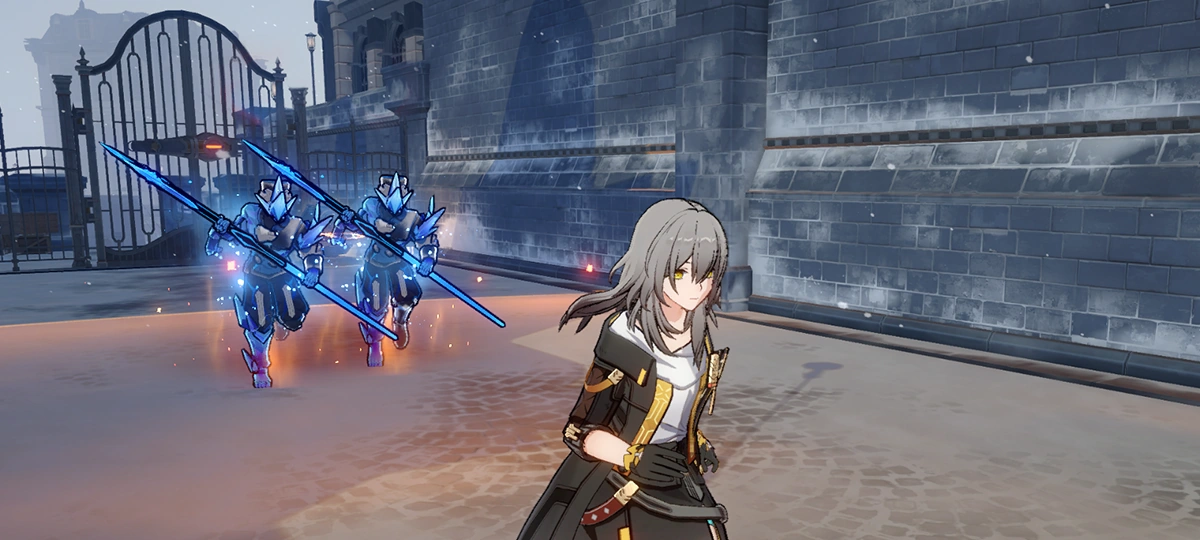 Enemies within the range of the thermal energy field will lose the Ice DMG boost available in snowstorms, and additionally receive Fire Weakness. It will also take extra Fire DMG, giving allies an advantage in combat.
Enemies within the range of the thermal energy field will lose the Ice DMG boost available in snowstorms, and additionally receive Fire Weakness. It will also take extra Fire DMG, giving allies an advantage in combat.
The Fool's Box
Main article: The Fool's Box
 Save the little girl by pushing boxes away to unblock her exit.
Save the little girl by pushing boxes away to unblock her exit.
 When there are multiple targets to be rescued on the field, all of them must be rescued to be considered a success.
When there are multiple targets to be rescued on the field, all of them must be rescued to be considered a success.
 The Xianzhou Luofu
The following puzzles are only found in The Xianzhou Luofu:
Remote Cycrane
Main article: Remote Cycrane
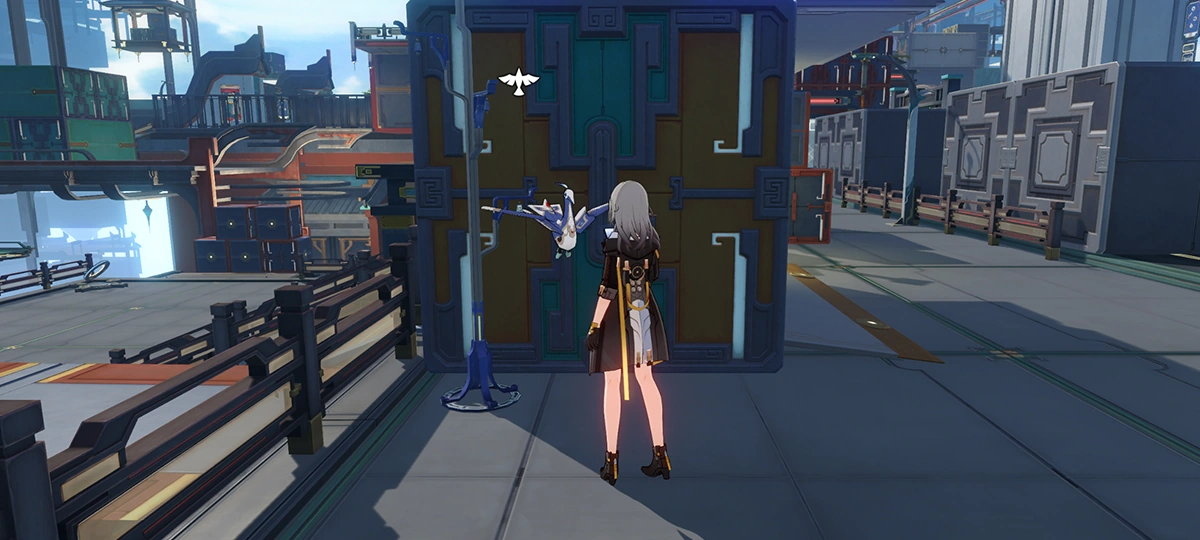 After interacting with the roost or the cycrane itself, you can start remotely controlling the cycrane.
After interacting with the roost or the cycrane itself, you can start remotely controlling the cycrane.
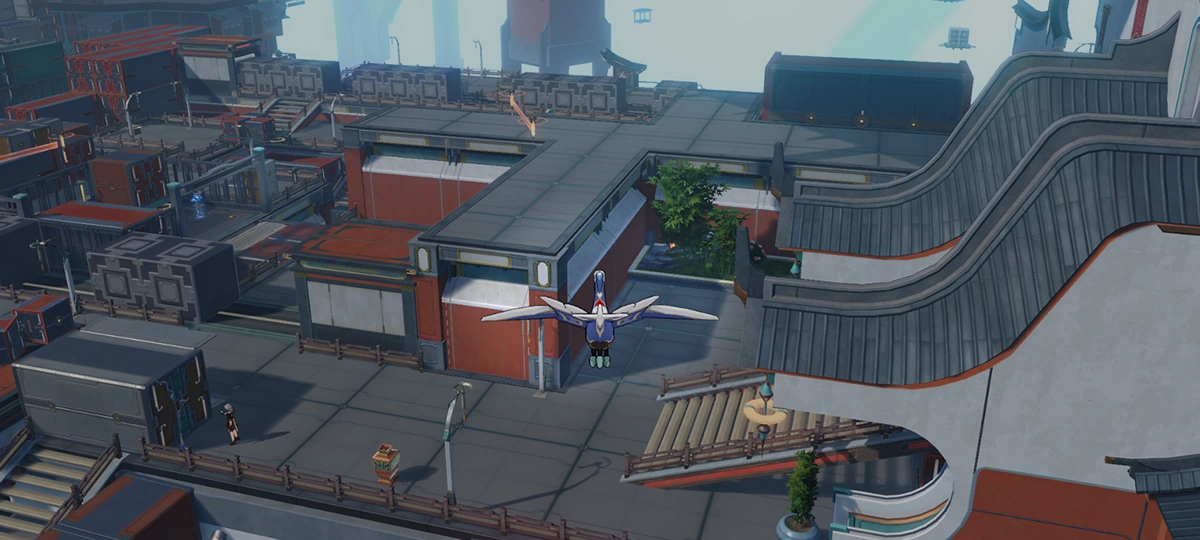 Cycranes can fly, allowing them to reach areas that are inaccessible to characters. Characters will remain at their original position while a cycrane is being remotely controlled.
Cycranes can fly, allowing them to reach areas that are inaccessible to characters. Characters will remain at their original position while a cycrane is being remotely controlled.
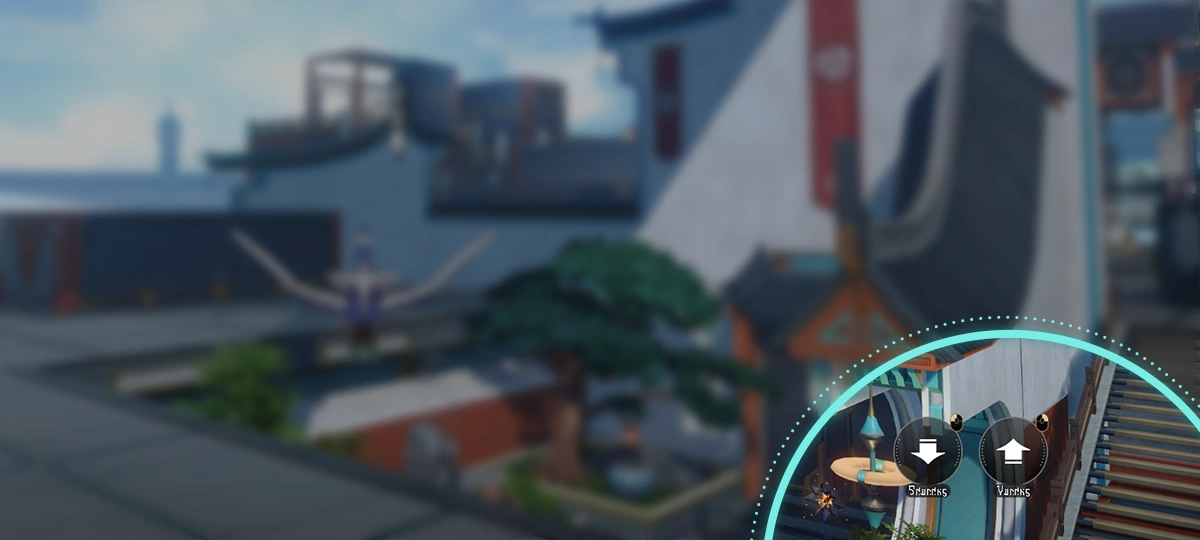 While in control of a cycrane, you have the option to either ascend or descend as desired.
While in control of a cycrane, you have the option to either ascend or descend as desired.
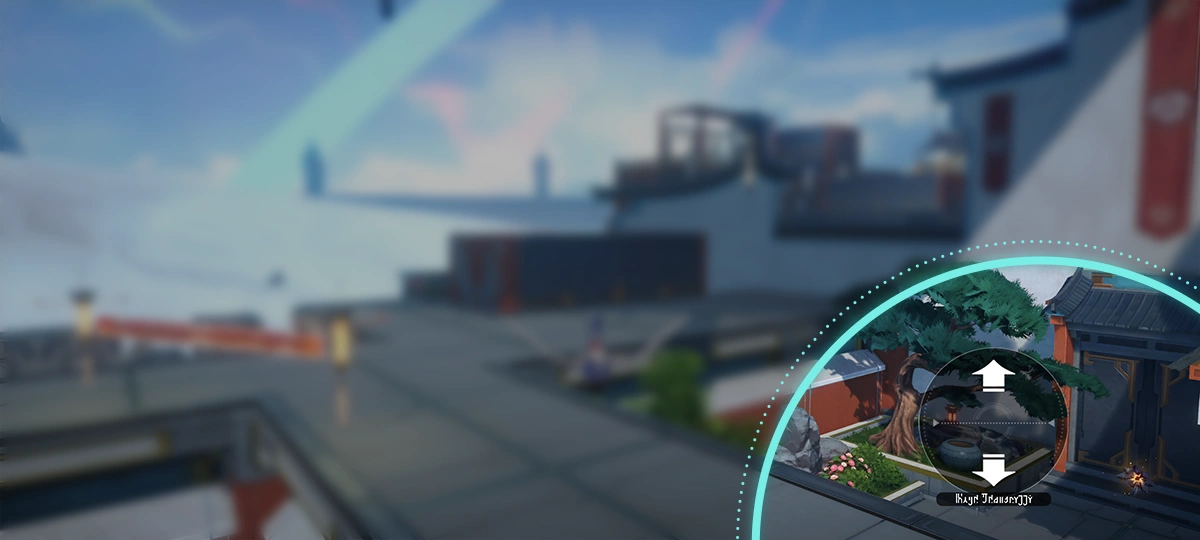 While in control of a cycrane, you can control it to ascend or descend.
While in control of a cycrane, you can control it to ascend or descend.
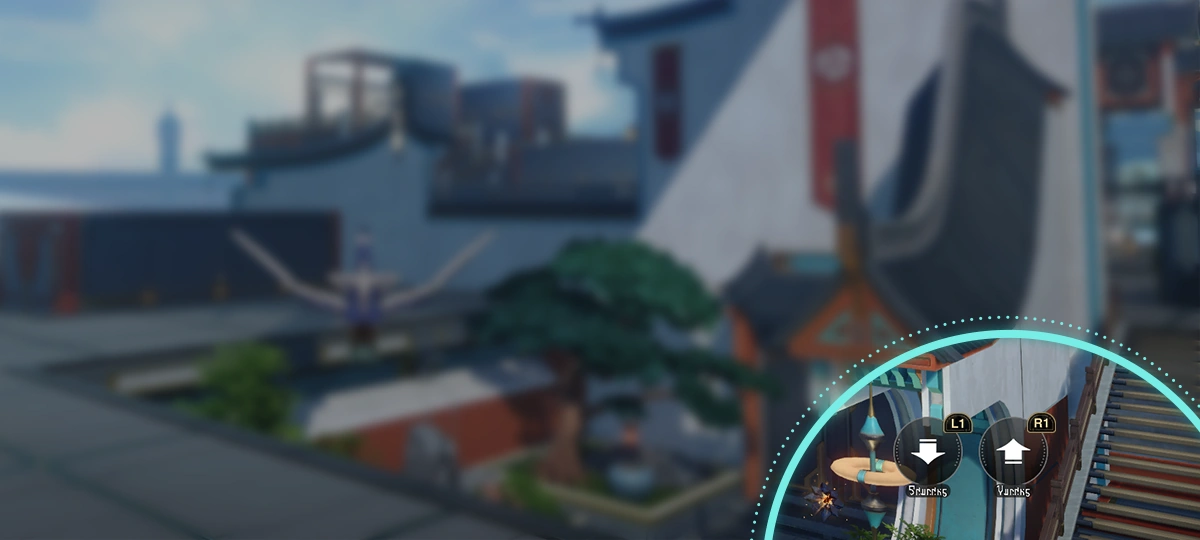 While flying a cycrane, you can control it to ascend or descend.
While flying a cycrane, you can control it to ascend or descend.
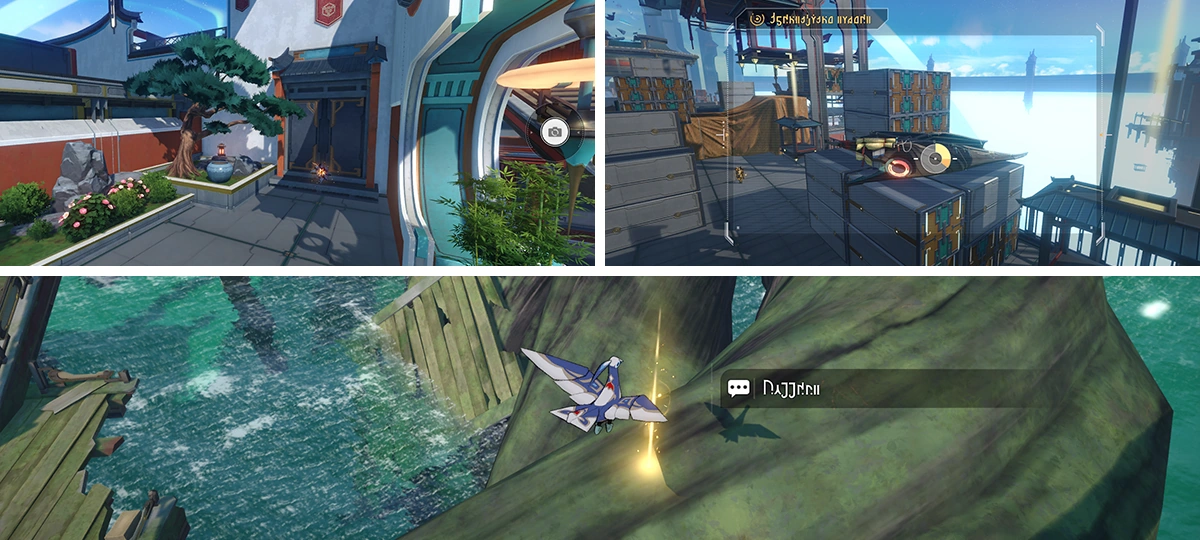 Cycranes can be used in different scenarios to accomplish various tasks.
Cycranes can be used in different scenarios to accomplish various tasks.
 When encountering enemies, the cycrane will automatically return.
When encountering enemies, the cycrane will automatically return.
Optical Markings
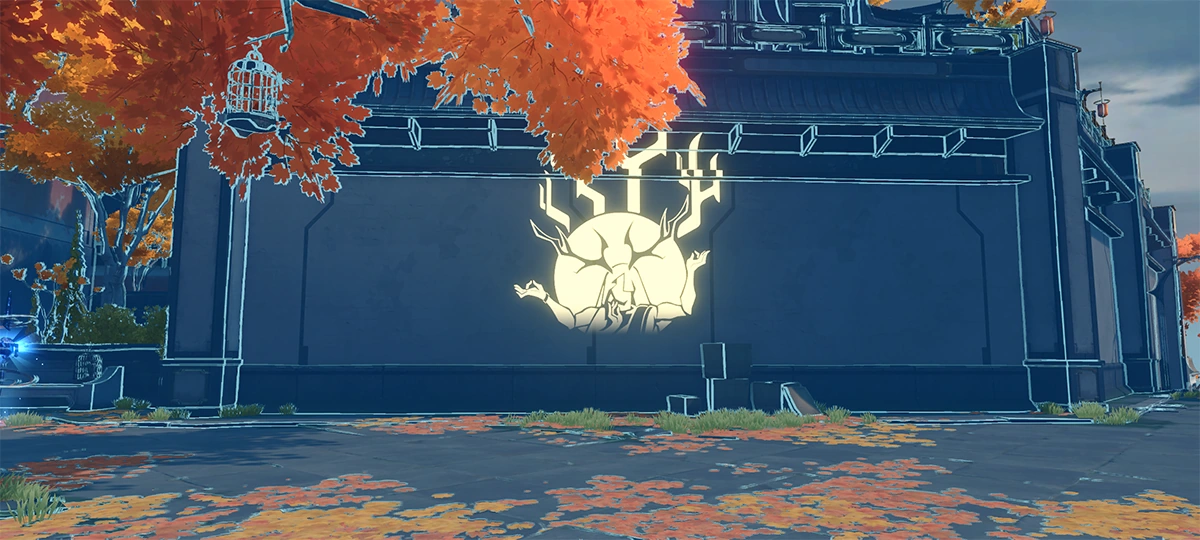 Optical markings are used by the Intelligentsia Guild to discreetly exchange knowledge. At a certain angle, the markings will be pieced together to show the complete optical rubbing.
Optical markings are used by the Intelligentsia Guild to discreetly exchange knowledge. At a certain angle, the markings will be pieced together to show the complete optical rubbing.
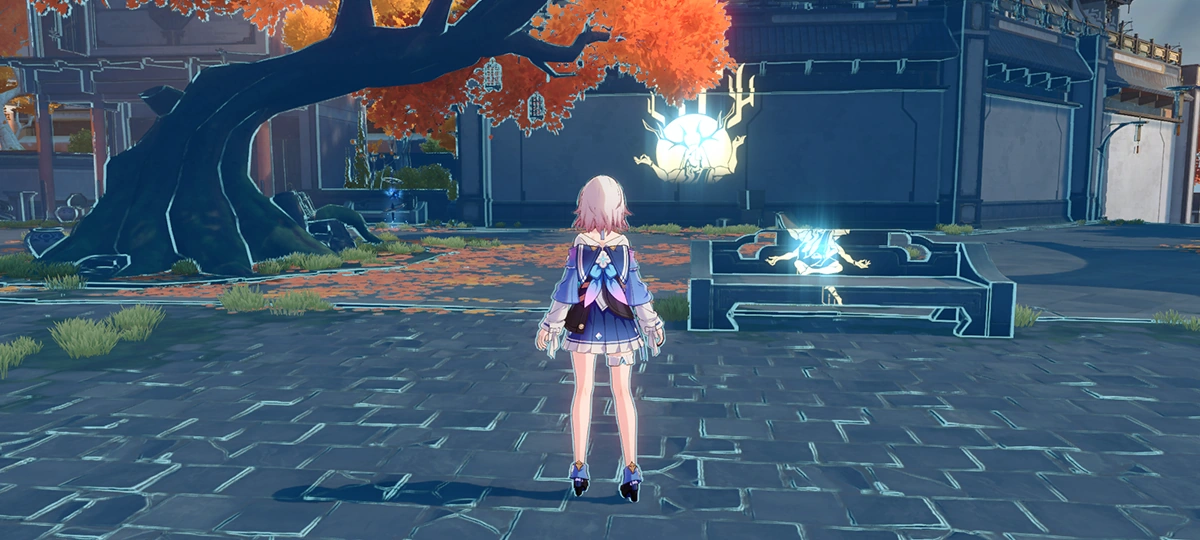 If you are unable to find the remaining markings in the area, use the Camera's detection system to obtain the remaining markings' location information.
If you are unable to find the remaining markings in the area, use the Camera's detection system to obtain the remaining markings' location information.
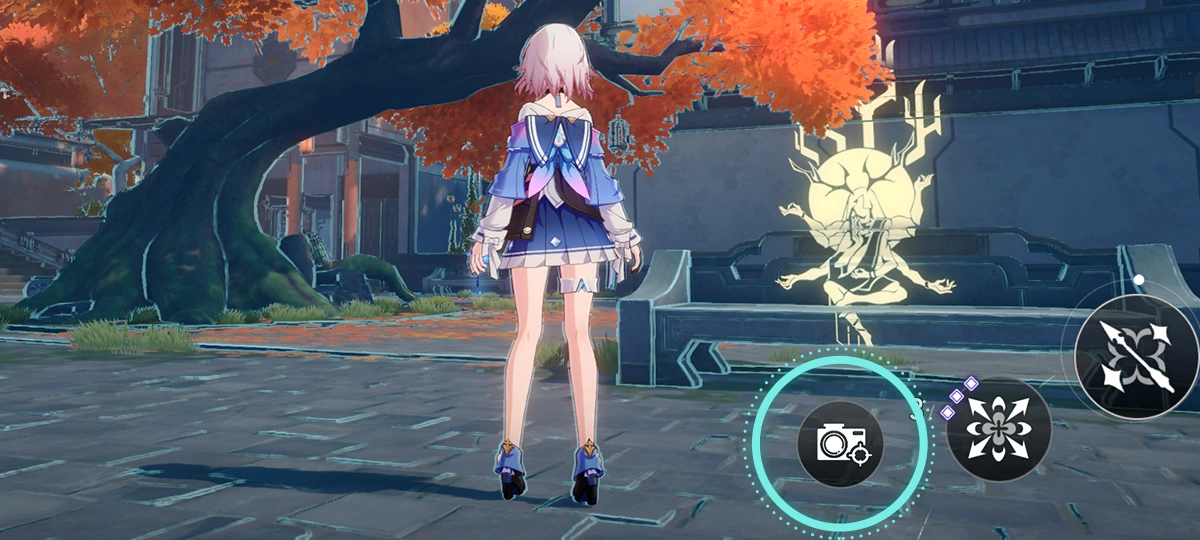 At a certain angle, piece together multiple incomplete markings and use the Camera to record the completed optical rubbing.
At a certain angle, piece together multiple incomplete markings and use the Camera to record the completed optical rubbing.
Hexanexus
Main article: Hexanexus
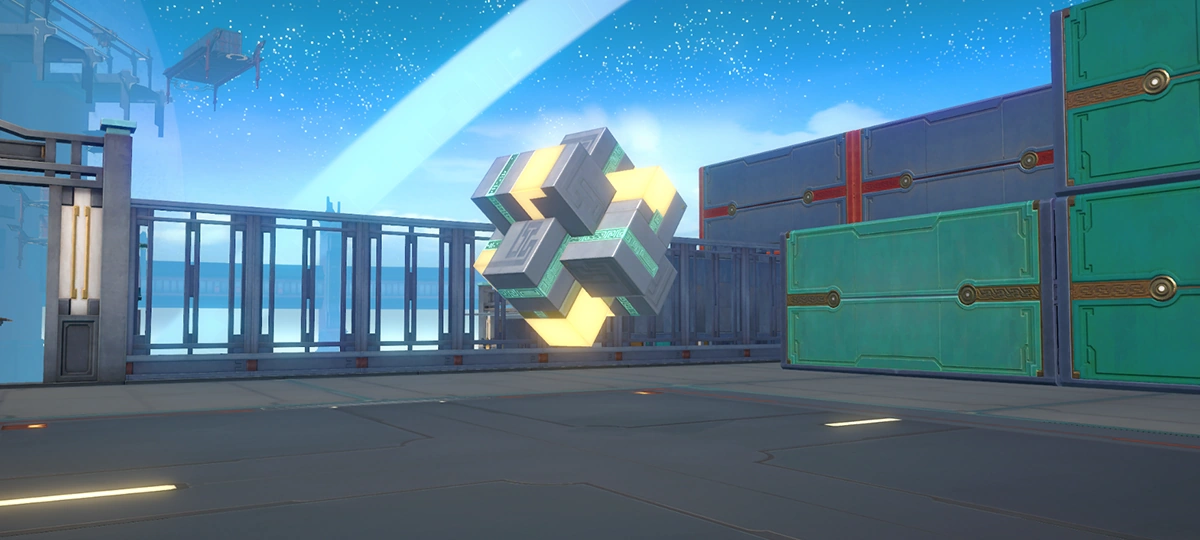 Hexanexus is a space junction device made by a mysterious organization in the Artisanship Commission. It attracted almost no notice because it is difficult to understand. Interact with the Hexanexus to activate it and solve the puzzle.
Hexanexus is a space junction device made by a mysterious organization in the Artisanship Commission. It attracted almost no notice because it is difficult to understand. Interact with the Hexanexus to activate it and solve the puzzle.
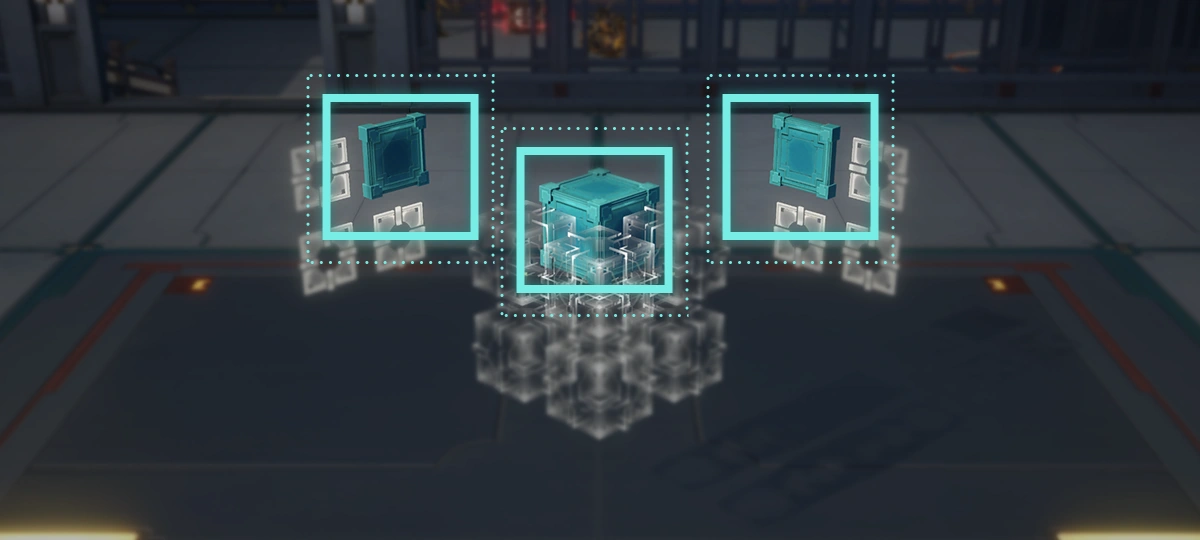 Rotate the corresponding area of the Hexanexus so that the physical block of the Hexanexus corresponds to the plates on both sides.
Rotate the corresponding area of the Hexanexus so that the physical block of the Hexanexus corresponds to the plates on both sides.
Upgraded
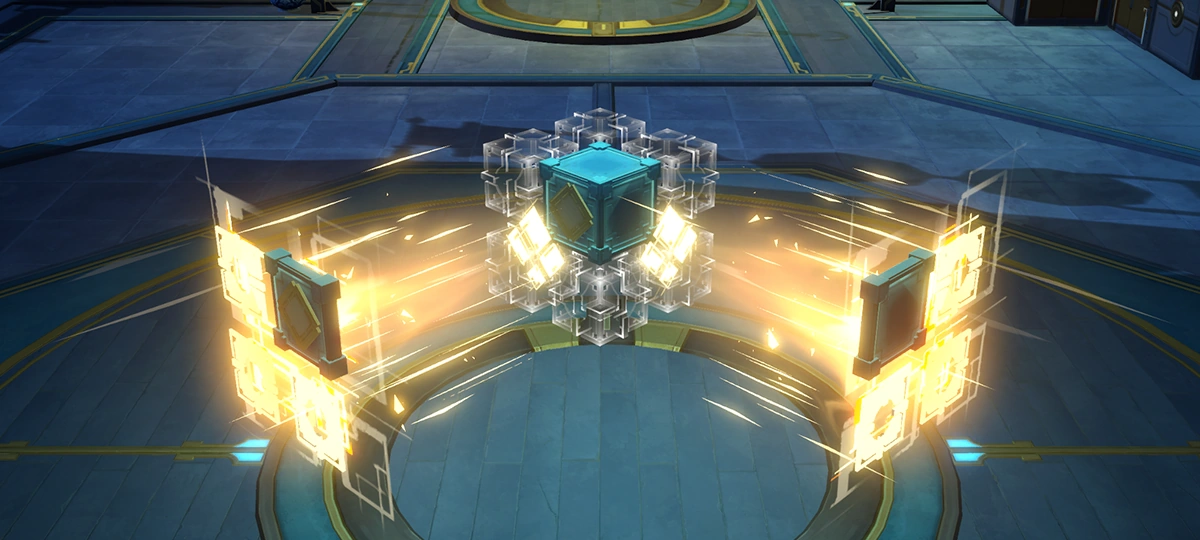 Some cubes have special patterns on them, which need to match the patterns on the plates on the two sides to solve the puzzle of the Hexanexus.
Some cubes have special patterns on them, which need to match the patterns on the plates on the two sides to solve the puzzle of the Hexanexus.
Abacus Circuitry
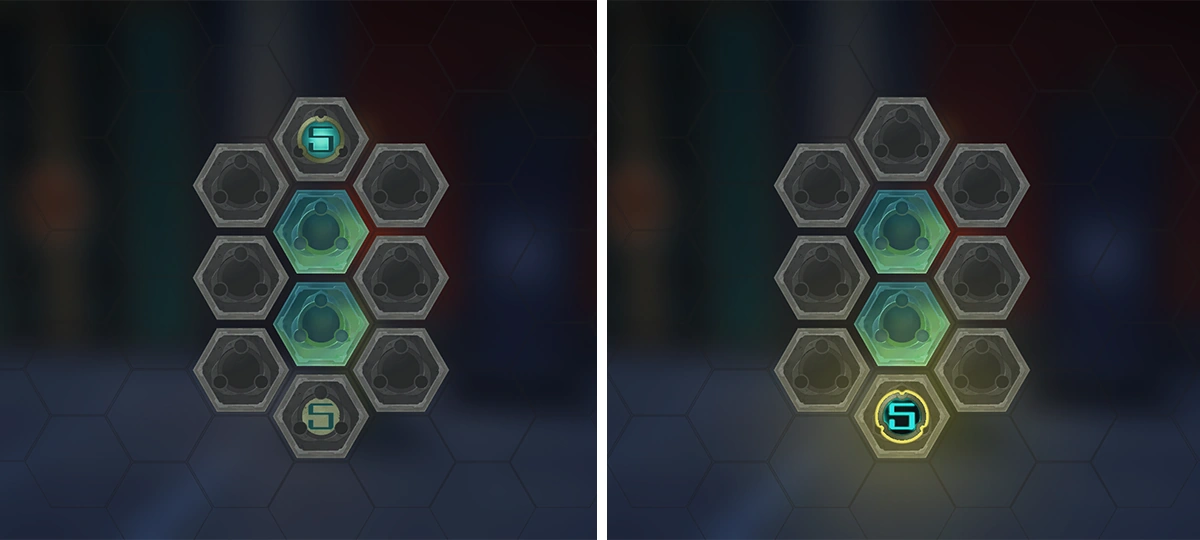 The jade abacus substrate system developed by the Artisanship Commission. Move the computing modules with subroutines stored in them to bases with corresponding patterns, so that the substrate can function normally.
The jade abacus substrate system developed by the Artisanship Commission. Move the computing modules with subroutines stored in them to bases with corresponding patterns, so that the substrate can function normally.
Fixed modules
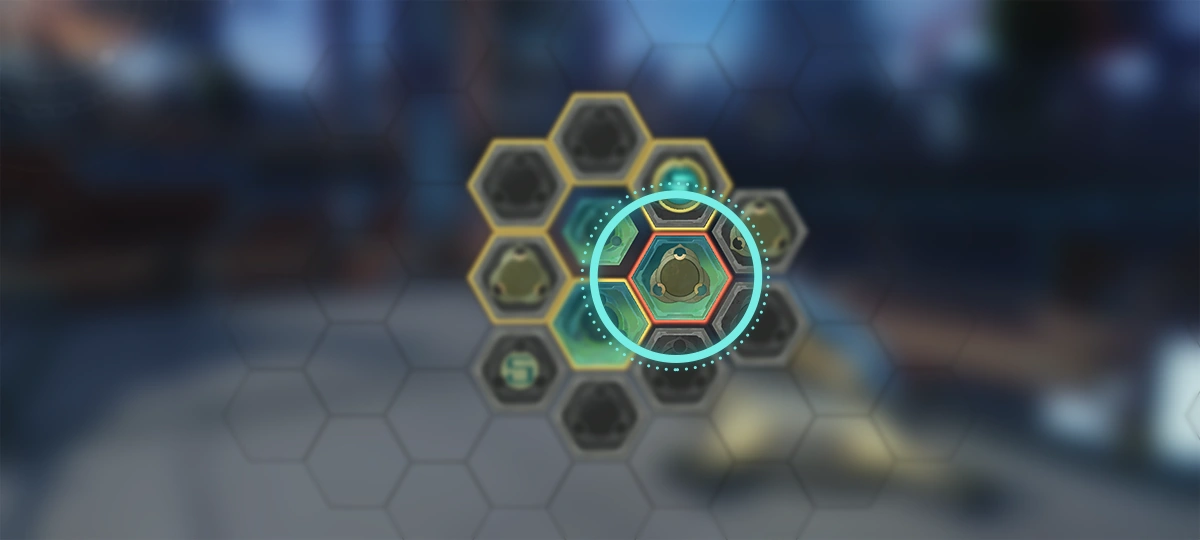 Fixed modules cannot be moved and will cause the nearby computing modules to spring back. Use this trick to adjust the position of computing modules.
Fixed modules cannot be moved and will cause the nearby computing modules to spring back. Use this trick to adjust the position of computing modules.
Teleportation modules
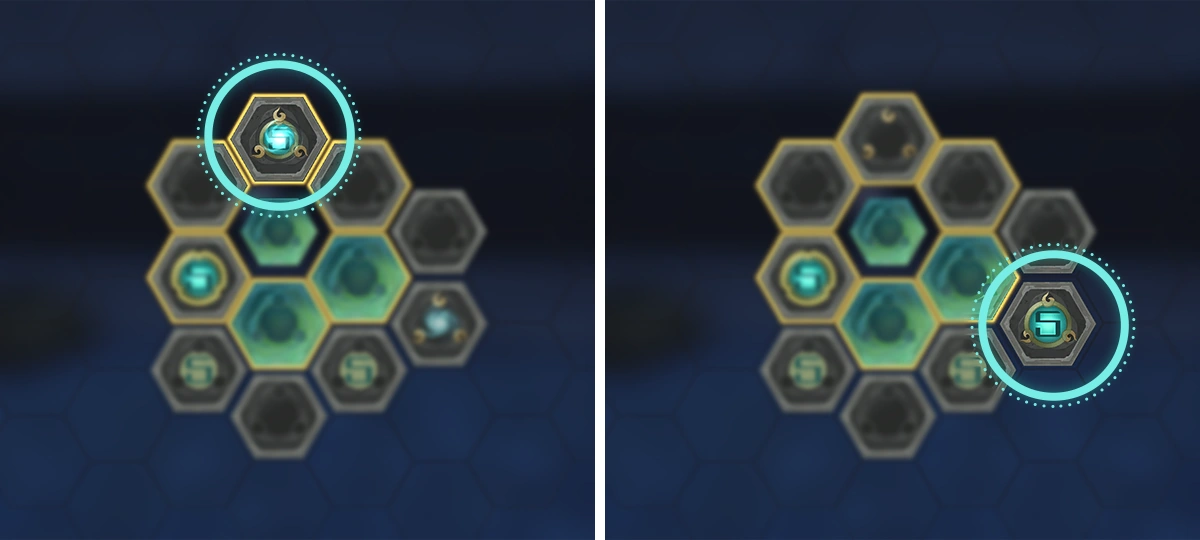 Teleportation modules will teleport the computing modules above it to the other end.
Teleportation modules will teleport the computing modules above it to the other end.
Luminflux Pyxis
See also: Master Gongshu § Dialogue
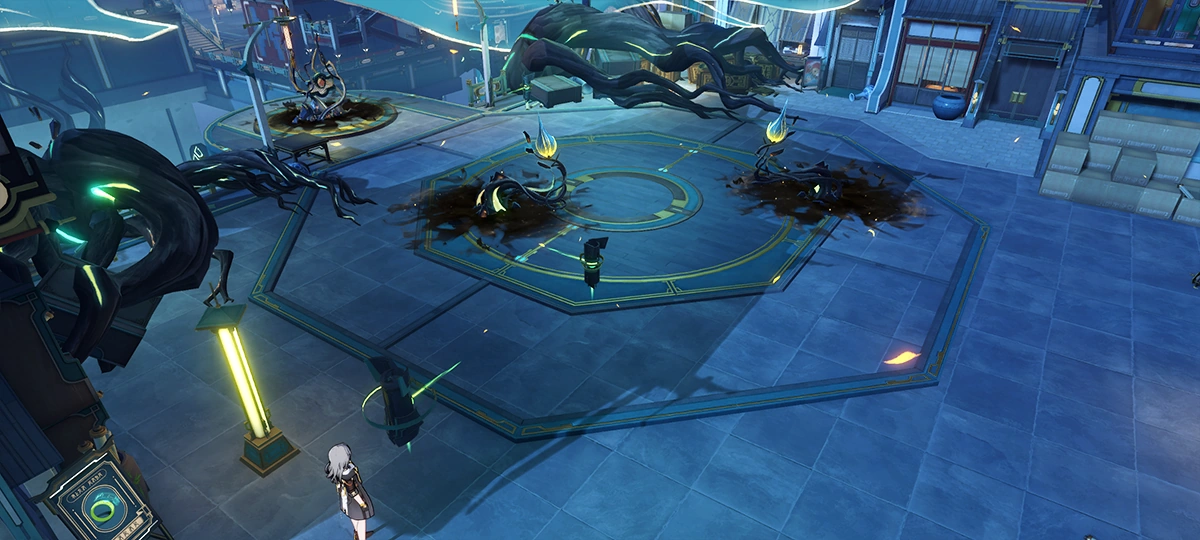 Ambrosial Arbor's branches can be found blocking the path. Use the Artisanship Commission's energy conduction device to destroy all the entangled Ambrosial Arbor's coils at the same time.
Ambrosial Arbor's branches can be found blocking the path. Use the Artisanship Commission's energy conduction device to destroy all the entangled Ambrosial Arbor's coils at the same time.
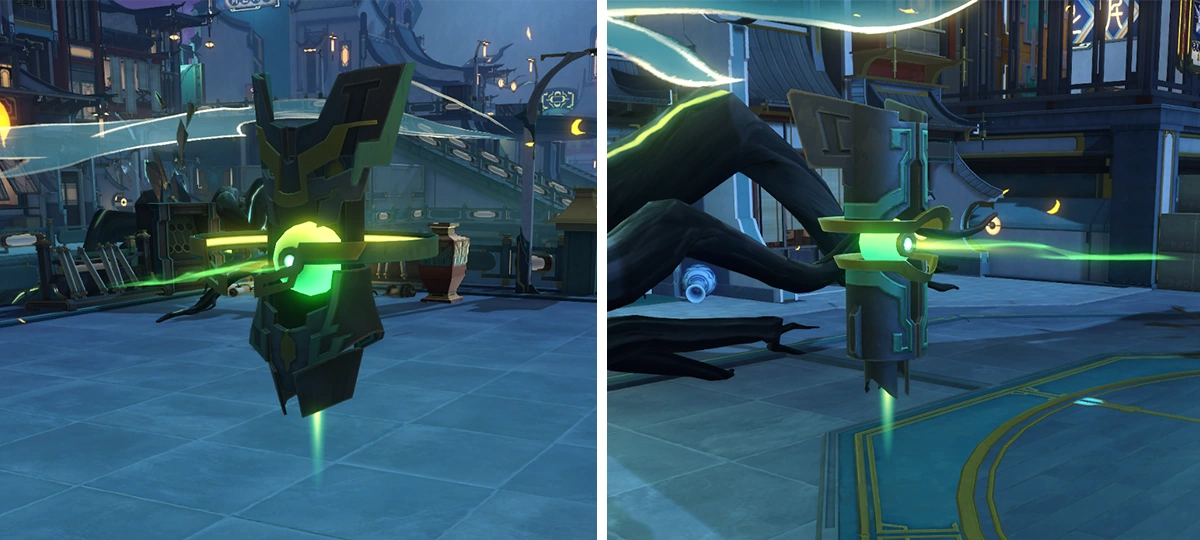 Rotate receiver nodes to adjust heliobus energy's conduction direction. Then activate the trigger node to release heliobus energy along the conduction direction.
Rotate receiver nodes to adjust heliobus energy's conduction direction. Then activate the trigger node to release heliobus energy along the conduction direction.
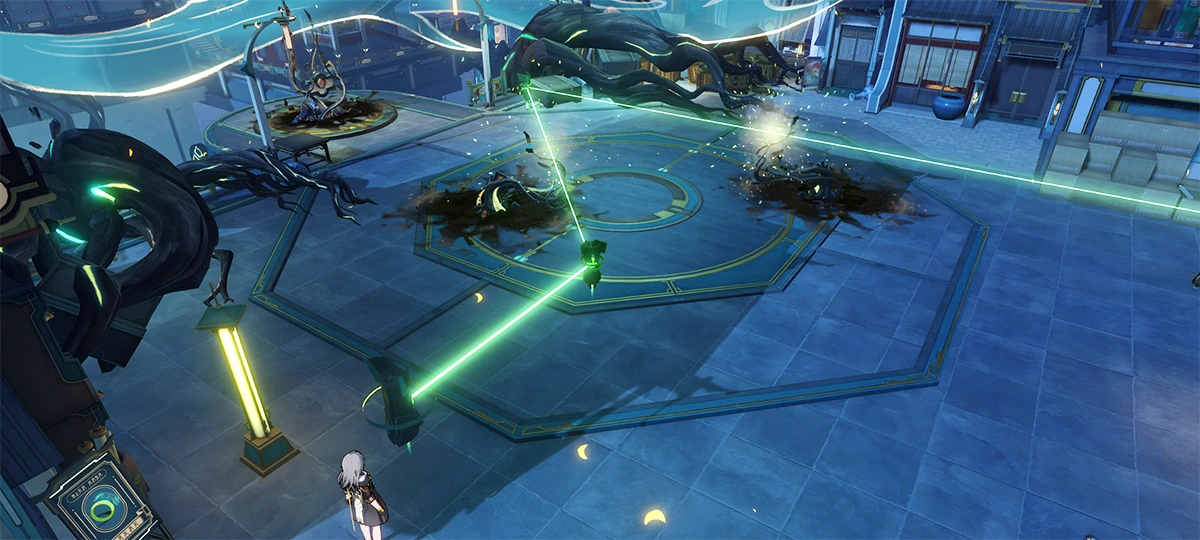 The Ambrosial Arbor coils need to be destroyed at the same time or they will grow back rapidly.
The Ambrosial Arbor coils need to be destroyed at the same time or they will grow back rapidly.
Mutare Magnus
Main article: Divination Commission (Location) § Mutare Magnus
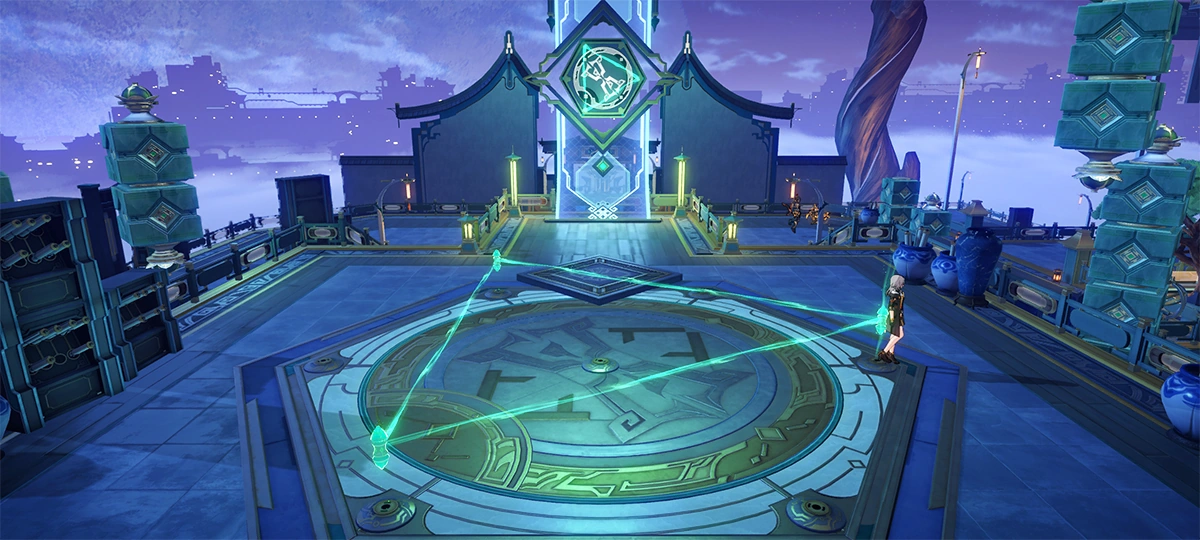 Mutare Magnus is a large-scale jade abacus calculation terminal used to calculate shipping routes and predict future events. To activate the base terminal, simply move the layout on the ground to match the pattern with the shape that is shown.
Mutare Magnus is a large-scale jade abacus calculation terminal used to calculate shipping routes and predict future events. To activate the base terminal, simply move the layout on the ground to match the pattern with the shape that is shown.
Diting
See also: Diting
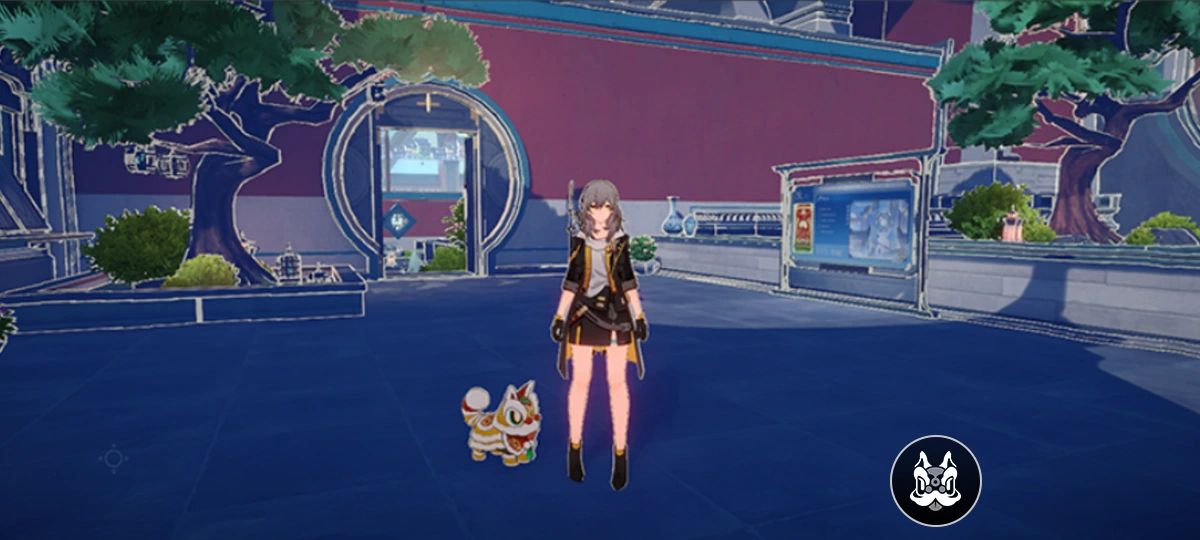 An ingenium dog crafted by the Artisanship Commission. Use its Locality Probe feature to find suspicious odors and traces.
An ingenium dog crafted by the Artisanship Commission. Use its Locality Probe feature to find suspicious odors and traces.
Worksite Dispatch
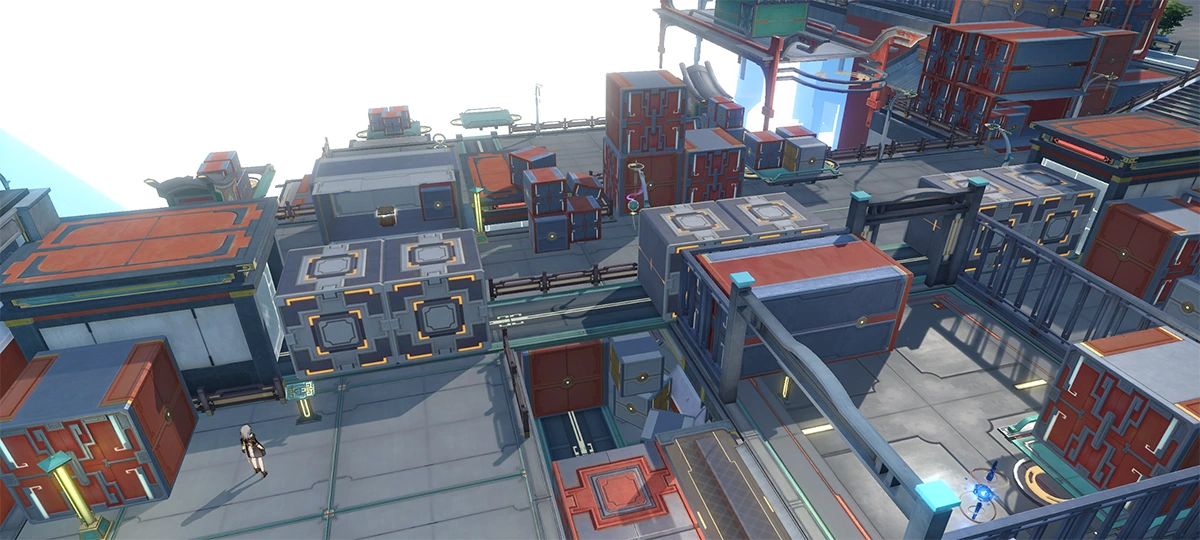 Various freight containers are placed on the assembly line. Adjust the position of the freight containers to fill gaps in the road or remove obstacles to open new passages.
Various freight containers are placed on the assembly line. Adjust the position of the freight containers to fill gaps in the road or remove obstacles to open new passages.
 Manual operation can only make minor adjustments to the freight containers on the assembly line. The lights on the control panel indicate the range of the adjustments that can be performed.
Manual operation can only make minor adjustments to the freight containers on the assembly line. The lights on the control panel indicate the range of the adjustments that can be performed.
Main article: Navigation Compass
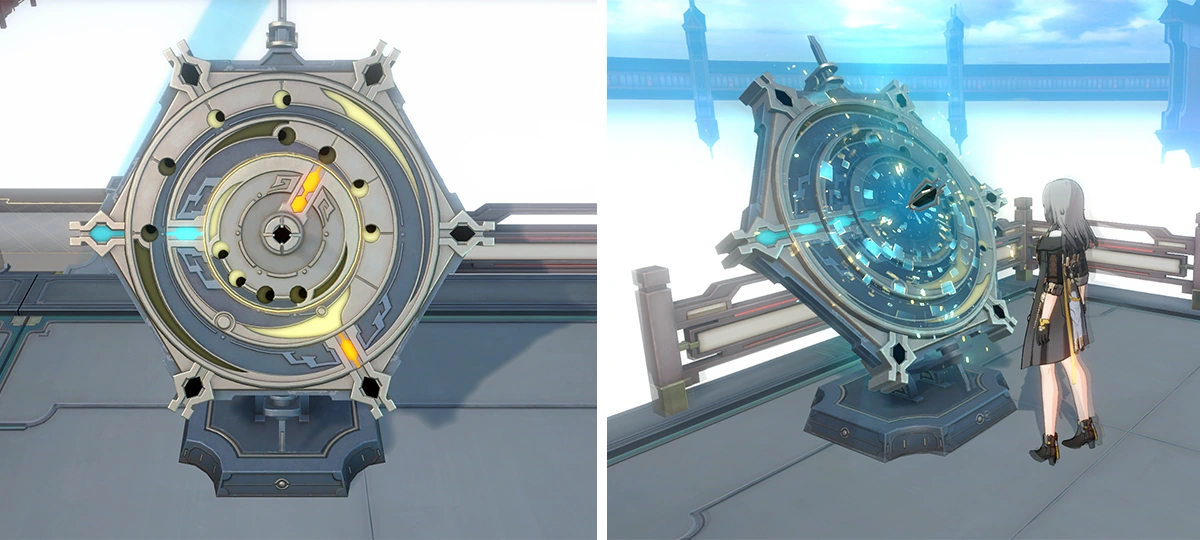 Turn the compass to align the inner and outer rings' Celestial Axis to the same direction.
Turn the compass to align the inner and outer rings' Celestial Axis to the same direction.
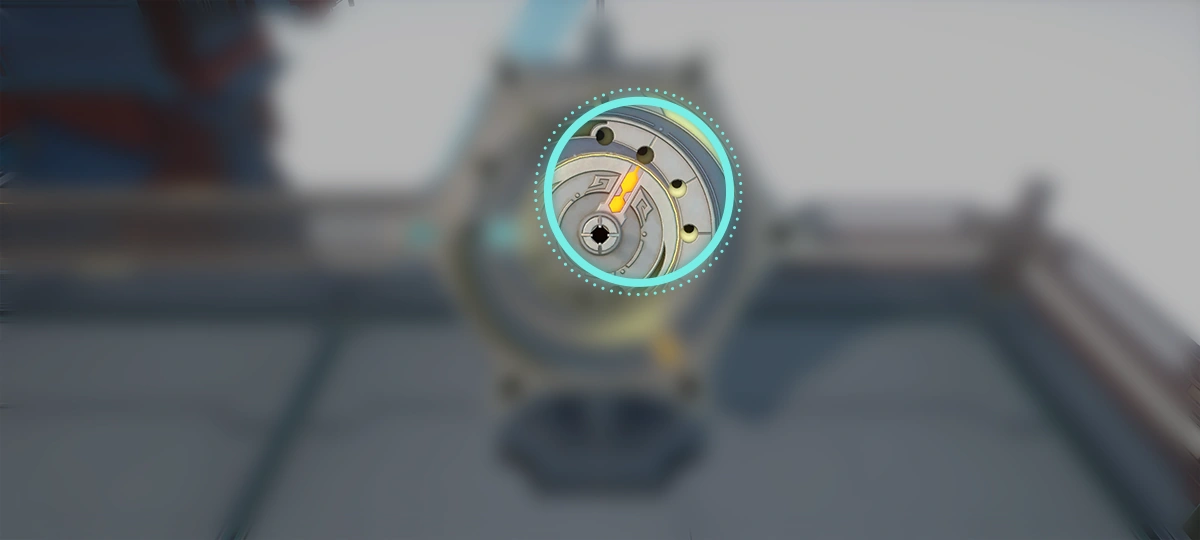 The Bright Astral Marks on the compass indicate the degree its Compass ring can rotate. For instance, one Bright Astral Mark would signify a 60° rotation per turn.
The Bright Astral Marks on the compass indicate the degree its Compass ring can rotate. For instance, one Bright Astral Mark would signify a 60° rotation per turn.
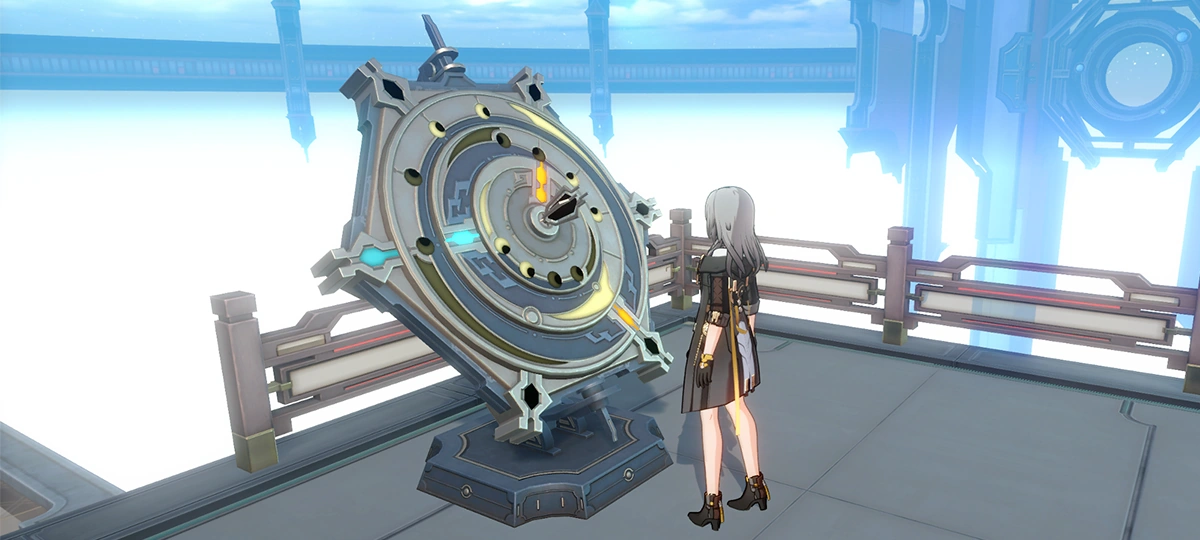 Two types of rotations exist: Clockwise and counterclockwise.
Two types of rotations exist: Clockwise and counterclockwise.
Percipient Sconce
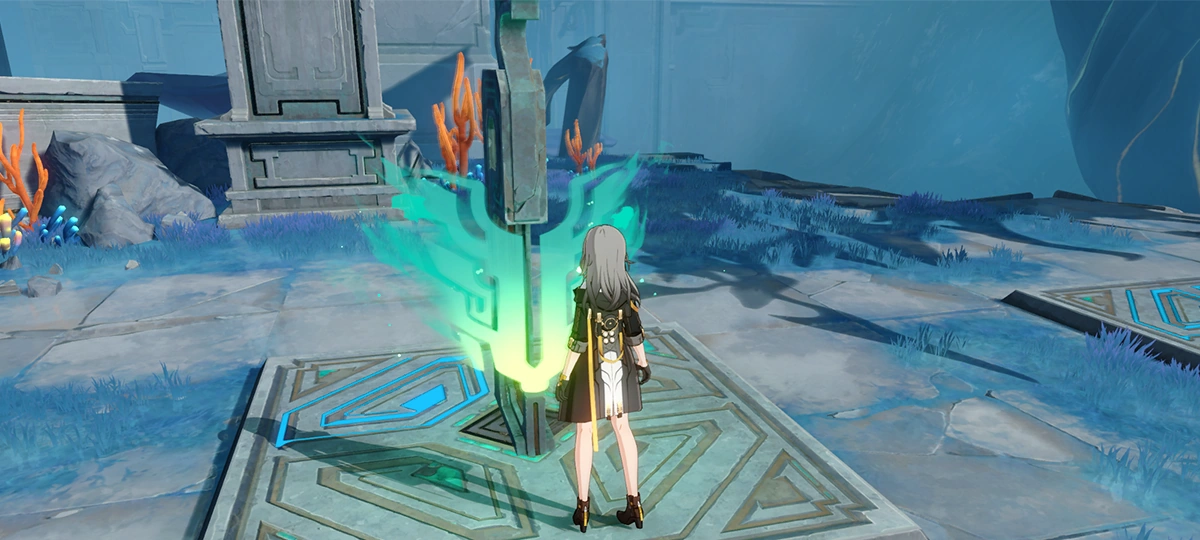 A ceremonial lamp left by the Vidyadhara that contains the Vidyadhara's power of sealing.
A ceremonial lamp left by the Vidyadhara that contains the Vidyadhara's power of sealing.
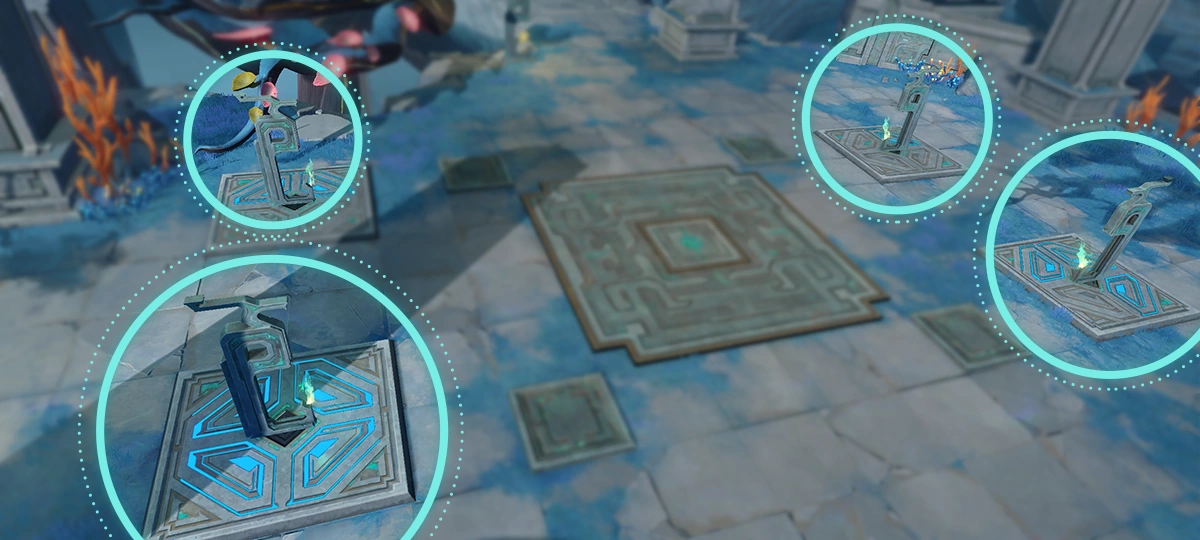 By lighting them up in a specific sequence, the corresponding seals in Scalegorge Waterscape can be removed.
By lighting them up in a specific sequence, the corresponding seals in Scalegorge Waterscape can be removed.
Pathfinder
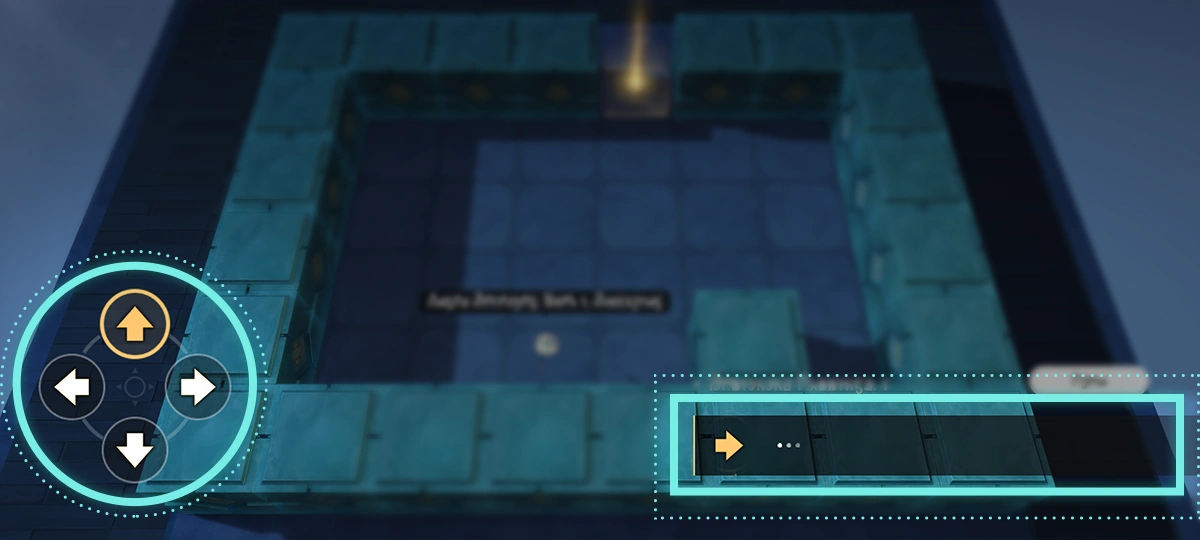 Enter the movement commands for the ingenium ahead of time to guide it to leave the maze in a set number of moves.
Enter the movement commands for the ingenium ahead of time to guide it to leave the maze in a set number of moves.
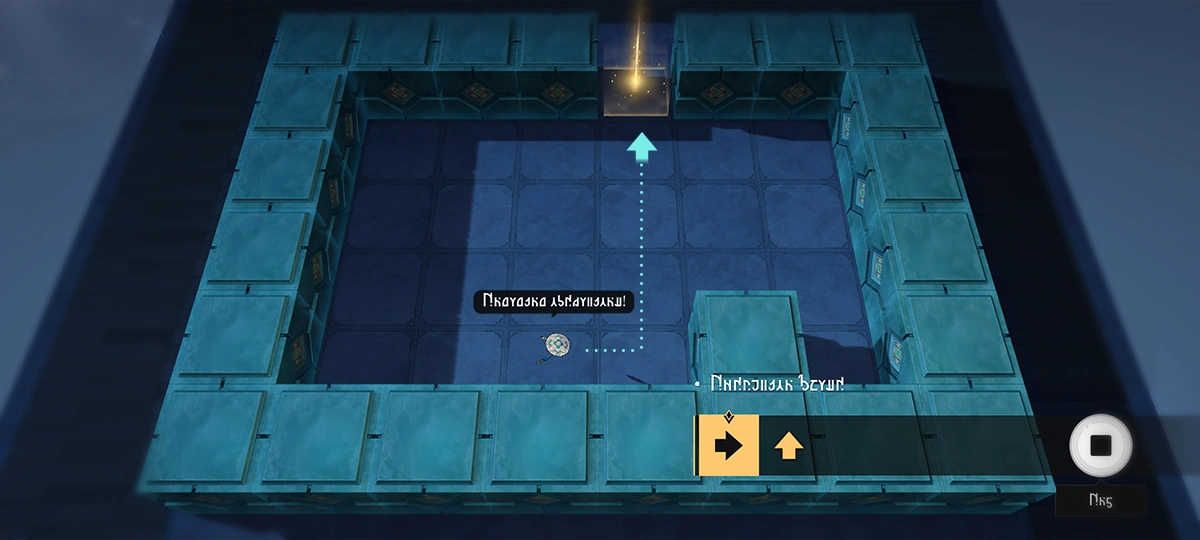 Each ingenium will proceed along the determined direction until the very end where it encounters an obstacle and awaits the next command.
Each ingenium will proceed along the determined direction until the very end where it encounters an obstacle and awaits the next command.
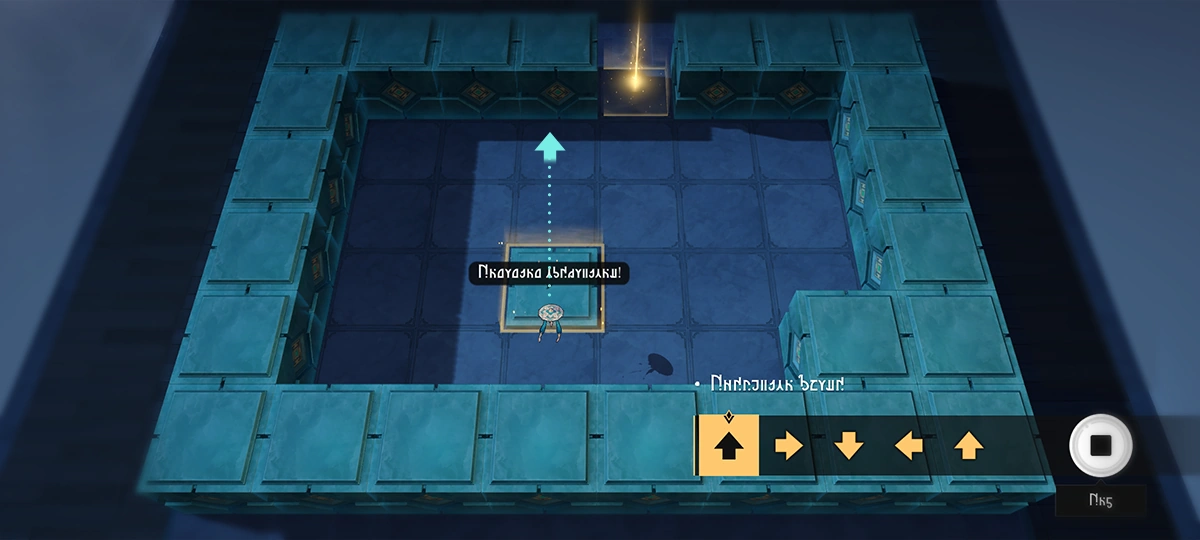 After the ingenium passes by a pressure plate, the plate will be turned into an obstacle
After the ingenium passes by a pressure plate, the plate will be turned into an obstacle
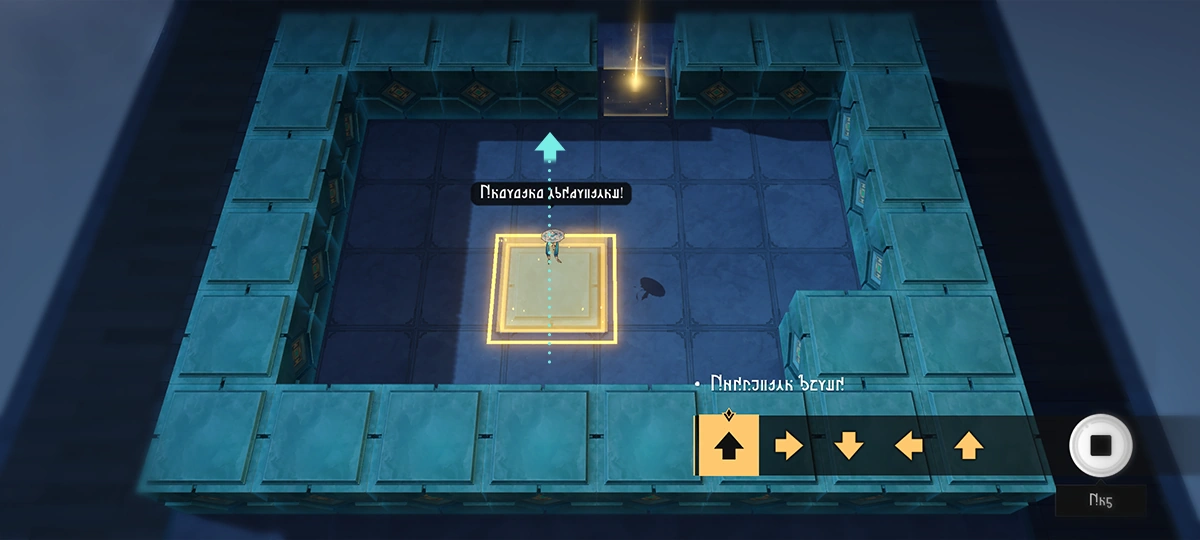 After the ingenium passes by a pressure plate, the plate will be turned into an obstacle
After the ingenium passes by a pressure plate, the plate will be turned into an obstacle
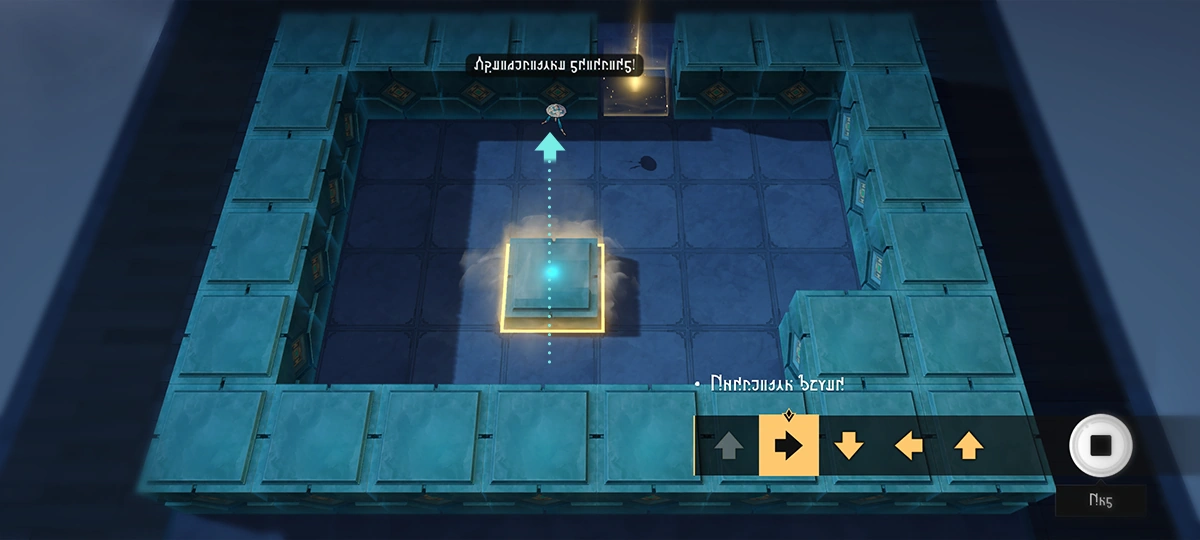 After the ingenium passes by a pressure plate, the plate will be turned into an obstacle
After the ingenium passes by a pressure plate, the plate will be turned into an obstacle
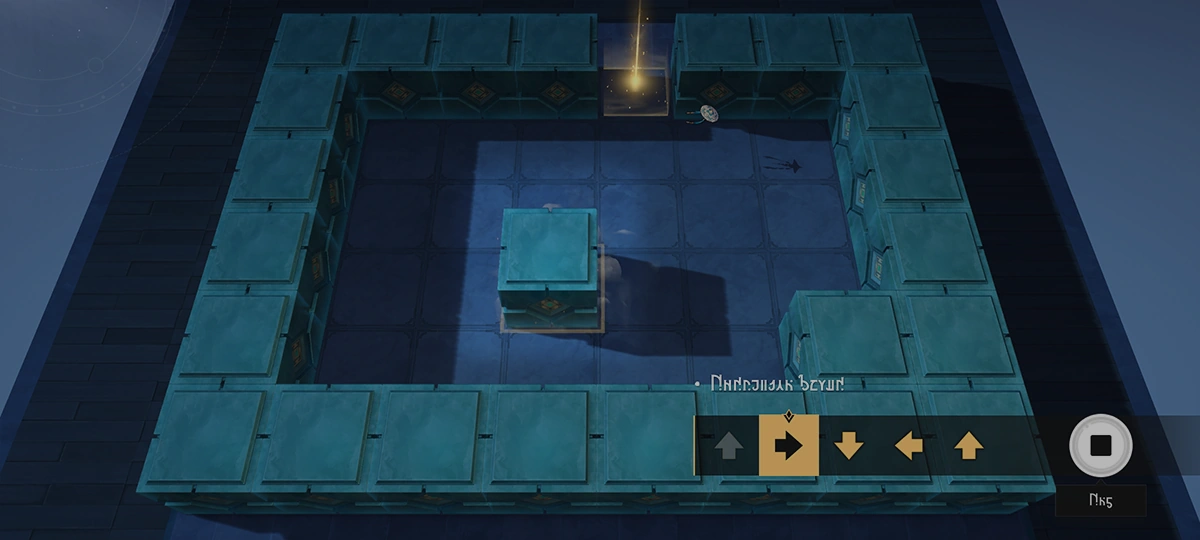 After the ingenium passes by a pressure plate, the plate will be turned into an obstacle.
After the ingenium passes by a pressure plate, the plate will be turned into an obstacle.
 Penacony
The following puzzles are only found in Penacony:
Dream Ticker
Main article: Dream Ticker
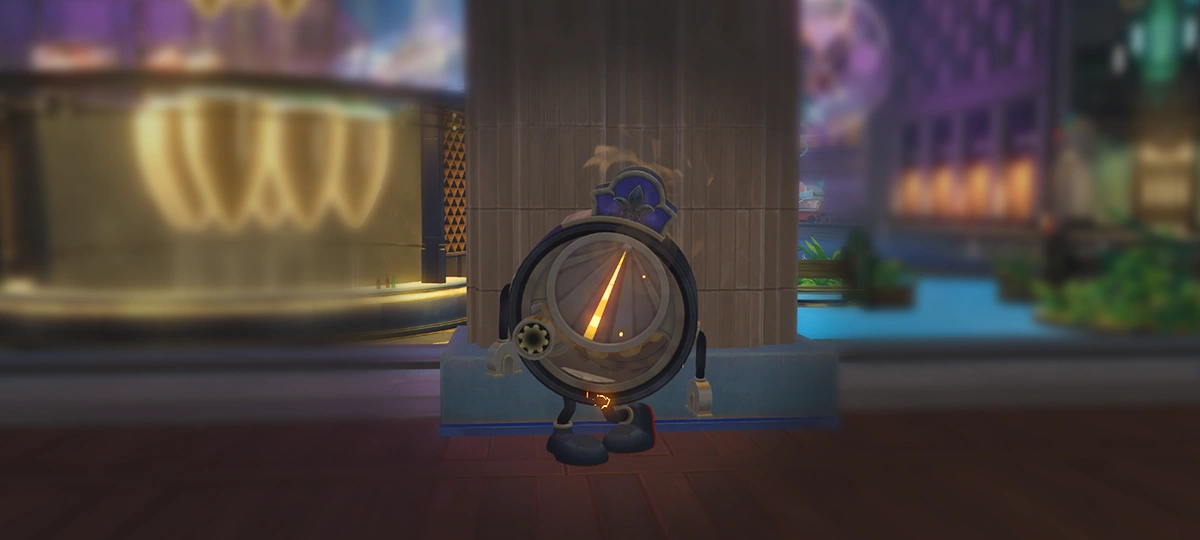 Occasionally, you may find malfunctioning Dream Tickers in Penacony. Interacting with them allows you to enter their Emoscape and repair these poor guys.
Occasionally, you may find malfunctioning Dream Tickers in Penacony. Interacting with them allows you to enter their Emoscape and repair these poor guys.
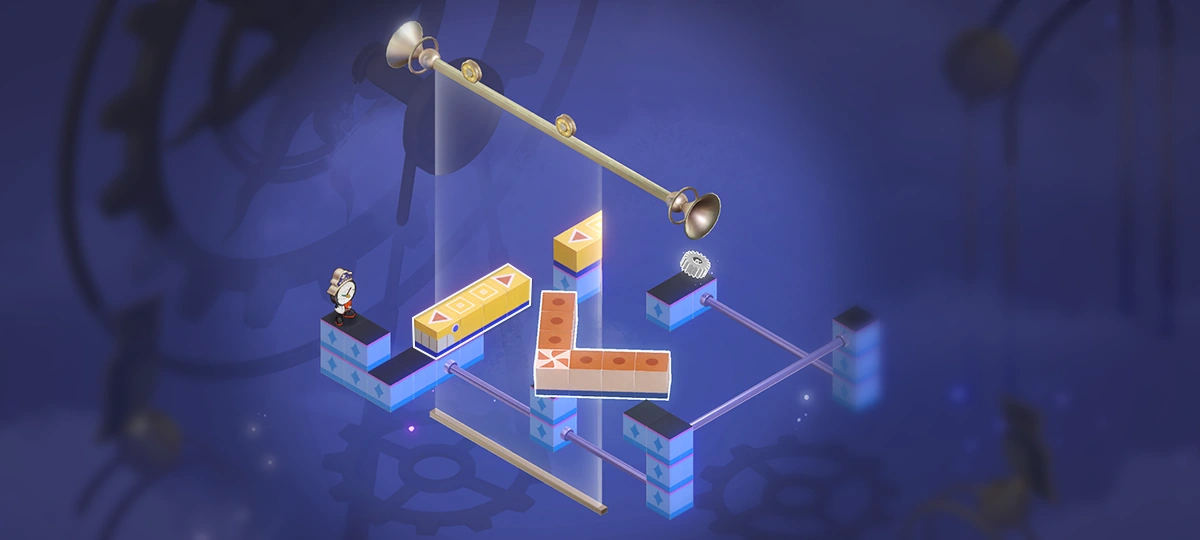 In the Emoscape, some building blocks are interactable, and you can either drag to move them or (taptap/presspress/clickclick) to rotate them. Use these blocks to help Clockie complete the path and collect gears to repair their mind.
In the Emoscape, some building blocks are interactable, and you can either drag to move them or (taptap/presspress/clickclick) to rotate them. Use these blocks to help Clockie complete the path and collect gears to repair their mind.
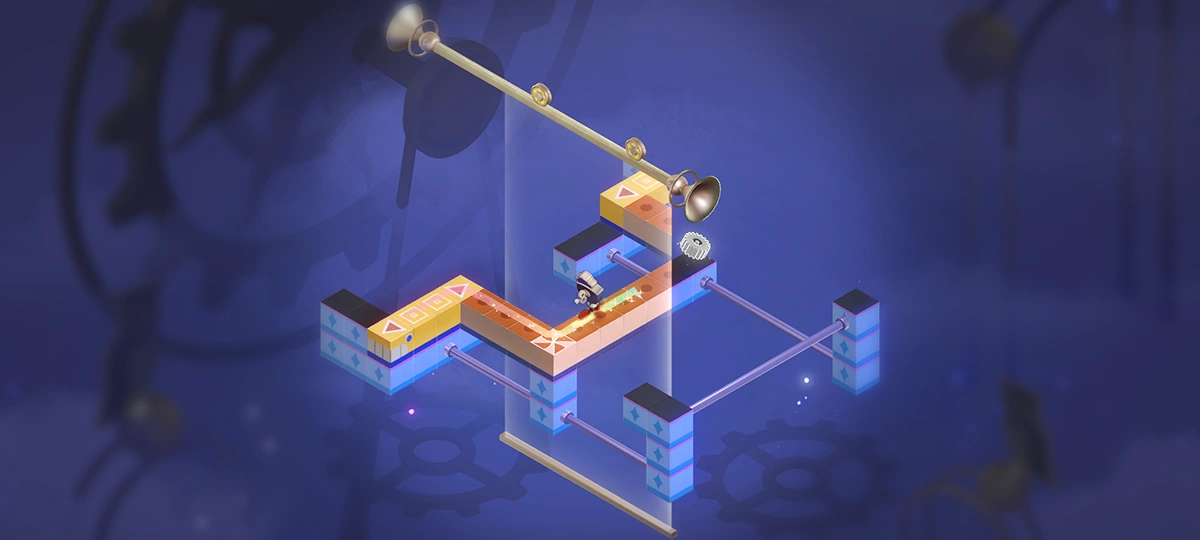 In addition, there is a movable Dream Mirror that replicates existing paths. Once a pathway to a gear is complete, Clockie will automatically collect the gear. Collect all the gears to complete the repair.
In addition, there is a movable Dream Mirror that replicates existing paths. Once a pathway to a gear is complete, Clockie will automatically collect the gear. Collect all the gears to complete the repair.
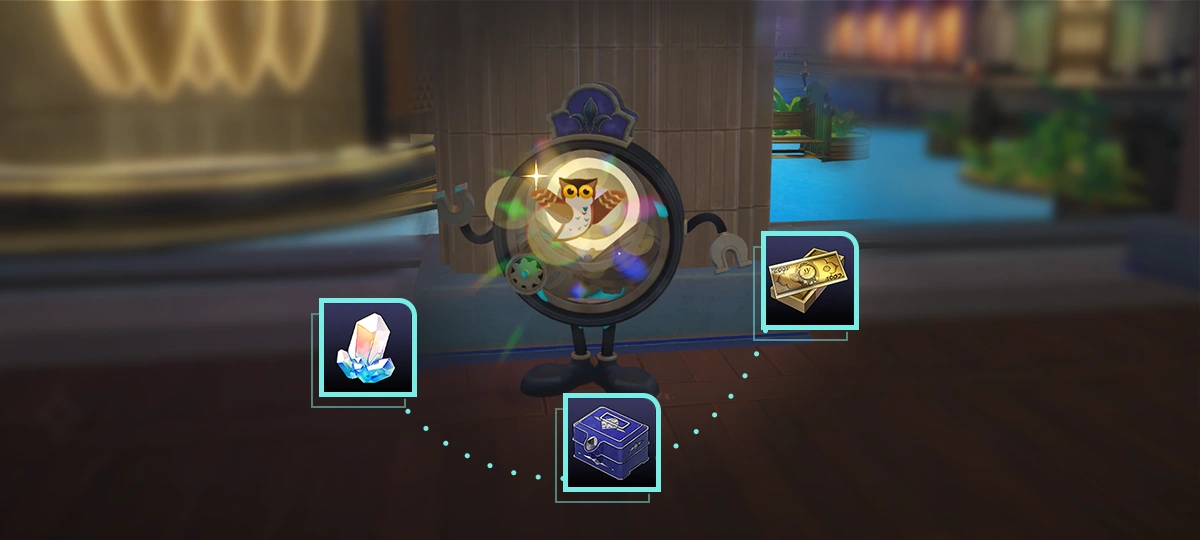 After exiting the Emoscape, you can awaken the repaired Dream Tickers and receive gifts from them.
After exiting the Emoscape, you can awaken the repaired Dream Tickers and receive gifts from them.
Dream Jigsaw
Main article: Dream Jigsaw
 Puzzle Gentleman holding Dream Jigsaws may appear anywhere in Penacony. Completing the jigsaw puzzle will make the object within it appear in the Dreamscape.
Puzzle Gentleman holding Dream Jigsaws may appear anywhere in Penacony. Completing the jigsaw puzzle will make the object within it appear in the Dreamscape.
 Drag Jigsaw Pieces and place them in the correct position within the frame. (TapTap/PressPress/ClickClick) Jigsaw Pieces to rotate them for the correct angle.
Drag Jigsaw Pieces and place them in the correct position within the frame. (TapTap/PressPress/ClickClick) Jigsaw Pieces to rotate them for the correct angle.
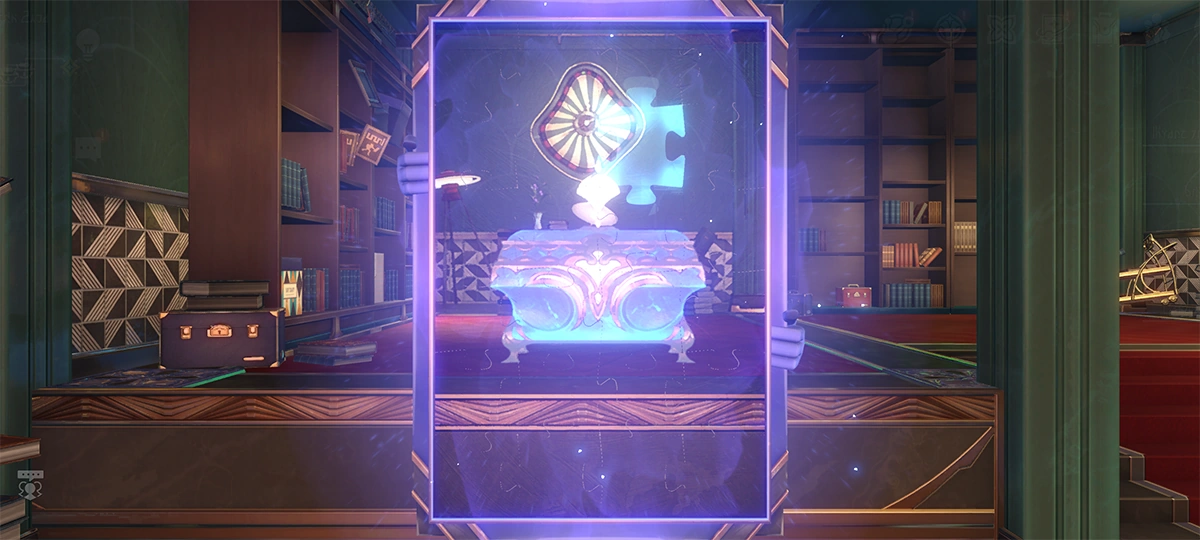 Once a puzzle is complete, the object within will appear in the Dreamscape.
Once a puzzle is complete, the object within will appear in the Dreamscape.
Unstable pieces
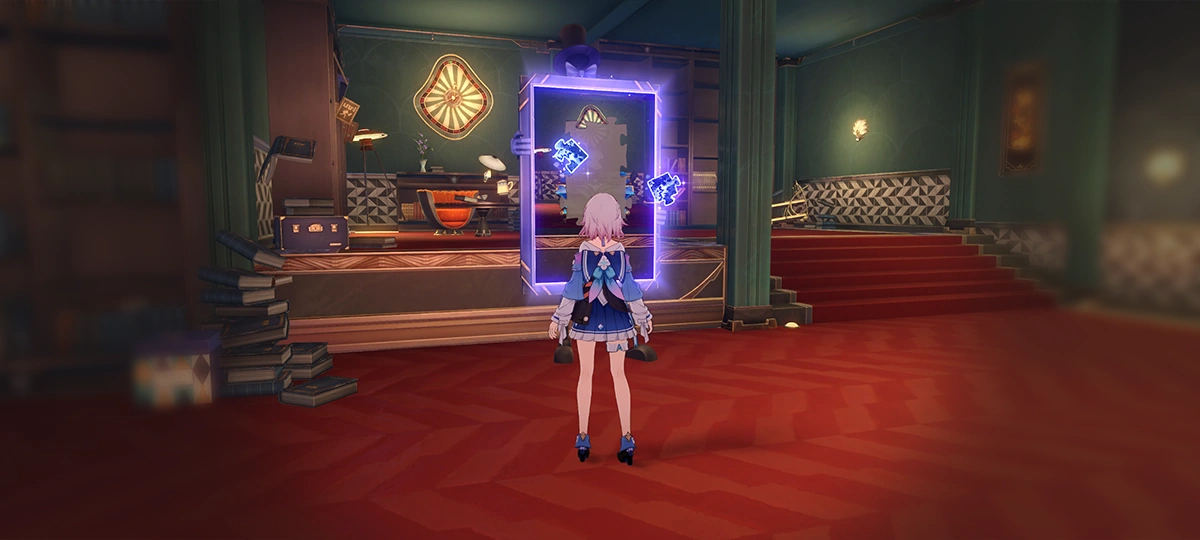 Some Dream Jigsaw pieces are unstable and may move to another location in the scene during interaction.
Some Dream Jigsaw pieces are unstable and may move to another location in the scene during interaction.
 Follow the instructions to retrieve the scattered pieces and complete the puzzle.
Follow the instructions to retrieve the scattered pieces and complete the puzzle.
Hanu's Adventure
Main article: Hanu's Adventure
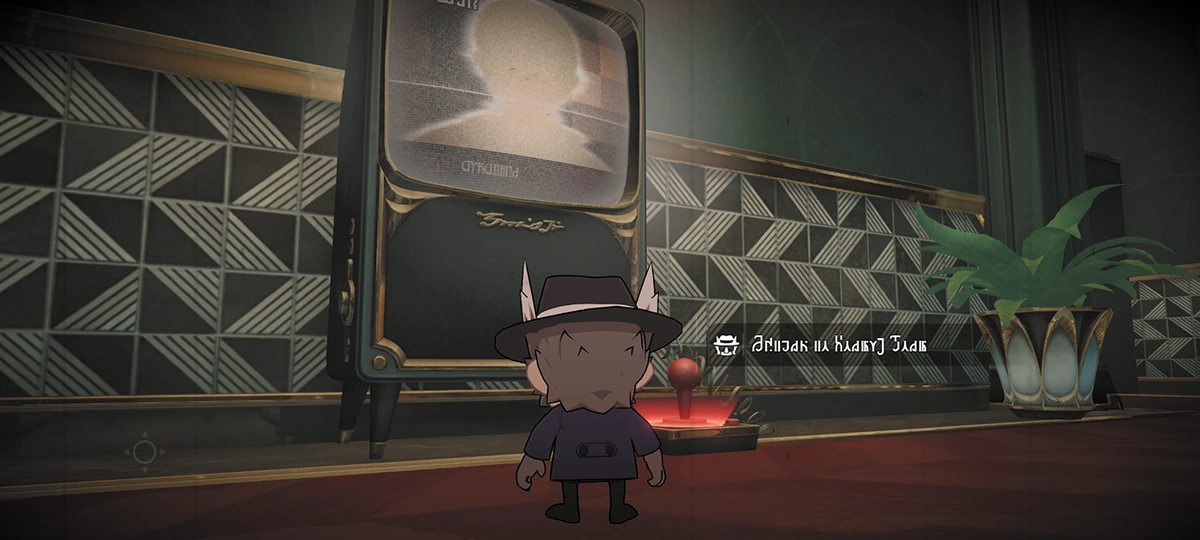 If you want to temporarily exit the game or end the transformation, you can interact with the shrinking machine again or teleport using the Map.
If you want to temporarily exit the game or end the transformation, you can interact with the shrinking machine again or teleport using the Map.
Lordly Trashcan
Main article: Lordly Trashcan
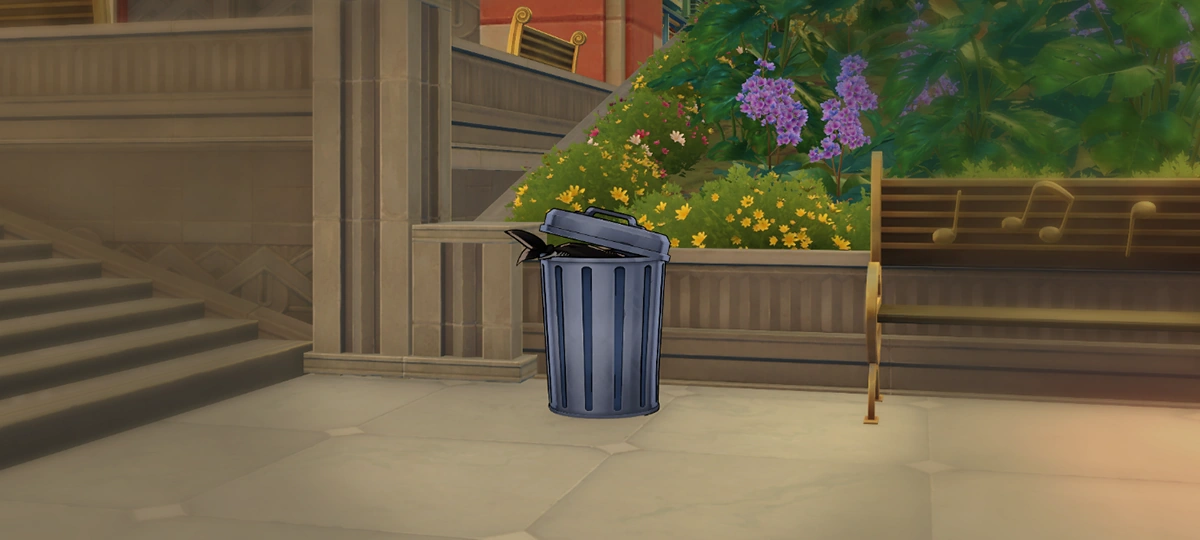 Lordly Trashcan may appear anywhere in the world, testing passing braves. Converse with it to face its trials, and completing their trials will earn you Stellar Jade rewards. The trials from each Lordly Trashcan can only be completed once and cannot be repeated.
Lordly Trashcan may appear anywhere in the world, testing passing braves. Converse with it to face its trials, and completing their trials will earn you Stellar Jade rewards. The trials from each Lordly Trashcan can only be completed once and cannot be repeated.
Origami Birds
Main article: Origami Bird
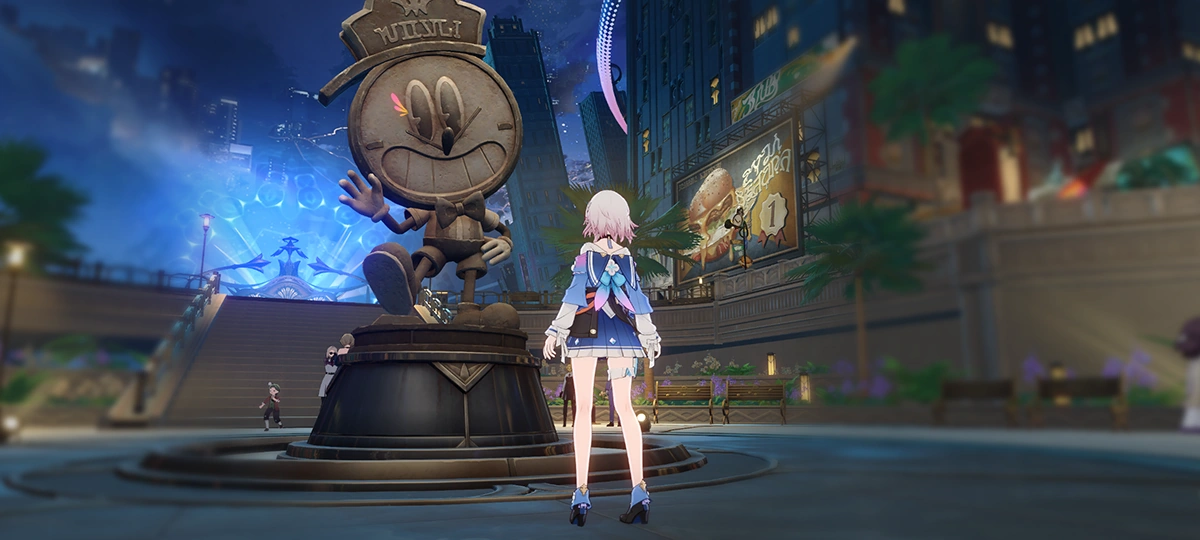 The Origami Birds bring branches and precious stones to build the city. However, these mischievous entities often turn into feathers and hide in the various corners among the places they've made.
The Origami Birds bring branches and precious stones to build the city. However, these mischievous entities often turn into feathers and hide in the various corners among the places they've made.
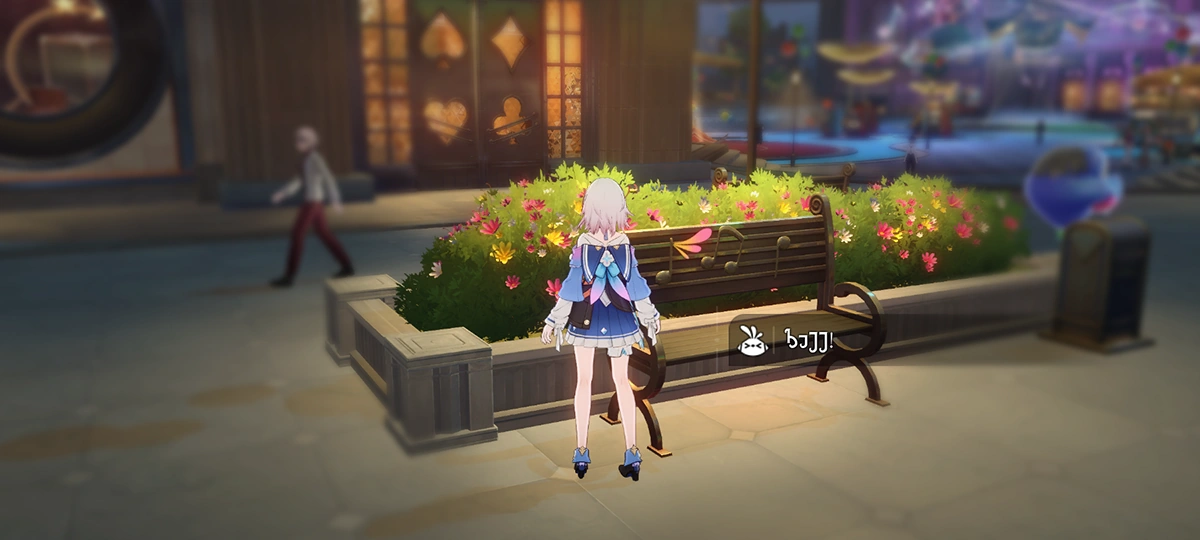 If you see through the bird's mimicry, then please go up and interact with them. The friendly birds will prepare a gift for adventurers who discover them.
If you see through the bird's mimicry, then please go up and interact with them. The friendly birds will prepare a gift for adventurers who discover them.
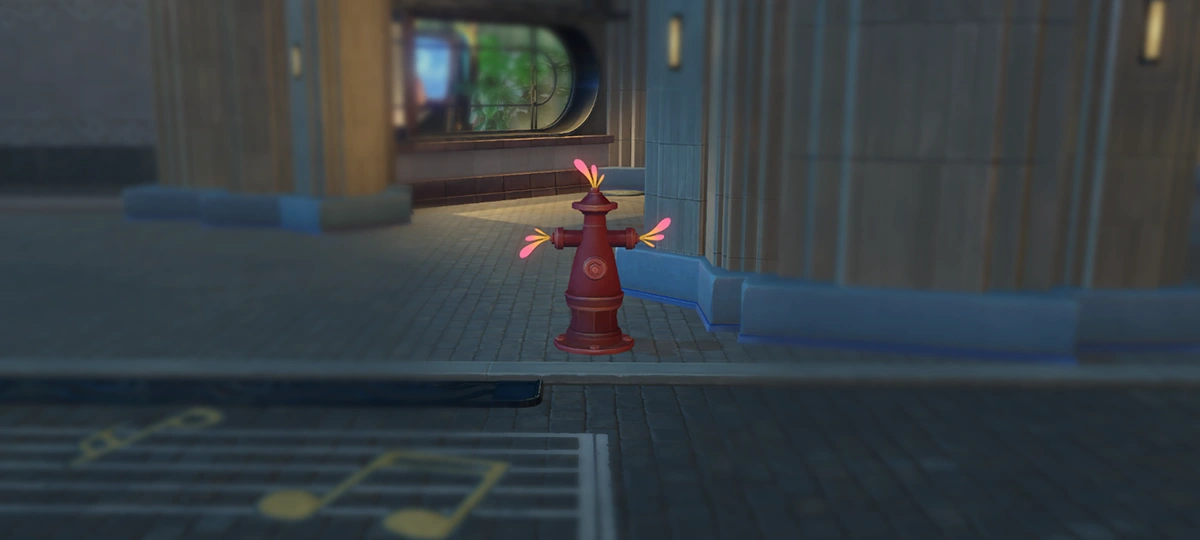 Some particularly playful birds won't directly admit their failure and require you to peel back their disguise little by little. Observe carefully and try many times to figure out the way to capture them.
Some particularly playful birds won't directly admit their failure and require you to peel back their disguise little by little. Observe carefully and try many times to figure out the way to capture them.
 Amphoreus
The following puzzles are only found in Amphoreus:
Creation Nymph
Main article: Creation Nymph
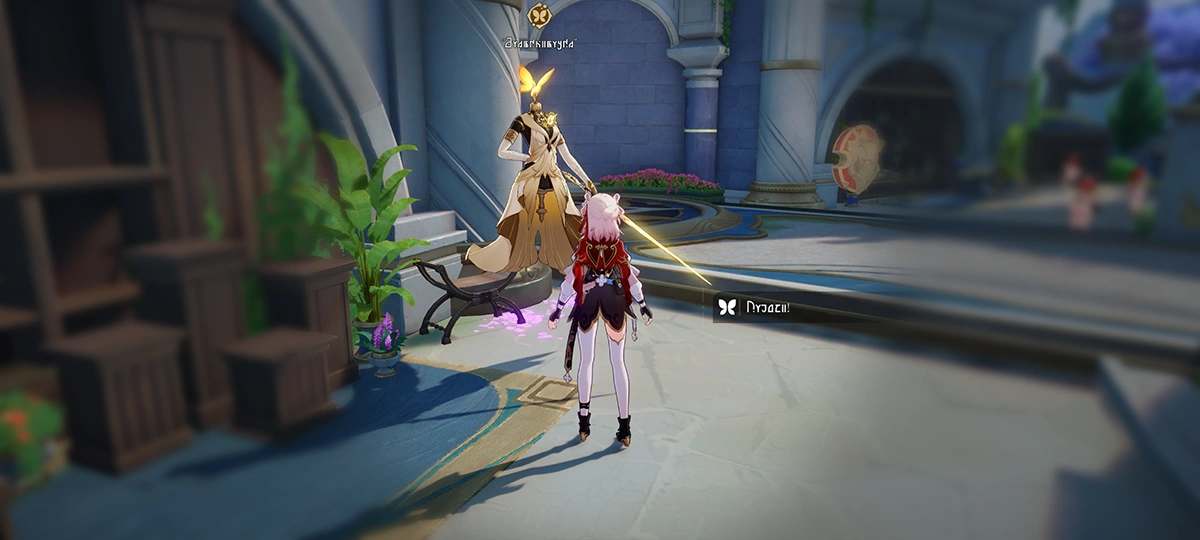 Nymphs with blessings are everywhere in Amphoreus. Approach and interact to collect the nymphs, and bring their blessings to Aglaea.
Nymphs with blessings are everywhere in Amphoreus. Approach and interact to collect the nymphs, and bring their blessings to Aglaea.
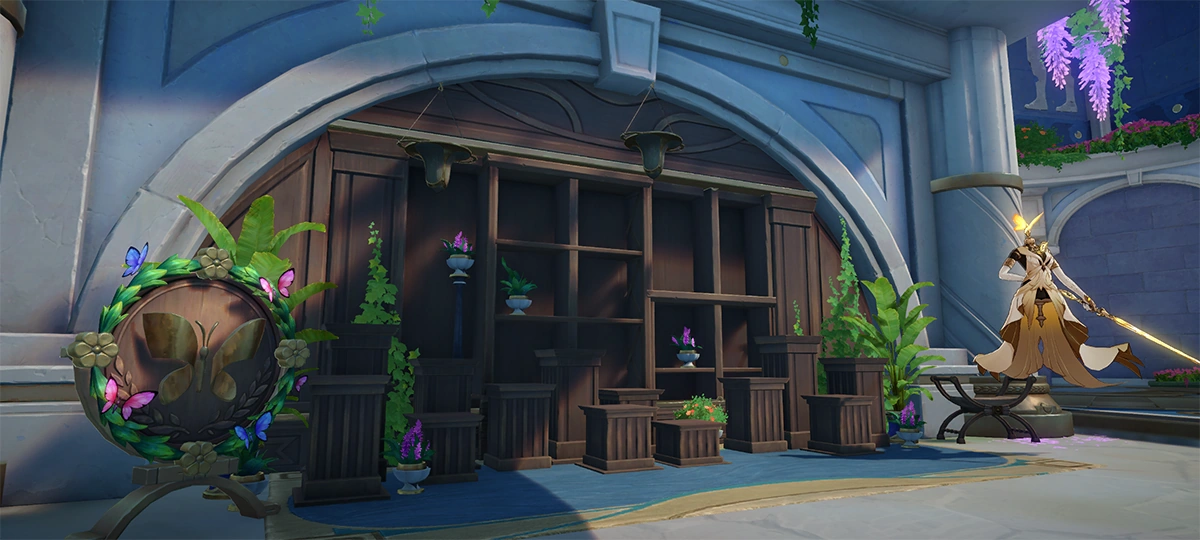 After collecting all the nymphs of an area, the Garmentmaker will begin deciphering the prophecy and may provide unexpected information to unknown surprises.
After collecting all the nymphs of an area, the Garmentmaker will begin deciphering the prophecy and may provide unexpected information to unknown surprises.
 Aglaea has set up Garmentmakers beforehand at areas where nymphs can be found. If there are still nymphs to be found in the area, Memory Crystal Shard can be submitted to the Garmentmaker to help locate them.
Aglaea has set up Garmentmakers beforehand at areas where nymphs can be found. If there are still nymphs to be found in the area, Memory Crystal Shard can be submitted to the Garmentmaker to help locate them.
Golden Scapegoat
Main article: Golden Scapegoat
 Use the holy flame in hand to light up the altar and bring light to this world!
Use the holy flame in hand to light up the altar and bring light to this world!
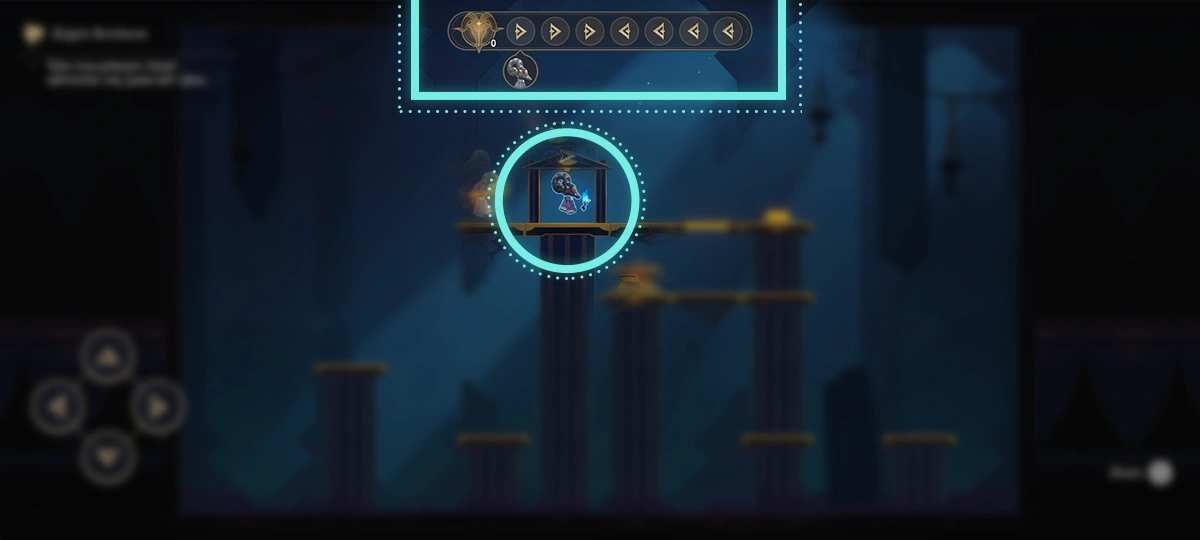 Watch out! Your each and every move will be recorded by the shadows in the void. When fate's footsteps returns to zero, an enshadowed version of you will manifest as an enemy and process along the fate you have etched into being...
Watch out! Your each and every move will be recorded by the shadows in the void. When fate's footsteps returns to zero, an enshadowed version of you will manifest as an enemy and process along the fate you have etched into being...
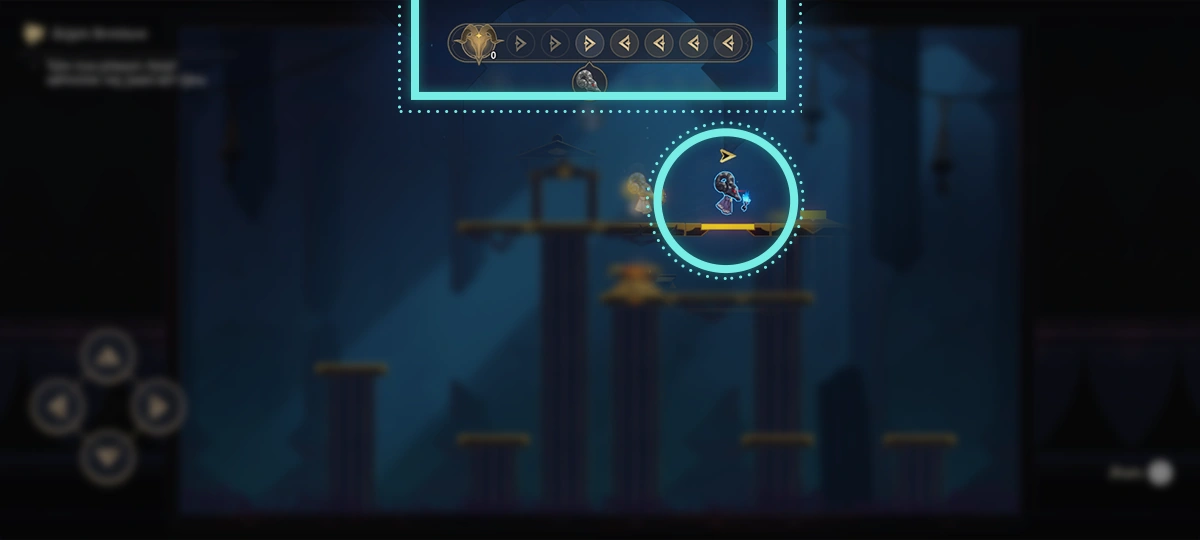 The enshadowed version of you is a foe that will strictly follow your previous actions and advance accordingly until the recorded steps have ended. Remember: Do not make contact with them.
The enshadowed version of you is a foe that will strictly follow your previous actions and advance accordingly until the recorded steps have ended. Remember: Do not make contact with them.
 The Ancient Crystalline Controllers you find on the path can alter the state of the flooring that has the same energy color. Use them to help you reach the altar.
The Ancient Crystalline Controllers you find on the path can alter the state of the flooring that has the same energy color. Use them to help you reach the altar.
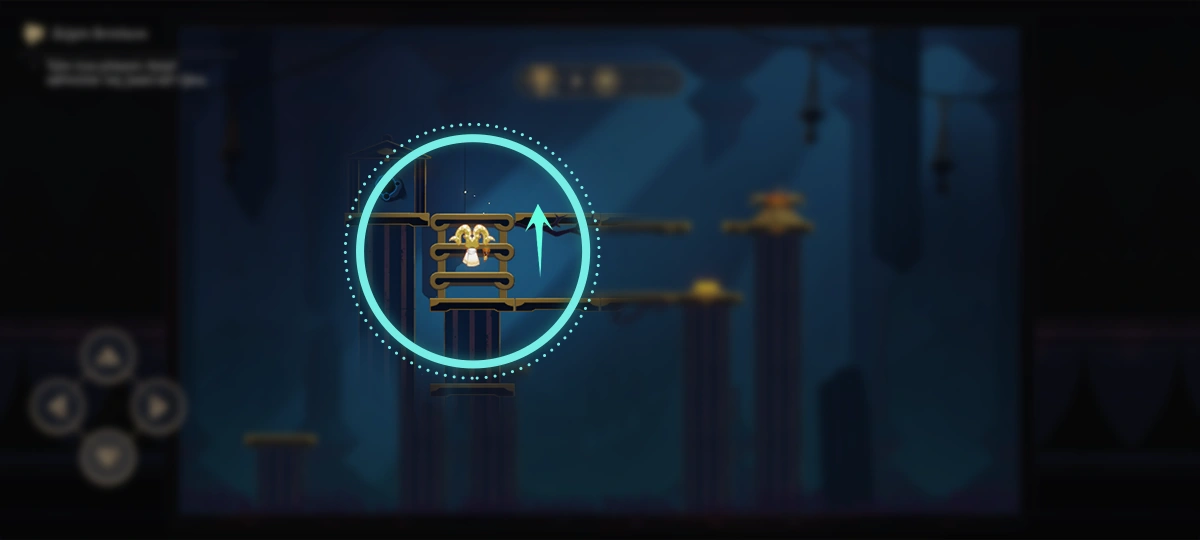 Use the ladder to move up or down. You only need to take one step for each ladder, regardless of their length.
Use the ladder to move up or down. You only need to take one step for each ladder, regardless of their length.
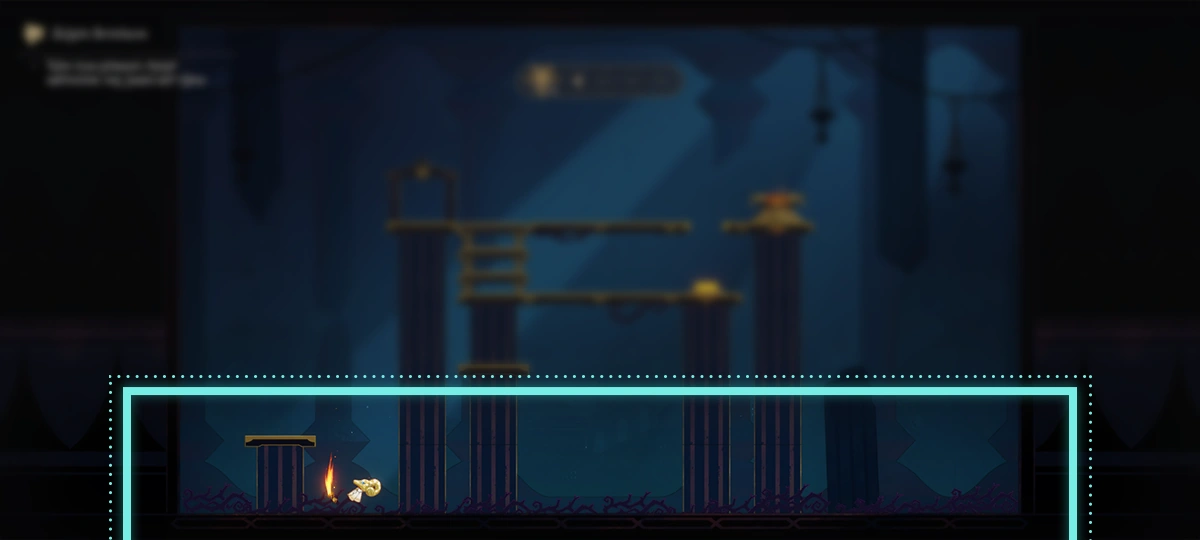 The path of destiny is not a smooth one... Should you fall, you will experience eternal damnation.
The path of destiny is not a smooth one... Should you fall, you will experience eternal damnation.
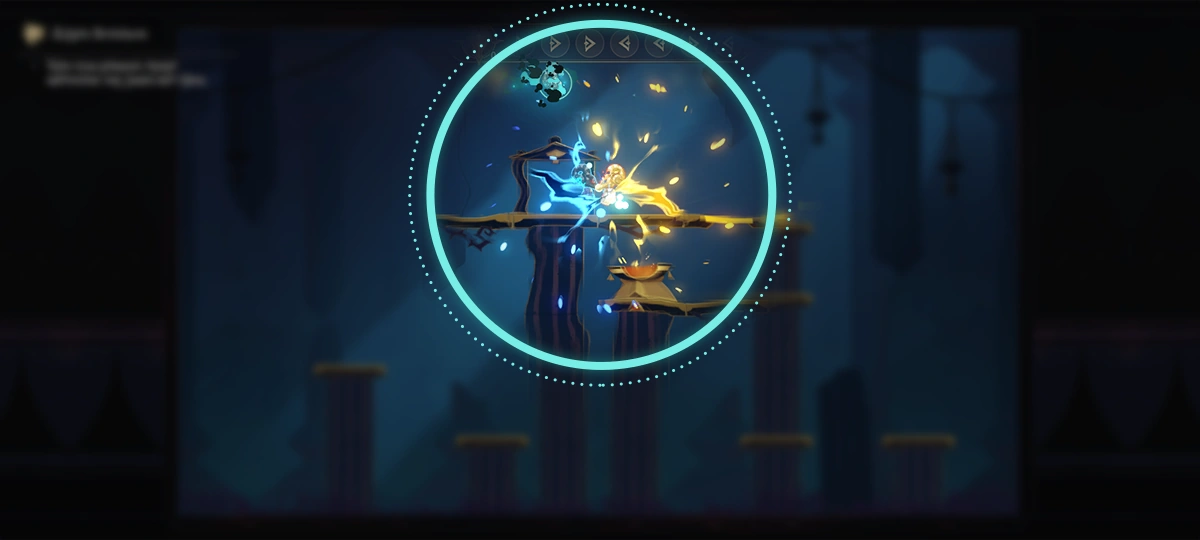 While on the road of destiny, it is a tragic thing to be tethered by the past... Do not approach the Enshadowed Version of You.
While on the road of destiny, it is a tragic thing to be tethered by the past... Do not approach the Enshadowed Version of You.
Golden Short Spear
Main article: Golden Short Spear
 Rewinding the "Golden Short Spear" via the prayer will replay its path. Follow and capture the rewound "Golden Short Spear" to obtain corresponding rewards
Rewinding the "Golden Short Spear" via the prayer will replay its path. Follow and capture the rewound "Golden Short Spear" to obtain corresponding rewards
Spirithief
Main article: Spirithief
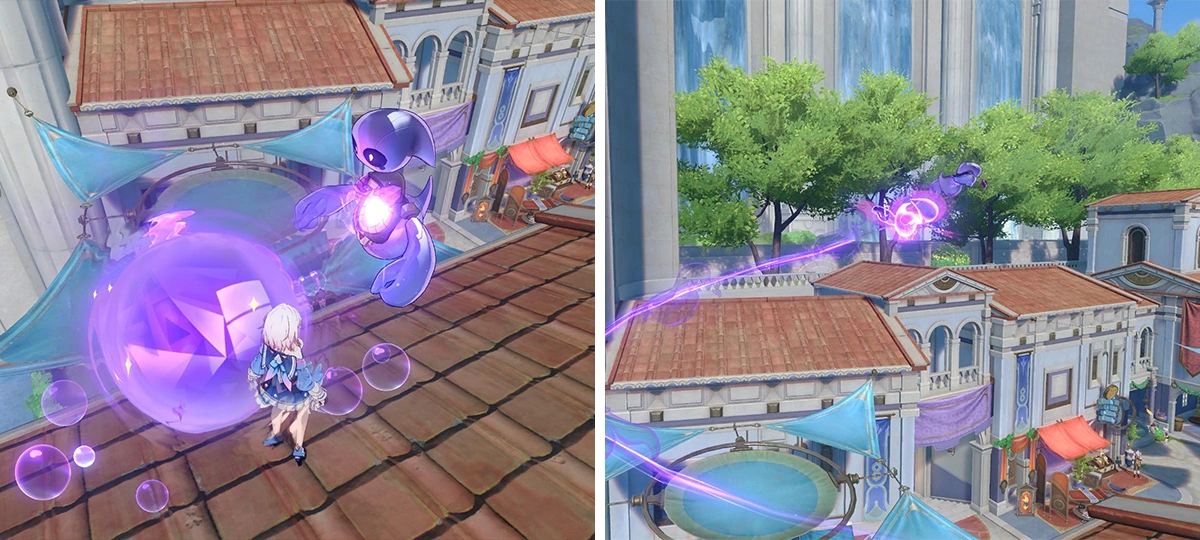 The Spirithief is a (self-proclaimed) well-known master thief across Amphoreus. They enjoy stealing treasures others are just about to obtain and then vanishing into the void with their stolen goods. They tend to leave a Coin of Whimsy in mockery in the aftermath.
The Spirithief is a (self-proclaimed) well-known master thief across Amphoreus. They enjoy stealing treasures others are just about to obtain and then vanishing into the void with their stolen goods. They tend to leave a Coin of Whimsy in mockery in the aftermath.
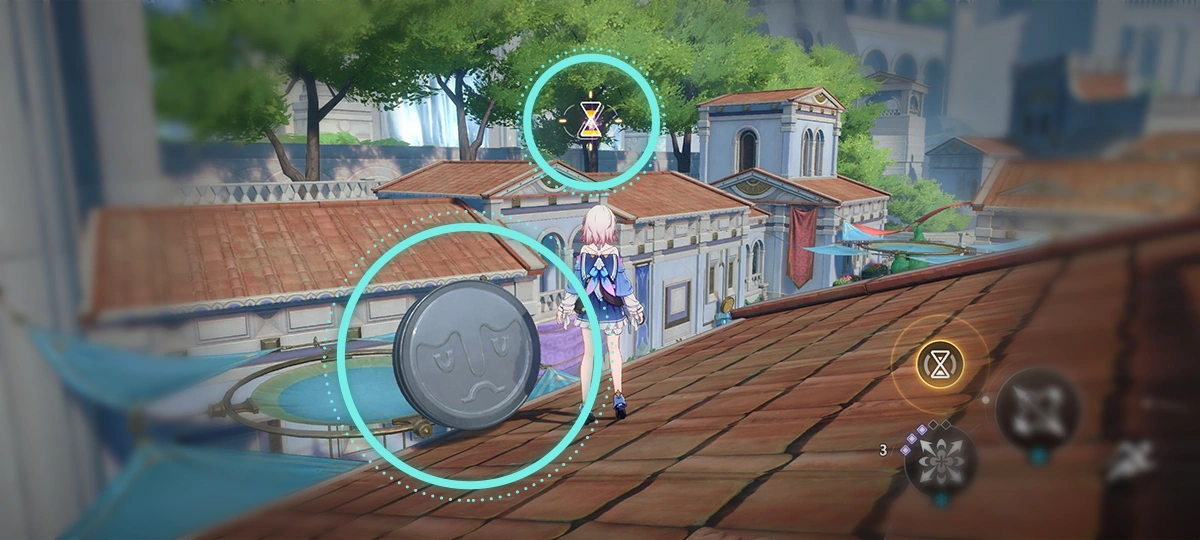 The only thing that can punish them is Oronyx's power. When near a Coin of Whimsy, use the rewinding powers provided by Oronyx's Prayer upon the fissures the thief escapes through to get the Spirithief to come back.
The only thing that can punish them is Oronyx's power. When near a Coin of Whimsy, use the rewinding powers provided by Oronyx's Prayer upon the fissures the thief escapes through to get the Spirithief to come back.
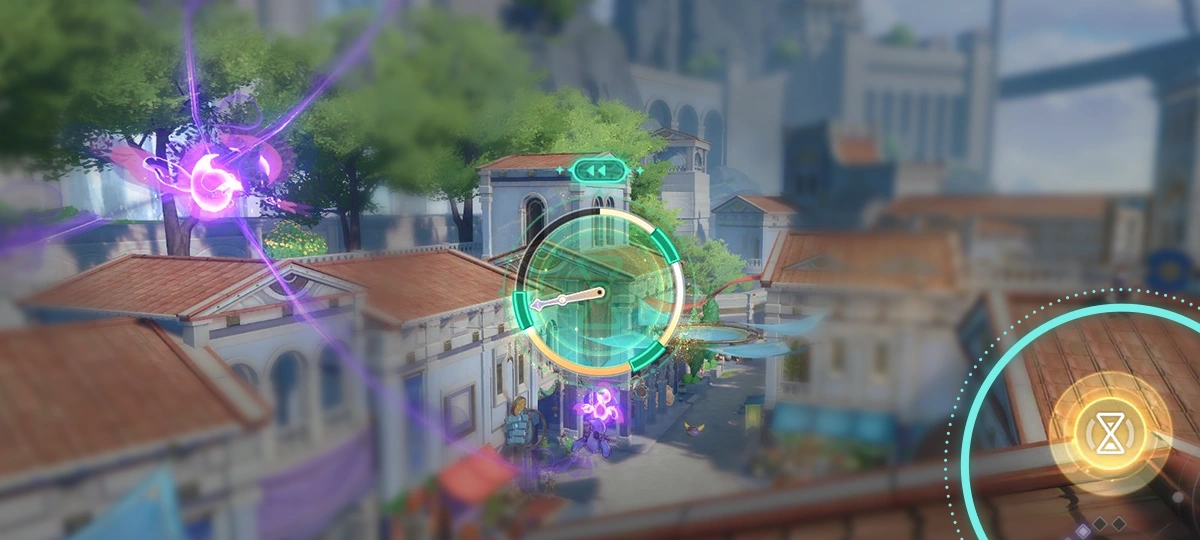 (TapTap/PressPress/ClickClick) and hold to activate Oronyx's Prayer and rewind the Spirithief's time to before they escaped. However, Spirithief will struggle valiantly within the special zone.
(TapTap/PressPress/ClickClick) and hold to activate Oronyx's Prayer and rewind the Spirithief's time to before they escaped. However, Spirithief will struggle valiantly within the special zone.
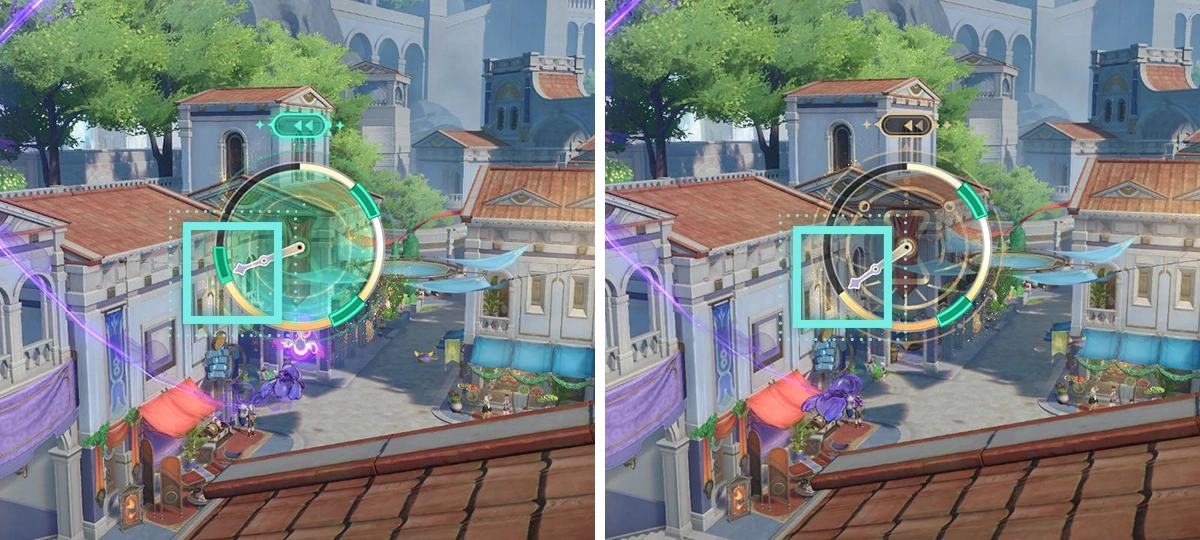 While the Spirithief is in the special zone, you need to release the button to end the praying, and then (taptap/presspress/press the buttonpress the button) and hold when they are unprepared to bring the Spirithief to justice.
While the Spirithief is in the special zone, you need to release the button to end the praying, and then (taptap/presspress/press the buttonpress the button) and hold when they are unprepared to bring the Spirithief to justice.
 Simulated Universe
Main article: Simulated Universe/Worlds § Adventure
 Universal Puzzles
The following puzzles can be found everywhere and are not tied to a specific world:
Photographic Recognition
 (TapTap/PressPress/ClickClick) to enter the Photographic Recognition mode. If there are identifiable objects nearby, the button will begin to flash.
(TapTap/PressPress/ClickClick) to enter the Photographic Recognition mode. If there are identifiable objects nearby, the button will begin to flash.
 The view can be moved and rotated once the camera is launched. Search for recognizable objects nearby.
The view can be moved and rotated once the camera is launched. Search for recognizable objects nearby.
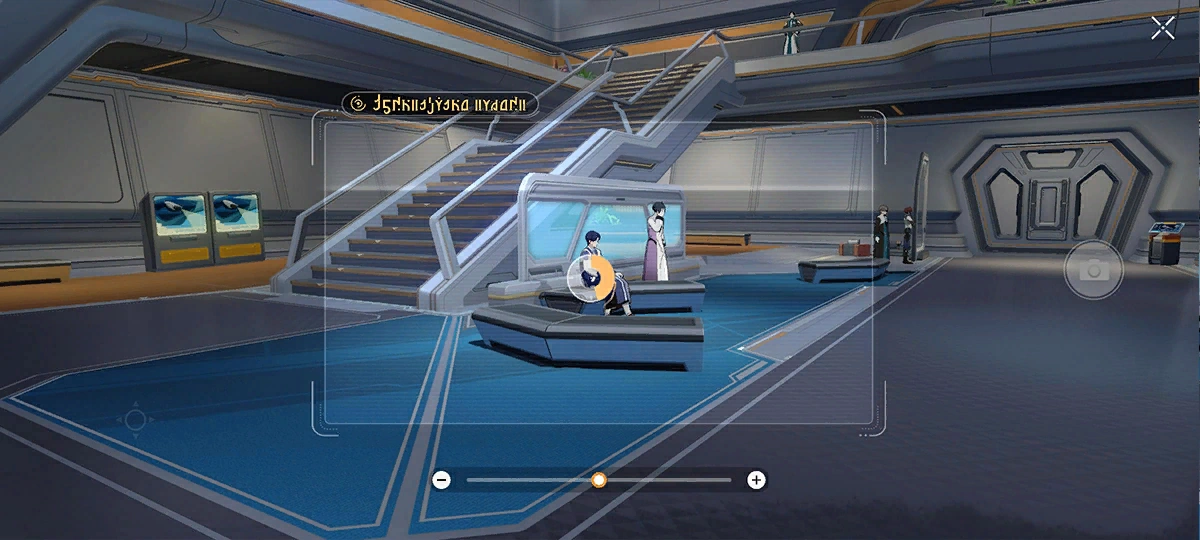 A target with a ring mark is detected. Hold still until the recognition is complete.
A target with a ring mark is detected. Hold still until the recognition is complete.
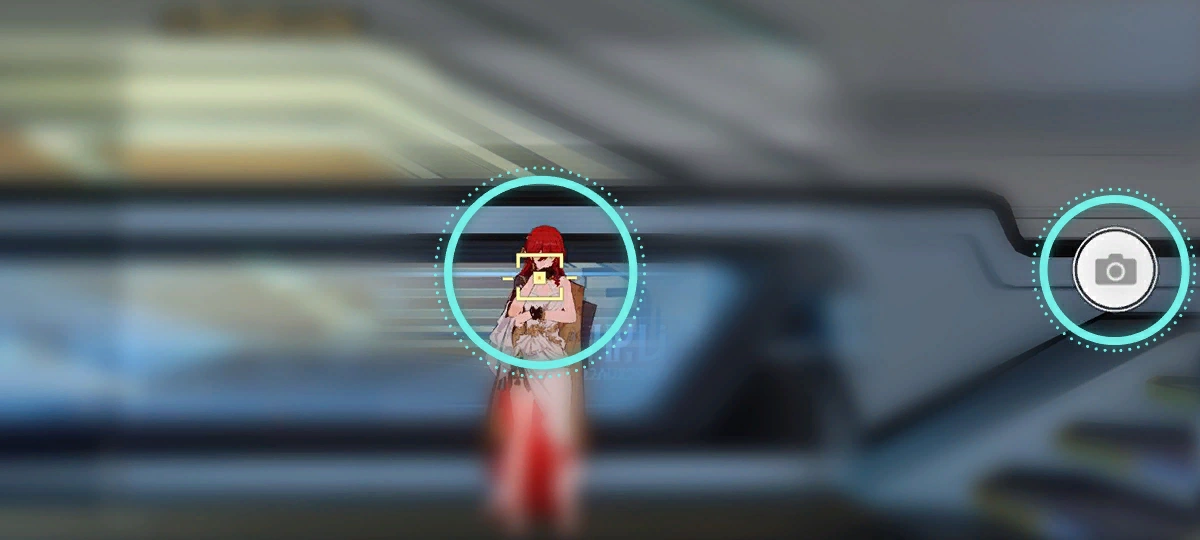 A target with a yellow mark is detected, which needs to be manually photographed.
A target with a yellow mark is detected, which needs to be manually photographed.
 Event Puzzles
The following puzzles can only be found in certain Events available with Conventional Memoir:
Aetherium Wars
Main article: Aetherium Wars
During the Victory Zone challenges, several unique puzzles will be encountered:
Snowshine Lamp (Modified)
Main article: Embark! Corridor of Fading Echoes!
 In the Corridor of Fading Echoes's Victory Zone, Trailblazers need to use the flame-transference feature of the modified lamps and ignite all lamps bearing the marks
In the Corridor of Fading Echoes's Victory Zone, Trailblazers need to use the flame-transference feature of the modified lamps and ignite all lamps bearing the marks
 When a lamp is ignited, it will create a a spherical thermal area that can ignite all other unlit lamps within its boundaries
When a lamp is ignited, it will create a a spherical thermal area that can ignite all other unlit lamps within its boundaries
 You can push the Snowshine Lamps and place them atop the armory boxes within the gameplay area to ignite the other lamps that remain out of reach and complete the challenge goal
You can push the Snowshine Lamps and place them atop the armory boxes within the gameplay area to ignite the other lamps that remain out of reach and complete the challenge goal
Victory Marking
Main article: Onward! Cloudford!
 When multiple fragments of a Victory Marking are found in a scene, Trailblazers can piece these fragments together into a complete Victory Marking by moving and changing the view to a specific angle and position.
When multiple fragments of a Victory Marking are found in a scene, Trailblazers can piece these fragments together into a complete Victory Marking by moving and changing the view to a specific angle and position.
 When the Victory Marking fragments are close to assembly, a special Camera button will appear and the complete Victory Marking will be saved after the picture is taken, thus concluding the challenge.
When the Victory Marking fragments are close to assembly, a special Camera button will appear and the complete Victory Marking will be saved after the picture is taken, thus concluding the challenge.
 There are also special Victory Marking fragments that are fitted upon the containers. You can move the containers to assemble the Victory Markings.
There are also special Victory Marking fragments that are fitted upon the containers. You can move the containers to assemble the Victory Markings.
Change History
Released in Version 1.0
| |||||||||||||||||||||||