Tutorial/Uncategorized
Last updated 2025-11-21
| Circuit Reset - Line Connection |
|---|
 If a Bangboo or device's logic circuit is interrupted the circuit must be reset. Rotate the nodes to align the signal flow between adjacent nodes and connect the start and end points to finish repairs. |
| Circuit Reset - Data Flow |
 When resetting the circuit, two different colors of signal flow may appear. The circuit will connect when the signal flow between two nodes matches in color. |
| Circuit Reset - Noise Stack and Encryption Module |
 Some transmitters are initially locked, known as encryption modules. These modules will only unlock when the firewall node is connected. |
| Signal Calibration: Red Signal |
 Red signals will become encrypted during transmission, and transmission progress will not be shown onscreen. This is when you must use your intuition to judge the time it takes for the signal to reach the outer circle and calibrate upon overlap. |
| "Password Unlock" Gameplay Guide |
 You'll need to enter the correct password to complete the decryption. When you enter the correct password, the screen will display "CORRECT"; conversely, if you enter it wrong, you'll see "ERROR" and need to try again.  The correct password information is hidden throughout the scene. You can only perform the "Password Unlock" once you've gathered all the information. When unlocking the password, you can use the "Hint" button at any time to check the correct password provided in your collected information. |
| Signal Calibration: Blue Signal |
 Blue signals will change their speed during transmission. You must pay close attention to the signal's changes in speed to accurately calibrate the signal when it overlaps with the outer circle. |
| Breach Firewall |
 Follow the rhythm of the music to assist Fairy in completing data attacks! Moving in sync with the rhythm or the white flashes on the screen increases the combo count, while moving off-beat decreases it. Hint: Click/Tap the monitors away from you to automatically find an accessible path.  Alert markers will appear in the red alert zones and move in rhythm towards specific directions. Avoid touching these alert markers, as doing so will significantly reduce your combo count.  Hint: Move in the direction of the incoming alert markers to the beat of the music to perfectly dodge them. |
| Antivirus Program |

Eliminate the corrupted data as quickly as possible to prevent the corruption from spreading! Eliminate the corrupted data as quickly as possible to prevent the corruption from spreading! Eliminate the corrupted data as quickly as possible to prevent the corruption from spreading! |
| Data Theft |

Control the Bangboo to push the components and crack the mechanism. Control the Bangboo to push the components and crack the mechanism. Control the Bangboo to push the components and crack the mechanism.  Component Rules: The Signal Ball  can be pushed and will keep moving in the corresponding direction. can be pushed and will keep moving in the corresponding direction.The Square Base Station  cannot be pushed but can be combined with the Signal Ball to create an Assembled Amplifier cannot be pushed but can be combined with the Signal Ball to create an Assembled Amplifier  . .The Assembled Amplifier can be pushed and moves only one tile. To crack the mechanism, you need to combine a Signal Ball and a Square Base Station .Then, push the Assembled Amplifier into the power port. |
| Operation and Rules |

General Operations:
General Operations:
General Operations:
 General Rules:
|
| Avoid the Wall Obstacles! |
 About the wall obstacles: |
| Avoid the impulses! |
 About the impulses: |
| Watch Your Speed! |
 About the speed zones: |
| Charge! Overload Mode! |
 About the Overload Mode: |
| Data Relink |
 Control the Bangboo signal to relink the data and establish a connection to the Hollow! Activate data units along the path and light them all up to reach the endpoint! Passing over an already activated unit will deactivate it. Use the reset option to return to the original state. |
| Sync Controls |
 When the Bangboo moves to the left, you can simultaneously control the target on the right to move in the same way. Try to bring the target to the designated location! |
| About "Case Replay" |
 "Case Replay" uses existing clues to recreate the sequence of events as a simulated performance. During "Case Replay," after each segment is played, it will enter a Pause State, allowing free exploration. Press Continue to view the next segment; press the segment node button below to rewatch a specific segment. Once the investigation is complete, press Exit to end Case Replay. 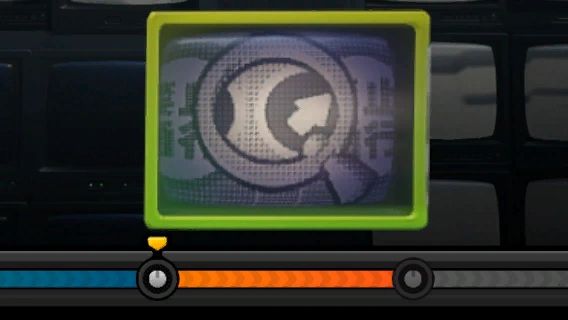 Some key segments in the "Case Replay" can assist with the real-world investigation. These segments are marked orange. After investigating critical information in the corresponding Monitor Array, the segments will revert to blue. |
| About "Night Vision Mode" |
 Using  grants access to the Infrared Cameras of the Ballet Twins, allowing you to see the entire surrounding environment. grants access to the Infrared Cameras of the Ballet Twins, allowing you to see the entire surrounding environment.During this time, movement on the array merely adjusts the camera's perspective, rather than moving the Proxy's body. Use  again to return to the Proxy's body. again to return to the Proxy's body. While panning through the Infrared Camera's perspective, you can use the camera's flash to disperse enemies. In Night Vision Mode, certain special creatures that cannot be interacted with normally become visible. Interacting with them in Night Vision Mode can also unlock some of the special mechanisms within the tower that are otherwise sealed. |
| Data Observation Devices |
 Stand near a device to activate it and begin automatic data collection. Nearby enemies will interfere with the data collection, causing the indicator light to turn red. |
| Destructibles |
 You may find items that are not completely corrupted during your exploration. Destroy supply boxes to get Ether Crystals which restore your Energy. This includes supplies left by previous Hollow Raiders, equipment provided by the Association, or even military supplies. |
| Ether Fuel Cells |
 Destroying an Ether fuel cell can deal a large amount of Daze to surrounding enemies. Ether fuel cells are power storage devices commonly used in New Eridu. Due to its fragile shell, it will discharge violently upon impact. |
| Time Trial Reward Challenge |
 You encountered one of the HIA's bounty targets! Elimate all enemies in the time limit to obtain the Association's reward! |
| Bangboo Challenge: One Punch Showdown |
 In this challenge, Agents' Chain Attacks and Ultimate can take down the enemy with only one hit. Note: The enemies can also defeat Agents with a single hit. Eliminating all enemies within the set time will reward you with special bonuses. |
| Combat Tutorial: Windswept & Vortex |
File:Tutorial Combat Tutorial: Windswept & Vortex 1.gif When applying a different type of Attribute Anomaly effect to an enemy already afflicted with an Attribute Anomaly, if one of the Anomaly effects is Windswept, the Disorder effect will not be triggered. Instead, the Vortex effect will be triggered: Upon triggering, the Attribute Anomaly other than Erosion will be finalized, dealing AoE Anomaly DMG of the corresponding attribute. For a period of time after triggering Vortex, Vortex cannot be triggered again. |
| Area Purge |
 Completing the periodically refreshed Area Purge commissions yields substantial rewards. The rewards for Area Purge commissions are updated every Monday. |
| Vital View: Gear Coin |
 Use Perfect Dodge to enter Vital View without limit, collect Gear Coins that can only be found using Vital View, and reach the target number to complete the challenge. |
| Attribute Shield |
 Elite and boss-level enemies may have attribute shields. Attacking with the corresponding damage attribute can increase efficiency. Triggering the corresponding Attribute Anomaly can instantly remove the shield. |
| Immersive Tactical Drill |
 During the event, meet specific Trigger Requirements to trigger timed Combat Buffs. Retriggering the buff will refresh the duration of the Combat Buff. In Advanced Drills, Proxies can freely match Trigger Requirements and Combat Buffs to challenge stages! |
| [Character Intro] Anby |
 [Character Intro] Anby (I) After the 3rd hit of Anby's Basic Attack, hold down, or pause for a short while then press  the Basic Attack button to use Basic Attack: Thunderbolt, dealing Electric DMG. the Basic Attack button to use Basic Attack: Thunderbolt, dealing Electric DMG. [Character Intro] Anby (II) After the 3rd hit of Anby's Basic Attack, press  the Special Attack button to activate her Special Attack more quickly, or press the EX Special Attack button to activate her Enhanced Special Attack more quickly, dealing Electric DMG. When Anby uses Basic Attack: Thunderbolt, Special Attack or EX Special Attack after the 3rd hit of her Basic Attack, the skill deals increased Daze. the Special Attack button to activate her Special Attack more quickly, or press the EX Special Attack button to activate her Enhanced Special Attack more quickly, dealing Electric DMG. When Anby uses Basic Attack: Thunderbolt, Special Attack or EX Special Attack after the 3rd hit of her Basic Attack, the skill deals increased Daze. |
| [Character Intro] Nekomata |
 [Character Intro] Nekomata (I) When Nekomata's Dodge Counter or Quick Assist hits an enemy, her DMG significantly increases for a brief duration.  [Character Intro] Nekomata (II) After any squad member inflicts Assault, the next time you press  the Special Attack button and launch Nekomata's EX Special Attack, she deals increased DMG. the Special Attack button and launch Nekomata's EX Special Attack, she deals increased DMG. |
| [Character Intro] Nicole |
 [Character Intro] Nicole (I) Nicole's EX Special Attack, Chain Attack, and Ultimate generate energy fields that pull nearby enemies towards the center, dealing massive Ether DMG. After the skill activates, Nicole automatically reloads her weapon, enhancing her Basic Attacks and Dash Attacks.  [Character Intro] Nicole (II) After reloading and enhancing her skills, her Basic Attacks and Dash Attacks will consume bullets to deal increased DMG. Enemies hit by her enhanced bullets or energy field will have their DEF reduced for a short period of time. |
| [Character Intro] Soldier 11 |
 [Character Intro] Soldier 11 (I) After Soldier 11 uses an EX Special Attack, Chain Attack or Ultimate, Basic Attacks, and Dash Attacks are guaranteed to trigger Fire Suppression, lasting for 15s or triggering 8 times.  [Character Intro] Soldier 11 (II) Press the Basic Attack button at the right moment and Soldier 11 will use Fire Suppression, dealing Fire DMG.File:Tutorial (Character Intro) Soldier 11 3.gif [Character Intro] Soldier 11 (III) Launch an EX Special Attack, Chain Attack or Ultimate to unlock the 5th hit of the Basic Attack. File:Tutorial (Character Intro) Soldier 11 4.gif [Character Intro] Soldier 11 (IV) After using Chain Attack: Uplifting Flame, Ultimate: Bellowing Flame, or EX Special Attack: Fervent Fire, enter Alert Stance. While in Alert Stance, if attacked while performing an attack, Basic Attack: Fire Charge is triggered to block the hit, followed by Basic Attack: Fire Assault. After Basic Attack: Fire Assault, press to continue a Basic Attack from the retained combo stage.File:Tutorial (Character Intro) Soldier 11 5.gif
[Character Intro] Soldier 11 (V) [Character Intro] Soldier 11 (V) |
| [Character Intro] Yidhari |
File:Tutorial (Character Intro) Yidhari 1.gif Yidhari can convert her HP into offensive power: When her HP decreases, she gains Decibels at a certain ratio, and the lower her HP, the higher DMG she deals;
Hold  to trigger EX Special Attack: Frost Coil. When it hits enemies, Yidhari recovers HP - the lower her current HP, the more HP recovered. to trigger EX Special Attack: Frost Coil. When it hits enemies, Yidhari recovers HP - the lower her current HP, the more HP recovered.File:Tutorial (Character Intro) Yidhari 2.gif While charging and during spinning charged attacks, press to perform Yidhari's ALT skill Special Attack: Surging Cold, Crushing Pursuit. If this clashes with an enemy attack, it will trigger Surging Cold and unlock EX Special Attack: Glacial Crush. Press or to unleash EX Special Attack: Glacial Crush, dealing increased DMG and restoring HP.During charged attacks or spinning charged attacks, after Yidhari is hit by an enemy attack, press to perform Special Attack: Surging Cold, Crushing Pursuit and also trigger Surging Cold.File:Tutorial (Character Intro) Yidhari 3.gif When Decibel Rating reaches Maximum, landing a charged attack or EX Special Attack on enemies will consume 3,000 Decibels, activate Ether Veil: Wellspring, and unlock Ultimate: Final Act - Crossing the River of Regret; Press  to allow Yidhari to unleash Ultimate: Final Act - Crossing the River of Regret once without consuming Decibels; to allow Yidhari to unleash Ultimate: Final Act - Crossing the River of Regret once without consuming Decibels;While Yidhari is in Ether Veil: Wellspring, the charging speed of Basic Attack: Frostbite Embrace will increase. |
| [Character Intro] Corin |
 [Character Intro] Corin (I) During the 3rd and 5th hits of Corin's Basic Attack, repeatedly press or hold the Basic Attack button to extend the chainsaw slash attack, dealing Physical DMG. [Character Intro] Corin (II) When Corin uses her EX Special Attack, you can also repeatedly press or hold the Special Attack button to extend the chainsaw slash attack, dealing massive Physical DMG, and gradually drains Energy as the move strikes the target. |
| [Character Intro] Caesar |
 [Character Intro] Caesar (I) Perfect Block is triggered when an enemy attacks just after you activate EX Special Attack: Parry Counter or perform a shield strike to trigger Interrupt. This will block the incoming attack's damage and counter with a shield strike. Pressing Special Attack after allows you to activate EX Special Attack: Overpowered Shield Bash without consuming any energy. (Interrupt: During the activation of an enemy's skill, hitting enemies with an attack interrupts their current action.) [Character Intro] Caesar (II) When Caesar activates EX Special Attack: Parry Counter, a Chain Attack, or an Ultimate, she grants all squad members the shield Radiant Aegis. While Radiant Aegis is active, the shield holder's ATK and anti-interrupt level will be increased.  [Character Intro] Caesar (III) When Assist Points are sufficient, hold Basic Attack to launch Basic Attack: Dead End, consuming 1 Assist Point. Caesar throws her shield to attack surrounding enemies and pulls smaller enemies closer. |
| [Character Intro] Billy |
 [Character Intro] Billy (I) By repeatedly pressing or holding , Billy will enter the Crouching Shot state, dealing Physical DMG. Repeatedly press or hold to extend the duration. Billy's Core Passive: Steady Shot enhances Crouching Shot's DMG. The bonus effect ends upon moving, returning to idle, being knocked back or launched. [Character Intro] Billy (II) When Billy is in the Crouching Shot state, you can drag the joystick to initiate Rolling Shot in the corresponding direction, repositioning him and dealing Physical DMG. |
| [Character Intro] Miyabi |
 [Character Intro] Miyabi (I) When Hoshimi Miyabi uses her Special Attack and other skills to deal Frost DMG, she applies Icefire to the target. When accumulating Frost Anomaly Buildup against targets with Icefire, Hoshimi Miyabi's Frost Anomaly Buildup Rate increases with her CRIT Rate. As Hoshimi Miyabi accumulates Frost Anomaly Buildup, it has its own independent Attribute Anomaly Buildup gauge and the Freeze, Shatter, and Frostbite effects triggered by it can react with other Attribute Anomalies, including Ice Attribute Anomaly, to trigger Disorder.  [Character Intro] Miyabi (II) When Hoshimi Miyabi accumulates maximum Frost Anomaly Buildup on an enemy affected by Icefire, it will apply the Frostbite effect to the enemy, removing Icefire, and triggering Frostburn - Break to deal massive Frost DMG to the target and inflict the Frostburn state. While in the Frostburn state, all squad members' accumulated Anomaly Buildup against the target increases, but Hoshimi Miyabi cannot reapply Icefire to the target. The Frostburn state will end with the Frostbite state. Reapplying an Attribute Anomaly effect to the enemy can overwrite Frostbite and remove Frostburn.  [Character Intro] Miyabi (III) Triggering Frostburn - Break, using an EX Special Attack, or using an Ultimate grants Hoshimi Miyabi Fallen Frost. With 2 or more points of Fallen Frost, hold and Hoshimi Miyabi will enter the Shimotsuki Stance and begin charging. Each level of charge will consume 2 points of Fallen Frost, up to a max of 3 charge levels. On releasing or when all Fallen Frost has been expended, Hoshimi Miyabi will perform a powerful slash forward based on the current charge level, dealing massive Frost DMG, and then exit Shimotsuki Stance. |
| [Character Intro] Koleda |
 [Character Intro] Koleda (I) After the 2nd or 4th hit of Koleda's Basic Attack or enhanced Basic Attack, press the Special Attack button to quickly unleash her Special Attack or EX Special Attack, immediately causing an explosion that deals Fire DMG. [Character Intro] Koleda (II) After Koleda unleashes her EX Special Attack, Chain Attack, or Ultimate, she gains the Furnace Fire effect. During Furnace Fire, after the 2nd hit of her Basic Attack combo, she can expend the Furnace Fire effect to launch an Enhanced Basic Attack, dealing massive Fire DMG. |
| [Character Intro] Anton |
 Anton enters Burst Mode after launching an EX Special Attack by pressing the Special Attack button. In Burst Mode, Anton launches more powerful moves and deals massive Electric DMG. With each hit on the target, his Energy gradually drains, lasting until all Energy is spent. |
| [Character Intro] Ben |
 [Character Intro] Ben (I) Hold the Special Attack button, and Ben will use his Special Attack or EX Special Attack to block enemy attacks, gaining a shield while blocking. The shield decays over time and is lost after exiting the block, after which it gradually regenerates. [Character Intro] Ben (II) After Ben performs a block using a Special Attack or EX Special Attack, releasing the Special Attack button allows for an active attack. Successful blocks against enemy attacks will enhance this attack, activating a Block Counter.If Ben launches an active attack or Block Counter during his EX Special Attack, pressing the Special Attack button again will unleash a formidable forward strike, dealing massive Fire DMG. |
| [Character Intro] Soukaku |
 [Character Intro] Soukaku (I) When Soukaku uses her EX Special Attack, Chain Attack, or Ultimate, she gains up to 3 stacks of Vortex. During her Special Attack or EX Special Attack, holding the Special Attack button allows for a quick transition to Fly the Flag. [Character Intro] Soukaku (II) Hold the Special Attack button and Soukaku will unleash her Fly the Flag attack, dealing Ice DMG. When Fly the Flag hits an enemy, it triggers a Quick Assist and grants a buff to Soukaku or an ally. When Soukaku has 3 stacks of Vortex and activates Fly the Flag, she consumes all stacks and enters the Frosted Banner state. [Character Intro] Soukaku (III) When in the Frosted Banner state, Soukaku can launch enhanced Basic Attacks and enhanced Dash Attacks, dealing massive Ice DMG. This skill can be triggered up to 6 times or last up to 45s. |
| [Character Intro] Lycaon |
 [Character Intro] Lycaon (I) Hold the Basic Attack button when Lycaon launches his Basic Attacks to Charge and enhance his attack, dealing Ice DMG. Each move of his Basic Attacks can be Charged. [Character Intro] Lycaon (II) Hold the Special Attack button when Lycaon launches a Special Attack or EX Special Attack to Charge his attacks. When quickly launched by pressing the corresponding button, EX Special Attacks consume less Energy. After holding the button to Charge, EX Special Attacks become more powerful. |
| [Character Intro] Lucy |
 [Character Intro] Lucy (I) When pressing the Special Attack button to trigger either a Special Attack or EX Special Attack, Lucy's loyal guard boar will leap into the fray and summon two more boars. These guard boars will then engage enemies in combat, utilizing a baseball bat, boxing gloves, or slingshot at random to inflict Physical DMG. [Character Intro] Lucy (II) With enough Energy, press or hold the Special Attack button to activate an EX Special Attack, hitting either a Line Drive or Fly Ball. After unleashing an EX Special Attack, when Lucy's guard boar causes an explosion, it grants the "Cheer On!" status to all friendly characters, Bangboo, and boars. Friendly units' ATK increases while under the "Cheer On!" effect. Hitting a Fly Ball can extend the effect's duration.When Lucy performs the 4th hit of her Basic Attack, or when she gains the "Cheer On!" status, the guard boars will whirl around with their baseball bats in a continuous motion, dealing Physical DMG to nearby enemies. |
| [Character Intro] Lighter |
 [Character Intro] Lighter (I) When in combat, Lighter automatically gains Morale over time, and when any squad member consumes Energy, Lighter also gains Morale. Lighter can store up to 100 Morale. When his Morale reaches 80, he will launch a Quick Assist the next time he switches to the field. If his Morale is 80 or higher, Lighter enters Morale Burst mode upon launching the 5th hit of his Basic Attack. When Lighter enters the Morale Burst state, the power of his light punch attacks, jab combos, and Finishing Moves in the 5th hit of his Basic Attack increase. While in the Morale Burst state, Lighter no longer automatically gains Morale over time.  [Character Intro] Lighter (II) While in Morale Burst, when Lighter hits an enemy with the 5th hit of his Basic Attack, his Impact increases while consuming Morale. Once his Morale is depleted, Lighter will automatically follow up with an even more powerful Finishing Move. In Morale Burst mode, when Lighter's Finishing Move hits an enemy, it inflicts the Collapse effect, extending the target's Stunned state by 3s. The Collapse effect can only be triggered once per target before they recover from the Stunned state. |
| [Character Intro] Burnice |
 [Character Intro] Burnice (I) Hold Special Attack to activate EX Special Attack: Intense Heat Stirring Method. If there is enough energy, hold Special Attack again to activate EX Special Attack: Intense Heat Stirring Method - Double Shot.EX Special Attack: Intense Heat Stirring Method - Double Shot deals greater Fire DMG and accumulates Fire Anomaly Buildup faster. When Burnice consumes energy, she will accumulate Heat. Upon reaching 50 points, Burnice will enter the Nitro-Fuel Cocktail state.  [Character Intro] Burnice (II) While in the Nitro-Fuel Cocktail state, holding Basic Attack consumes Heat to unleash Basic Attack: Mixed Flame Blend. When Burnice hits enemies with her Basic Attack: Mixed Flame Blend, EX Special Attack, Chain Attack, or Ultimate, she inflicts the Scorched effect. When other squad members hit enemies in the Scorched state, the Afterburn effect is triggered. Consume Heat to deal Fire DMG to the target and accumulate Fire Anomaly Buildup.File:Tutorial (Character Intro) Burnice 3.gif [Character Intro] Burnice (III) After Potential Activation, the cooldown of Afterburn is reduced, and Burnice's Anomaly Mastery and DMG scale with initial Energy Generation. When hitting enemies with Basic Attack: Mixed Flame Blend, it can trigger the Afterburn effect without consuming Heat. File:Tutorial (Character Intro) Burnice 4.gif [Character Intro] Burnice (IV) When squadmates trigger Afterburn 12 times, Burnice gains one Emberflow. When Burnice enters combat with Emberflow, she activates EX Special Attack: Intense Heat Tossing Method, dealing Fire DMG, and when this skill's heavy attack hits enemies with an Anomaly, it triggers the Abloom effect. |
| [Character Intro] Grace |
 When Grace's Basic Attack or Dash Attack hits an enemy and deals Physical DMG, she gains 1 stack of Zap (up to 8 stacks). Upon reaching the maximum stacks, using a Special Attack or EX Special Attack will consume all stacks of Zap, increasing the accumulated Electric Anomaly Buildup. File:Tutorial (Character Intro) Grace 2.gif [Character Intro] Grace (II) When consuming all Zap to activate an EX Special Attack, throw an extra enemy-attracting grenade that creates an electromagnetic field at the explosion point, continuously pulling enemies in and dealing Electric DMG File:Tutorial (Character Intro) Grace 3.gif [Character Intro] Grace (III) When activating an Ultimate, gain 25 stacks of Pulse. 1 stack of Pulse is consumed when gaining Zap. After consuming Pulse to gain 8 stacks of Zap, your next grenade throw will launch an additional grenade, and hitting enemies suffering Electric Anomaly will trigger Abloom, dealing additional Electric DMG based on a percentage of the original Attribute Anomaly DMG. |
| [Character Intro] Ellen |
 [Character Intro] Ellen (I) Hold or double press  the Dodge button to make Ellen enter the Roaming state, enabling dashing movement. While Ellen is in the Roaming state, press the Basic Attack button to launch a Swift Scissors strike, dealing Ice DMG. Ellen gains 1 Flash Freeze Charge upon hitting enemies with her Swift Scissors strike. the Dodge button to make Ellen enter the Roaming state, enabling dashing movement. While Ellen is in the Roaming state, press the Basic Attack button to launch a Swift Scissors strike, dealing Ice DMG. Ellen gains 1 Flash Freeze Charge upon hitting enemies with her Swift Scissors strike.Hold while Ellen is in the Roaming state to launch Charged Scissors strikes, dealing massive Ice DMG. Ellen gains 3 Flash Freeze Charges upon hitting enemies with her Charged Scissors strikes. [Character Intro] Ellen (II) When Ellen has Flash Freeze Charges, the Flash Freeze effect is activated. Once Flash Freeze activates, Basic Attacks and Dash Attacks expend Flash Freeze Charges, dealing massive Ice DMG. Ellen can have up to a maximum of 6 Flash Freeze Charges.  [Character Intro] Ellen (III) With enough Energy, press Special Attack to launch an EX Special: Tail Swipe, dealing massive Ice DMG. If Energy is sufficient when triggered, press again to follow up with EX Special Attack: Sharknami, dealing massive Ice DMG.When an EX Special Attack hits an enemy, gain 1 Flash Freeze Charge. After executing the move, you can immediately follow up with the 3rd hit of a Basic Attack.  [Character Intro] Ellen (IV) After using the 3rd hit of Basic Attack: Flash Freeze Trimming, EX Special Attack: Sharknami, Dodge Counter: Reef Rock, and Assist Follow-Up, Ellen will automatically trigger Basic Attack: Icy Blade, dealing multiple instances of Ice DMG to enemies in a large area ahead, with additional instances of Ice DMG against Medium/Large enemies. After triggering Basic Attack: Icy Blade, Ellen gains the Quick Charge effect. Basic Attack: Icy Blade does not affect original skill ALTs. After triggering Basic Attack: Icy Blade, press the corresponding button to perform the original ALT skill.  [Character Intro] Ellen (V) After the 3rd hit of Basic Attack: Flash Freeze Trimming, Dash Attack: Arctic Ambush's Charged Scissor Strike, and Dodge Counter: Reef Rock, if Ellen has Flash Freeze Charge, pressing Basic Attack will launch Basic Attack: Glacial Blade Wave, dealing massive Ice DMG. This skill consumes 2 points of Flash Freeze Charge, and after using this skill, you can immediately follow up with the 3rd hit of Basic Attack.Character is invulnerable while using this skill. |
| [Character Intro] Asaba Harumasa |
 [Character Intro] Asaba Harumasa (I) During combat, Harumasa can set up Electro Quivers on the field: When the 5th hit of his Basic Attack/EX Special Attack/Chain Attack hits an enemy or the ground, 2/6/6 Electro Quivers will be generated. After using a Chain Attack, the number of Electro Quivers generated when the next Basic Attack's 5th hit hits an enemy will increase to 6. When no Electro Quivers are present on the field and any character in the squad applies an Attribute Anomaly to an enemy, 6 Electro Quivers will be generated. At any given time, a maximum of 6 Electro Quivers can exist on the field.  [Character Intro] Asaba Harumasa (II) After the 5th hit of a Basic Attack, EX Special Attack, or Chain Attack and setting Electro Quivers, hold to immediately shoot Falling Feather at enemies in front, dealing Electric DMG.Aiming mode can also be entered by holding to fire Falling Feather at a designated target.When Harumasa fires Falling Feather and hits an enemy, if Electro Quivers are present on the field, they will be activated and fire Ha-Oto no Ya at the target hit by Falling Feather, applying the Electro Prison effect to them. When the Electro Prison effect reaches 2 or more stacks, X-Marked will be applied to the target.  [Character Intro] Asaba Harumasa (III) When an X-Marked enemy is on the field, Harumasa will enter the Awakened state. While in the Awakened state, when dodging, press to trigger Dash Attack: Hiten no Tsuru - Slash, quickly dashing to the X-Marked and delivering a powerful slash. While under the Awakened state, press after a Basic Attack: Falling Feather to quickly follow up with Dash Attack: Hiten no Tsuru - Slash.When the slash hits the target, it will consume the Electro Prison effect and X-Marked status. Before X-Marked runs out, repeatedly pressing will trigger Dash Attack: Hiten no Tsuru - Slash repeatedly. |
| [Character Intro] Rina |
 When Rina launches a Basic Attack, Special Attack, or EX Special Attack, she sends out Drusilla and Anastella to attack, dealing Electric DMG. While Drusilla and Anastella are attacking, Rina's Basic Attack Combo won't be interrupted by her other attacks. When either Bangboo is sent out to attack, PEN Ratio is increased for the other squad members. The buff ends when both Drusilla and Anastella return to Rina's side. |
| [Character Intro] Tsukishiro Yanagi |
 [Character Intro] Tsukishiro Yanagi (I) Yanagi has two stances: Jougen and Kagen. During combat, Yanagi gains the corresponding stance bonuses based on her current stance type: Jougen stance bonus: Increases the Electric DMG, and increases Anti-Interrupt Level during Basic Attacks. Kagen stance bonus: Increases her PEN Ratio and increases Interrupt Level of Basic Attacks; When using a Special Attack, EX Special Attack, or other skills, Yanagi can switch stances. After switching, Yanagi retains the previous stance's buff for 8s.  [Character Intro] Tsukishiro Yanagi (II) If Special Attack: Ruten is used after the 3rd, 4th or 5th hit of Basic Attack: Tsukuyomi Kagura, it triggers Swift Ruten: Yanagi switches stances and immediately follows up with the 3rd hit of the Basic Attack from the current stance.  [Character Intro] Tsukishiro Yanagi (III) When Yanagi has enough energy, hold Special Attack to unleash EX Special Attack: Gekka Ruten, which consists of a Thrust Attack and a Downward Strike.Thrust Attack: During the Thrust Attack, Yanagi will switch her current stance and enter the Shinrabanshou state. While in this state, when chaining into a Basic Attack from the 5th hit of her Basic Attack or any other skill, the Basic Attack will begin from the 3rd hit. Downward Attack: When the Downward Attack hits an enemy with an Attribute Anomaly, it will trigger a special Disorder effect called Polarity Disorder. Polarity Disorder will not remove the target's Attribute Anomaly. |
| [Character Intro] Zhu Yuan |
 [Character Intro] Zhu Yuan (I) Zhu Yuan can accumulate Enhanced Shotshells to enhance some of her attacks. Her EX Special Attack, Chain Attack, Ultimate, and Assist Follow-Up restore Enhanced Shotshells.  [Character Intro] Zhu Yuan (II) Press and hold Basic Attack to have Zhu Yuan enter Suppressive Mode. Unleash up to 3 Shotshell piercing attacks. If Zhu Yuan has any Enhanced Shotshells when shooting, she will consume 1 Enhanced Shotshell to deal massive Ether DMG. [Character Intro] Zhu Yuan (III) When Zhu Yuan is in Assault Mode, drag the stick/joystick and press Basic Attack to trigger Dash Attack: Firepower Offensive, adjusting position in the indicated direction.When Zhu Yuan is in Suppressive Mode, hold Basic Attack and drag the stick/joystick to trigger Dash Attack: Overwhelming Firepower, adjusting position in the indicated direction. |
| [Character Intro] Qingyi |
 [Character Intro] Qingyi (I) During the 3rd hit of Qingyi's Basic Attack, repeatedly press Basic Attack to keep up a continuous attack. Stop repeatedly pressing Basic Attack and Qingyi will automatically follow-up with the 4th hit of her attack.When Qingyi activates a skill and deals Electric DMG, she will accumulate Flash Connect Voltage.  [Character Intro] Qingyi (II) When Flash Connect Voltage accumulates to 75%, Qingyi enters the Flash Connect state. While under this state, holding down Basic Attack will activate Basic Attack: Enchanted Moonlit Blossoms. Continue holding the button to launch five consecutive rush attacks. Upon letting go of Basic Attack, trigger a Finishing Move ahead of time.When Basic Attack: Enchanted Moonlit Blossoms' Finishing Move hits an enemy, it applies Subjugation, which increases the target's Stun DMG Multiplier. Triggering Finishing Move right before the character is about to get attacked will trigger Perfect Dodge. |
| [Character Intro] Jane |
 [Character Intro] Jane (I) Jane has an extra dodge. Before she enters the Passion state, she alternates between the two dodges. After entering the Passion state, Jane can pass through enemies in front when dodging. Each dodge has its own Dash Attack and Dodge Counter.  [Character Intro] Jane (II) When Jane triggers Perfect Dodge, Defensive Assist, or a skill that deals DMG to an enemy, she accumulates Passion Stream. When it reaches its limit, Jane enters the Passion state. While under this state, Jane's Physical Anomaly Buildup Rate and ATK will increase and her Dash Attacks and Dodge Counters will be enhanced. When Jane deals DMG while under the Passion state, it will consume Passion Stream. Triggering Perfect Dodge or Defensive Assist will restore Passion Stream. When Passion Stream is depleted, she will leave the Passion state.  [Character Intro] Jane (III) Upon entering the Passion status, Jane obtains one Basic Attack: Salchow Jump activation. While there are activations available hold the Basic Attack button to activate Basic Attack: Salchow Jump. Keep holding to extend the skill duration. Basic Attack: Salchow Jumps recover Passion Stream when Jane, while under the Passion status, deals damage to enemies. |
| [Character Intro] Seth |
 [Character Intro] Seth (I) When Seth has enough energy, press Special Attack to activate EX Special Attack: Thunder Shield Rush - High Voltage and have him execute a series of slashes ahead, dealing massive Electric DMG while accumulating Resolve and gaining a Shield of Firm Resolve. Hold to charge the skill, increasing its power. [Character Intro] Seth (II) When Resolve is greater than 75%, hold Basic Attack to consume Resolve and activate Basic Attack: Lightning Strike - Electrified. When Seth hits an enemy with a Finishing Move from Basic Attack: Lightning Strike - Electrified or with an Assist Follow-Up: Public Security Ruling, it will trigger a Quick Assist for the previous squad member and provide Shield of Firm Resolve for that squad member. A squad member with Shield of Firm Resolve has their Anomaly Proficiency increased. |
| [Character Intro] Piper |
 [Character Intro] Piper (I) Hold the Special Attack button to trigger Special Attack: Tire Spin, and Piper will spin, unleashing increasingly powerful spinning slashes. The charge level of the move will gradually increase while pressed, up to 2 levels. When followed after the first 3 attacks of a Basic Attack, Dash Attack or Dodge Counter, the skill can be triggered quickly at the enhanced level.Release Special Attack to perform a downward smash based on Special Attack: Tire Spin's charge level. Causing Physical DMG. [Character Intro] Piper (II) With enough Energy, continue holding the Special Attack button after Special Attack: Tire Spin reaches its highest charge level to continuously consume energy and perform EX Special Attack: Engine Spin.When Piper hits an enemy with Spinning Slash during EX Special Attack: Engine Spin or her Ultimate, she gains a stack of Power, with a maximum of 20 stacks. Each stack boosts Piper's Physical Anomaly Buildup Rate. |
| [Character Intro] Hugo |
 [Character Intro] Hugo (I) During the 4th hit of Basic Attack: Dark Abyss Quartet, after Dodge Counter: Phantasm - Slash, or after Quick Assist: Elegy, hold to perform a Charged Shot.After executing a ranged attack from any of the above moves, press or hold to trigger Basic Attack: Dark Abyss Concerto.While performing Basic Attack: Dark Abyss Concerto, holding will also charge up for a Charged Shot. [Character Intro] Hugo (II) When an EX Special Attack or Ultimate hits a stunned enemy, the Totalize effect is triggered. This effect increases the skill's DMG Multiplier based on the enemy's remaining Stun time at the moment of activation. After triggering Totalize, the enemy will immediately recover from Stun and a certain amount of Daze will be inflicted based on remaining Stun duration. |
| [Character Intro] Astra Yao |
 [Character Intro] Astra Yao (I) Press or hold to activate a Special Attack and enter the Idyllic Cadenza state, which increases all squad members' DMG. In the Idyllic Cadenza state, Astra cannot move, but can press to attack, or press to dodge, and her Basic Attacks and Dodge Counters will turn into special moves under the Idyllic Cadenza state.Hold or to exit the Idyllic Cadenza state. [Character Intro] Astra Yao (II) Pressing or holding to activate Special Attack and enter the Idyllic Cadenza state will trigger other squad members' Quick Assists.When the active character lands an attack or heavy attack on the enemy, Astra Yao can trigger the other squad member's Quick Assist when she has enough Energy. When switching characters with skills like a Quick Assist, Astra Yao will consume Energy to attack and grant an ATK boosts to both herself and the incoming character. When switching back to Astra Yao, if she is already in the Idyllic Cadenza state, she launches a Special Attack upon switching in.  [Character Intro] Astra Yao (III) After launching Ultimate: "Fantasian Sonata", Astra Yao enters the Idyllic Cadenza state and restores HP to all squad members. After using this skill, the next two Quick Assists will be replaced with Chain Attacks. |
| [Character Intro] Evelyn |
 [Character Intro] Evelyn (I) When Evelyn uses her skills to deal DMG to enemies, she builds up Burning Embers. When Burning Embers is at or above 50%, hold or to consume Burning Embers to activate Garrote and gain 1 Burning Tether Point.After accumulating 3 Burning Tether Points, Evelyn's next Garrote attack will consume all Burning Tether Points and transform into a Chain Attack.  [Character Intro] Evelyn (II) When not under a Binding Seal, press or to activate Special Attack: Locked Position. Upon hitting an enemy, Evelyn enters a Binding Seal with that enemy.After entering Binding Seal, press or to perform Special Attack: Binding Sunder - First Form or EX Special Attack: Binding Sunder - Final Form.When switching to another squad member during Binding Seal, Evelyn will automatically follow up with Special Attack: Binding Sunder - First Form. Launching Binding Sunder just before getting hit triggers a Perfect Dodge and builds up a large amount of Burning Embers.  [Character Intro] Evelyn (III) After activating Ultimate: Lunalux Garrote - Timbre, Evelyn enters the Dance of Awakened Fire state. While in this state, Evelyn will retain 1 Burning Tether Point when consuming Burning Tether Points to launch Chain Attack: Lunalux - Snare. |
| [Character Intro] Vivian |
 [Character Intro] Vivian (I) After using Basic Attack (4th hit), Dodge Counter, Quick Assist and other attacks, Vivian will enter the Noblewoman state. At this point, pressing will trigger Basic Attack: Noblewoman - Waltz, and hitting the target will grant 1 Flight Feather.Additionally, performing moves like an EX Special Attack, Assist Follow-Up, Chain Attack, and Ultimate will also grant Flight Feathers.  [Character Intro] Vivian (II) After performing any move that grants Flight Feathers, Vivian will automatically enter the Fluttering Frock state. At this point, pressing will trigger Basic Attack: Fluttering Frock - Suspension, consuming all Flight Feathers and converting them into an equal amount of Guard Feathers.When switching characters while in Fluttering Frock, Vivian will automatically perform Basic Attack: Fluttering Frock - Suspension.  [Character Intro] Vivian (III) When Vivian has Guard Feathers, if any squad member hits a target with an EX Special Attack, Vivian will consume 1 Guard Feather and launch Basic Attack: Featherbloom at the target. If Basic Attack: Featherbloom hits a target suffering an Anomaly, it will deal additional Attribute Anomaly DMG based on a percentage of the original damage. If the additional ability is triggered, when a squadmate applies an Attribute Anomaly effect, Vivian will also consume one Guard Feather and perform Basic Attack: Featherbloom on the target. |
| [Character Intro] Zhao |
File:Tutorial (Character Intro) Zhao 1.gif [Character Intro] Zhao (I) When Frostbite Points are full, switching Zhao into combat will trigger Entry Skill: Burst of Frost. When Zhao activates Entry Skill: Burst of Frost, an Ether Veil: Wellspring will be activated. File:Tutorial (Character Intro) Zhao 2.gif [Character Intro] Zhao (II) When Zhao triggers an EX Special Attack under Ether Veil, a Quick Assist will activate. If switched out afterwards, it will automatically chain into Basic Attack: Final Verdict and Zhao will begin charging. |
| [Character Intro] Pulchra |
 When Pulchra activates an EX Special Attack, Assist Follow-Up, Chain Attack, or Ultimate, she enters the Hunter's Gait state, increasing her Daze damage. While Pulchra is in Hunter's Gait state, when other active characters in the squad land a heavy attack with a Special Attack or EX Special Attack, it triggers Pulchra's Aftershock. Afterward, when other characters land any attack on enemies, Pulchra will unleash multiple Aftershock attacks. |
| [Character Intro] Trigger |
 [Character Intro] Trigger (I) Hold Basic Attack to enter Sniper Stance, allowing Trigger to fire consecutive sniper shots forward. When the skill hits an enemy, Trigger gains 25 Purge points. With Purge points, when other active characters in the team hit enemies with attacks, they can trigger various Aftershock attacks from Trigger. When any Aftershock hits enemies, it increases the target's Stun DMG Multiplier effect, which remains effective even when the target is not Stunned. [Character Intro] Trigger (II) When Trigger has Purge, other active characters in the squad can activate Trigger's Basic Attack: Harmonizing Shot when hitting enemies with a Basic Attack, Dodge Counter, Special Attack, or Quick Assist, dealing Electric DMG and accumulating Daze. When hitting enemies with heavy attacks from an EX Special Attack, Assist Follow-Up, or Ultimate, they can activate Trigger's Basic Attack: Harmonizing Shot - Tartarus, dealing Electric DMG and accumulating a large amount of Daze.  [Character Intro] Trigger (III) When hitting enemies with an EX Special Attack or Ultimate, Trigger will enter Coordinated Support. While in Coordinated Support, other active characters in the squad can trigger Basic Attack: Harmonizing Shot whenever they hit enemies with any attack, without consuming Purge and with no cooldown restrictions. |
| [Character Intro] Yixuan |
 [Character Intro] Yixuan (I) On entering combat, Yixuan gains 120 Adrenaline. Hold to continually consume Adrenaline to launch EX Special Attack: Cloud-Shaper. Repeatedly press to consume Adrenaline to launch EX Special Attack: Ink Manifestation, EX Special Attack: Celestial Cloud Blitz - Break, and EX Special Attack: Qingming Eruption - Break, one after the other.Hold to charge continuously during EX Special Attack: Ink Manifestation. While charging, enemy attacks are blocked automatically. The instant EX Special Attack: Ink Manifestation is launched, or its rising wing strike hits an enemy with red or yellow flash, a Perfect Block effect is triggered, granting a certain amount of Adrenaline.
[Character Intro] Yixuan (II) [Character Intro] Yixuan (II) [Character Intro] Yixuan (II) |
| [Character Intro] Soldier 0 - Anby |
 [Character Intro] Soldier 0 - Anby (I) When Soldier 0 - Anby's attacks hit an enemy, they apply the Silver Star mark and charges the target. For every one-third of charge, the enemy receives 1 stack of White Thunder, stacking up to 3 times. When the enemy has White Thunder, press to activate:Quickly dash forward, slashing through enemies and dealing multiple hits of Electric DMG. When the move hits an enemy, it will consume 1 stack of White Thunder to trigger additional Electric DMG, which is considered Aftershock DMG. Character is invulnerable while using this skill.  [Character Intro] Soldier 0 - Anby (II) With enough energy, hold to activate:Combines her twin swords and throws them forward for a high-speed slash, dealing massive Electric DMG; When the skill hits an enemy, it will fully charge Silver Star; Character is invulnerable while using this skill.  [Character Intro] Soldier 0 - Anby (III) When the additional damage from White Thunder triggers 3 times on the same enemy: A thunderbolt will strike at the enemy's location, dealing Electric DMG to enemies within range; This damage is considered Aftershock DMG. File:Tutorial (Character Intro) Soldier 0 - Anby 4.gif [Character Intro] Soldier 0 - Anby (IV) While the Silver Star mark is active, Aftershock DMG received from squadmates will accumulate Silver Star charge for enemy units. When an enemy target with at least 1 stack of White Thunder is defeated, Special Attack: Thunder Smite will be unleashed on the nearest enemy target; When Special Attack: Thunder Smite DMG is triggered, Special Attack: Azure Flash - Boundary will automatically activate after the current skill ends, dealing Electric DMG, and the skill is considered an Aftershock. File:Tutorial (Character Intro) Soldier 0 - Anby 5.gif [Character Intro] Soldier 0 - Anby (V) Dodge Counter grants Voltage Overload status when hitting enemies. During this state, dodge performance is enhanced, and when using Basic Attack/Dash Attack/Dodge Counter, if the enemy target has White Thunder, press to interrupt the current skill at any time and unleash Special Attack: Azure Flash;During this state, when pressing , and when the enemy doesn't have White Thunder, you can directly unleash EX Special Attack: Sundering Bolt. |
| [Character Intro] Ju Fufu |
 [Character Intro] Ju Fufu (I) Hu Wei will automatically attack enemies. Gain Might when Hu Wei hits an enemy or when Ju Fufu uses an EX Special Attack or Ultimate. When Ju Fufu is not the active character and has at least 100 Might, after Hu Wei hits an enemy, Ju Fufu will trigger Chain Attack: Suppressing Tiger Cauldron to perform an aftershock. On triggering Chain Attack: Suppressing Tiger Cauldron, all squad members' CRIT DMG is increased, and Chain Attacks and Ultimates deal increased DMG.  [Character Intro] Ju Fufu (II) After triggering Dash Attack, hold Basic Attack to enter a high-speed spinning state, dealing DMG and bouncing off enemies upon contact.When triggering EX Special Attack, Ultimate, or Assist Follow-Up, Ju Fufu will gain Momentum which can be consumed in the high-speed spinning state upon contact with enemies to deal Fire DMG and gain Might.  [Character Intro] Ju Fufu (II) While in the high-speed spinning state press  to switch characters, maintaining the spin and auto-attacking enemies.When Ju Fufu is not the currently active character and has Momentum, she will automatically enter a high-speed spinning state after Chain Attack: Suppressing Tiger Cauldron. to switch characters, maintaining the spin and auto-attacking enemies.When Ju Fufu is not the currently active character and has Momentum, she will automatically enter a high-speed spinning state after Chain Attack: Suppressing Tiger Cauldron. |
| [Character Intro] Alice |
 [Character Intro] Alice (I) After any squad member inflicts a Physical Anomaly on an enemy, Alice deals additional DMG each 0.95s of its active duration equal to a percentage of the original Physical Anomaly DMG. If Disorder is triggered while the enemy is suffering a Physical Attribute Anomaly, the Disorder DMG Multiplier is increased. When Alice inflicts Assault through Anomaly Buildup, the fifth hit of her next Basic Attack is enhanced.  [Character Intro] Alice (II) When Alice's attacks hit enemies or trigger Assault through Anomaly Buildup, she gains Blade Etiquette. When Alice stacks Blade Etiquette to its maximum, she can hold to unleash a three-stage charged Basic Attack: Starshine Waltz. Upon landing the Finishing Move, it triggers a special Assault effect called Polarity Assault that ignores Anomaly Buildup to deal an instance of Assault, which can also interact with other Attribute Anomalies, including Physical Attribute Anomaly, to trigger Disorder. |
| [Character Intro] Yuzuha |
 [Character Intro] Yuzuha (I) When Yuzuha's EX Special Attack and Ultimate hit enemies with heavy attacks, they inflict Sweet Scare, and the enemy will subsequently be attacked by Basic Attack: Sugarburst Sparkles and Basic Attack: Sugarburst Sparkles - Max. When enemies in this state are first hit by an attack of matching attribute from the active character, Flavor Match will be triggered, and subsequent Basic Attack: Sugarburst Sparkles and Basic Attack: Sugarburst Sparkles - Max attacks will be converted to that character's attribute.  [Character Intro] Yuzuha (II) Yuzuha can gain Sugar Point through EX Special Attack, Chain Attack, Ultimate, Defensive Assist, and Basic Attack: Tanuki Cloak. When the active character's attack hits an enemy, it triggers Basic Attack: Hard Candy Shot around the enemy. When Hard Candy Shot hits an enemy under Sweet Scare with a heavy attack, Yuzuha consumes 1 Sugar Point to perform a Basic Attack: Sugarburst Sparkles - Max attack. |
| [Character Intro] Pan Yinhu |
 [Character Intro] Pan Yinhu (I) When Pan Yinhu hits an enemy with EX Special Attack: Mountainous Pulse Strike, the previous characters Quick Assist is triggered. The agent who enters via that Quick Assist gains a Sheer Force increase. [Character Intro] Pan Yinhu (II) When Pan Yinhu uses EX Special Attack: Mountainous Pulse Strike, gain 3 points of Break Force. With Break Force, press to launch Special Attack: Touch of Death and attack surrounding enemies, dealing Physical DMG.The skill can be triggered 3 times consecutively, each time consuming 1 point of Break Force. After Pan Yinhu activates EX Special Attack: Mountainous Pulse Strike, for a time, switching your active Agent via a Quick Assist or Chain Attack will cause Pan Yinhu to automatically launch Special Attack: Touch of Death on enemies until his Break Force points run out. [Character Intro] Pan Yinhu (II) When another character in your squad is a Rupture character or shares the same faction, Additional Ability: Iron Stomach is triggered: When Pan Yinhu hits an enemy with Special Attack: Touch of Death, the enemy suffers from the Depleted Qi effect for a duration, increasing received DMG from all units. This effect does not stack, but repeated hits on the same target will extend its duration.  [Character Intro] Pan Yinhu (III) When Pan Yinhu activates Ultimate: A Feast Fit for an Emperor!, in addition to dealing DMG to enemies, it restores HP for all Agents in the squad and continues to restore HP over time. |
| [Character Intro] Ye Shunguang |
File:Tutorial (Character Intro) Ye Shunguang 1.gif [Character Intro] Ye Shunguang (I) While not in the Enlightened Mind state, Ye Shunguang can accumulate Qingming Sword Force. Some attacks still accumulate small amounts, while pressing to unleash EX Special Attack: Gale Suppression will directly give 1 point of Qingming Sword Force.With 6 points of Qingming Sword Force and while not in Enlightened Mind state, hold or press to switch in from off-field and launch Entry Skill: Illuminating Darkness, entering the Enlightened Mind state and activating Ether Veil: Verdict.File:Tutorial (Character Intro) Ye Shunguang 2.gif [Character Intro] Ye Shunguang (II) In the Enlightened Mind state, Ye Shunguang can use stronger skills, dealing Honed Edge DMG. When enemies enter Ether Veil: Verdict, Veil Vulnerability will be applied based on their Stun DMG Multiplier. In Enlightened Mind state and with Qingming Sword Force, pressing to reach the third hit will unleash Basic Attack: Enlightened Mind - Skyward Ascent.While airborne, repeatedly press to consume Qingming Sword Force and launch the powerful attack Basic Attack: Enlightened Mind - Sunderlight Annihilation. Press to activate Enlightened Mind - Return to Dust and exit Enlightened Mind state.File:Tutorial (Character Intro) Ye Shunguang 3.gif [Character Intro] Ye Shunguang (III) After consuming Decibels to activate Ultimate: Chasing Storms, press in the Enlightened Mind to unleash Ultimate: Cleaving Heavens, dealing massive Honed Edge DMG to enemies. After using this skill, Ye Shunguang will exit Enlightened Mind and Ether Veil: Verdict will be removed. |
| [Character Intro] Lucia |
File:Tutorial (Character Intro) Lucia 1.gif When Lucia launches certain attacks, she deals DMG to enemies with Ethereal forms. These attacks are divided into Whim and Harmony; Whim includes the 5th hit of Basic Attack, Special Attack, Dodge Counter, and Quick Assist; Harmony includes EX Special Attack, Assist Follow-Up, Chain Attack, and Ultimate; When Lucia activates Harmony, she applies Darkbreaker status to all squad members. Under Darkbreaker status, Sheer Force is increased; When Harmony deals DMG, the DMG of the final hit increases by a certain percentage of Lucia's maximum HP. File:Tutorial (Character Intro) Lucia 2.gif Lucia gains Dream Points when activating Whim and Harmony; when using Whim or Harmony, Lucia enters Dream state if her Dream Points reaches 100, simultaneously activating Ether Veil: Wellspring; Ether Veil: Wellspring affects all squad members, increasing their maximum HP while active. During Ether Veil: Wellspring, reactivating Ether Veil: Wellspring or using EX Special Attack or Ultimate while in Dream state will extend its duration; Lucia exits Dream state when not under the effect of any type of Ether Veil. File:Tutorial (Character Intro) Lucia 3.gif While Lucia is in Dream state, using any Whim will consume Dream Points and upgrade Whim into Harmony; When off-field, if the active character's attack hits an enemy, Lucia will consume Dream Points to trigger Aftershock, and this Aftershock becomes Harmony; When Lucia triggers a skill upgrade or Aftershock, all squad members gain Dreamer's Nursery Rhyme status, under which DMG increases; When Dream Points are insufficient to trigger skill upgrade or Aftershock, Lucia will exit Dream state. |
| [Character Intro] Aria |
File:Tutorial (Character Intro) Aria 1.gif When the 4th hit of Aria's Basic Attack: Sweet Melody or EX Special Attack hits an enemy, Fandom Power is generated on the field after the attack ends. When a Chain Attack is activated, Fandom Power is also generated on the field. After the 4th hit of Basic Attack: Sweet Melody, an Assist Follow-Up, Chain Attack, or Ultimate, Special Attack: Full-Sugar Electronica - No Ice can be activated. If the attack hits an enemy, 1 Fandom Power is also generated on the field after the attack ends. When holding , Aria enters a charging state, with up to three charge stages. Releasing , or reaching the maximum charge duration, causes Aria to perform a powerful downward attack based on the current charge stage. While charging, if Fandom Power is nearby, it will be absorbed, with each Fandom Power absorbed immediately increasing the charge level by 1 stage.File:Tutorial (Character Intro) Aria 2.gif When the charged 3rd hit of Aria's Basic Attack: Perfect Pitch lands as a heavy attack on a target affected by Ether Anomaly, Electric Anomaly, Fire Anomaly, Physical Anomaly, or Ice Anomaly, it triggers Abloom, dealing an additional instance of Attribute Anomaly DMG. When the target is Stunned, this DMG ratio is further increased. File:Tutorial (Character Intro) Aria 3.gif After Aria activates an Ultimate, she enters the Moment of Delusion state. While Moment of Delusion is active, the 3rd hit of Basic Attack: Perfect Pitch is upgraded to an enhanced version. When entering the Moment of Delusion state, Aria gains multiple stacks of All-Out Support. While charging, if Aria has All-Out Support, she consumes 1 stack of All-Out Support to charge, each stack of All-Out Support increasing the charge level by 2 stages. After launching the 3rd hit of Basic Attack: Perfect Pitch, if she has All-Out Support, or if there are more than 2 Fandom Power nearby, keep holding or pressing within a short time frame to repeatedly activate the 3rd hit of Basic Attack: Perfect Pitch.When entering the Moment of Delusion state, Aria simultaneously activates Ether Veil: Delusion Reprise. While Ether Veil: Delusion Reprise is active, all squad members gain an additional ATK increase. If the additional ability conditions are met, activating an Ether Veil generates 4 Fandom Power on the field. |
| [Character Intro] Nangong Yu |
File:Tutorial (Character Intro) Nangong Yu 1.gif When Downbeat is sufficient, hold to charge, then release to launch Basic Attack: Adorable Explosive Impact. Can perform up to three charged attacks.The second and third attacks each consume 50 Downbeat. Downbeats replenish over time and when any squad member inflicts an Anomaly on an enemy. When any squad member stuns an enemy, Nangong Yu gains 2 stacks of Dance Prowess, up to a maximum of 2 stacks. When Nangong Yu has Dance Prowess, hitting enemies afflicted with Attribute Anomaly or in a Stunned state with her EX Special Attack, Basic Attack: Adorable Explosive Impact, or Quick Assist heavy attack will consume 1 stack of Dance Prowess and trigger Polarity Disorder on the enemy. |
| [Character Intro] Cissia |
File:Tutorial (Character Intro) Cissia 1.gif Press or hold to activate EX Special Attack, gaining 3 to 6 stacks of Venom;Every 5s, 1 stack of Venom is consumed to trigger Corrode Bone, dealing 1 instance of Electric DMG to enemies; While Venom is active, all squad members' Electric DMG ignore a portion of enemy DEF, lasting until 30s after Venom is depleted; When gaining 1 stack of Serpentine Shadow for every 6 stacks of Venom, hold to activate Basic Attack: Serpent's Kiss to rapidly consume all remaining Venom. Each stack consumed triggers Corrode Bone once. |
| [Character Intro] Starlight - Billy |
File:Tutorial (Character Intro) Starlight - Billy 1.gif When Starlight - Billy's attacks hit enemies, he gains Determination. The amount recovered varies by skill. Determination caps at 120 points. Additional Determination is gained when triggering a Perfect Dodge, using EX Special Attack: Cool Wheelie, using Chain Attack: Knight's Swagger, or when triggering a Block. When sufficient Determination is available, hold to use Basic Attack: Full-Throttle Starlight.Hold to use EX Special Attack: High-Traction Wheels and recover HP.When Decibel Rating reaches Maximum, press to consume Decibels and use Ultimate: Starlight Knight Flying Kick. Character is invulnerable while using this skill. |
| [Character Intro] Promeia |
File:Tutorial (Character Intro) Promeia 1.gif Under certain conditions, Promeia restores a set amount of Corrosive Chill, which is automatically converted into Trial by Cold. After the final hit of Basic Attack: Sweeping Edge, Special Attack: Execution - Descending Frost, or Special Attack: Execution - Layered Frost, if she has enough Trial by Cold, hold or to activate EX Special Attack: Execution - Merciless Judgment and trigger Abloom.When Promeia triggers Abloom and hits an enemy, she gains additional Decibels. After using Ultimate: Glaciating Impalement, she gains 1 chance to directly activate Special Attack: Execution - Layered Frost. If she is attacked shortly after using EX Special Attack: Execution - Glacial Death, she will automatically activate EX Special Attack: Execution - Shrouded in Shadow. When this happens, press or to also activate Special Attack: Execution - Layered Frost. |
| [Character Intro] Pyrois |
File:Tutorial (Character Intro) Pyrois 1.gif When Decibel Rating reaches Blasting, Pyrois can unleash their Ultimate. When activating the Ultimate, Pyrois can choose from four different branches: Up Branch: Restores Solar Prominence and enhances Pyrois's damage against Stunned enemies. Down Branch: Increases Energy Generation Rate and boosts Pyrois's damage over time. Left Branch: Deals additional damage to enemies affected by Contamination. Right Branch: Applies the Totalize effect to Stunned enemies, dealing extra damage and ending their Stunned state. When Solar Prominence is sufficient, hold to unleash Enhanced Basic Attack: Celestial Light. |
| [Character Intro] Velina |
File:Tutorial (Character Intro) Velina 1.gif Press to activate EX Special Attack: Wind Shear - Purifying Rise. After using this skill, tap or hold again to activate EX Special Attack: Wind Shear - Triple Deathblow.Using either EX Special Attack: Wind Shear - Purifying Rise or EX Special Attack: Wind Shear - Triple Deathblow restores 45 points of Windbloom. Windbloom has a maximum cap of 135 points. When Windbloom is at 90 points or higher, hold or to activate EX Special Attack: Wind Shear - Eye of the Storm, summoning a Sweeping Cyclone and triggering the previous character's Quick Assist.When the Sweeping Cyclone hits an enemy affected by Contamination, it triggers the Chromatic Tint effect, converting the Sweeping Cyclone to the corresponding attribute and dealing damage of that attribute. |
| [Character Intro] Norma |
File:Tutorial (Character Intro) Norma 1.gif Press or hold to activate EX Special Attack: En-Nah Barrage. Norma enters the En-Nah Barrage state and summons two En-Nah Turrets.When Norma or Norma's Top Hat Companion is on the field, it continuously restores Preheated Chamber. Once Preheated Chamber reaches the threshold, hold to activate Basic Attack: Hat Trick, changing the triggered Quick Assist into a Chain Attack of the character switching in. |
| Signal Calibration: Green Signal |
 Tune the signal to repair it. When tuning, the green signal will expand outward. When the green signal overlaps with the outer circle, press  or the spacebar to complete tuning. or the spacebar to complete tuning. |
| Signal Calibration: Reset |
Don't worry if the calibration isn't going well! You can click the reset button at the top-right to restart. |
| Controls |

Use A/D to move left and right. Drag the virtual joystick Drag  Hold the  button to consume fuel and accelerate. While accelerating, you can safely push through obstacles on the road. button to consume fuel and accelerate. While accelerating, you can safely push through obstacles on the road. Press the button to perform a dodge. Using dodge allows you to avoid obstacles on the road and safely push through obstacles. |
| Irradiant Crystals |
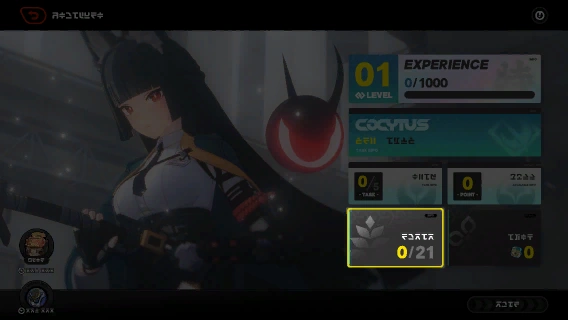 Section 6, time for work! Assist the White Star Institute in collecting Irradiant Crystals, study the peculiar properties of Melinoe, and leave your work report in Yanagi's Section 6 Deputy Chief's Notes. Even if you accidentally miss the Irradiant Crystals during the mission, you can still obtain them in the Hollow during Free Exploration mode. |
| Phantom Disruptor |
 Look for the fluorescent prompts in the environment through the equipment's operation lens. Align both sides with the prompt to adjust the misalignment caused by spatial anomalies. |
| Beam Disruptor |
 Adjust the beam and hit the receiver in the environment to restore the road lost due to spatial anomalies.  Beam Disruptor Array: In more complex environments, you need to connect the disruptors in sequence with the beams to create an array and clear a path. |
| Asaba Harumasa Special Interaction |
 In "The Source" and "Karma and Tribulation", Harumasa can press and hold to enter aiming mode, locking onto mechanisms and Mini Cargo Trucks within the field of view. While in aiming mode, Harumasa can switch targets by moving the camera. Releasing will cause Harumasa to fire Falling Feather to trigger mechanisms or open Mini Cargo Trucks. |
| Click Click Hollow Reporter |
 When an Agent defeats enemies or uses a skill corresponding to the Primary Target, gain Flash of Insight  Energy, up to a maximum of 3 tiles. Energy, up to a maximum of 3 tiles. Flash of Insight can be activated with at least 1 tile of Energy. Upon entering Hunting Hour, you can freely rotate or zoom the camera to adjust your shot. During Hunting Hour, completing the Primary Target lets you consume Energy to activate Flash of Insight . This rewards you with Mr. Click's Satisfaction and a stage-specific Filter Buff. Completing Optional Targets grants additional Mr. Click's Satisfaction. Upon clearing the stage, the 1st Squad Member will be featured as the cover character for this shoot.  After completing an event stage, the corresponding stage's "Hyperfocus Shot" mode will be unlocked. Challenge missions are disabled in "Hyperfocus Shot" mode. In the stage, there are no time limits or Challenge objectives, and Agents take no damage. Agents can freely use all skills, including Flash of Insight , allowing the Proxy to capture thrilling combat moments with ease!" |
| Stage Tutorial |
 Enemies will prioritize Astra Yao as their attack target. Protect Astra Yao while defeating the enemies  Using an Ally Skill grants an Invulnerable effect to both characters and increases Ellen's DMG  Complete subsequent stages to enhance Ally Skills |
| Special Enemy! |
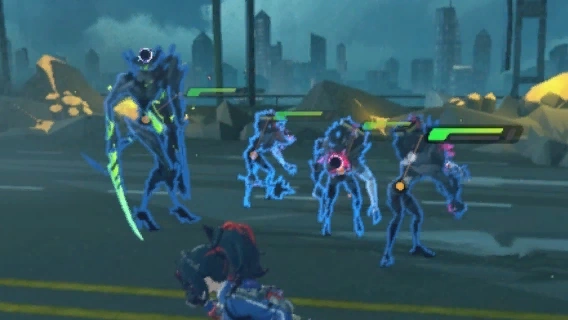 In certain stages, special enemies with a blue DMG Reduction effect may appear. Activate Flash of Insight to unleash an Energy Blast and remove their DMG Reduction effect. |
| "Grand Marcel Adventure" Controls Guide |
 Press  , to make Eous jump up. , to make Eous jump up.Hold to have Eous jump higher.Press  , to make Eous dash forward. , to make Eous dash forward.Press , then press while Eous is still in the air to make it jump further. |
| Aftershock Gameplay Details |
The Agents Soldier 0 - Anby, Trigger, and Pulchra can all perform Aftershock.
|
| [Ultimate] Gameplay Details |
· When Yixuan consumes Adrenaline, she accumulates Technique Points. With enough Technique Points, she can trigger an additional Ultimate: Ultimate: Endless Talisman Suppression; · After Yixuan unleashes Ultimate: Endless Talisman Suppression, she gains one Auric Ink Point. Yixuan can consume one Auric Ink Point to unleash Basic Attack: Auric Array; · Triggers when there are Attack or Rupture Characters the same squad with Ju Fufu: The maximum Decibels for all characters in the squad increases. When an Attack or Rupture character uses an Ultimate, that character gains Decibels. |
| [Abloom] Gameplay Details |
When Vivian has Guard Feathers, if any squad member hits a target with an EX Special Attack, Vivian will consume 1 Guard Feather and launch Basic Attack: Featherbloom at the target. When Basic Attack: Featherbloom hits a target suffering from an Anomaly, it triggers Abloom: deals additional Attribute Anomaly DMG based on a percentage of the original damage. |
| [Totalize] Gameplay Details |
When Hugo's EX Special Attack or Ultimate hits a Stunned enemy, the Totalize effect is triggered. This effect increases the skill's DMG Multiplier based on the enemy's remaining Stun duration at the moment Totalize was triggered. After triggering Totalize, the enemy will immediately recover from Stun and a certain amount of Daze will be inflicted based on remaining Stun duration at the moment Totalize was triggered. |
| [Promeia] Gameplay Details |
File:Tutorial (Character Intro) Promeia 1.gif Under certain conditions, Promeia restores a set amount of Corrosive Chill, which is automatically converted into Trial by Cold. While she has Trial by Cold, after the final hit of Basic Attack: Sweeping Edge, Execution - Descending Frost, or Execution - Layered Frost lands, hold to chain into Execution - Merciless Judgment.DMG Dealing Tip: · WithTrial by Cold [sic]: Use + + hold · When the enemy attacks: Use |
| [Hoshimi Miyabi] Gameplay Details |
When triggering Frostburn - Break, using EX Special Attack, or activating Ultimate, Hoshimi Miyabi gains Fallen Frost. After obtaining 2 or more stacks of Fallen Frost, hold to enter Shimotsuki Stance and begin charging. Each charge stage consumes 2 stacks of Fallen Frost, with a maximum of 3 charge stages.DMG Dealing Tip: · With 6 stacks of Fallen Frost, hold to perform 3-stage charging. |
| [Evelyn] Gameplay Details |
When Evelyn uses her skills to deal DMG to enemies, she builds up Burning Embers. When Burning Embers is at or above 50%, hold or to consume Burning Embers to activate Garrote and gain 1 Burning Tether Point.After accumulating 3 Burning Tether Points, Evelyn's next Garrote attack will consume all Burning Tether Points and transform into a Chain Attack. DMG Dealing Tip: · When Burning Embers is at 50% or higher: hold /· When you have 3 Burning Tether Points: hold / |
| [Starlight - Billy] Gameplay Details |
File:Tutorial (Character Intro) Starlight - Billy 1.gif When Starlight - Billy's attacks hit enemies, he gains Determination, with the amount gained varying by skill. While in combat, he gradually recovers Determination. Triggering a Perfect Dodge, using EX Special Attack: Cool Wheelie, using Chain Attack: Knight's Swagger, or triggering a block grants additional Determination. DMG Dealing Tip: · When Determination is full: hold · When you need to restore HP: hold · When enemies flash red/yellow: press to trigger a block |
| [Jane] Gameplay Details |
When Jane deals DMG while under the Passion state, it will consume Passion Stream. Triggering Perfect Dodge or Defensive Assist will restore Passion Stream. When Passion Stream is depleted, she will leave the Passion state. DMG Dealing Tip: · When Passion Stream is about to run out: hold + continue holding |
| [Hugo] Gameplay Details |
When Hugo's EX Special Attack or Ultimate hits a Stunned enemy, the Totalize effect is triggered to increase the skill's DMG Multiplier based on the enemy's remaining Stun duration at the moment of activation. DMG Dealing Tip: · When an enemy becomes Stunned: Use / to trigger the Totalize effect. |
| Dash Attack and Dodge Counter |
 When your character runs for a period of time or dodges forwards, they will begin Dashing. While Dashing, your character moves faster, and you can press to launch a Dash Attack. When your character is about to be attacked, press to launch a Perfect Dodge and become Invulnerable for a short period of time. When you trigger a Perfect Dodge, immediately press to launch a Dodge Counter. |
| Investigation Zone Squad |
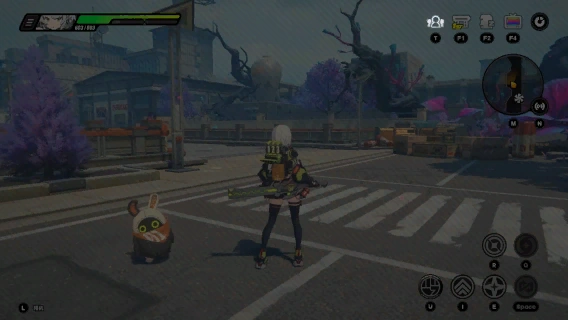
After entering Aerospace City, the Investigation Zone Menu will appear in the top right corner. Press T for Squad Configuration to freely switch between Investigation Zone squads. After entering Aerospace City, the Investigation Zone Menu will appear in the top right corner. Press the Squad Configuration button to freely switch between Investigation Zone squads. After entering Aerospace City, the Investigation Zone Menu will appear in the top right corner. Press <Action:MainCityShortcutBar> + <Action:UIWest> for Squad Configuration to freely switch between Investigation Zone squads. |
| Bangboo Wanderer Wants to Know |
 The Bangboo Wanderer will ask you questions. If you answer correctly, you'll receive a reward; but if you answer incorrectly, you'll need to defeat the enemies it summons to get your reward.  When Yixuan is in your Squad, she can help you by eliminating one wrong option. |
| Elevator Device |
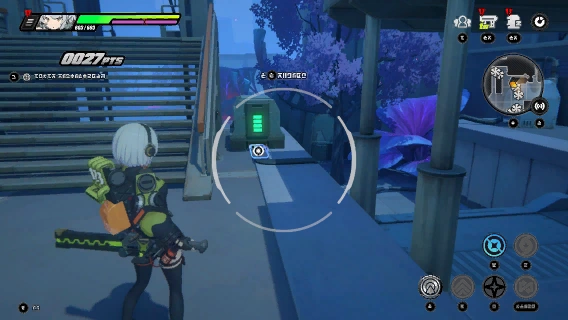 There's a generator near the lift mechanism. Find it and use the Revelation ability to make the inert refractive Ether change states, making the power lines visible. 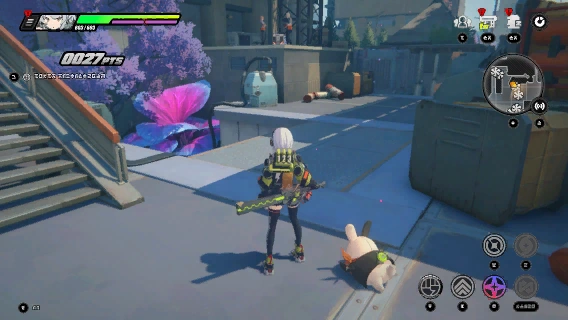 When wires are revealed, they'll be electrified and the lift platform will rise; when hidden, they're affected by inert Ether, breaking the circuit and causing the lift to descend. Use your abilities wisely to explore hidden areas! |
| Clear the Corrosive Electric Core |
File:Tutorial Clear the Corrosive Electric Core 1.gif Ether particles may sometimes attach to wires inside the Hollow. The crosshairs will highlight wires charged with Ether particles. Follow the wire to locate the Corrosive Electric Core that's causing the short circuit. Press  to eliminate the Corrosive Electric Core and restore the circuit to normal. to eliminate the Corrosive Electric Core and restore the circuit to normal. |
| [Multi-Energy Shield] |
 Multi-Energy Shields consist of multiple overlapping barriers of different colors. Use the Revelation Technique to guide matching colored lasers to hit the shield and remove it layer by layer. |
| Insight Technique: Advanced |
File:Tutorial Insight Technique: Advanced 1.gif Insight can now extract more clues from existing ones. Aim your crosshair at a clue and hold <IconMap:Icon_RoleSkillKeyCommon> to reveal the hidden information. |
| Treasure Hunt Bangboo |
File:Tutorial Treasure Hunt Bangboo 1.gif After repairing the Exploreboo, it will guide Agents to find hidden Mini Cargo Trucks as a way of showing gratitude. Follow and protect it to discover the hidden Mini Cargo Trucks. |
| [Bladeflash Mirage] Ability Use |
File:Tutorial (Bladeflash Mirage) Ability Use 1.gif When the "Flying Sword" marker appears on screen, press  to have Ye Shunguang fly to the target location. This ability becomes unavailable once combat begins. to have Ye Shunguang fly to the target location. This ability becomes unavailable once combat begins.File:Tutorial (Bladeflash Mirage) Ability Use 2.gif Rotate the camera to switch the selected Flying Sword marker. File:Tutorial (Bladeflash Mirage) Ability Use 3.gif When the "Flying Sword Combo" mark appears on screen, press and Ye Shunguang will continuously fly towards the target location. This flight cannot be interrupted. |
| Universal Terminal Access Tutorial |
File:Tutorial Universal Terminal Access Tutorial 1.gif After the Proxy arrives in Roscaelifer, the Collaboorators grant partial terminal access to the region's surveillance systems. Hold to take control or load into these devices grants shared vision and control. |
| Mobile Platform |
File:Tutorial Mobile Platform 1.png If you come across an unpowered mobile platform, use the Universal Terminal to make observations on any large power supply equipment connected to it. Then activate the drone's Charge Mode to start charging it up. |
| Aerial Transit |
File:Tutorial Aerial Transit 1.png When a Aerial Transit is nearby, press  Tooltip for ⓘ/RR/ Tooltip for ⓘ/RR/ Tooltip for ⓘ to move along the tracks. Tooltip for ⓘ to move along the tracks.File:Tutorial Aerial Transit 2.png When other tracks appear, press  Tooltip for ⓘ/RR/ Tooltip for ⓘ Switch Tracks to jump to a different track. Tooltip for ⓘ/RR/ Tooltip for ⓘ Switch Tracks to jump to a different track.File:Tutorial Aerial Transit 3.png When a nearby exit point is available, the Switch Tracks button will automatically change to  Tooltip for ⓘ/RR/ Tooltip for ⓘ Leave Tracks button. Press it to jump off the tracks manually. The Character will automatically leave the tracks upon reaching the terminal. Tooltip for ⓘ/RR/ Tooltip for ⓘ Leave Tracks button. Press it to jump off the tracks manually. The Character will automatically leave the tracks upon reaching the terminal.File:Tutorial Aerial Transit 4.png Press  Tooltip for ⓘ/FF/ Tooltip for ⓘ/FF/ Tooltip for ⓘ to move in the opposite direction. Tooltip for ⓘ to move in the opposite direction. |
| Singularity Leakage Tutorial |
File:Tutorial Singularity Leakage Tutorial 1.png
In normal areas, hold F while interacting with a Singularity Leakage to enter a dangerous space where the Hollow and reality overlap. Within this overlapping space, hold F while interacting with a Singularity Convergence to leave and return to the original area. In normal areas, hold <IconMap:Icon_RoleSkillKeyCommon> while interacting with a Singularity Leakage to enter a dangerous space where the Hollow and reality overlap. Within this overlapping space, hold <IconMap:Icon_RoleSkillKeyCommon> while interacting with a Singularity Convergence to leave and return to the original area. |
| Area Monitoring Tutorial |
File:Tutorial Area Monitoring Tutorial 1.png After taking control of a camera, select a target marked with Monitoring, then hold R to begin monitoring. Key information from events or dialogue will be automatically compiled in the records panel. File:Tutorial Area Monitoring Tutorial 2.png After monitoring is complete, select End Monitoring in the panel to exit and return to the camera view. |
| Airspace Monitoring Tutorial |
File:Tutorial Airspace Monitoring Tutorial 1.png Reconnaissance drones are scattered throughout Roscaelifer. Take control of them to assist Eous in reaching areas that the Proxy and Agents cannot access. File:Tutorial Airspace Monitoring Tutorial 2.png Tap  to make the drone ascend, tap to make the drone ascend, tap  to make it descend. Short press to make it descend. Short press  to charge a target, or hold to use overloaded energy to unleash a charged blast on the target. to charge a target, or hold to use overloaded energy to unleash a charged blast on the target.File:Tutorial Airspace Monitoring Tutorial 3.png Hold to charge, then unleash a charged blast on the target. |
| (Companion Character Intro) Remielle |
File:Tutorial (Companion Character Intro) Remielle 1.png During combat, press the Ally Skill button and Remielle will enter the field, unleashing an Ally Skills on enemies. After use, the Ally Skill will enter cooldown. |
| Real-Time Surveillance Tutorial |
File:Tutorial Real-Time Surveillance Tutorial 1.gif After taking control of a camera or drone, the Proxy can activate the"Universal [sic] Terminal Access function. With this access level, hold to take control of other cameras and switch monitoring perspectives. You can also take control of or load into other devices, or review previously recorded surveillance footage. File:Tutorial Real-Time Surveillance Tutorial 2.gif With this access level, use the camera to select targets marked with Scan to obtain additional clues. The Proxy can explore and observe the surroundings to locate targets carrying useful information. |
| Corrosion-Resistant Locked Box |
File:Tutorial Corrosion-Resistant Locked Box 1.png A storage crate packed with high-value supplies. Hack it using Universal Terminal Access to claim its valuable contents. |
| Cretan Hollow |
 Located on the border of the Janus Quarter, Cretan Hollow neighbors the desolate old capital area. Its impact on citizens' daily lives is relatively minor, but it still often causes disaster alerts in the eastern districts. "Long had the throne fallen, with beasts caged in eternal struggle. And the gods, as ever, watch in silence." —A verse was carved onto the wall of a deserted tunnel in the old metro swallowed by the Cretan Hollow. |
| Lemnian Hollow |
 Located in the southwest of the Old Capital Chasm, Lemnian Hollow resides at a considerable distance from the citizens of New Eridu. However, it is also the most active among its six siblings in New Eridu, and the residential areas are frequently troubled by the presence of its Companion Hollows. I was once told a legend from the old civilization: Amidst the isles of Lemnian, our ancestors raised grand temples and sacred shrines. But in the new world, this story looks different: Deep in the depths of Lemnian lies an abyss, infested with the nests and lairs of the evil. Cease your prayers. Cease your prayers. |
| VR Device |
 The VR Device, provided by the Hollow Investigative Association's Career Club, is a portable simulation device. You can engage in free training and the Agent Academy using the VR Device. Completing Agent Academy sessions also grants Training Rewards. |
| Ballet Twins |
 The Ballet Twins skyscraper was constructed by the Ballet Group, a once wealthy real estate company. Tragically, after the fall of the old capital, the Ballet Group went bankrupt, and the Ballet Twins were swallowed by a Hollow. Long ago, when the Ballet brothers were on the last tram, heading through the heart of Eridu, Bolt Ballet pointed to the bright lights and declared, "One day, we'll build the tallest building in all of Eridu there." |
| Bangboo Channel |
 Bangboo can be obtained in the channel using Boopons. Boopons can be obtained in the following ways:
|
| Outer Ring |
 In the vast wilderness outside the central district of New Eridu, a group of wild and free souls uphold a unique way of life — motorcycles and fuel. Eternally Inextinguishable Cinder Lake allows them to live without relying on Ether, and because of this, they can escape the city's noise, freely roaming the dust of the Outer Ring. The Outer Ring has its own rules and its own "Overlords." However, the Hollow haze is drawing near, as the Companion Hollow of the Papago begins to spread across this land... |
| Port Elpis |
 In Port Elpis, where slogans outnumber beacons, the city engulfed by the Hollow was formed by two layers of overlapping structures: Torchlit Lighthouse stands in the darkness, yet it guides the upper layers. The port walkway meanders through, with lost souls wandering in the labyrinth of containers, searching for the rescue number that's long been torn off. At the edge of the city and the sea, you see a slogan that reads, "You can't catch anything by the riverbank, and you certainly can't here." But the port authority would tell you that it's not a warning, but a fated prophecy. If you want to know, the port authority also believes that they do not embrace negativity, but the most positive things — Elpis is the deity of hope and expectation. This port later became a transit hub during the fall of the old capital, and thus has long been known as "Hope." |
| [Notice] Advance Screening not available |
 Currently in Plot Immersive Mode • The In Progress indicator when on the streets means you're in Immersive Mode. • In Investigation Zone mode, when temporary teleportation is restricted, it means you're in Immersive Mode. If you're in the middle of a Main Story Mission, proceed and complete the current phase to exit Immersive Mode. If you're in Agent Story or Special Episode, use the exit button on the interface to leave Immersive Mode. |
| Trust Level Increase |
 You will unlock Trust upgrade missions once you reach a certain Trust level with an Agent. Complete these missions to increase your Trust level and earn rewards. To view Trust details with available Agents, check the Partner Archive at the workbench. |
| Special Area Log |
 While exploring Hollow Zero, you may encounter a Special Area. Enter the Special Area to document it in Ray's Research Log. |
| Lost Items From the Old Capital |
 While exploring Hollow Zero, you might encounter event choices that lead to acquiring Lost Items which once obtained, are added to Ray's Research Log.  You can also complete specified missions to acquire Lost Items which once obtained, are added to Ray's Research Log. |
| Investigator Training Course |
 [Investigator Training Course] A series of practical lessons trial-launched by the HIA Club. The objective is to enable the general public to experience the routine tasks of Hollow Investigators, thereby gaining more extensive and realistic survival knowledge through a blend of education and entertainment.  [Course Categories] Investigator training courses are divided into four types based on the daily activities of Hollow Investigators: Combat Courses, Knowledge Theory Courses, Tactics Courses, and Merit-Based Rewards. Each corresponds to a distinct node in the course tree diagram.  · Combat Courses: In every battle, investigators face unique circumstances that challenge not just their individual capabilities but also the squad's tactical decision-making and member cooperation. Different Combat Courses will impose different demands on tactical planning and coordination among team members.  · Knowledge Theory Courses: Having extensive knowledge about the Hollows is essential for any investigator. In these classes, you'll learn some Hollow knowledge that isn't easy to find normally — so no nodding off!  · Tactics Courses: Outside of combat, investigators take breaks in safer parts of the Hollows, offering a great chance for tactical planning and building Agent experience. Engage in continuous tactical exercises in simulated Hollow environments to gain survival experience! · Agent EXP will be gained in mins, and each course can take up to 10 hours. Once the remaining EXP is depleted, the agent will no longer gain EXP from this course.  Merit-Based Rewards: Hollow investigations have always been about rewarding based on merit. The treasures discovered in the Hollows are for those who get this far. This element is essential to faithfully replicating a Hollow investigator's daily life Feel free to receive some small tokens from the HIA!  [Focus] · Unlocking course nodes requires consuming specific Focus points. When your Focus points decrease to a level where you cannot unlock or participate in the next course, please take time to rest and recover. · Focus points are restored by 150 points daily at 4:00 AM, with a maximum capacity of 500 Focus points. |
| Serving Dishes Tutorial |
 · Drag the dishes listed below onto the plate · Tap dishes to automatically choose empty spaces to put them in · When the dishes in the plate have both Taste and Nutrition values that equal to or exceed the customer's requirements, you can serve the food  · Some customers will specifically ask for today's special, and the dish will be pre-placed on the plate. It cannot be removed or swapped · Today's special dish effects will also become active. Please choose the remaining dishes based on customers' tastes |
| Holographic Onslaught Arena |
 During the Alliance and Frontline stages, focus on the different Tactical Buffs, and effectively utilize Tactical Buffs to gain Combat Buffs to defeat stronger enemies. In the Special Offensive stage, work with Anby and Trigger and take down the enemies with Aftershock Frenzy! |
| Shadow Riptide Clash |
In Alliance and Frontline stages, pay attention to different Tactical Buffs and make good use of the Combat Buff effects they provide to overcome powerful enemies. In Clash stages, Ye Shunguang and Xiao'Zhao team up. Using Ye Shunguang's various skills to attack enemies will increase your score multiplier. |
| Simulated Sequence Showdown |
In Alliance and Frontline stages, pay attention to different Tactical Buffs and make good use of the Combat Buff effects they provide to overcome powerful enemies. In Martial Practice stages, Banyue and Caesar team up. Using Banyue's various skills to attack enemies will increase your score multiplier. |
| Ultimate Verdict Trial |
In "Union" stages, focus on different "buffs" and keep meeting Trigger Requirements to stack "combat buff" effects and defeat powerful enemies. In "Special Offensive" stages, Promeia and Yuzuha take the field together. Using Promeia's various skills to attack enemies will increase your score multiplier. |
| Themed Mechanic: Perfect Coordination |
 Tutorial: Press "Switch Character" to summon your support character in battle and unleash a Coordinated Attack. This will not interrupt your character's current action. Coordinated Attacks have an 8s cooldown. Activating a Coordinated Attack right before being attacked triggers Perfect Coordination, enhancing the effect. Themed Mechanic: Lighter's DMG greatly increases. Upon triggering Perfect Coordination, Vital View is also triggered.
|
| Hard Mode "Duel!" Rules |
 In Hard Mode, you need to defeat enemies and perform Perfect Dodges to score points. Try to score as many points as possible within the time limit! |
| Theme Mechanic: Frenzy |
 Tutorial: After defeating 5 normal enemies in a row, Lighter enters the Frenzy state, granting him a powerful buff for 10 seconds. While in Frenzy, defeating every 3 additional enemies extends the state by 5 seconds. Defeating a normal enemy's advanced form counts as defeating 2 normal enemies, and defeating an elite enemy counts as defeating 5 normal enemies. Theme Mechanics: Lighter's DMG is significantly increased. In Frenzy state, Lighter can instantly kill enemies whose HP is below a certain percentage. |
| Theme Mechanic: Full Frenzy |
 Tutorial: When Lighter defeats 5 normal enemies in a row within 10 seconds while in Frenzy, he enters the Full Frenzy state, granting him an even more powerful buff for 10s. However, the Full Frenzy state cannot be extended. Defeating a normal enemy's advanced form counts as defeating 2 normal enemies, and defeating an elite enemy counts as defeating 5 normal enemies. Theme Mechanics: Lighter's DMG is significantly increased. While in Full Frenzy, his CRIT Rate and CRIT DMG are greatly boosted, and his Morale regenerates twice as fast. |
| Stage Themed Mechanic: Provoke |
 Tutorial: Hold the Dodge button to Provoke. Theme Mechanics: Lighter's DMG is significantly increased. When he provokes an enemy, all squad members' CRIT DMG is increased. While in the Provoke state, Lighter automatically counters enemy attacks when he is about to get hit and further increases all squad members' CRIT DMG. After successfully countering an enemy attack, press the Basic Attack to launch a follow-up attack. The themed mechanic will automatically inherit the content of the previous stage |
| Endless Stage "Eternal Noon" Rules |
 Enemies deal more DMG over time. Defeating elite enemies extends the challenge time. |
| Test Subject with Data Error |
 The mastermind has gained partial access to the VR systems and can tamper with the internal data of test enemies. When defeated, these altered enemies will explode, dealing area damage around them. |
| Endless Conflict |
 After completing floor 25, Endless Conflict will be unlocked in the Simulated Battle Trial. In Endless Conflict, you can keep challenging increasingly powerful enemies, there will be no more phases, and your Agent HP will not recover in any way outside of combat. The highest floor you manage to reach will be recorded and displayed on the main interface and badge. |
| Exploration Hint |
 The objective of this mission is to explore as far down the Arpeggio Fault as possible and reach the bottom. In this exploration, due to the exceptional supplies prepared, Pressure and Corruption will not affect our exploration.  During the exploration, the squad will accumulate EXP, steadily enhancing the abilities of our Formation Strategy! You can accumulate EXP by defeating enemies. Upon reaching 100 EXP, you will gain a Sub-Strategy. The type of Sub-Strategy gained will depend on your chosen Formation Strategy prior to starting the exploration. |
| Wandering Scribe |
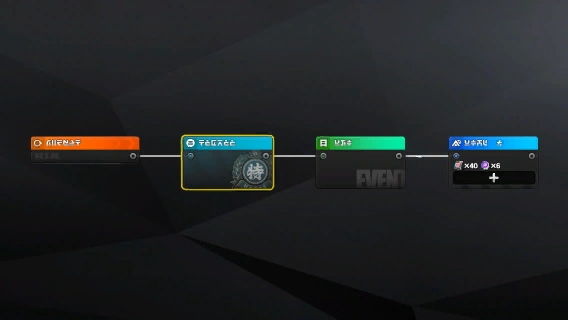 [Game Mode Summary] Work with Zi Xu, a novelist from a distant land, and co-create your own original story — "A Tale Through the Looking Glass".  Blooming Reflections In the story, "Blooming Reflections," you can make different choices in different chapters. Your decisions shape the story's course. Even a decided path can be rewritten within fiction. You can revisit your choice at any time. 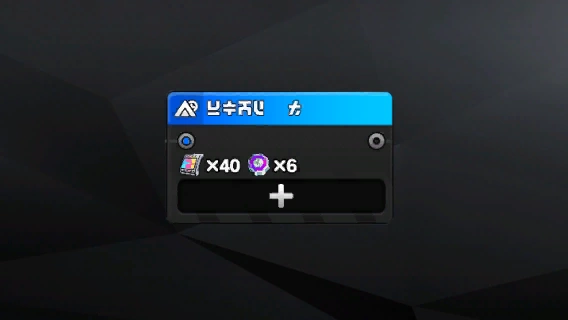 [Combat Assistance] Agents can transform into Bookspirits and help you resolve different crisis you encounter as the protagonist of the story. Inviting Agents to join battles grants various rewards. Even when you're offline, time will accumulate normally during the event. When an Agent meets the additional conditions for the current battle, extra rewards will be granted.  [Combat Rewards] The rewards obtained by inviting Agents to assist in combat will be sent to Proxies via mail after the event concludes. |
| Where the Stars Shine Bright |
[Gameplay Overview] "Where the Stars Shine Bright" is a promotional event launched by the HIA in collaboration with Hollow Special Operations, aimed at supporting Section 6. Civilians familiar with Section 6 can learn more about this squad during the event and receive "support rewards." [Meet Section 6] By answering the staff's questions based on information about Section 6, you can prove your knowledge of the squad and receive support rewards. This section encourages communication and allows participants to answer the questions multiple times! [Collaborative Promotion] Invite Agents to participate in collaboration promotion to receive generous rewards. Even if offline, time will still accumulate normally during the event. When Agents meet the additional conditions of the current collaboration task, extra rewards can be obtained. [Support Rewards] The rewards obtained by inviting Agents to participate in Collaborative Promotion will be sent to Proxies via mail after the event concludes. |
| Assessment Points |
 · Deploying Bangboo requires Assessment Points. · Assessment Points will naturally increase over time. · Different Bangboo require different amounts of Assessment Points. |
| Stamina and Enemy Units |
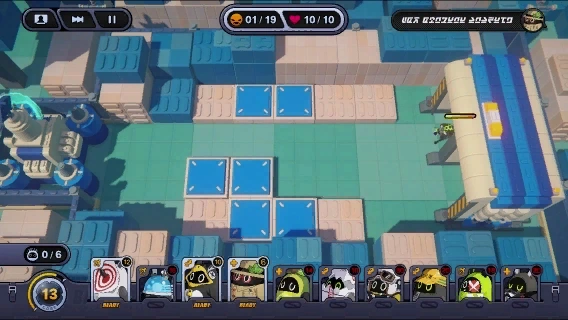 · Target: Prevent the enemies from entering the base! · The enemies will invade the base along a predetermined path, from the starting point. If they enter the base, it will reduce the base's durability. If the base's durability reaches zero, the assessment has failed. · Successfully repelling the enemies and defending the base will complete the assessment. |
| Student Appearance |
 · Drag and drop the Bangboo to different positions on the assessment field, and they will automatically start attacking the enemies. · Bangboo of the same type can be deployed together; however, the more Bangboo of the same type on the field, the higher the Assessment Points required for deployment. · You can pause or adjust the speed to help you observe the battlefield and deploy your Bangboo effectively! |
| Combat Position & Tactical Position |
 · Different Bangboo can be deployed in different positions. · There are relatively safe Tactical Positions on the field, where Bangboo will not be attacked by regular enemies. · When Bangboo are placed on Attack Positions on the ground, they can block enemies, but will also be attacked directly by enemies. · The vast majority of Bangboo can only block 1 enemy at a time. |
| Students Appear |
File:Tutorial Students Appear 1.gif · Drag and drop the Bangboo to different positions on the assessment field, and they will automatically start attacking enemies. · Spend Assessment Points to deploy Bangboo. However, the more Bangboo of the same type on the field, the higher the Assessment Points required for deployment. · At the same time, Assessment Points will gradually increase over time. |
| Pause & Fast Forward |
File:Tutorial Pause & Fast Forward 1.gif · You can pause or adjust your speed at any time to observe the battle and arrange your lineup! |
| Upgrading Bangboo |
 · Carrying specific Bangboo Training Notes allow the corresponding Bangboo to upgrade during the assessment. · With sufficient Assessment Points, select the Bangboo on the field and select Upgrade to complete the operation, significantly enhancing its skills. · By selecting a Bangboo in the assessment, you can select the corresponding buttons to view its detailed introduction or have it exit the field. |
| Ground Position & Elevated Position |
File:Tutorial Ground Position & Elevated Position 1.gif · Different Bangboo can be deployed in different positions. · There are relatively safe Elevated Positions on the field, where Bangboo will not be attacked by regular enemies. · When Bangboo are placed on Ground Positions on the ground, they can block enemies, but will also be attacked directly by enemies. · The vast majority of Bangboo can only block 2 enemy at a time. |
| Bangboo Upgrade |
File:Tutorial Bangboo Upgrade 1.gif · Bangboo Upgrade unlocked! · With sufficient Assessment Points, select the Bangboo on the field and select Upgrade to complete the operation, significantly enhancing its skills. · By selecting a Bangboo in the assessment, you can select the corresponding buttons to view its detailed introduction or have it exit the field. |
| Gas Burner |
 · The Marcel Group has placed a certain number of Gas Burners in the assessment arena. · Due to the burning effect, Bangboo standing on the Gas Burners will continuously lose Stamina, and enemies will also continuously lose HP. |
| Blower |
 · The Marcel Group has placed a certain number of Blowers in the assessment arena. · Due to the increased wind speed, Bangboo standing on the Blowers will gain a boost, and their skill effect range will significantly increase. |
| Buff Items |
 Enhancement items that can be carried in the assessment are divided into two categories: Bangboo Training Notes: These training notes allow specific types of Bangboo to gain stronger abilities in battle. A maximum of 2 training notes can be carried. Bangboo Chips: These chips tend to have more general effects and stronger supportive abilities. A maximum of 1 chip can be carried. |
| Special Students |
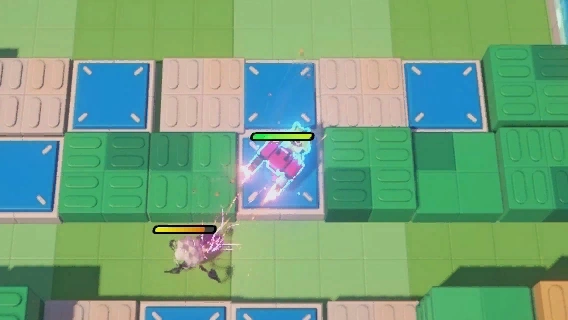 The Agents have entrusted their Bangboo to the Proxies! These special students have stronger combat abilities, but they cannot be used in multiple rounds, and they cannot be upgraded during battle. |
| Hollow Zero: Gear |
 · Strengthen Gear by obtaining Resonium of the same category · Different Gear have different unique Bangboo Assists · Assisting Bangboo will accumulate energy over time. With enough energy, they can be used to summon Bangboo to attack enemies and buff allies |
| Illusory Bush |
 Illusory Bushes are a special mechanic in this assessment. Enemies in Illusory Bushes will hide and cannot be detected by Bangboo. They will only reveal themselves and become vulnerable to attack when they are blocked by Bangboo. |
| Photosynthetic Charger |
 Photosynthetic Chargers are a special mechanic in this assessment. Bangboo and monsters on Photosynthetic Chargers will receive an ATK boost. |
| Controller |
File:Tutorial Controller 1.gif Controller is a special mechanism in this assessment. When a Bangboo is deployed on the Controller, the state of the Controller changes. This, in turn, deactivates currently activated Charge Areas, and activate currently deactivated Photosynthetic Chargers. |
| Simulated Miasma |
 Simulated Miasma are a special mechanic in this assessment. Bangboo cannot be deployed on Simulated Miasma, and enemies standing on Simulated Miasma will gain an ATK boost. |
| Miasma Tumor |
File:Tutorial Miasma Tumor 1.gif Miasma Tumors are a special mechanic in this assessment. The Miasma Tumor is often surrounded by Simulated Miasma. The Miasma Tumor can be attacked, and when a Miasma Tumor is destroyed, the surrounding Miasma Areas will also disappear. |
| "Gilded Carrot Day" Events |
 The Gilded Carrot Day festivities are live in New Eridu! Ridu's Got Boo It's showtime on Gilded Carrot Day! Enter the annual Bangboo Beauty Pageant, dress up Eous in themed outfits, and compete against rivals in a fierce battle of fashion and stage presence! |
| Grand Marcel Adventure |
 Several Bangboo competitors will enter the "Grand Marcel Adventure" arena to compete for the top spot across various types of challenges. [Basic Controls] In each level, you can control Eous to jump, dive, and dash. [Challenge Types] Speed Challenge - Race!: Dodge all the obstacles in the arena and reach the finish line as quickly as possible! Survival Challenge - Survive!: Tiles will disappear a short time after being stepped on! Keep running, jumping, and moving — don't fall to the bottom, or you're out! |
| "Ridu's Got Boo" Double-Hand Commands |

The directional buttons will be divided into two sets, blue and orange. You will need to use both hands. The directional buttons will be divided into two sets, blue and orange. You will need to use both hands. The directional buttons will be divided into two sets, blue and orange. You will need to use both hands. |
| Battle Trial: The Last Stand |
 Players can use their Agents and Bangboo to challenge "Battle Trial: The Last Stand" in the Simulated Battle Trial. Defeat powerful enemies to earn rare rewards such as Polychrome, Hamster Cage Pass, Tuning Calibrator, and Hi-Fi Master Copy!  "Battle Trial: The Last Stand" is divided into stages of 10 floors each. Within a stage's challenge, the Agent's HP will be inherited from floor to floor and will not recover. Full recovery will only occur after successfully completing that stage.  In "Battle Trial: The Last Stand", you can choose one of three Battle Environments before starting each floor's challenge to gain unique combat buffs and reward bonuses. Choosing the appropriate Battle Environment based on the enemy's type and characteristics will be the key to winning this trial.  By reaching certain floors, you can obtain different ranks of badges of honor depending on your achievements. Start off with Initial Battle Bronze Badge Complete floor 10 to obtain Entrapment Silver Badge Complete floor 20 to obtain Onslaught Gold Badge Complete floor 30 to obtain Dominance Diamond Badge Complete floor 40 to obtain Battle Master Badge Complete floor 50 to obtain Undefeated Legend Badge Display these badges in your profile to show off to your friends!  After floor 50, each floor completed will grant a Demon Lord medal. Try to collect as many Demon Lord medals as possible to showcase your impressive strength! |
| "Ridu's Got Boo" Gameplay Details |
 [Introduction] "Ridu's Got Boo" is an annual Bangboo beauty contest held in New Eridu. In this event, Bangboo take the stage to showcase their charm, impress the judges and audience, and outshine their rivals with captivating performances. [Gameplay Details] · You will guide Eous in a turn-based competition against rivals. · During the rival's turn, hints for countering their moves will appear at the top of the screen. · During your turn, follow the hints to issue commands to Eous, who will perform once all commands are given. [Fever] · During the Fever state, Eous will begin an improvised performance. Follow the on-screen prompts and repeatedly press the highlighted buttons to cheer for Eous. Each cheer will lift Eous's spirits, earning higher scores during the performance. · Each correct input gains Fever Energy. When enough commands are completed and the Fever Energy bar is full, Eous enters Fever state. 
Instructions: Press W S A D corresponding to the four directional buttons on the left side of the interface. Instructions: Press the buttons as indicated on the screen. Instructions: Press [Duel Details] Each duel consists of multiple turns following this sequence: Rival's Performance - Your Command Phase - Eous's Performance. [Fever] · During Fever state, follow the on-screen prompts and repeatedly press the highlighted buttons to cheer for Eous and earn higher scores during the improvised performance. · Each correct input gives Fever Energy. When enough commands are completed and the Fever Energy bar is full, Eous enters Fever state. |
| "Ridu's Got Boo" Central Button Details |

A green button has been added to the center of the interface. A green button has been added to the center of the interface. A green button has been added to the center of the interface. |
| "Ridu's Got Boo" Dressing Room Gameplay Details |
 This is the exclusive backstage dressing room for "Ridu's Got Boo." Changing outfits here will not affect Eous's look in other modes. Feel free to dress Eous in outfits best suited for the competition! Wearing outfits that match the competition theme will grant you bonus points! |
| "Ridu's Got Boo" Disruptive Tactics |
 The green button icon on the move prompt board may turn gray. When performing a move, please ignore the gray icons as they are false prompts. |
| "Ridu's Got Boo" Chaotic Tactics |
 The order of the directional buttons on the screen will be shuffled, with up and down and left and right being reversed. Please be cautious when performing moves. |
| Fishing Gameplay Details |
 When the circle reaches the button, press it to successfully hook the fish, moving you to the next phase where you'll enter a battle of strength to reel in your catch. If your timing is off, the fish will get away, and you'll have to cast your rod again.  When the Press Repeatedly prompt appears above the fish's shadow, press the button repeatedly to deplete its stamina.  When the Hold prompt appears above the fish's shadow, hold down the button to deplete its stamina. |
| Skill Use Details |
 When the Power Control skill is available, pressing the skill button will deplete the fish's stamina further. |
| Signal Lights Challenge Gameplay Details |
 Select the correct colors in order to light up the signal lights from top to bottom.\nThe three vertical lights at the back will provide color hints, while the console will cycle through different colors. Hit the console when the displayed color matches the light to light it up.  When all three signal lights are successfully lit, the container movement program will start. |
| Sniper Gameplay Details |
File:Empty.png Trigger can enter Sniper Mode at specific locations, allowing you to snipe hard-to-reach targets. File:Empty.png Once you snipe all targets, you can move forward. |
| "Dreamland Equipment" Fireworks Dual Box |
 Missile pods that can be installed on Tully's shoulders that will launch auto-tracking missiles that automatically fire a small number of missiles at intervals during combat. When an Agent activates their EX Special Attack, it will use Maximum Firepower to launch a massive missile barrage. Can be upgraded using Shadow Pursuit Dreamland Resonium obtained from the modification workshop.  In Tully's fantasy space, enemies have high resistance to DMG dealt by Agents, causing the damage numbers to remain gray. |
| "Dreamland Equipment" Meteor Blazing Gun |
 A machine gun can be implanted on Tully's chest, firing out powerful projectiles, but with a limited magazine capacity. After firing all bullets in the magazine, it will reload, and once reloaded can continue attacking.
With each reload, Tully will load projectiles corresponding to an attribute type of a randomly selected Agent in the squad. Can be upgraded using Projectile Dreamland Resonium obtained from the modification workshop. |
| "Dreamland Equipment" Glimmering Whiskers |
 Can modify Tully's ears into laser emitters that shoot out destructive energy beams from their tips. When enemies suffer an Attribute Anomaly or become Stunned, it uses Enhanced Energy Beam to fire a sustained laser attack. When the energy beam hits an enemy, it applies the Weaken effect, increasing the damage they receive. Can be upgraded using Sharp Edge Dreamland Resonium obtained from the modification workshop. |
| Basic Shot |
Press Tap the Fire button Press 
Press R to refill the magazine. Press the Reload button Press <Action:TriggerTpsReload> to refill the magazine.  Defeat enemies to earn points. Hit their Ether Core for bonus points! Chain hits on Ether Cores to multiply your bonus points! Take down all enemies as fast as you can to rack up a high score! The countdown timer at the top shows the maximum time limit. Clear waves early and leftover time converts to bonus points - the more time you save, the higher your score! |
| Aimed Shot |
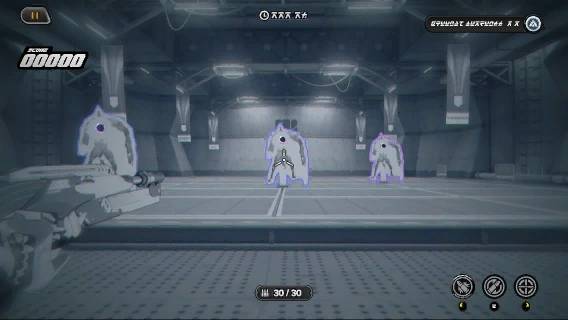
Press Tap the Aim button Press |
| Shooting Instructions |
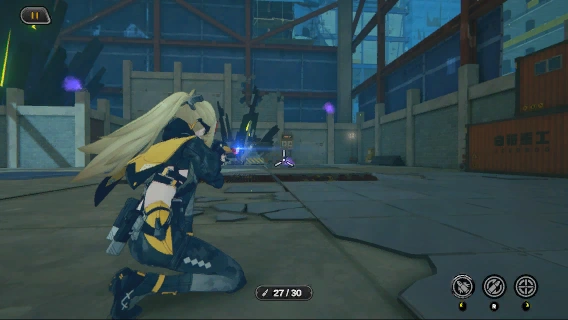
Press Tap the Fire button Press 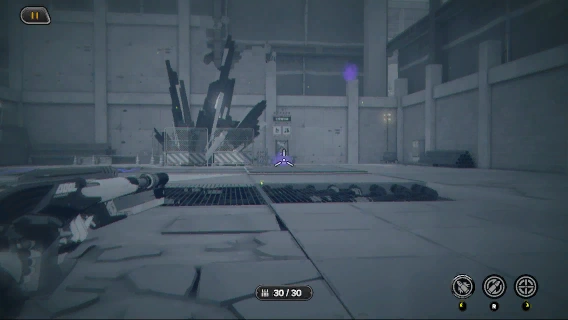
Press Tap the Aim button Press <Action:TriggerTpsCameraZoom> to target distant Ether containers. |
| Adjust Density and Rotate the Pot |
 You can adjust the density of the flowers using the button on the right. Each flower material has two forms: sparse and dense. You can freely rotate the pot to view the flowers from different angles. |
| Silver Screen Invitation Details |
 While watching the movie, dialogue options will appear that require you to make choices within a time limit. Choose responses that match their current mood based on the atmosphere and text hints to improve the movie rank in the top-left corner.  When the movie rank reaches  "Popcorn Partners", you can trigger your viewing companion's review time after the show, unlocking Movie Notes. "Popcorn Partners", you can trigger your viewing companion's review time after the show, unlocking Movie Notes. While watching the movie, press to fast-forward and skip dialogue. You can also use the Playback function in the upper right corner to check previous dialogue content. |
| Light & Shadow Exclusive Details |

Thought bubbles will randomly appear in six fixed positions on the screen. Thought bubbles will randomly appear in six fixed positions on the screen. Tap the corresponding position to hit them. Thought bubbles will randomly appear in six fixed positions on the screen.  Your thoughts while watching the movie will appear as thought bubbles, pressing these bubbles in time will increase the appreciation meter in the top left corner. Some special thought bubbles need to be pressed multiple times.  Consecutively hitting thought bubbles will accumulate Combo Count. When your Combo Count reaches 10 or more, hitting thought bubbles will grant double appreciation points.  When the movie reaches a crucial plot point, it will enter the Climax phase, where more thought bubbles will appear on screen. During this state, pressing thought bubbles will grant x3 Appreciation Points. |
| Distraction Bubbles! |
 Watch out for Distraction Bubbles that may appear at any time in "Light & Shadow Exclusive"! Hitting these bubbles will break your focus, reduce your appreciation score, and reset your combo, so try to avoid them! |
| Blast Bubble! |
 A Blast Bubble may appear in "Light & Shadow Exclusive"! Pressing a Blast Bubble will remove all thought bubbles currently on screen, while also increasing your Appreciation Points and Combo Count. Make sure to press it as soon as it appears! |
| Suibian Temple Management |
 The Proxy can develop and craft unique items at Suibian Temple to sell, and can also send Bangboo out to explore on adventures. |
| Discovery |
 At the Discovery Workshop, you can use Scrolls of Discovery obtained from adventures to research new products. Products researched by consuming materials and Scrolls of Discovery can be crafted and sold, which improves business efficiency. |
| Dismantle |
 Excess products and materials can be dismantled into Cloud Crests. Direct dismantling yields fewer Cloud Crests, so handle with care. |
| Product Crafting |
 Create plans at the crafting station to produce Suibian Temple specialty goods for sale by consuming materials and time. When starting the business, completed goods need to be collected manually. As your Restoration Level increases, you will unlock automatic item collection. |
| Product Sales |
File:Tutorial Product Sales 1.gif Stock products on the shelves to earn Cloud Crests over time. When products are sold, customers will randomly leave tips. Collect these tips to earn bonus Cloud Crests. |
| "Depths" Tab |
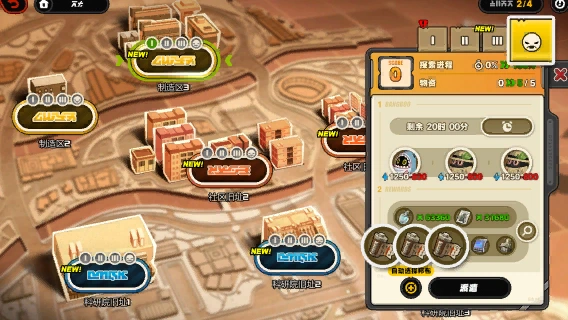 When Suibian Temple's Restoration Level reaches 35, the "Depths" tab will be unlocked for each area. The "Depths" tab has higher requirements for the adventure squad's total Adventure Power. Materials available in the "Depths" tab will change with the refresh of Yum Cha Sin's "Regular Procurement" orders, but they will still be one of the material sets from the area's first three tabs. Supplies in the "Depths" tab include Scrolls of Refinement needed for upgrading certain goods and other great rewards. |
| Adventure |
 Proxies can dispatch squads composed of Bangboo to various areas for adventures. After completing an adventure, the squad can bring back materials needed during management, as well as crucial supplies like Scrolls of Discovery and Scrolls of Refinement, along with reward items such as Polychrome and Dennies. Adventures can be ended early to receive partial exploration rewards, with the reward calculation based on the base adventure time. The base time for non-"Depths" tabs is 3 minutes, while for "Depths" tabs it's 15 minutes. When the actual adventure time exceeds the base time, rewards will be calculated according to the maximum multiplier limit achievable within the base time. |
| Adventure Duration |
 After selecting the adventure area and tab, you must to specify the duration of the adventure. The adventure duration will increase the exploration progress of the current tab. Additionally, the longer the adventure time, the more management materials your squad can bring back from the target area. |
| Adventure Squad |
 Bangboo must be assigned before setting out on an adventure. The more Bangboo participating in the adventure, the more Supplies the squad can bring back from the target area. The total Adventure Power of your Bangboo Squad determines whether they can bring back resources like Scrolls of Discovery and Scrolls of Refinement. As your Restoration Level increases, both the number of Bangboo you can dispatch per adventure squad and the number of adventure squads available will increase. |
| Score, Exploration Progress and Supplies |
 Each tab's rating consists of two parts: Exploration Progress and Supplies. Exploration Progress: The longer a single adventure lasts, the more Exploration Progress can be gained. Exploration Progress increases continuously with the accumulation of total adventure time of the current tab. Supplies: Obtaining each supply requires meeting two conditions: Exploration Progress and Adventure Power. The number of supplies obtainable in each area tab is limited, and the tab's rating will increase as the corresponding supplies are obtained. |
| Supplies |
 To obtain Supplies, you must meet two conditions: Exploration Progress and Adventure Power. At the end of an adventure, if you've reached the required Exploration Progress and your current squad's Adventure Power is sufficient, you'll receive the corresponding Supplies. Supplies include essential items for management such as Scrolls of Discovery and Scrolls of Refinement. |
| Crafting Station |
 A facility for crafting products. As your Suibian Temple Restoration Level increases, more crafting stations will gradually unlock. |
| Managerboo |
 You can appoint 1 Bangboo as the Managerboo of the Sales Stall. A Managerboo will provide buffs to selling (not effective when the selling price bonus is lower than 1). While a Managerboo is working, it will continuously drain Battery Charge. When its Battery Charge reaches 0, it will stop providing buffs to the player. A Bangboo that leaves the Sales Stall will begin to regain Battery Charge. |
| Shelf |
 A facility for selling products. As the Suibian Temple Restoration Level increases, new shelves can be purchased at Good Goods. |
| Level Up |
 When Suibian Temple Restoration Level reaches 35, you can obtain Scrolls of Refinement from adventures to upgrade existing products. You can consume materials and Scrolls of Refinement to upgrade products, which increases their value. |
| BooBox Details |
 Spend  Cloud Crests at BooBox to hire Bangboo assistants who can help with adventures, crafting, and selling. Cloud Crests at BooBox to hire Bangboo assistants who can help with adventures, crafting, and selling. As your Suibian Temple Restoration Level increases, the probability of finding higher grade Bangboo assistants in the BooBox will gradually increase. When your Suibian Temple Restoration Level reaches 25, S-grade Bangboo will appear in the BooBox, providing stronger buffs for your Suibian Temple's management and adventures. |
| Devon Pawnshop Details |
 At Devon Pawnshop, you can use  Omnicoins to redeem items: Omnicoins to redeem items:
 When your Temple Level reaches 45, you'll unlock the Cloud Crest - Periodic Tab: Cloud Crest to redeem for items. |
| Good Goods Details |
 At Good Goods, you can use Cloud Crests to redeem important supplies. Cloud Crests to redeem key supplies like Shelves and Bangboo Energy Plug-Ins needed for temple management. At Good Goods, you can use supplies gathered at the edge of the Aerospace City to redeem product crafting materials.  Lumite ore can be exchanged for product crafting materials from Production Area 1, Production Area 2, Production Area 3. Lumite ore can be exchanged for product crafting materials from Production Area 1, Production Area 2, Production Area 3. Inert Ether Canister can be exchanged for product crafting materials from Former Community 1, Former Community 2, Former Community 3; Inert Ether Canister can be exchanged for product crafting materials from Former Community 1, Former Community 2, Former Community 3; High-Entropy Alloy can be exchanged for product crafting materials from Former Research Center 1, Former Research Center 2, Former Research Center 3. High-Entropy Alloy can be exchanged for product crafting materials from Former Research Center 1, Former Research Center 2, Former Research Center 3. |
| Yum Cha Sin Details |
 Yum Cha Sin posts Neighborhood Wishes written down by residents:  Wishletters required to level up the temple, as well as Cloud Crests, Omnicoins, and other important items. Wishletters required to level up the temple, as well as Cloud Crests, Omnicoins, and other important items. After Suibian Temple reaches Lv. 20, Regular Procurement at Yum Cha Sin is unlocked. Omnicoins needed to redeem items at Devon Pawnshop. Omnicoins that can be earned within the same period. The limit resets every 7 days. |
| Assigned Bangboo |
 The Bangboo assigned to Suibian Temple is your main assistant for adventuring, crafting, and selling. When Suibian Temple reaches Lv. 15, you can hire more assigned Bangboo from the BooBox to assist with the temple's restoration. |
| Bangboo Level-Up |
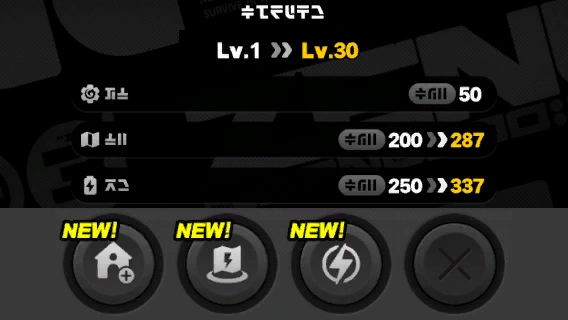 Assigned Bangboo upgrading unlocks when Suibian Temple reaches Lv. 10. Assigned Bangboo can level up by using "Bangboo Energy Module Plug-Ins". These plug-ins can be purchased at Good Goods. As a Bangboo's level increases, their Business Acumen, Adventure Power, and Battery Endurance will increase to varying degrees. Bangboo specialized in different modules will see different ability improvements when leveling up. As Bangboo levels unlock, their special skills will also unlock progressively. |
| Battery Charge |
 Bangboo consume Battery Charge when adventuring, crafting, and selling. When a Bangboo's Battery Charge is low, these actions cannot be performed. When a Bangboo is not engaged in any of these three activities, its Battery Charge recovers over time: By default, Bangboo recover 2 Battery Charge per minute. Additionally, some BangbooTalents can increase the Battery Charge recovery rate. |
| Stats |
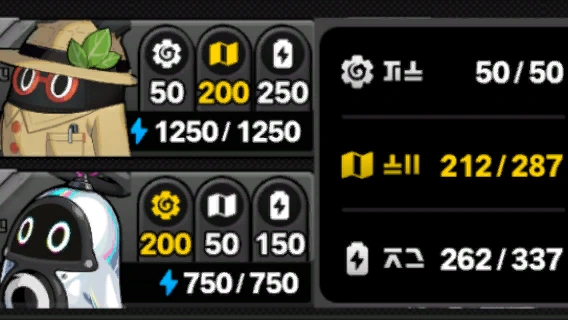 Assigned Bangboo have 3 ability values: Business Acumen, Adventure Power, and Battery Endurance. Different Bangboo excel at different modules (production, sales, adventure), resulting in significant differences in their corresponding ability values. |
| Talents & Specialties |
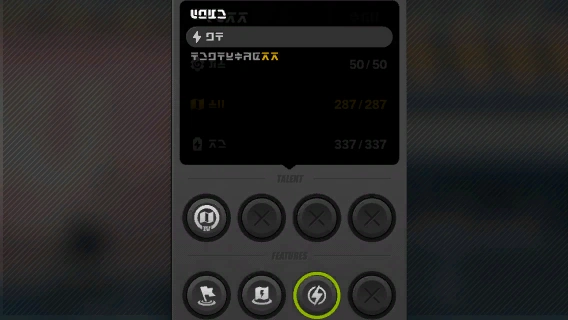 Deployed Bangboo possess Talents and Specialties, which provide various buffs to their crafting, selling, and adventure. Bangboo specialties unlock gradually as their Level increases, with the first specialty unlocked by default. The higher a Bangboo's Rank, the more specialties they can have, and their Talent buff effects will be significantly stronger than those of lower-ranked Bangboo. |
| About the Golden Mecha |
File:Tutorial About the Golden Mecha 1.gif The Golden Mecha can switch between melee and ranged modes, with Melee Mode set as the default when entering combat. In Melee Mode, the Golden Mecha primarily attacks with punches and kicks. Press to launch a punch.Press to perform a ground stomp.Hold to execute a charged kick.File:Tutorial About the Golden Mecha 1.gif When hitting enemies, Eous can accumulate Heat. When Heat reaches maximum, Eous' next punch will deal significantly increased DMG. File:Tutorial About the Golden Mecha 1.gif Press <IconMap:Icon_Custom_MechBooReady> to aim and launch your fist, entering Ranged Mode. Press <IconMap:Icon_Custom_MechBooReady> again to recall your fist, returning to Melee Mode. When Heat reaches maximum, the launched fist deals massively increased DMG. File:Tutorial About the Golden Mecha 1.gif Press to dodge.Hold and Eous will enter jet movement mode, allowing for faster movement.Dodging and jet movement consume Spray Fuel, Spray Fuel will regenerate over time when not being consumed. File:Tutorial About the Golden Mecha 2.gif While punching, press to perform a spinning kick.The spinning kick can block monster attacks. On a successful block, the Heat gauge instantly fills to maximum. File:Tutorial About the Golden Mecha 3.gif Hold <IconMap:Icon_Custom_MechBooReady> to aim and launch a fist, entering Ranged Mode. In Ranged Mode, hold to switch from punching to pulse shots.Keep firing until the arm glows, then release to launch a guided missile, summoning a fist to attack. |
| "En-Nah" Chess Legend |
File:Tutorial "En-Nah" Chess Legend 1.png Welcome to "En-Nah" Chess Legend. In this game, you'll face off against opponents in Bangboo battles! Recruit powerful Bangboo, build an unstoppable lineup, and clinch your victory! |
| Store Recruitment |
File:Tutorial Store Recruitment 1.gif The first step to building a powerful lineup is to recruit Bangboo. You can spend coins at the store to recruit Bangboo to your team! |
| Standby Zone |
File:Tutorial Store Recruitment 1.gif Recruited Bangboo will join your Standby Zone. From the Standby Zone, you can deploy Bangboo to the Battlefield to prepare for combat. Additionally, Bangboo on the Battlefield can be recalled to the Standby Zone. |
| Start Combat |
File:Tutorial Start Combat 1.png
When you're all set, press the Combat button in the bottom right to start the battle! When you're all set, hold <Action:UIWest> to start the battle! |
| New Turn |
File:Tutorial New Turn 1.png Congrats on completing your first combat! After each battle, you'll return to the Preparation Phase to regroup and strengthen your lineup! |
| New Coins |
File:Tutorial New Coins 1.png You'll earn Coins in each new Turn. Additionally, after each combat, victory will earn you 1 Coin to recruit Bangboo, while defeat will grant you 1 Free refresh for the Store. |
| Bangboo Refinement |
File:Tutorial Bangboo Refinement 1.gif Buy three Bangboo of the same name to fuse them into a more powerful Rank 2 Bangboo. Similarly, buy three Rank 2 Bangboo of the same name to get a more powerful Rank 3 Bangboo. |
| Store Level |
File:Tutorial Store Level 1.gif The higher the Store level, the more Bangboo you can deploy, and the higher chance to recruit rarer Bangboo.
You can consume Coins to buy Store EXP. When the Store EXP is maxed out, you can upgrade the Store. Also, at the beginning of each Turn, you will gain 4 Store EXP. |
| Bangboo Bonds |
File:Tutorial Bangboo Bonds 1.png Each Bangboo has two bond attributes.
Buy and deploy Bangboo with matching bonds to activate special bond effects. The more Bangboo you gather with matching bonds, the stronger the bond effect becomes. |
| Bangboo Rarity |
File:Tutorial Bangboo Rarity 1.png Bangboo comes in S, A, B, and C rarities. The higher the rarity, the more powerful the Bangboo. Work hard to raise your Store Level to recruit rare Bangboo! |
| Recommended Lineup |
File:Tutorial Recommended Lineup 1.png After selecting the recommended lineup, you'll see a recommended icon on the suggested Bangboo or Chip. Don't hesitate — grab them fast! |
| Recommended Lineup Adjustment |
File:Tutorial Recommended Lineup Adjustment 1.gif
You can change the recommended lineup anytime through the Recommended Lineup function on the event main screen, or by pressing the Recommended Lineup button in combat. You can change the recommended lineup anytime through the Recommended Lineup function on the event main screen, or by holding <Action:UISelect> in combat. |
| Store Lock |
File:Tutorial Store Lock 1.png When you don't have enough Coins to recruit a particular Bangboo from the Store, you can use the Lock function.
After locking it, the Bangboo in the Store will remain in the store until the next turn. |
| Selling Bangboo |
File:Tutorial Selling Bangboo 1.gif
Drag Bangboo from the Standby Zone and battlefield to the bottom-left or bottom-right corner of the screen to sell it at its original price. After selecting a Bangboo, press <Action:UINorth> to sell it at its original price |
| Ocean Angling Guide |
 When the Hold prompt appears, hold the  button to deplete the catch's stamina. button to deplete the catch's stamina. When the Strike Accurately prompt appears, tap/press the button at the right moment to deplete the catch's stamina. When the Support Skill in the bottom right is fully charged, press to use the Agent's support skill. |
| Ocean Angling: Powerful Catch Tutorial |
 [Powerful Catch Spawn Rules] While fishing, certain kinds of fish and rare subspecies will appear as powerful catches.  [Powerful Catch Battle Tutorial] Powerful Catches have a red Excitement Gauge. Reel the powerful catch to deplete its Excitement. Once Excitement is depleted, the powerful catch will enter a Weakened state for 4s. While the powerful catch is Weakened, repeatedly press to eliminate a large amount of stamina. |
| Aqua Mirage Aquarium |
 [Catch Showcase] After catching specific fish, you can showcase them at the aquarium to increase visitor traffic! Each fish showcased adds 150 base visitor traffic. Additionally, each weight rank will increase visitor traffic by 30, and rare subspecies will also add an extra 30 visitor traffic. Try decorating the aquarium to boost Fantasy Resort's visitor traffic!  [Buying Decorations] Use Angler Commemorative Coins earned from selling fish in the Catch Storage to purchase decorations for your aquarium. Each decoration you buy will increase your Fantasy Resort visitor traffic by 200 and make your aquarium more beautiful. [Angler Commemorative Coins and Releasing] The daily limit for Angler Commemorative Coins is 1,200, with a total cap of 7,200. Once you reach the limit, you'll unlock the Release feature in Catch Storage. For every release you make, you'll obtain Ocean's Gratitude +1. |
| Beginner Tutorial - Seven-Beat Prompt |
File:Tutorial Beginner Tutorial - Seven-Beat Prompt 1.gif During party music performances, vinyl records will flash one by one in the center of the screen. When the flashing prompt reaches the last record, press the Space button to increase the performance completion bar at the top of the screen.
Please note that sometimes the rhythm patterns may appear consecutively. Pay close attention and respond carefully. |
| Advanced Tutorial - Skip Beat Prompts |
File:Tutorial Advanced Tutorial - Skip Beat Prompts 1.gif When the music rhythm changes, certain discs will be hidden, and the flashing indicator on the vinyl disc will appear on the fourth beat. As it approaches the final disc, press the space button to increase the performance meter at the top of the screen. |
| Advanced Tutorial - Hold Prompts |
File:Tutorial Advanced Tutorial - Hold Prompts 1.gif When a circular progress bar appears on the flashing vinyl disc, it means it will pause briefly before moving on. When it's about to reach the last disc, the disc will glow slightly. You need to hold Space button until the progress bar is completely filled and glowing, then release Space button. |
| Expert Tutorial - Random Rhythm |
File:Tutorial Expert Tutorial - Random Rhythm 1.gif The music rhythm will change randomly during the performance, so stay alert. Regardless of the changes, simply press the Space button when the flashing prompt indicates the last disc is approaching to increase the completion meter at the top of the screen and successfully finish the performance! |
| Knockback Beginner |
File:Tutorial Knockback Beginner 1.gif In "The Art of Knockback" training ground, the Agent's knockback ability will be greatly enhanced. Basic Attack combos will cause minor knockback effects, only pushing normal enemies. Dodge Counter, EX Special Attack, and Ultimate will cause major knockback effects, pushing enemies more effectively. |
| Husk Ball |
File:Tutorial Husk Ball 1.gif Enemy targets called Husk Balls will periodically spawn in the arena. After taking damage, they will bounce back and forth across the field. Agents can make good use of this characteristic to defeat powerful enemies. Note: The next wave will only spawn after all Husk Balls in the arena have been eliminated. |
| Knockback Collision |
File:Tutorial Knockback Collision 1.gif Skillfully knock back other enemy units on the battlefield, making them crash into the massive enemy target to deal massive damage. |
| Ether Power Canister |
File:Tutorial Ether Power Canister 1.gif When faced with massive enemy targets that cannot be knocked back, use Ether Power Canisters that spawn in the arena. Find the right angle and launch them towards the giant enemy target to deal massive explosion damage. Note: The next wave will only spawn after all Ether Power Canisters on the field have been used. |
| Dream Combat General Rules |
File:Tutorial Dream Combat General Rules.png · You can select one skill to use per turn. · Choose a skill and select a suitable target, then click the skill again to cast it. (Hold a skill to view its detailed description.) · You can also control a monster's movement to find the best position to use your skills. File:Tutorial Energy.png Some monster skills can restore Energy, while certain powerful skills consume Energy to activate. Different skills are color-coded from weak to strong: green, blue, purple, and orange. |
| Ethereal-Specific Mechanics: Marks |
File:Tutorial Ethereal-Specific Mechanics: Marks.png · Marks can increase DMG dealt to enemies. · Support Ethereals' skills can apply marks to enemies, while DPS Ethereals' skills can consume marks to trigger an Aftershock. |
| Monster Category Counters |
File:Tutorial Monster Category Counters.png · There are 3 monster categories. Ethereal counters Mechanical, Mechanical counters Biological, and Biological counters Ethereal. · When attacking, monsters deal increased DMG to the type they counter, and reduced DMG to the type that counters them. |
| Rapid-Press Interaction |
File:Tutorial Rapid-Press Interaction.gif Ionized Skill 2 supports Rapid-Press Interaction. When the button appears, tap/press repeatedly for better skill effects. |
| Mechanical-Specific Mechanics: Energy |
File:Tutorial Mechanical-Specific Mechanics: Energy 1.png · The core mechanic of Mechanical monsters is Energy. · Offensive mechs' powerful skills consume large amounts of energy, but you can use Support mechs to charge them for higher damage output quickly. |
| Biological-Specific Mechanics: Buffs |
File:Tutorial Biological-Specific Mechanics: Buffs 1.png · The core mechanic of Biological monsters is Buffs. · Offensive companion skills are enhanced based on the current number of buff stacks. You can use Support companions to apply buffs and unleash burst damage. · Stat-enhancing buffs last 2 turns. Triggering the same-name buff again refreshes the effective turn number. You can check buff status by pressing C to access the Status tab. |
| Scene Prop: Charging Pod |
File:Tutorial Scene Prop Charging Pod 1.png Scene Props will randomly appear in some stages. They can be destroyed with just one attack. When you attack an enemy, destroying the Scene Prop is not a bad idea. Charging Pod: Break it to restore Energy. |
| Scene Prop: Swift Clock |
File:Tutorial Scene Prop: Swift Clock 1.png Scene Props will randomly appear in some stages. They can be destroyed with just one attack. When you attack an enemy, destroying the Scene Prop is not a bad idea.
Swift Clock: Break it to act again immediately. |
| Scene Prop: Healing Pod |
File:Tutorial Scene Prop: Healing Pod 1.png Scene Props will randomly appear in some stages. They can be destroyed with just one attack. When you attack an enemy, destroying the Scene Prop is not a bad idea.
Healing Pod: Break it to restore HP. |
| Post Commission |
 Post Commission At the Intel Board, you can pay Battery Charge or Notorious Hunt challenge attempts in advance to post specific types of Delegated Commissions: Notorious Hunt, Expert Challenge, Hard Commission. When other Proxies accept and complete the Delegated Commission, the poster can claim the commission rewards. Other Proxies in the same Outpost can see the Delegated Commissions posted by each other. Claim Rewards When a Delegated Commission is accepted and completed by another Proxy, the poster can claim the commission rewards from "Manage Commission". Claiming rewards will consume the deposited Battery Charge or Notorious Hunt attempts.  Commission Time Limits After posting a Delegated Commission, there is a 72-hour deadline. The commission will be automatically removed when the deadline is reached or when crossing into a new week. Please pay attention to the commission time limit. When a commission expires, the corresponding Battery Charge will be returned via mail (Challenge attempts will be automatically refunded upon expiration, but will not be refunded when crossing into a new week).  Attempt Limit You can post up to 3 Delegated Commissions at the same time. There is a limit to the number of Delegated Commissions you can post during each period. When a commission is canceled or expires, the corresponding posting attempt will be returned. There is no limit to completing Delegated Commissions from other Proxies. |
| Intel Board |
 Intel Board Discover or create an Outpost to unlock the Intel Board. On the Intel Board, Proxies at the same Outpost can post and accept commissions from each other.  Accept Delegated Commission Complete Delegated Commissions from other Proxies to obtain:
 Post Delegated Commission In the Intel Board, you can post specific types of Delegated Commissions: Notorious Hunt, Expert Challenge, Hard Commission After other Proxies accept and complete these Delegated Commissions, the poster can claim the commission rewards. |
| Sword Collection Memories |
 Sword Memories: Interact to absorb, collecting multiple memories to piece together a complete story. Sealed Sword Memories: Complete the challenge to break the seal. The memories of mighty swordmasters recorded by the Qingming Sword have materialized into sword-shaped entities within the secret realm.  Once collected, they can be placed in the Shrine of the Three Monkeys to gain Sword Mastery. |
| Sword Keeper Trial and Nightmare Gauntlet |
 The Qingming Sword has set up high-difficulty trials for its Sword Keeper, recording in memory form the powerful foes encountered by Sword Keepers throughout history. Keeper's Trial: Awakens the combat memories of past Sword Keepers who faced mighty opponents. Nightmare Gauntlet: Gathers the powerful enemies encountered by past Sword Keepers onto a single battlefield, where continuous battles against these formidable warriors will put the Sword Keeper's abilities to the ultimate test. |
| Sword Will Resonance |
 You can obtain Sword Will Essence and Sword Mastery during exploration. Sword Mastery can be used to unlock new abilities. You can earn Sword Mastery by progressing through the event plot, completing Sword Memory Collections, completing Sword Keeper Trials, and clearing the Nightmare Gauntlet. Sword Will Essence can be used to upgrade unlocked abilities. You can earn Sword Will Essence by progressing through the event plot, completing certain Sword Keeper Trials, and clearing the Nightmare Gauntlet. You can perform the following operations at any Sword Altar in the Hidden Realm: Ability Unlock: Consume 1000 Sword Mastery to unlock a new ability. Ability Enhancement: Consume 1 Sword Will Essence to enhance an unlocked ability. Ability Reset: Fully refunds consumed Sword Mastery and Sword Will Essence, and resets the unlock and upgrade status of the corresponding ability. You can Teleport to any unlocked Sword Altar on the map. |
| Swift Strike |
File:Tutorial Swift Strike 1.gif
Swift Strike is Ye Shunguang's unique ability in the Qingming Realm. In combat, when controlling Ye Shunguang, Swift Strike is Ye Shunguang's unique ability in the Qingming Realm. In combat, when controlling Ye Shunguang, |
| Event Squad |
In the Qingming Realm, "Trial - Ye Shunguang", "Trial - Zhao", and "Trial - Dialyn" will be provided as Squad Configuration options. In the Qingming Realm, "Trial - Ye Shunguang", "Trial - Zhao", and "Trial - Dialyn" will be provided as Squad Configuration options. |
| Disintegration Technique and Miasma Nodes |

Press Press |
| Snap! Focus Showdown! |
During combat stages, Flash of Insight Energy recovers over time, and Agents gain extra Energy when they defeat enemies! Energy can be stored up to 3 bars.Flash of Insight can be activated with at least 1 bar of Energy. Upon entering Hunting Hour, you can freely rotate, move, zoom, and pan the camera to adjust your shot.During Hunting Hour, completing the Primary Target lets you consume Energy to activate Flash of Insight . This rewards you with Mr. Click's Satisfaction and a stage-specific Filter Buff. Completing Optional Targets grants additional Mr. Click's Satisfaction.Upon clearing the stage, the 1st Squad Member will be featured as the cover character for this shoot. After completing an event stage, the corresponding stage's"Hyperfocus Shot" mode will be unlocked. Challenge missions are disabled in "Hyperfocus Shot" mode. In the stage, there are no target limitations, and Agents take no damage. Agents can freely use all skills, including Flash of Insight , allowing the Proxy to capture thrilling combat moments with ease! |
| • Joint Investigation: The Divine Maze |
 Joint Investigation: The Divine Maze consists of two parts: Solo Investigation and Joint Investigation.
In Solo Investigation, Proxies will team up with designated Agents and head to three investigation areas — "Breaking Thunder," "Joyful Blaze," and "Pale Breath" — to learn and master each area's unique mechanics. In Joint Investigation, the Proxy will select one Agent and work together with two other Agents chosen by other Proxies. Joint Investigation can be played at three difficulty levels: Standard, High Risk, and Nightmare. In a Standard investigation, you progress through a basic commission, and in a High Risk investigation, you pick up from the final enemy/enemies from the Standard investigation. Then, at Nightmare difficulty, you face off against Notorious-level enemies. There are 9 Agents available for this investigation. Energy, Adrenaline, and Decibel Generation Rate have all undergone adjustments for these investigations. |
| Survey Data and Exploration Level |
 Complete investigations to earn Survey Data, which in turn raises your Exploration Level. As your Exploration Level increases, you can obtain Gear and Resonium to equip on your Agents in Joint Investigation, as well as emoticons and voice emotes for communicating with other Proxies during investigations. The first time you complete a Joint Investigation each day, you also get a bonus Survey Data reward! |
| Lightweight Effects Mode |
 In Joint Investigations, Lightweight Effects Mode is enabled by default. This turns off most skill effects from your fellow Agents. You can toggle this mode at any time during the investigation. |
| Emoticons and Voice Emotes |
File:Tutorial Emoticons and Voice Emotes 1.png To facilitate your communication with other Proxies during a Joint Investigation, we've added a Message Wheel for use in missions. There are three types of messages you can send:
File:Tutorial Emoticons and Voice Emotes 2.png
Once equipped, during a Joint Investigation, you can use the Emote button on the right to send emotes and voice emotes to the whole squad. Once equipped, during a Joint Investigation, you can use the Emote button on the right to send emotes and voice emotes to the whole squad. Once equipped, during a Joint Investigation, you can use |
| Solo Investigation |
File:Tutorial Solo Investigation 1.png Before starting the investigation, the Proxy must first complete a Solo Investigation of the area with the designated Agent. In Solo Investigation, the designated Agent will help you master the area's unique mechanics and apply them in combat across different areas. Complete Solo Investigation to unlock the Joint Investigation for the area. |
| Breaking Thunder: Gameplay |
File:Tutorial Breaking Thunder - Gameplay 1.gif In the "Breaking Thunder" area, lightning will appear wherever the player is. When lightning is about to strike, use Perfect Assist to redirect it at nearby enemies (if enemies are present). Enemies hit by redirected lightning take massive amounts of damage.Otherwise, the Agent struck by lightning will also take a massive amount of damage. |
| Joyful Blaze: Gameplay |
File:Tutorial Joyful Blaze - Gameplay 1.gif In the "Joyful Blaze" area, meteorites will continuously fall to the ground. When at risk from a falling meteorite, use Perfect Dodge , a Special Attack, or a Dash Attack to trigger the Blaze effect, which unleashes a flaming shockwave on the surroundings. This shockwave applies a massive amount of Daze on enemies hit, as well as destroys the meteorite.If you fail to dodge in time, the meteorite will create a burning zone that lasts for a period of time, and Agents caught in this zone will continuously take damage. |
| Pale Breath: Gameplay |
File:Tutorial Pale Breath - Gameplay 1.png When inside the "Pale Breath" area, the Agent's Miasma Contamination level will keep on increasing. Then, when Miasma Contamination reaches its maximum, all Agents in the squad will take one-time damage based on current HP percentage. File:Tutorial Pale Breath - Gameplay 2.gif Increases one's Miasma Quelling value. When the Miasma Quelling bar is full, it triggers the Miasma Quelling effect which will last for some time, unleashing a purifying shockwave that deals massive damage to the enemy's Miasmic Shield. Meanwhile, the Agent gains the Miasma Quelling status for a period of time, dealing additional Miasma Quelling DMG with their Basic Attacks. The Miasma Quelling bar fills up when the Agent performs attacks or Chain Overdrives, or when other Agents in the squad trigger the Miasma Quelling effect. Miasma Particles that increase one's Miasma Quelling value can also be found in-stage. |
| Miasma Particles |
File:Tutorial Pale Breath - Gameplay 2.gif When certain enemies are defeated, they drop a set number of Miasma Particles. Crush these particles to significantly fill your Miasma Quelling bar. Some enemy skills will also release a set number of Miasma Particles when used. |
| Survey Prep |
File:Tutorial Survey Prep 1.png Once inside the survey prep area, activate all data piles in the area to complete the area objective. When an Agent enters a data pile's activation range, its data activation progress will increase. When 2 or more Agents are within range of the same data pile at the same time, the activation rate of that data pile is increased. |
| Lightning Lure |
 In "Breaking Thunder," special equipment can be found in certain areas — Lightning Towers. When an Agent interacts with a Lightning Tower, the area challenge begins. At this time, players who have interacted with the Lightning Tower will be subject to more frequent Thunderbolt attacks in the current area; conversely, players who have not interacted with the tower will not be hit by Thunderbolt attacks in the current area. |
| Survey Data and Exploration Level |
 In Joint Investigation: The Divine Maze, Proxies can earn Survey Data by completing Solo Investigations and Joint Investigations. When you accumulate enough Survey Data, your Exploration Level will increase. As you reach higher Exploration Levels, you'll unlock rewards like Polychrome, emoticons and voice emotes, Gear, and Resonium! |
| Survey Data Limit |
File:Tutorial Survey Data Limit 1.png During the early stages of the event, there will be a cap on the Proxy's Exploration Level. This cap will then be gradually raised over time. The first time you complete a Joint Investigation each day, you also get a bonus Survey Data reward. |
| Tactical Prism and Resonium Selection |
File:Tutorial Tactical Prism and Resonium Selection 1.png Reach the specified Exploration Level to unlock the Customizable Tactical Prism Program/Selectable Resonium Chest, which allow the Proxy to select one Tactical Prism or Resonium they do not own yet. If no item is available, you may select the corresponding Survey Data instead. |
| Joint Investigation |
File:Tutorial Joint Investigation 1.png In Joint Investigation, you conduct an investigation together with two other Proxies. To start the investigation, select your preferred area and stage. You may also select at the same time your desired difficulty (Standard, High Risk, or Nightmare). After selecting a stage, press "Start Matching" to match with other Proxies who have selected the same stage. You can also invite other Proxies to match via Friends > Outpost. Upon completing a Joint Investigation, Proxy contribution will be given based on the Chain Meter contribution, the number of times key actions are completed, and DMG dealt by the Agent. File:Tutorial Joint Investigation 2.png The Standard investigation is an investigation stage featuring area progression with various types of area gameplay and thematic content. The stage culminates in a showdown with three different powerful enemies; In a High Risk investigation, the Proxy has to challenge the powerful enemies from the Standard investigation; and In Nightmare investigations, the Proxy has to face off against Notorious-rank enemies. File:Tutorial Joint Investigation 3.png The probability of obtaining Resonium and Gear from Mini Cargo Trucks differs by investigation area: · In Breaking Thunder at Standard/High Risk difficulty, Mini Cargo Trucks have a higher chance of dropping Slot 1 Resonia; · In Joyful Blaze at Standard/High Risk difficulty, Mini Cargo Trucks have a higher chance of dropping Slot 2 Resonia; · In Pale Breath at Standard/High Risk difficulty, Mini Cargo Trucks have a higher chance of dropping Slot 3 Resonia; and · In Final Battle at High Risk difficulty, Mini Cargo Trucks have a higher chance of dropping Gear! File:Tutorial Joint Investigation 4.png When playing on Nightmare difficulty, the Proxy will have a time limit for the challenge, and will also need a higher Investigation Rating to tackle the Nightmare encounter. Complete all challenges on Nightmare difficulty and you get Thin Line of Reality as your reward! |
| Gear, Resonium, and Investigation Rating |
File:Tutorial Gear, Resonium, and Investigation Rating 1.png Each Agent's Investigation Rating is based on the sum of their equipped Gear and Resonium Ratings. The Proxy's Investigation Rating is based on the Agent with the highest Investigation Rating among their 9 Agents.
The Gear Rating is based on the highest Rating for the Agent's corresponding Tactical Prism, while for Resonium, the higher its rank, the higher the Resonium Rating. Selecting the most suitable Gear/Resonia for your Agents based on Ratings is the key to conducting Joint Investigations with maximum efficiency. |
| Gear |
File:Tutorial Gear 1.png The Tactical Prism is the most advanced piece of Gear obtainable in Joint Investigation. It is obtainable through Exploration Level rewards. You can also obtain B-Rank/A-Rank General Gear from Mini Cargo Trucks unlocked during Joint Investigation. The Rating for an Agent's Tactical Prism is 400, while the Ratings for an A-Rank General Gear and B-Rank General Gear items are 200 and 100 respectively. |
| Resonium |
File:Tutorial Resonium 1.png There are three slots available for Resonium equipment, and different types of Resonium can be equipped in each. S-Rank Resonium is the highest grade obtainable in Joint Investigation, and can only be acquired from Mini Cargo Trucks in Joint Investigation. Each slot is compatible with only 2 types of S-Rank Resonium. A-Rank Resonium can also be selected and obtained from Exploration Level rewards. S-Rank Resonium has a Rating of 200, while A-Rank Resonium and B-Rank Resonium have Ratings of 100 and 50 respectively. |
| Default Agent |
File:Tutorial Default Agent 1.png When an Agent is set as the Default Agent, they are automatically selected as the active Agent in the Agent selection phase of Joint Investigation. |
| Clue Board |
File:Tutorial Clue Board 1.png Investigation Clues are obtainable from a Solo Investigation or Joint Investigation (Standard). Different Investigation Clues are found in different areas, and clue details can be viewed on the Clue Board once the clue is obtained. Investigation Clues are divided into three types on the Clue Board: Hidden Clues, Broken Clues, and Common Clues. |
| Hidden Clues |
File:Tutorial Hidden Clues 1.png Hidden Clues are special items found in secret locations across three areas which contain an area's core secrets. To obtain a Hidden Clue, you must obtain the Broken Clue linked to the corresponding secret location. Check the Clue Board for the corresponding Area Clues to find Broken Clues. |
| Broken Clues |
File:Tutorial Broken Clues 1.png Broken Clues help the Proxy to obtain Hidden Clues by unlocking the related secret locations. Once a Broken Clue is obtained, information about the area containing the associated Hidden Clue will be displayed on the Clue Board. |
| Ye Shunguang in Joint Investigation |
 In "Joint Investigation: Divine Maze":
When not in Enlightened Mind state: |
| Yixuan in Joint Investigation |
 In Joint Investigation: Divine Maze: When a teammate unleashes their Ultimate, Yixuan continuously recovers 2 Adrenaline for 10s. This effect can stack up to 2 times. |
| Ellen in Joint Investigation |
 In "Joint Investigation: Divine Maze": Ellen's ATK increases by 65%. |
| Tsukishiro Yanagi in Joint Investigation |
 In "Joint Investigation: Divine Maze": Tsukishiro Yanagi's ATK increases by 30%. |
| Lighter in Joint Investigation |
 In Joint Investigation: Divine Maze: Hits landed by Lighter in Morale Burst using a startup light punch or jab combo will reduce the target's All-Attribute RES, while Elation increases the Agent's All-Attribute DMG. Lighter's ATK increases by 50%, and his DMG dealt to enemies increases by 50%. |
| Qingyi in Joint Investigation |
 In "Joint Investigation: Divine Maze": Qingyi's ATK increases by 50%, and her DMG dealt to enemies increases by 150%. |
| Lucia in Joint Investigation |
 In Joint Investigation: Divine Maze: Lucia's ATK increases by 50%, her DMG dealt increases by 100%, and she ignores 30% of the target's Attribute RES. After an EX Special Attack, press Special Attack again to launch an Aftershock. This Aftershock is a Harmony. If Lucia is not in the Dream state, recover 40 Dream Points upon activation. When Lucia triggers Harmony, all Agents in the squad who are in Darkbreaker state gain increased Sheer Force, and non-Rupture Agents' ATK increases by 1,500. Agents receive 50% less Health recovery effects when inside the Starlight Convergence. |
| Soldier 11 in Joint Investigation |
 In "Joint Investigation: Divine Maze": Soldier 11's ATK increases by 100%. |
| Trigger Mechanisms |
File:Tutorial Trigger Mechanisms 1.gif Some mechanisms can only be triggered in mecha form. Remember to switch forms when necessary! |
| "Shield Burst" Module |
File:Tutorial "Shield Burst" Module 1.png "Shield Burst" Module "Shield Burst" module loaded! The "Golden Mecha Prototype" can now generate energy shields to protect itself! File:Tutorial Pulse Shield 1.gif Pulse Shield When entering combat, convert 40% HP into Pulse Shield; If Eous takes no DMG for 10s, Pulse Shield will continuously regenerate. File:Tutorial Backup Energy Module 1.gif Backup Energy Module While Pulse Shield is active, the Decibels required to activate Ultimate are greatly reduced. When activating Ultimate, Eous will consume Pulse Shield. File:Tutorial Shield Burst 1.gif Shield Burst When Decibel Rating reaches Maximum, press and hold to detonate Pulse Shield, dealing massive DMG to surrounding enemies, then restore Pulse Shield to maximum.The more Pulse Shield consumed, the higher the DMG dealt. Shield Burst DMG is additionally increased by 100%. |
| Season Theme |
File:Tutorial Season Theme 1.gif In "En-Nah" Chess Legend, accumulating Coins doesn't grant interests. Before a match begins, you can select a unique Agent. Each Agent has two recommended Chips, which will be refreshed on turn 4 and turn 8. |
| Deployed Bangboo |
File:Tutorial Deployed Bangboo 1.png Each time the Store Level increases, there is a higher chance of receiving high-quality Bangboo, and you will also be allowed to deploy more Bangboo. You can deploy up to 6 Bangboo. |
| Result Calculation |
File:Tutorial Result Calculation 1.png A victory turn grants 1 Coin, and a defeat turn grants 1 free refresh. |
| Squad Configuration restricted in current area |
 Certain areas require specific Agents to be brought along. When entering these areas, designated "Trial-Agent" characters will be added to your current squad.
You can reconfigure your squad by entering the Investigation Zone Squad Configuration interface. However, in restricted areas, you must still bring the required Agent characters. |
| Polarity Calibration Basics |
File:Tutorial Polarity Calibration Basics 1.gif
The calibration signal moves automatically along a circular track at a constant speed. At the right moment, perform either a "Flip The calibration signal moves automatically along a circular track at a constant speed. At the right moment, perform either a "Flip The calibration signal moves automatically along a circular track at a constant speed. At the right moment, perform either a "Flip |
| "Polarity Calibration" Red Arc Node |

Displayed as a red arc, overlapping with it will negatively affect repair calibration! Perform a "Flip Displayed as a red arc, overlapping with it will negatively affect repair calibration! Perform a "Flip Displayed as a red arc, overlapping with it will negatively affect repair calibration! Perform a "Flip |
| "Polarity Calibration" Boost! (Joint Investigation Only) |
 Successfully resolving each type of node boosts the calibration signal's bypass speed.
|
| "Polarity Calibration" Yellow Dot Node |

Displayed as yellow dots. Calibration should be initiated when the signal overlaps with them At the right moment, "Flip Displayed as yellow dots. Calibration should be initiated when the signal overlaps with them At the right moment, "Flip Displayed as yellow dots. Calibration should be initiated when the signal overlaps with them At the right moment, "Flip |
| "Polarity Calibration" Blue Dot Node |

Displayed as blue dots. Calibration is completed automatically when the player's calibration signal overlaps with them. Displayed as blue dots. Calibration is completed automatically when the player's calibration signal overlaps with them. Displayed as blue dots. Calibration is completed automatically when the player's calibration signal overlaps with them. |
| Buyan Store |
 Explore the unknown, uncover Buyan's secrets. The Buyan store gathers hidden relics from ages past. Explore the Lemnian Hollow to find various collectibles, complete Collection Missions, earn Mystery Points, raise your Mystery Level, and claim generous rewards. The secrets you uncover are logged in the Mystery Database, available to review anytime. |
| Outpost Overview |
 Outpost Overview An Outpost is a community organization built by like-minded Proxies. After joining an Outpost, Proxies can chat with fellow members in the Outpost Channel, share Squad Configurations, Deadly Assault Battle Records, Signal Search results, and other intel.  Create Outpost Each Proxy can create up to 1 Outpost. After creating an Outpost, players enter a 24-hour cooldown. No new Outposts can be created until the cooldown ends. File:Tutorial Join Outpost 1.gif Join Outpost Proxies can join Outposts through Outpost Invites or Discover Outposts. In the Join Outpost screen, Proxies may accept invitations from others or search by Outpost ID to apply to any Open Outpost. Proxies can also use Discover Outposts to search by tags and apply to Outposts that match their preferences. |
| Member Management |
 Member Management Leaders and Managers can manage members with lower ranks in the Members menu. Leader permissions: 1. Edit codenames 2. Remove members 3. Assign/remove Managers 4. Transfer leadership Manager permissions 1. Edit codenames 2. Remove members  Outpost Codename A Codename is a Proxy's personal identifier within the Outpost. Proxies can change their own Codename in the Members menu. Leaders and Managers may edit the Codenames of members ranked below them. |
| Ether Battery Auto-Combat Tutorial |
 In Combat Simulation or Area Patrol, in addition to consuming Battery Charge to fight and earn rewards, you can also use the Ether Battery auto-battle feature to obtain mission rewards instantly.
On the Combat Simulation or Area Patrol screen, press the Auto-Battle button, then press Auto-Battle again to instantly receive the rewards for a single 60 Battery Charge Combat Simulation or Area Patrol mission. Ether Batteries can be acquired via the New Eridu City Fund or through item crafting and other methods. |
| Switching Forms |
File:Tutorial Switching Forms 1.png [Switching Forms] Agents that support form switching in city districts can freely switch forms in the character selection screen by pressing the Switch Form button. Switching forms in city districts does not affect squad selection or the Agent's appearance in Hollows. |
| Ornaments |
File:Tutorial Ornaments 2.gif After clearing a Tasting Turn, extra rewards are granted. In addition to ingredient selections, there is also one decoration selection. |
| Cooking Guide |
File:Tutorial Cooking Guide 1.gif You can use the joystickuse the joystick/use the mouseuse the mouse to move the ladle, and press the buttonpress the button/left-clickleft-click/press  press Tooltip for press ⓘ/press press Tooltip for press ⓘ to scoop. press Tooltip for press ⓘ/press press Tooltip for press ⓘ to scoop.File:Tutorial Cooking Guide 2.gif When Remaining Scoops or the Countdown reaches zero, the Turn settlement begins. Up to 25 items can be scooped per round. |
| Quality |
 Ingredients come in three quality tiers: Common, Rare, and Legendary. The higher the quality, the stronger the effect. |
| Marinate System |
File:Tutorial Marinate System 1.gif Marinate is a special mechanic that triggers an effect when an ingredient has been cooked in the pot for a set amount of time. Ingredients that can marinate will show a progress bar after being placed in the pot. When the bar is full, the Marinate effect will trigger in the pot. |
| Premium Mechanic |
File:Tutorial Premium Mechanic 1.gif Proxies may have noticed that some ingredients have special effects. When the cooking phase begins, each ingredient has a 10% chance to become an Premium Ingredient. Premium Ingredients have their base Deliciousness score doubled, and their effects are also enhanced. Prioritizing Premium Ingredients when scooping is therefore a good strategy. File:Tutorial Premium Mechanic 2.gif On the Order screen, Menu screen, and Menu Catalog screen, Proxies can switch to preview the Premium version of an ingredient's details. |
| Eous Combat |
File:Tutorial Eous Combat 1.gif Eous Combat [Basic Attack] Press to activate: Deals DMG to enemies. Repeatedly press to unleash up to four attacks.[Special Attack] Press  to activate: Deals DMG to surrounding enemies. Activating Special Attack right before being attacked will Block the attack. to activate: Deals DMG to surrounding enemies. Activating Special Attack right before being attacked will Block the attack.[EX Special Attack] Hold  to activate: Continuously spin to draw in enemies and deal DMG. Activating EX Special Attack right before being attacked will Block the attack. to activate: Continuously spin to draw in enemies and deal DMG. Activating EX Special Attack right before being attacked will Block the attack.[Pounce & Dodge] Press to activate: Pounces forward to deal DMG to enemies. Activating right before being attacked will dodge the attack.Jump: Press to activate. Hold to jump higher.File:Tutorial Eous Combat 1.gif Ultimate Ultimate: When Decibel Rating reaches Maximum, press to activate: Unleash a shockwave, dealing massive DMG to surrounding enemies.
During your exploration of Bootopia, you can collect special weapons. Equipping these weapons can change the effect of Eous's Ultimate.File:Tutorial Key Bindings 1.png Key Bindings All Eous combat-related keybindings can be adjusted in the Options menu. |
| Miasma |
File:Tutorial Miasma 1.png Watch out for Miasma enemies! Getting close to Miasma enemies will cause Eous to continuously accumulate Miasma Contamination. When Miasma Contamination reaches its limit, Eous will take massive DMG. It's a good idea to take out Miasma enemies first. |
| Looting Chests |
File:Tutorial Looting Chests 1.png Looting Chests Numerous unclaimed Chests are scattered throughout the amusement island. You can loot them for equipment, armor, consumable items, and other supplies used to enhance Eous's talents. Consumable items include bombs and health recovery items. File:Tutorial Looting Chests 1.png Create Outpost Bombs and health recovery items must be equipped before use. Once equipped: Press  to use bombs. to use bombs.Press  to use health recovery items. to use health recovery items. |
| Obstacles & Bombs |
File:Tutorial Obstacles & Bombs 1.png Attacks or bombs can destroy certain obstacles on the island to create new paths.
Bombs can be obtained from chests. Once equipped in your equipment slot, press to launch a bomb ahead, dealing DMG to enemies and obstacles within range. |
| Bootopia Teleport Beacons |
File:Tutorial Bootopia Teleport Beacons 1.png Multiple teleport beacons are scattered throughout Bootopia.
Unlocking Teleport Beacons: Find these teleport beacons and interact with them to unlock them. Spawn Locations: When entering Bootopia while tracking a mission, Eous will prioritize spawning at the teleport beacon closest to the mission target. Teleport Function: Unlocked teleport beacons have a teleport function. You can find these teleport beacons on the map interface and teleport to a location next to the designated teleport beacon. |
| About Automatic Security Turrets |
File:Tutorial About Automatic Security Turrets 1.gif Many automatic security turrets are scattered about Bootopia. Turrets are enemies with high damage and wide attack range, specializing in launching long-range missile attacks. Using cover in the environment to dodge attacks and slowly closing in to defeat the turrets is a solid strategy. Additionally, activating a Special Attack or EX Special Attack just before getting hit by a turret's missile can deflect the missile, dealing damage to the turret. |
| Evacuation Point |
File:Tutorial Evacuation Point 1.png Evacuation Point There are numerous Evacuation Points scattered throughout the island. Leave the island from an Evacuation Point to safely get away with the supplies you've obtained. File:Tutorial Evacuation Point 1.png Watch Your HP Once Eous's HP drops to zero, the current island exploration will immediately end in failure, and Eous will be forced to leave Bootopia. At the same time, all supplies collected during this exploration will be lost, except for those stored in the Safe. Therefore, it's a smart move to store important supplies in the Safe. File:Tutorial Evacuation Point 1.png Pause & Quit You can also manually choose to Pause or abandon the current exploration in the Options menu. |
| Retreat Time |
File:Tutorial Retreat Time 1.png Retreat Time Each exploration has a time limit. If you don't evacuate before time runs out, it counts as a failed evacuation, and you'll lose all the supplies you collected during that run. File:Tutorial Retreat Time 2.png Equipment Durability Each exploration of the island consumes 1 Durability from the equipment you bring. Once Durability hits zero, the equipment will be considered Damaged. Using damaged equipment will greatly reduce Eous' combat effectiveness. Consider selling your damaged equipment. |
| Mini-Game (I) |
File:Tutorial Mini-Game (I) 1.gif During the 40-second time limit, nails will randomly pop up from the ground. Find the popped-up nails and whack them to earn points. The more nails you hit, the higher your score, and the better your final rewards. |
| Mini-Game (II) |
File:Tutorial Mini-Game (II) 1.gif Within the 40-second time limit, Golden Bangboo will randomly spawn in the area. Find and defeat these Golden Bangboo! The more Golden Bangboo you defeat, the higher your score, and the better your final rewards. |
| About the Map |
File:Tutorial About the Map 1.gif You can check the location of your current mission target on the map. As you progress through missions, you'll also be able to check other facilities around the amusement island on the map. Additionally, as you unlock Bangboo talents, you'll be able to see the locations of some chests on the map. |
| Swaping Equipment |
File:Tutorial Swaping Equipment 1.gif You found a better piece of equipment! You can swap your equipment in the Inventory screen. Equip Eous with stronger gear to boost its combat capabilities. |
| Game Rules |
File:Tutorial Game Rules 1.gif The Proxy must travel between different areas of the Data Panel, collect all Important Data highlighted in yellow, and reach the destination. Drag the virtual joystick to move up, down, left, or right.Drag the virtual joystick to move up, down, left, or right./Use  to move.Use to move. Tooltip for Use to move.ⓘ/Use W/S/A/D to move up, down, left, or right.Use W/S/A/D to move up, down, left, or right. to move.Use to move. Tooltip for Use to move.ⓘ/Use W/S/A/D to move up, down, left, or right.Use W/S/A/D to move up, down, left, or right.You can undo your last move by returning to the previous tile. Note: You do not need to visit every area. Once all highlighted Important Data has been collected, proceed directly to the destination. |
| One-Way Area |
File:Tutorial One-Way Area 1.gif Certain areas only allow entry and exit from a designated direction. Pay close attention to these One-Way Areas and use them strategically to reach the destination more easily. |
| Universal View |
File:Tutorial Universal View 1.png Certain areas only allow entry and exit from a designated direction. Pay close attention to these One-Way Areas and use them strategically to reach the destination more easily. |
| Rotating Area |
File:Tutorial Rotating Area 1.png Entering a Rotating Area causes all One-Way Areas on the field to rotate clockwise. Pay close attention to these Rotating Areas and use them wisely to reach the destination more easily. |
| Game Target |
File:Tutorial Game Target 1.png Game Target
File:Tutorial Win/Loss Conditions 1.png Win/Loss Conditions |
| Drop Rules |
File:Tutorial Drop Rules 1.png Drop Rules File:Tutorial Drop Rules 1.png In-Game Development |
| Active Skill |
File:Tutorial Active Skill 1.png Active Skill File:Tutorial Red Light Attack 1.png Red Light Attack |
| Craft Rules |
File:Tutorial Craft Rules 1.png A-Rank Marble Crafting Rules: S-Rank Marble Crafting Rules:
|
| Stage Environment |
File:Tutorial Stage Environment (I) 1.png * Shield-bearing Ethereals appear. Most marbles can't penetrate their shields to inflict damage
|
| Stage Environment |
File:Tutorial Stage Environment (II) 1.png |
| Stage Environment |
File:Tutorial Stage Environment (III) 1.png |
| Stage Environment |
File:Tutorial Stage Environment (IV) 1.png |
| Chain Parry |
File:Tutorial Chain Parry 1.gif When a × golden light indicator appears before an enemy attack, tap twice in quick succession to trigger a Chain Parry;Chain Parry is an advanced combat technique that can only be activated when another character in your squad is capable of performing a Defensive Assist. When successfully triggered, two characters will launch a Defensive Assist together to block the enemy's attack, creating a new opening for your squad to strike back. File:Tutorial Chain Parry 2.gif After successfully triggering Chain Parry, press to launch a Chain Assault, during which both characters will perform an Assist Follow-Up and Counter the enemy together. |
| "Treasure Trading" Tutorial |
File:Tutorial "Treasure Trading" Tutorial 1.png Select Orders: Check the buffs each order provides and pick the right orders to make the ones that follow easier to complete
Fulfill Orders: Based on the required score, choose the right Sea Materials to submit — meet the score requirement to turn in the order. Hit the special conditions for even stronger buffs Business Target: Use the Sea Materials you've brought in to complete as many orders as possible — rack up that revenue! |
| Harvest Sea Materials |
File:Tutorial Harvest Sea Materials 1.png Harvest Sea Materials Move your Agent close to various Sea Materials to collect them into your Inventory. The tide has washed plenty of Sea Materials ashore — catch as many as you can before time runs out!File:Tutorial Harvest Sea Materials 2.png Wooden Box Obstacle, Fever Time Obstacle: Stacked wooden boxes cannot be cleared by beachcombing tools. Agents will be blocked upon colliding with them. Fever: Ignore all obstacles, with Speed and Pickup Range both increased, lasting 10 seconds! Continuously catching Sea Materials will get you Energized — once the bar is full, you can enter Fever state. File:Tutorial Harvest Sea Materials 3.png Beachcombing Ability [Lucy] Active Skill: Spawn 2 items ahead with random effects. (Cooldown: 20s) |
| Sigrid Character Intro |
File:Tutorial Sigrid Character Intro 1.png Character Active Skill: All Basic Techniques immediately trigger their effects once Character Passive Skill: Initially gain 1 stack of each of the 3 Basic Techniques File:Tutorial Sigrid Character Intro 2.png Character Techniques Three-Color Build: Core strategy revolves around completing Three-Color orders and acquiring random Basic Techniques. Lower the requirements for Three-Color orders while boosting the score. Single-Color Build: Core strategy revolves around completing Single-Color orders and acquiring Wave Basic Techniques. Gain bonus Basic Technique when obtaining bottle caps, plus a percentage-based boost to existing techniques — resulting in faster technique growth. However, it carries a higher risk of being unable to continue operations when Single-Color orders run dry. |
| Stealth Mode |
File:Tutorial Stealth Mode 1.png Claret is leading an infiltration investigation. To avoid tipping off the target, keep a low profile at all times. Press  Tooltip for ⓘ/ Tooltip for ⓘ to toggle between stealth mode and normal mode. In stealth mode, Claret moves slower but is less likely to be spotted by enemies. In normal mode, she moves faster but is more likely to attract enemy attention. Tooltip for ⓘ/ Tooltip for ⓘ to toggle between stealth mode and normal mode. In stealth mode, Claret moves slower but is less likely to be spotted by enemies. In normal mode, she moves faster but is more likely to attract enemy attention. |
| Enemy Alert Status |
File:Tutorial Stealth Mode 1.png Making noise or getting spotted raises enemy suspicion. Once suspicion hits the threshold, enemies enter alert status and come searching for you. Enemies in alert status are sharper and more observant. Get caught again and your infiltration fails. Watch out too: taking down enemies or hacking mechanisms will also trigger enemies' alert. File:Tutorial Stealth Mode 2.png To ensure the plan goes off without a hitch, it's necessary to take certain measures to incapacitate the enemy. Sneak up behind an enemy without being noticed and press Tooltip for ⓘ. Claret can quickly take out the guard in front of her without alerting anyone else. |
| Hold to Slow-Mo |
File:Tutorial Hold to Slow-Mo 1.png Mr. Click upgraded the Hold to Slow-Mo function. Hold Hold to Slow-Mo to advance the flow of time. Pick the perfect opportunity to snap that shot! |


_Soldier_11_3.gif)
_Soldier_11_4.gif)
_Soldier_11_5.gif)
_Yidhari_1.gif)
_Yidhari_2.gif)
_Yidhari_3.gif)
_Burnice_3.gif)
_Burnice_4.gif)
_Grace_2.gif)
_Grace_3.gif)
_Zhao_1.gif)
_Zhao_2.gif)
_Soldier_0_-_Anby_4.gif)
_Soldier_0_-_Anby_5.gif)
_Ye_Shunguang_1.gif)
_Ye_Shunguang_2.gif)
_Ye_Shunguang_3.gif)
_Lucia_1.gif)
_Lucia_2.gif)
_Lucia_3.gif)
_Aria_1.gif)
_Aria_2.gif)
_Aria_3.gif)
_Nangong_Yu_1.gif)
_Cissia_1.gif)
_Starlight_-_Billy_1.gif)
_Promeia_1.gif)
_Pyrois_1.gif)
_Velina_1.gif)
_Norma_1.gif)


_Ability_Use_1.gif)
_Ability_Use_2.gif)
_Ability_Use_3.gif)


_Remielle_1.png)


_1.gif)
_1.gif)


_1.png)
_1.png)
_1.png)
_1.png)


