Where's the Rest?
This page is a
stub. You can help Honkai Impact 3 Wiki by
expanding it.
Prologue
Plays automatically upon entering the event screen for the first time.
(TBA)
Chapter 1
Familiar City
Objectives: Find a way to leave the beach.
Objectives: Make sure the ladder is safe to climb.
Objectives: Investigate the abandoned construction site and find a way to repair the ladder.
Objectives: Use the repair kit on the ladder.
Objectives: Go to HOMU's Joyful Dining.
Objectives: Ask about the vampire.
Objectives: Go to the diner and investigate.
(TBA)
Alley in Memories
I want to go see those places again.
“
Objectives: Leave the restaurant and head to the alley in Sapphire to investigate.
Objectives: Save the child calling for help.
Objectives: Ask the child calling for help.
Objectives: Head to the alley in Sapphire to investigate.
Objectives: Help the drunkard find his identification.
Objectives: Help the drunkard find his key.
Objectives: Return what the drunkard in the way lost to him.
Objectives: Continue heading to the alley in Sapphire.
Objectives: Investigate the vampire marks in the alley.
Objectives: Pick up the shards on the ground.
(TBA)
The Promised Place
If we can't do everything tonight, we can do it tomorrow night, and the night after that…
“
Objectives: Head to World 3.
Objectives: Head to the rooftop entrance.
Objectives: Ask passerby how you can open the door.
Objectives: Ask the child about the matter.
Objectives: Find the resident who took the key.
Objectives: Defeat the attacking monsters.
Objectives: Ask the resident where the key is.
Objectives: Head to the swimming pool to look for the key.
Objectives: Open the gate in the way.
Objectives: Head to the rooftop entrance.
(TBA)
Strange Fluctuations
Special energy flux detected in the streets. We need to investigate.
“
Objectives: Follow Sirin's directions and find the source of magical flux.
(TBA)
World in Flux
Day suddenly changed to night? What's going on?
“
Objectives: Investigate the alley again.
Objectives: Continue investigating this area.
Objectives: Follow the drunkard.
Objectives: Find the waitress of HOMU's Joyful Dining.
Objectives: Himeko wants to take us somewhere.
(TBA)
On the Other Side of Sapphire
Himeko wants to take us to somewhere I haven't gone before.
“
Objectives: Follow Himeko to the first pendulum clock.
Objectives: Ask the youth how to enter the factory.
Objectives: Try to find the key in the northern mountain forest.
Objectives: Go back to the youth.
Objectives: Catch up with the fleeing youth.
Objectives: Help Bronie crack the first pendulum clock.
(TBA)
Take a Break
Bronie's Trackers are malfunctioning. Go rest in Himeko's home first.
“
Objectives: Leave the warehouse and head to Himeko's home.
(TBA)
The Second Pendulum Clock
Done resting. Time to go to the second pendulum clock.
“
Objectives: Follow Himeko to the second pendulum clock.
Objectives: Where could the entrance of the wine cellar be?
Objectives: Ask the man about the wine cellar.
Objectives: Pick the flower on the mountain for the man.
Objectives: Give the flower to the man.
Objectives: Help Bronie crack the second pendulum clock.
(TBA)
The Third Pendulum Clock
Cracked the first two pendulum clocks. Time to find the next pendulum clock.
“
Objectives: Leave the wine cellar and follow Himeko to find the third pendulum clock.
Objectives: The unremarkable blades of grass are somehow capable of invoking gusts. Find a way to get through here.
Objectives: Go check on the third pendulum clock.
Objectives: Abelard gave us a volume of Vampire Knight and Human Princess. Try to trade it for a volume of PIP SQUAD EPIC!
Objectives: Got PIP SQUAD EPIC! Give it to Abelard.
Objectives: Help Bronie crack the third pendulum clock.
(TBA)
The Hidden Pendulum Clock
Though we've cracked three pendulum clocks, we haven't broken the loop. Looks like there are other devices left.
“
Objectives: Leave the auction house and head to the high-rise in Sapphire.
Objectives: In that alley, Himeko once… Maybe that's where she awoke from the loop.
Objectives: Bronie has located the secret pendulum clock. Let's go help her.
Objectives: Head to the high-rise in Sapphire.
(TBA)
Chapter 2
Chapter 2 Opening Notice
Reach Lv. 12 and wait until 10:00, SEP 18 to claim next chapter's missions.
“
Objectives: Reach Lv. 12 and wait until 10:00, SEP 18 to claim next chapter's missions.
Welcome the Future
All pendulum clocks have been cracked and time in Sapphire will gradually return to normal.
“
Objectives: The path that leads out of Sapphire has opened. We can finally move on.
(TBA)
Suburbs of Sapphire
That castle is ahead. I have a feeling that she's there. We must get there somehow.
“
Objectives: The bat ahead is gesturing us to follow it.
Objectives: Catch up with the little bat.
Objectives: Follow the little bat's directions.
(TBA)
Providential Guidance
The little bat took us to a camp. Is this a coincidence or is someone helping us in secret?
“
Objectives: See if you can find anything in the camp.
Objectives: The answer to the riddle on the note is “the mountain in the back”, whose terrain is perfect for ambushes. Try to assassinate all monsters!
Objectives: Follow the little bat's directions.
Objectives: Follow the little bat's directions.
(TBA)
Castle Gate
We finally made it here. The gate is closed tightly, but we'll find a way to open it.
“
Objectives: Find a way to open the door.
Objectives: Activate the 1st device in the garden.
Objectives: Activate the 2nd device in the garden.
Objectives: Activate the 3rd device in the garden.
Objectives: Open the gate.
Objectives: Finally opened the castle gates! Almost there.
(TBA)
Complete Luna's patrol of the castle.
Dispose of the intruders.
“
Objectives: Find the intruder.
Objectives: Head to the prison and check on the prisoner.
Objectives: Her body is growing weaker by the second.
Script at: After the Blood Moon Fades/Story/Complete Luna's patrol of the castle.
After the Blood Moon Fades/Story/Complete Luna's patrol of the castle.
Find a way to enter the castle hall.
Find a way to enter the castle hall.
“
Objectives: Enter the castle.
Objectives: Find a way to enter the inner castle.
Objectives: Follow the directions and find the key in the eastern courtyard.
Objectives: Follow the stranger and head back to the safe part of the castle.
(TBA)
Save Theresa.
Save the Theresas locked inside the castle.
“
Objectives: Follow Kallen's directions and save the imprisoned Theresa.
Objectives: Follow the Campus Detective's directions and save the imprisoned Theresa.
Objectives: Cross the flooded room and head to the west of the castle.
Objectives: Find the key in the flooded room.
Objectives: Use the key from the flooded room to open the pathway.
Objectives: Look for the key to the northeast sentry tower.
Objectives: Save the imprisoned Theresa.
(TBA)
Head to the Tower.
Retreat to the Tower and find a way to meet Luna.
“
Objectives: Escape to the inner castle.
Objectives: Try to defeat the monster in the way.
Objectives: Follow Kallen and head to the hidden passage.
Objectives: Head to her residence.
Objectives: This time, we're finally meeting.
(TBA)(TBA)
Discover New Realm of Wonders
Go unlock Realm of Wonders - A Drop in the Ocean.
“
Objectives: Go unlock Realm of Wonders - A Drop in the Ocean.
Chapter 3
Chapter 3 Opening Notice
Reach Lv. 25 and wait until 10:00, SEP 22 to claim next chapter's missions.
“
Objectives: Reach Lv. 25 and wait until 10:00, SEP 22 to claim next chapter's missions.
Discuss countermeasures.
Objectives: Now that she's foreseen my ending with Luna, she must've planned for the crushing defeat.
(TBA)
Revive Theresa.
Objectives: Follow Kongming's message and head to each Theresa's room to reconstruct them.
Objectives: No matter how perilous the road ahead is, I'll be with you.
(TBA)
Culprit
Open the spatial rift and head to the final location.
“
Objectives: That guy who calls himself the Ferryman also has a ship. We need to move out now to stop him from burning the Ether Anchor.
(TBA)
Rickety Ship
Objectives: Confront the Ferryman on the ship bridge.
Objectives: The door is locked. Need to restore electricity first.
Objectives: Check the item on the ground.
Objectives: Open the door via a temporary energy source.
Objectives: Find other temporary energy sources.
Objectives: Head to the Electrical Room.
Objectives: Find something that can hold the lever down.
Objectives: Flip the electricity on.
Script at: After the Blood Moon Fades/Story/Rickety Ship
After the Blood Moon Fades/Story/Rickety Ship
Deadly Game
The red numbers are blinking. We must save Kasumi and Delta against time.
“
Objectives: You can now proceed toward the bridge.
Objectives: Watch out for the spikes on the ground.
Objectives: Find a way to cross this camouflaged obstacle course that's only visible when approached.
Objectives: Defeat the berserk Kasumi.
Objectives: Activate the device on the left.
Objectives: Find the pattern and cross this area.
Objectives: Use the portal to cross this area.
Objectives: Defeat the berserk Delta.
Objectives: Activate the device on the right.
Objectives: With the two devices activated, let's rush to the bridge.
Script at: After the Blood Moon Fades/Story/Deadly Game
After the Blood Moon Fades/Story/Deadly Game
To the Bridge
The enemy is surging in the dark.
“
Objectives: Go to the bridge.
Objectives: Can't go in the front door. Go around the side of the deck.
Objectives: Use the cannon to destroy the obstacles.
Objectives: Cross the frozen water.
Objectives: Go to the bridge.
Script at: After the Blood Moon Fades/Story/To the Bridge
After the Blood Moon Fades/Story/To the Bridge
Ferryman
Squirm in the interstice of worlds like the ants you are.
“
Objectives: To save everyone, you have to be prepared to lose them all.
Objectives: I must hurry if I want to find her.
Objectives: I've made up my mind. This time, I'll rely on my own power to arrive at an ending where no one will be hurt.
Objectives: Return to the bridge again.
Script at: After the Blood Moon Fades/Story/Ferryman
After the Blood Moon Fades/Story/Ferryman
Discover New Realm of Wonders
Go unlock Realm of Wonders - Secret Castle Gate.
“
Objectives: Go unlock Realm of Wonders - Secret Castle Gate.
Discover New Realm of Wonders
Go unlock Realm of Wonders - Simulated Flight.
“
Objectives: Go unlock Realm of Wonders - Simulated Flight.
Side Missions
Left-Right Symmetry
Legends say an obsessive-compulsive scientist hid their treasure in a field of statues.
“
Objectives: Find the resident obsessed with phantom statues.
Objectives: Align the statues on both sides symmetrically by just removing one phantom statue.
Objectives: The statues on both sides are aligned symmetrically.
Objectives: The treasure is right ahead. Observe the placement of the statues on the right and find the way to it!
Treasure in the Mountain
Rumors say a treasure is hidden in the mountain forest.
“
Objectives: Rumors say a treasure is hidden in the mountain forest.
Objectives: Follow the child's map and find the treasure.
Objectives: Give what you found to the child.
Orchard
Objectives: The owner of the orchard is distressed. Let's go help her.
Objectives: Remove the abnormal obstacles in the orchard.
Objectives: Tell Juliet that her orchard is back to normal.
Objectives: Help her pick all the fruits and carry them back to the finish. Don't step on the same tile twice!
Objectives: Romeo and Juliet prepared a gift to thank us.
Comic Book Fan's Troubles
We met Abelard again, and he has a new problem. We must help him so he won't be corrupted.
“
Objectives: Help Abelard find his cherished comic book.
Objectives: Find the entrance of this park.
Objectives: Find the comic book that Abelard lost.
Objectives: We found Abelard's comic book. Return it to him.
Objectives: Abelard lost another comic book. Go look for it.
Objectives: Return all the comic books you found to Abelard.
Beach Treasure Hunt
What treasures can be found on Sapphire's beaches?
“
Objectives: Chat with the old man on the beach.
Objectives: Use the Detector and the Multifunctional Excavation Tool to search for treasure on the beach and let the Old Man appraise them.
Objectives: What kind of treasure is this? Ask the old man about it.
Mysterious Statue
What secrets could be hiding inside the mysterious statue?
“
Objectives: Investigate the statue on the island in the manor.
Objectives: Solve the riddle and claim the treasure.
Girl by the Road
The girl in the suburbs is looking for anyone with a shovel.
“
Objectives: Ask the girl what she needs the shovel for.
Objectives: Dig out 1 spring bamboo shoot in the veggie patch.
Objectives: Give the spring bamboo shoot to the girl.
Objectives: Dig out 4 spring bamboo shoots in the mountain.
Objectives: Give the spring bamboo shoots to the girl.
Objectives: Place the spring bamboo shoots on the altar in the mountain.
Objectives: A monster suddenly appeared! Deal with it first.
Objectives: Find the stories they left on the mountain top.
Yard Cleaning
Declutter and teach the littering monsters a lesson.
“
Objectives: An odd bat is frustrated at the garbage in the castle. Maybe it needs our help!
Objectives: Clean up the garbage in the castle.
Objectives: Teach the littering monster a lesson.
Objectives: The castle is finally clean! Go tell Peano about it.
HOMU World
We made the promise to go to HOMU World together.
“
Objectives: Ask nearby residents if they have amusement park tickets.
Objectives: Find clues of the vampire.
Objectives: Tell residents the clues.
Objectives: Tell Luna you two can enter HOMU World.
Objectives: Enter the amusement park with Luna.
Objectives: Play the heart stomper.
Objectives: Play the dancing machine.
Objectives: Enjoy the amusement park with Luna.
Village in the Wild
A simple village is situated in the suburbs. The villagers haven't interacted with the outside world for hundreds of years.
“
Objectives: Enter the village.
Objectives: Retrieve the ammo guarded by the monster in the northern warehouse.
Objectives: Load the shell into the cannon.
Objectives: Fire the cannon and go through the passage.
Objectives: Defeat the Water Djinn.
Missing Components
Objectives: The owner of the castle has left precious treasures.
Objectives: Find the key to the treasure chest.
Objectives: Open the treasure chest with the key.
Disassembling
I've been wanting to update your ship, just didn't have the right materials. Now my chance has finally come.
“
Objectives: Head to the left engine room.
Objectives: Head to the coolant room.
Objectives: Walk through the coolant room.
Objectives: Head to the engine room.
Objectives: Dismantle the left engine.
Disassembling
I've been wanting to update your ship, just didn't have the right materials. Now my chance has finally come.
“
Objectives: Clean up the utility room on the right side of the ship.
Objectives: Head to the engine room on the right.
Objectives: Walk through the engine room on the right.
Objectives: Dismantle the right engine.
Leaky Deck
The leaky part of the ship seems to be storing something.
“
Objectives: Explore the deck.
Objectives: Check the stored items.
Past Echoes
Objects of the past that carry shattered ideals.
“
Objectives: Head to Ferryman's treasure room.
Objectives: Check the items in the storage one by one.
Realm of Wonders
Each successful entry in any Realm of Wonder costs  Lunar Banquet Invite ×1. One Lunar Banquet Invite will be issued daily.
Abandoned Factory
A Drop in the Ocean
Treacherous Wilderness
Secret Castle Gate
Simulated Fight
Memory Fragment
Birth
Lost in West Sapphire - Deserted Alleyway.
(TBA)
Big Sister
Lost in West Sapphire - Southwest Corner of High-rise Compound.
Sister? That's strange...
“
(TBA)
First Encounter
Lost in West Sapphire - Northeast Corner of the Amusement Park Entrance.
I always wished that someone would say these words to me...
“
(TBA)
Death
Lost in West Sapphire - Southwest Corner of the Swimming Pool.
I had died once. No... not just once.
“
(TBA)
Guest
Lost in East Sapphire - Invisible Maze in the Garden.
(TBA)
Truth
Lost in East Sapphire - Northwest Corner of the Orchard.
Why...? Why did this happen...?
“
(TBA)
Request
Lost in East Sapphire - East Entrance.
I wish to create a new beginning, a good one with smiles.
“
(TBA)
Reunion
Lost in East Sapphire - West Entrance.
Vampires might not believe in gods or fate, but you're the biggest miracle in my life.
“
(TBA)
Failed
Lost in Sapphire Suburbs - Middle Hill.
I can't hurt him, or let any harm come to him.
“
(TBA)
Transaction
Lost in Sapphire Suburbs - Castle Wing.
Making use of one another, that's enough.
“
(TBA)
Capture
Lost in Sapphire Suburbs - Castle Gate.
I can betray the whole world for him.
“
(TBA)
Suspicions
Lost in Sapphire Suburbs - Castle Wing Entrance.
We're staying by each other's side until the last moment of my life.
“
(TBA)
Backlash
Lost in Castle - East Courtyard.
I can't turn back anymore, right?
“
(TBA)
Letter
Lost in Castle - East Tower.
(TBA)
Blood Moon
Lost in Castle - 2F Banquet Hall.
Will this lie really come to an end?
“
(TBA)
Wish
Lost in Castle - West Courtyard.
Right now, will you... also think about me in the same way?
“
(TBA)
After collecting all Memory Fragments, a dialogue will immediately trigger.
(TBA)


 Lunar Banquet Invite ×1. One Lunar Banquet Invite will be issued daily.

 Stamina cost: 10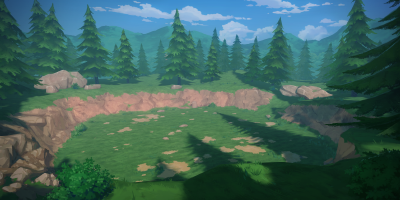
 Pick the flowers that continue to bloom on the field. Pick the given amount to pass the challenge. Beware of explosions that destroy the flowers within its radius! As you pick more flowers, more explosions will occur.