Tutorial/Uncategorized
Last updated 2025-11-16
There are 147 tutorials that are not added to the tutorials menu, even if they fit any of the other definitions:
| Xianzhou Luofu Zone |
|---|
Main article: Wispae Amusement Park  Cultural facilities are unique installations found in the Xianzhou Luofu Zone. Most of these facilities take effect either through chance-based triggers or triggering every few seconds. Cultural facilities are unique installations found in the Xianzhou Luofu Zone. Most of these facilities take effect either through chance-based triggers or triggering every few seconds.Cultural facilities are unique installations found in the Xianzhou Luofu Zone. Most of these facilities take effect either through chance-based triggers or triggering every few seconds.  Some facilities can increase the trigger chance or reduce the trigger interval of other facilities. Plan wisely to ensure that the effects of cultural facilities are triggered frequently. Some facilities can increase the trigger chance or reduce the trigger interval of other facilities. Plan wisely to ensure that the effects of cultural facilities are triggered frequently.Some facilities can increase the trigger chance or reduce the trigger interval of other facilities. Plan wisely to ensure that the effects of cultural facilities are triggered frequently. |
| Worldbearing Trial II |
 Find the three Crystals representing "Despair" and break them in sequence to complete the trial. Find the three Crystals representing "Despair" and break them in sequence to complete the trial.Find the three Crystals representing "Despair" and break them in sequence to complete the trial.  This trial takes place in an area shrouded in darkness, with different space-time inside and outside the area. When a character crosses the boundary between lit and dark areas, they will teleport to the dark area on the opposite side. This trial takes place in an area shrouded in darkness, with different space-time inside and outside the area. When a character crosses the boundary between lit and dark areas, they will teleport to the dark area on the opposite side.This trial takes place in an area shrouded in darkness, with different space-time inside and outside the area. When a character crosses the boundary between lit and dark areas, they will teleport to the dark area on the opposite side. 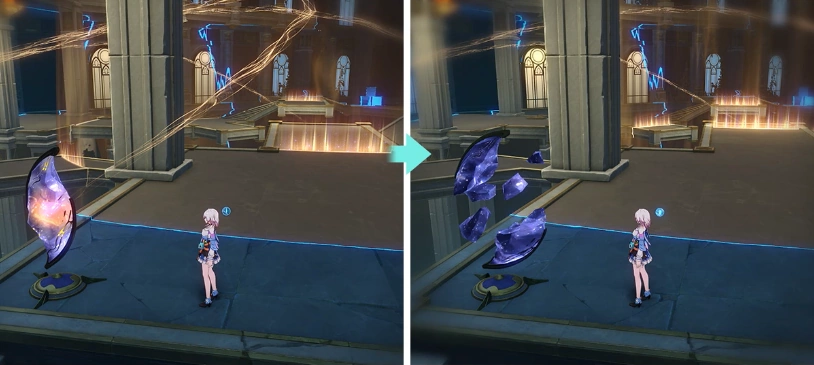 Each time you break a Crystal, the boundary of the lit area shrinks. Use this property to complete the trial. Each time you break a Crystal, the boundary of the lit area shrinks. Use this property to complete the trial.Each time you break a Crystal, the boundary of the lit area shrinks. Use this property to complete the trial. |
| Worldbearing Trial I |
 Find the three Crystals representing "Wish" and reforge them in sequence to complete the trial. Find the three Crystals representing "Wish" and reforge them in sequence to complete the trial.Find the three Crystals representing "Wish" and reforge them in sequence to complete the trial.  The trial will form a lit area, with different space-time inside and outside the area. When a character crosses the boundary between lit and dark areas, they will teleport to the lit area on the opposite side. The trial will form a lit area, with different space-time inside and outside the area. When a character crosses the boundary between lit and dark areas, they will teleport to the lit area on the opposite side.The trial will form a lit area, with different space-time inside and outside the area. When a character crosses the boundary between lit and dark areas, they will teleport to the lit area on the opposite side.  Every time you reforge a Crystal, the boundaries of the lit area will expand. Use this property to complete the trial. Every time you reforge a Crystal, the boundaries of the lit area will expand. Use this property to complete the trial.Every time you reforge a Crystal, the boundaries of the lit area will expand. Use this property to complete the trial. |
| Wispae Amusement Park |
Main article: Wispae Amusement Park  The Star Rail FEST pre-development project has officially launched. As the Lead Architect, you'll be building a Star Rail-themed amusement park for the wispae in the World in Canvas. The Star Rail FEST pre-development project has officially launched. As the Lead Architect, you'll be building a Star Rail-themed amusement park for the wispae in the World in Canvas.The Star Rail FEST pre-development project has officially launched. As the Lead Architect, you'll be building a Star Rail-themed amusement park for the wispae in the World in Canvas.  Before the park opens each day, you'll need to select Attractions and place them on the appropriate tiles. Before the park opens each day, you'll need to select Attractions and place them on the appropriate tiles.Before the park opens each day, you'll need to select Attractions and place them on the appropriate tiles.  Once the park is open for business, wispae visitors will enter one by one and pay Arca Coins as they pass by the attractions. Once the park is open for business, wispae visitors will enter one by one and pay Arca Coins as they pass by the attractions.Once the park is open for business, wispae visitors will enter one by one and pay Arca Coins as they pass by the attractions.  Earn enough Arca Coins and raise your amusement park to the corresponding Rating to receive rewards including Stellar Jades, development materials, and more. Earn enough Arca Coins and raise your amusement park to the corresponding Rating to receive rewards including Stellar Jades, development materials, and more.Earn enough Arca Coins and raise your amusement park to the corresponding Rating to receive rewards including Stellar Jades, development materials, and more. |
| Weakness Break: Quantum and Entanglement |
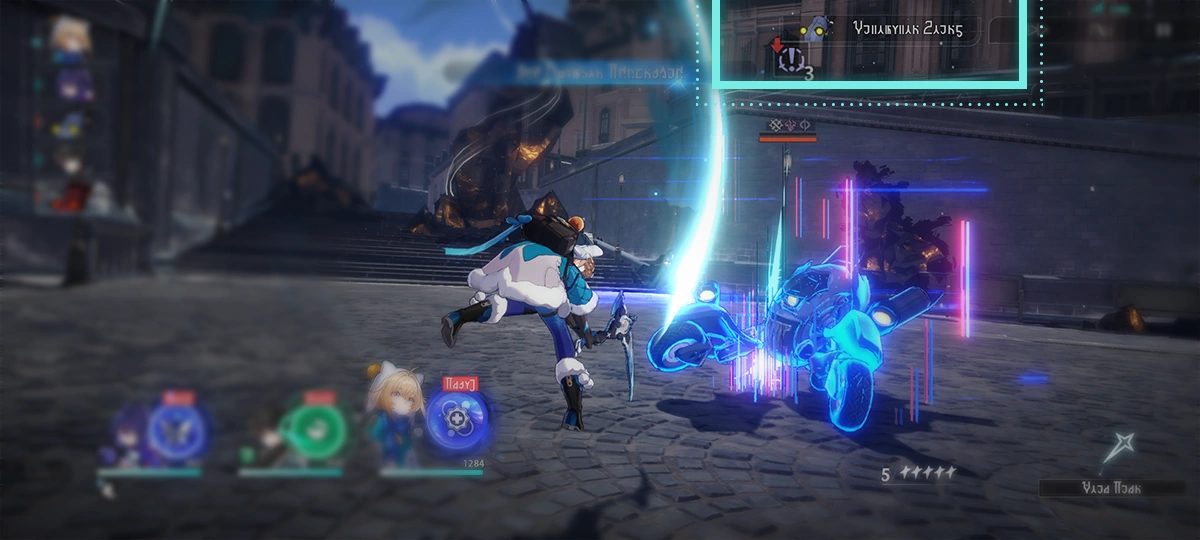 Causing Weakness Break with Quantum DMG will inflict Entanglement. Causing Weakness Break with Quantum DMG will inflict Entanglement.Causing Weakness Break with Quantum DMG will inflict Entanglement.  Entanglement will deal Additional Quantum DMG at the start of the enemy target's turn. If the target is attacked while under Entanglement, the Additional DMG taken will increase. Entanglement will deal Additional Quantum DMG at the start of the enemy target's turn. If the target is attacked while under Entanglement, the Additional DMG taken will increase.Entanglement will deal Additional Quantum DMG at the start of the enemy target's turn. If the target is attacked while under Entanglement, the Additional DMG taken will increase. |
| Weakness Break: DoT |
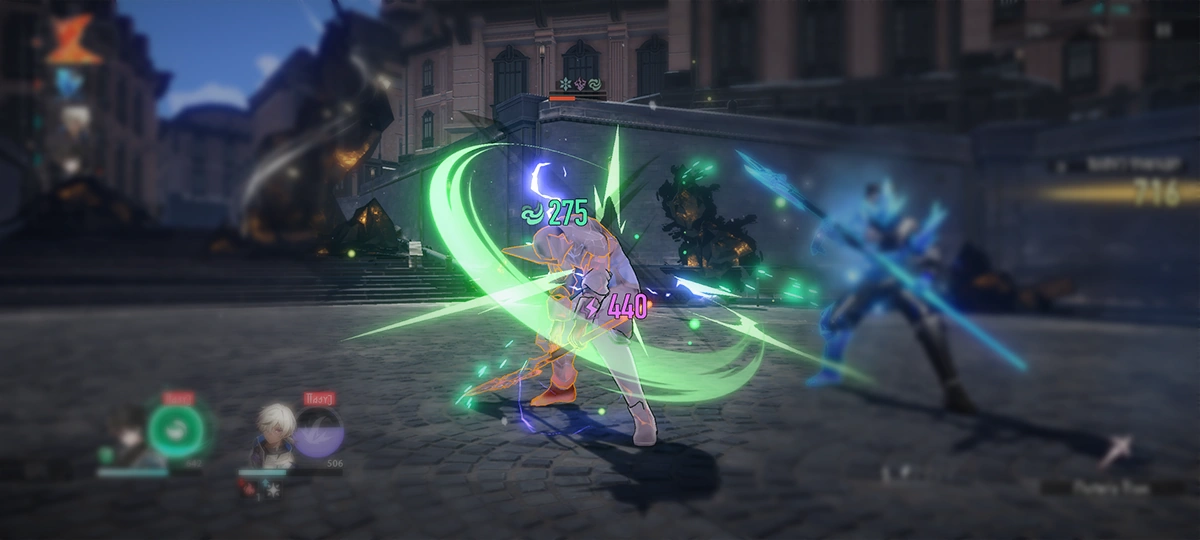 Causing Weakness Break with Fire, Lightning, Wind, or Physical DMG will inflict Burn, Shock, Wind Shear, or Bleed DoT effects respectively. When taking action, the target will take DMG of the corresponding Types. Causing Weakness Break with Fire, Lightning, Wind, or Physical DMG will inflict Burn, Shock, Wind Shear, or Bleed DoT effects respectively. When taking action, the target will take DMG of the corresponding Types.Causing Weakness Break with Fire, Lightning, Wind, or Physical DMG will inflict Burn, Shock, Wind Shear, or Bleed DoT effects respectively. When taking action, the target will take DMG of the corresponding Types. |
| Weakness Break: Control |
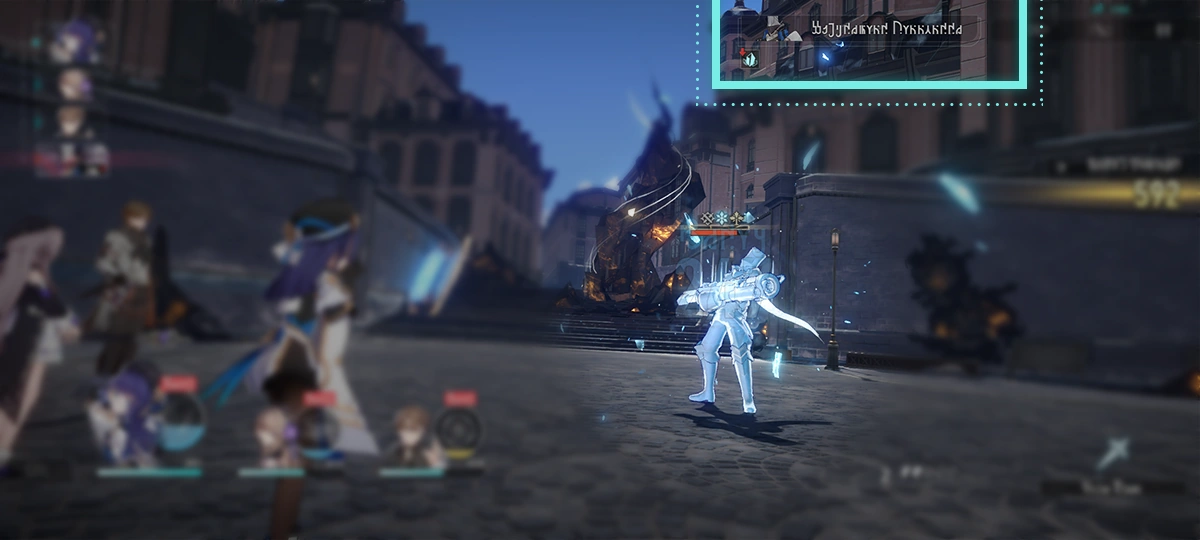 Causing Weakness Break with Ice and Imaginary DMG will inflict Frozen and Imprisonment effects respectively and reduce the enemy's actions. Causing Weakness Break with Ice and Imaginary DMG will inflict Frozen and Imprisonment effects respectively and reduce the enemy's actions.Causing Weakness Break with Ice and Imaginary DMG will inflict Frozen and Imprisonment effects respectively and reduce the enemy's actions. |
| Weakness Assault: Gameplay Details |
Main article: Tides of War  Break the enemy's Weakness or attack Weakness Broken enemies to accumulate Grit Value. Break the enemy's Weakness or attack Weakness Broken enemies to accumulate Grit Value.Break the enemy's Weakness or attack Weakness Broken enemies to accumulate Grit Value.  Weakness Breaking non-boss enemies can remove the boss's Weakness Protection. Weakness Breaking non-boss enemies can remove the boss's Weakness Protection.During "Grit Phase 4: Power Awoken", the enemy Boss will not have Weakness Protection. Attacking enemies in the Weakness Broken state will provide immense buffs. Weakness Breaking non-boss enemies can remove the boss's Weakness Protection. During "Grit Phase 4: Power Awoken", the enemy Boss will not have Weakness Protection. Attacking enemies in the Weakness Broken state will provide immense buffs.  Breaking an enemy's Weakness can inflict Toughness reduction on all enemies. Breaking an enemy's Weakness can inflict Toughness reduction on all enemies.During "Grit Phase 4: Power Awoken", the enemy Boss will not have Weakness Protection. Attacking enemies in the Weakness Broken state will provide immense buffs. Breaking an enemy's Weakness can inflict Toughness reduction on all enemies. During "Grit Phase 4: Power Awoken", the enemy Boss will not have Weakness Protection. Attacking enemies in the Weakness Broken state will provide immense buffs. |
| Voracity Corrosion |
Main article: Voracity Corrosion  The ancient Aeon of Voracity is gradually awakening. THEIR ravenous power steadily encroaching outward. The ancient Aeon of Voracity is gradually awakening. THEIR ravenous power steadily encroaching outward.Infecting a portion of this world's enemies, THEY empower them with the might of Voracity. The ancient Aeon of Voracity is gradually awakening. THEIR ravenous power steadily encroaching outward. Infecting a portion of this world's enemies, THEY empower them with the might of Voracity.  When the monsters contaminated by the Voracity takes fatal damage, they will not be defeated, but will instead immediately restore a certain percentage of their HP. When the monsters contaminated by the Voracity takes fatal damage, they will not be defeated, but will instead immediately restore a certain percentage of their HP.Dealing DMG to them can continuously suppress their Max HP. Once suppressed to a certain percentage, the enemy can be completely defeated. When the monsters contaminated by the Voracity takes fatal damage, they will not be defeated, but will instead immediately restore a certain percentage of their HP. Dealing DMG to them can continuously suppress their Max HP. Once suppressed to a certain percentage, the enemy can be completely defeated. |
| Visit Another Player's Party Car |
Main article: Express Renovation Escapade  You can search in your own Party Car, or catch more creations by visiting Friends' or Strangers' Party Cars. You can search in your own Party Car, or catch more creations by visiting Friends' or Strangers' Party Cars.You can search in your own Party Car, or catch more creations by visiting Friends' or Strangers' Party Cars. |
| Virtual Scentventure |
Main article: Virtual Scentventure 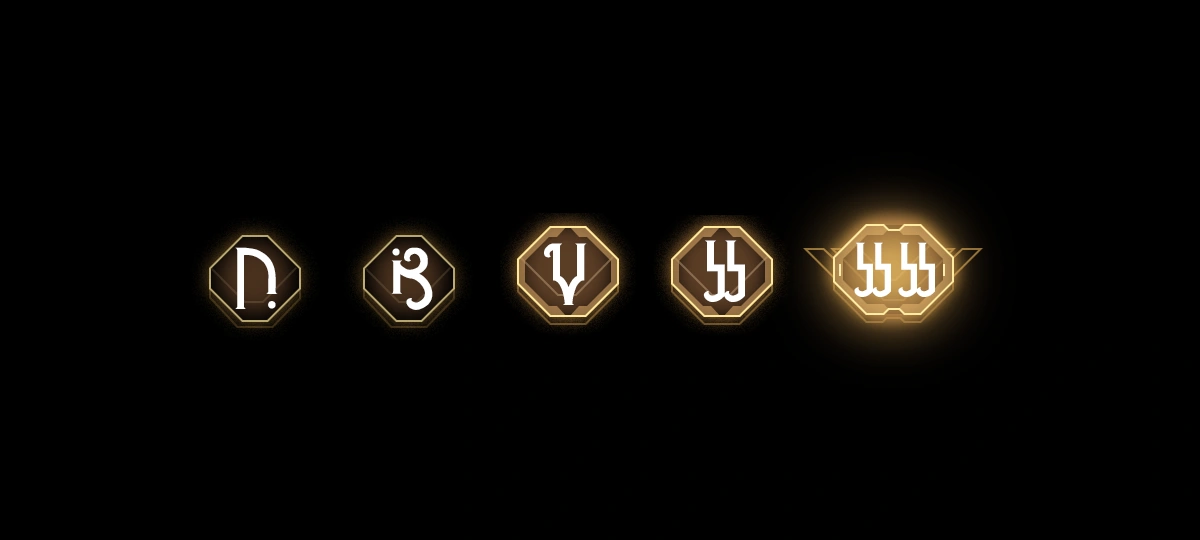 After clearing the Illusion Challenge, you will earn a score for each stage and a rank. Rank SS is the highest rating. After clearing the Illusion Challenge, you will earn a score for each stage and a rank. Rank SS is the highest rating.After clearing the Illusion Challenge, you will earn a score for each stage and a rank. Rank SS is the highest rating. |
| Underground Treasure Hunt: Treasure Hunter Area |
Main article: Underground Treasure Hunt  Explore Treasure Hunter Areas to encounter familiar companions who will join up and become selectable trial characters. Explore Treasure Hunter Areas to encounter familiar companions who will join up and become selectable trial characters.Explore Treasure Hunter Areas to encounter familiar companions who will join up and become selectable trial characters. |
| Underground Treasure Hunt: Teleporter |
Main article: Underground Treasure Hunt  Defeating all enemies will activate the Teleporter. After you (Tap/Press/Click) on the Teleporter, the current exploration will end and results will be calculated. Defeating all enemies will activate the Teleporter. After you (Tap/Press/Click) on the Teleporter, the current exploration will end and results will be calculated.Defeating all enemies will activate the Teleporter. After you (Tap/Press/Click) on the Teleporter, the current exploration will end and results will be calculated. |
| Underground Treasure Hunt: Recruitment Area |
Main article: Underground Treasure Hunt  Explore Recruitment Areas to select characters you already own to join the exploration team. Explore Recruitment Areas to select characters you already own to join the exploration team.Explore Recruitment Areas to select characters you already own to join the exploration team. |
| Underground Treasure Hunt: Provision Supply |
Main article: Underground Treasure Hunt  Provision Supplies will replenish the Stamina needed for exploration. Once Stamina is exhausted, it will instead consume HP. Provision Supplies will replenish the Stamina needed for exploration. Once Stamina is exhausted, it will instead consume HP.Provision Supplies will replenish the Stamina needed for exploration. Once Stamina is exhausted, it will instead consume HP. |
| Underground Treasure Hunt: Healing Supply |
Main article: Underground Treasure Hunt 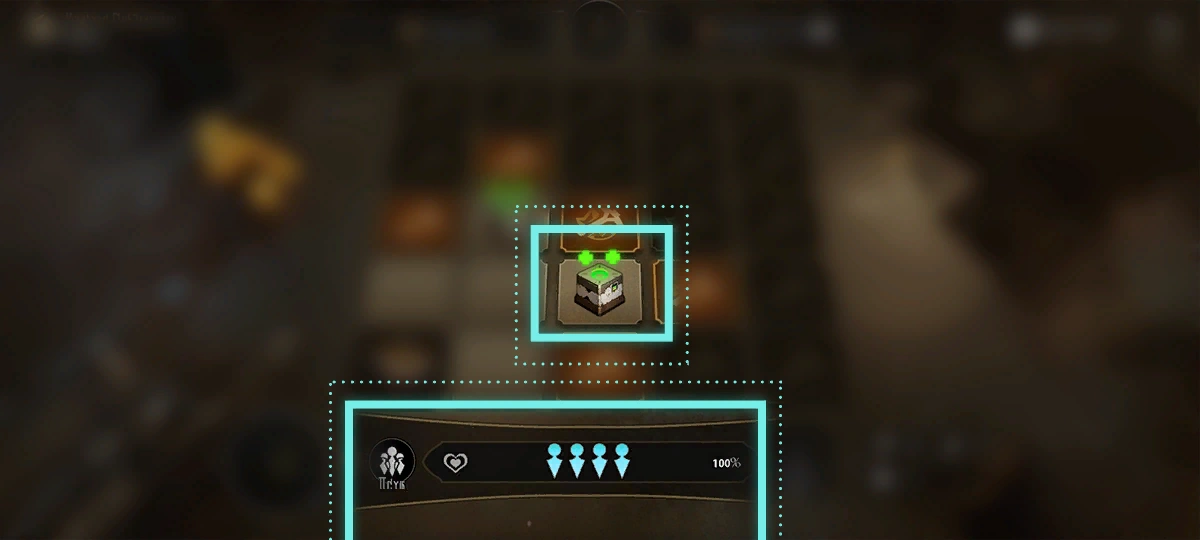 Healing Supplies will restore the HP of all characters in the team. Healing Supplies will restore the HP of all characters in the team.Healing Supplies will restore the HP of all characters in the team. |
| Underground Treasure Hunt: Enemy - Treasure Ability |
Main article: Underground Treasure Hunt 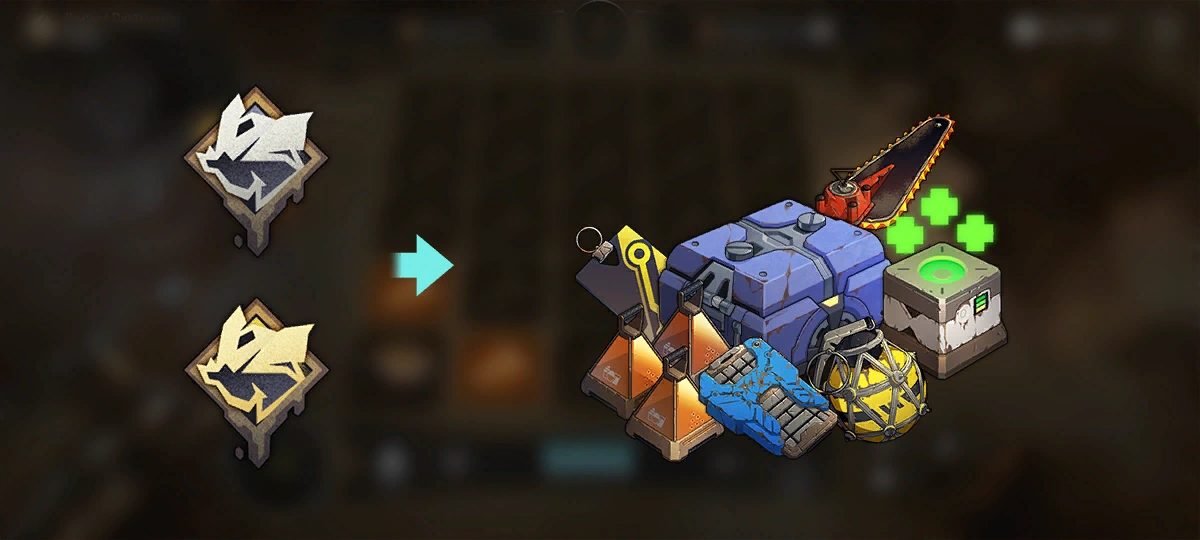 A Trotter with treasure might appear among enemies with Treasure Abilities. The enemies will start a countdown based on your actions. Defeat the Trotter before the countdown ends to obtain items in the ruins. This enemy will immediately appear, but will not lock down the surrounding area. A Trotter with treasure might appear among enemies with Treasure Abilities. The enemies will start a countdown based on your actions. Defeat the Trotter before the countdown ends to obtain items in the ruins. This enemy will immediately appear, but will not lock down the surrounding area.A Trotter with treasure might appear among enemies with Treasure Abilities. The enemies will start a countdown based on your actions. Defeat the Trotter before the countdown ends to obtain items in the ruins. This enemy will immediately appear, but will not lock down the surrounding area. |
| Underground Treasure Hunt: Enemy - Surprise Attack Ability |
Main article: Underground Treasure Hunt 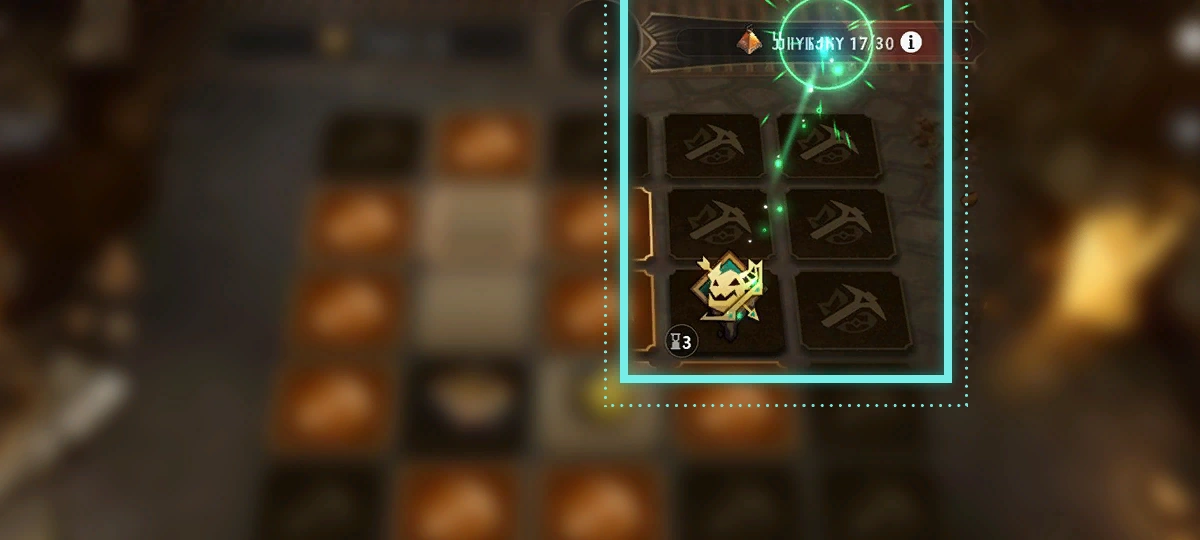 Enemies with Surprise Attacks Abilities will initiate a countdown based on your actions. When the countdown ends, they will launch an attack that reduces Stamina. Enemies with Surprise Attacks Abilities will initiate a countdown based on your actions. When the countdown ends, they will launch an attack that reduces Stamina.These enemies will immediately appear, but will not lock down the surrounding area. Enemies with Surprise Attacks Abilities will initiate a countdown based on your actions. When the countdown ends, they will launch an attack that reduces Stamina. These enemies will immediately appear, but will not lock down the surrounding area.  Exploring, battling, picking up items, or using items each counts as 1 action, with each action further reducing the countdown timer. Exploring, battling, picking up items, or using items each counts as 1 action, with each action further reducing the countdown timer.Exploring, battling, picking up items, or using items each counts as 1 action, with each action further reducing the countdown timer. |
| Underground Treasure Hunt: Enemy - Support Ability |
Main article: Underground Treasure Hunt  Enemies with Support Abilities will strengthen enemies in the surrounding areas and increase their ATK. Enemies with Support Abilities will strengthen enemies in the surrounding areas and increase their ATK.This enemy will immediately appear, but will not lock down the surrounding area. Enemies with Support Abilities will strengthen enemies in the surrounding areas and increase their ATK. This enemy will immediately appear, but will not lock down the surrounding area. |
| Underground Treasure Hunt: Enemy - Summoning Ability |
Main article: Underground Treasure Hunt 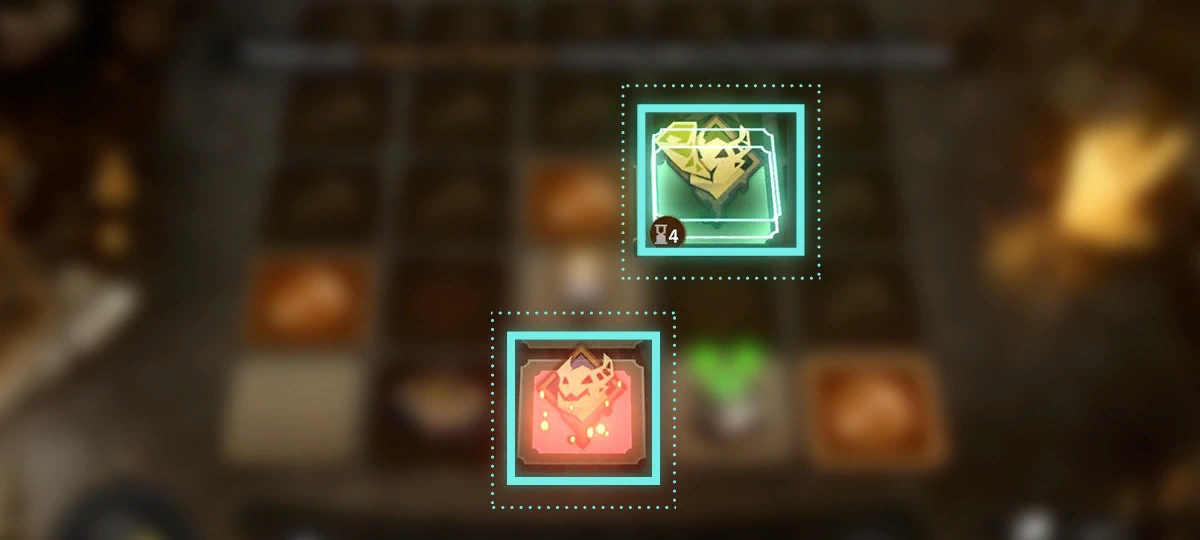 Enemies with Summoning Abilities will start a countdown based on your actions. When the countdown ends, a non-Elite Enemy will be summoned in an empty area. Enemies with Summoning Abilities will start a countdown based on your actions. When the countdown ends, a non-Elite Enemy will be summoned in an empty area.This enemy will immediately appear, but will not lock down the surrounding area. Enemies with Summoning Abilities will start a countdown based on your actions. When the countdown ends, a non-Elite Enemy will be summoned in an empty area. This enemy will immediately appear, but will not lock down the surrounding area. |
| Underground Treasure Hunt: Enemy - Lockdown Ability |
Main article: Underground Treasure Hunt  Enemies with Lockdown Abilities can lock down nearby areas, and can be defeated through combat. Enemies with Lockdown Abilities can lock down nearby areas, and can be defeated through combat.Enemies with Lockdown Abilities can lock down nearby areas, and can be defeated through combat. |
| Underground Treasure Hunt: Enemy - Growth Ability |
Main article: Underground Treasure Hunt 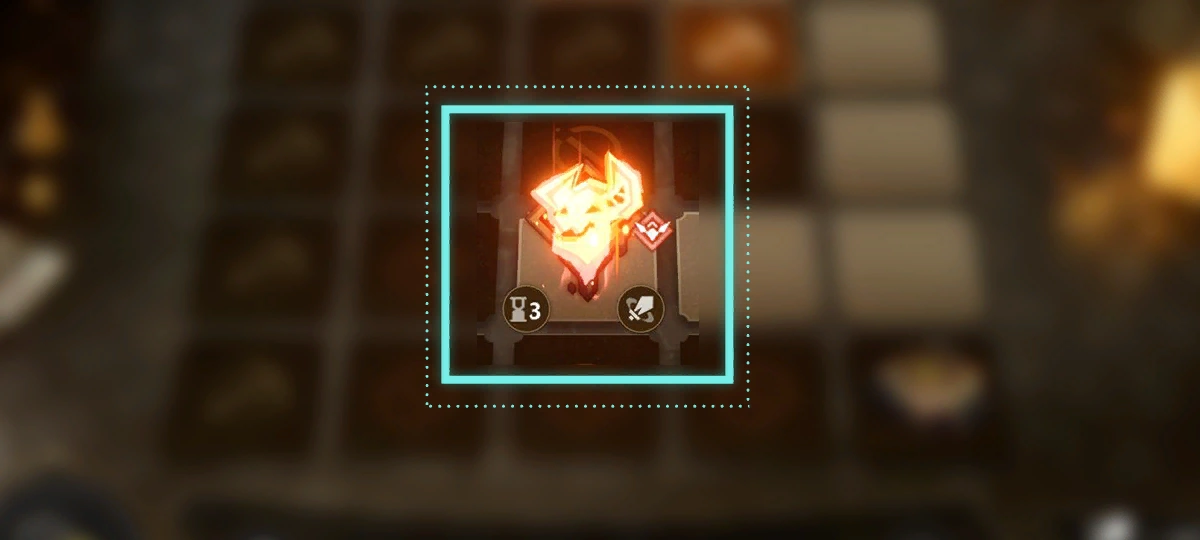 Enemies with Growth Abilities will start a countdown based on your actions. When the timer reaches zero, they will be strengthened, increasing their ATK. Enemies with Growth Abilities will start a countdown based on your actions. When the timer reaches zero, they will be strengthened, increasing their ATK.Enemies with Growth Abilities will start a countdown based on your actions. When the timer reaches zero, they will be strengthened, increasing their ATK.  Enemies with Growth abilities can put the surrounding areas on lock down. Enemies with Growth abilities can put the surrounding areas on lock down.Enemies with Growth abilities can put the surrounding areas on lock down. |
| Underground Treasure Hunt: Enemy - Golden Treasure Ability |
Main article: Underground Treasure Hunt 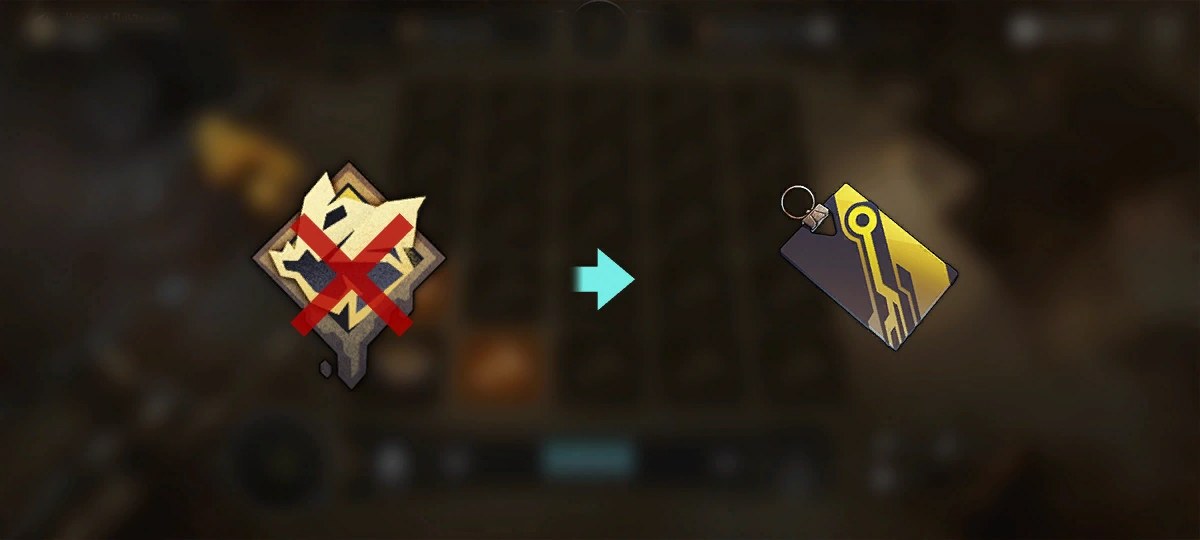 Locate the enemy with the golden Treasure ability and defeat the Trotter before the countdown finishes to obtain Door Card. Locate the enemy with the golden Treasure ability and defeat the Trotter before the countdown finishes to obtain Door Card.Locate the enemy with the golden Treasure ability and defeat the Trotter before the countdown finishes to obtain Door Card. |
| Underground Treasure Hunt: Enemy - Garrison Ability |
Main article: Underground Treasure Hunt  Enemies with Garrison Abilities will strengthen themselves according to the number of unexplored areas surrounding them, increasing their own ATK. Enemies with Garrison Abilities will strengthen themselves according to the number of unexplored areas surrounding them, increasing their own ATK. These enemies will immediately appear, but will not lock down the surrounding area. Enemies with Garrison Abilities will strengthen themselves according to the number of unexplored areas surrounding them, increasing their own ATK. These enemies will immediately appear, but will not lock down the surrounding area.  Defeat enemies with Garrison abilities to obtain Door Card. Defeat enemies with Garrison abilities to obtain Door Card.Defeat enemies with Garrison abilities to obtain Door Card. |
| Underground Treasure Hunt: Ancient Relic |
Main article: Underground Treasure Hunt  Ancient Relics can provide buffs for single battles. Additionally, completing relic challenges grants additional rewards. Ancient Relics can provide buffs for single battles. Additionally, completing relic challenges grants additional rewards.Ancient Relics can provide buffs for single battles. Additionally, completing relic challenges grants additional rewards. |
| Underground Treasure Hunt: Ancient Equipment |
Main article: Underground Treasure Hunt 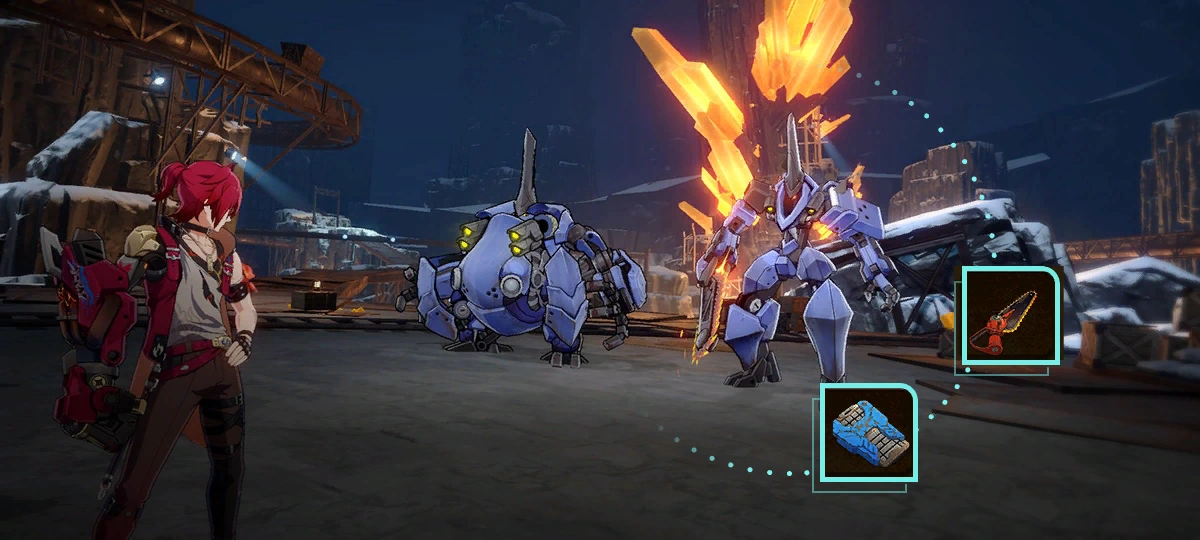 Collect Ancient Weapons and Armor to increase the characters' stats to have an easier time battling all kinds of enemies in the ruins. Collect Ancient Weapons and Armor to increase the characters' stats to have an easier time battling all kinds of enemies in the ruins.Collect Ancient Weapons and Armor to increase the characters' stats to have an easier time battling all kinds of enemies in the ruins. 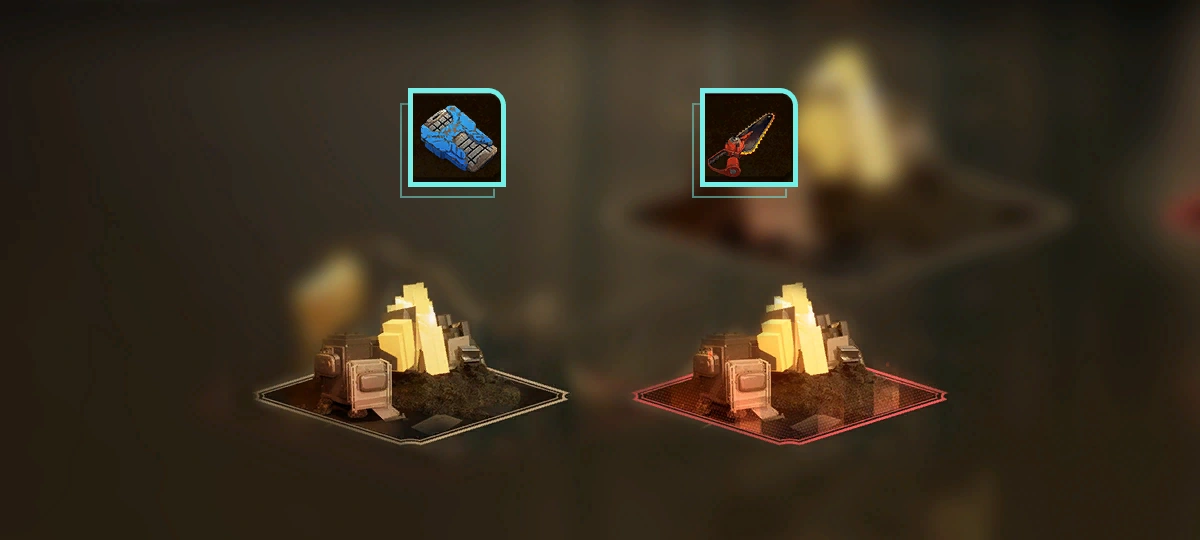 Increased stats can take effect in both Surface Exploration and Deep Exploration of the ruins. Increased stats can take effect in both Surface Exploration and Deep Exploration of the ruins.Increased stats can take effect in both Surface Exploration and Deep Exploration of the ruins. |
| Underground Treasure Hunt: Ancient Bomb |
Main article: Underground Treasure Hunt  Ancient Bombs can be used to immediately defeat 1 Normal Enemy. Ancient Bombs can be used to immediately defeat 1 Normal Enemy.Ancient Bombs can be used to immediately defeat 1 Normal Enemy. |
| Underground Treasure Hunt |
Main article: Underground Treasure Hunt 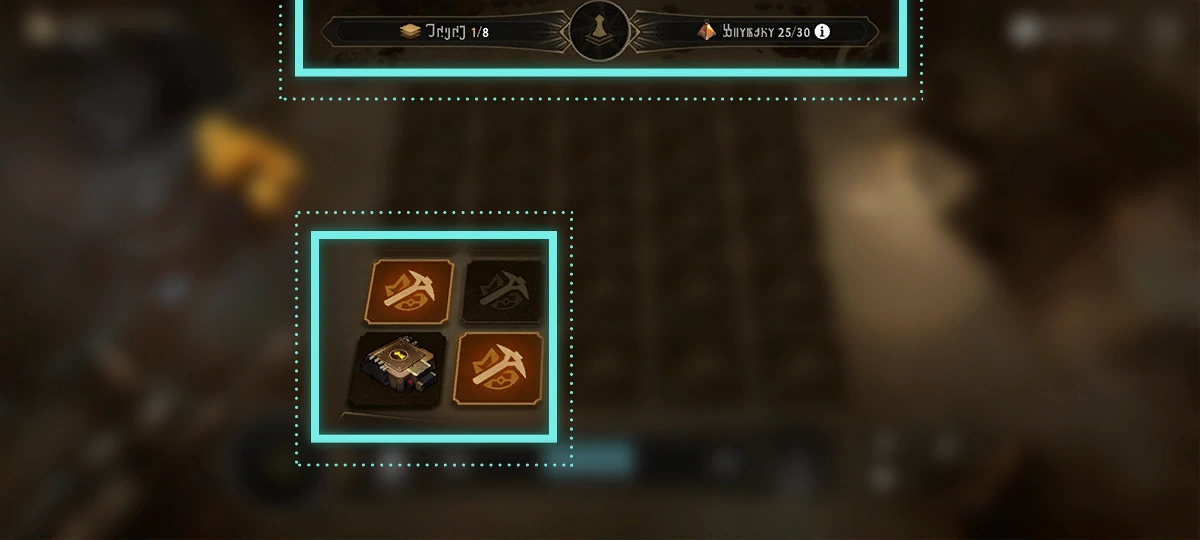 By consuming Stamina, you can explore the illuminated areas. By consuming Stamina, you can explore the illuminated areas.By consuming Stamina, you can explore the illuminated areas. 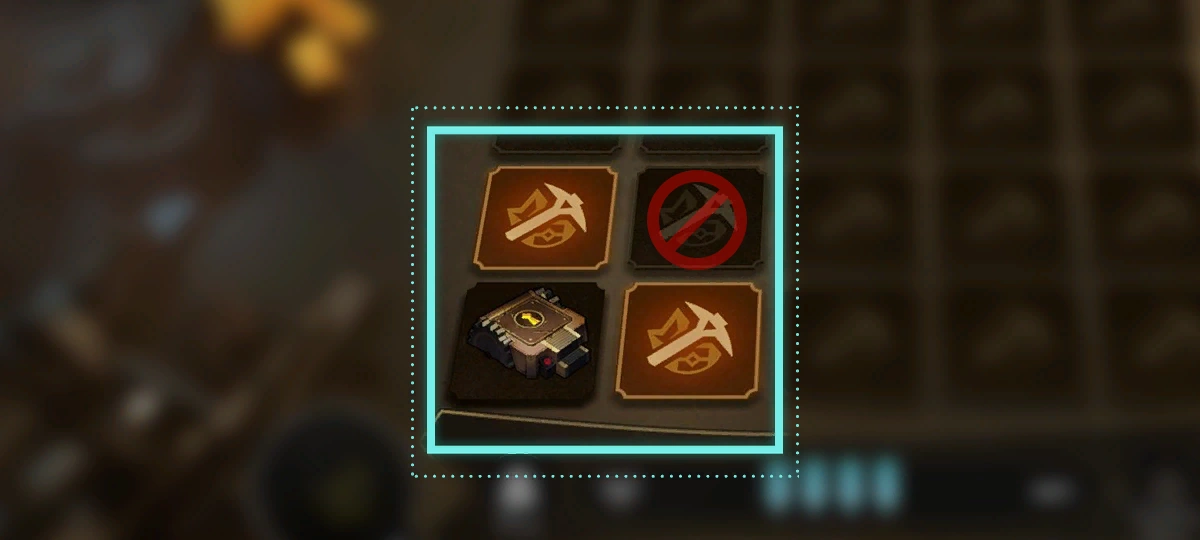 Dimmed areas cannot be explored or interacted with. Explore areas adjacent to dimmed areas to illuminate them. Dimmed areas cannot be explored or interacted with. Explore areas adjacent to dimmed areas to illuminate them.Dimmed areas cannot be explored or interacted with. Explore areas adjacent to dimmed areas to illuminate them. 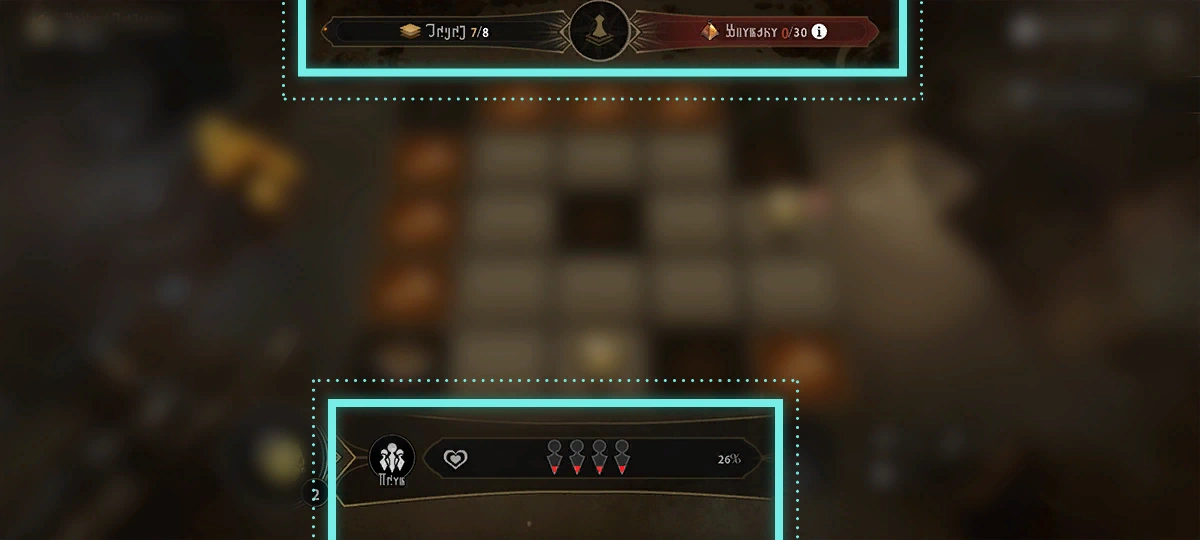 When Stamina is exhausted, every subsequent use of it will deduct a percentage of HP from all characters in the team. When Stamina is exhausted, every subsequent use of it will deduct a percentage of HP from all characters in the team.When Stamina is exhausted, every subsequent use of it will deduct a percentage of HP from all characters in the team. 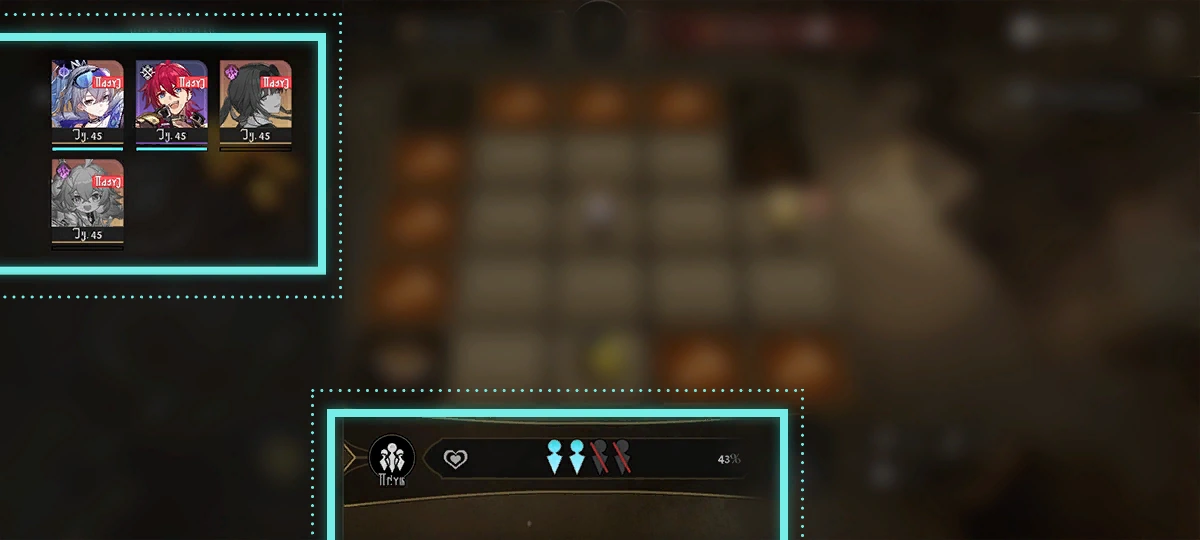 When a character in the team is downed, their health bar will turn gray. (Tap/Press/Click) Team to view the current status of all characters. When a character in the team is downed, their health bar will turn gray. (Tap/Press/Click) Team to view the current status of all characters.When a character in the team is downed, their health bar will turn gray. (Tap/Press/Click) Team to view the current status of all characters. Collect Ancient Weapons and Armor to increase the characters' stats to have an easier time battling all kinds of enemies in the ruins.Collect Ancient Weapons and Armor to increase the characters' stats to have an easier time battling all kinds of enemies in the ruins. Increased stats can take effect in both Surface Exploration and Deep Exploration of the ruins.Increased stats can take effect in both Surface Exploration and Deep Exploration of the ruins. 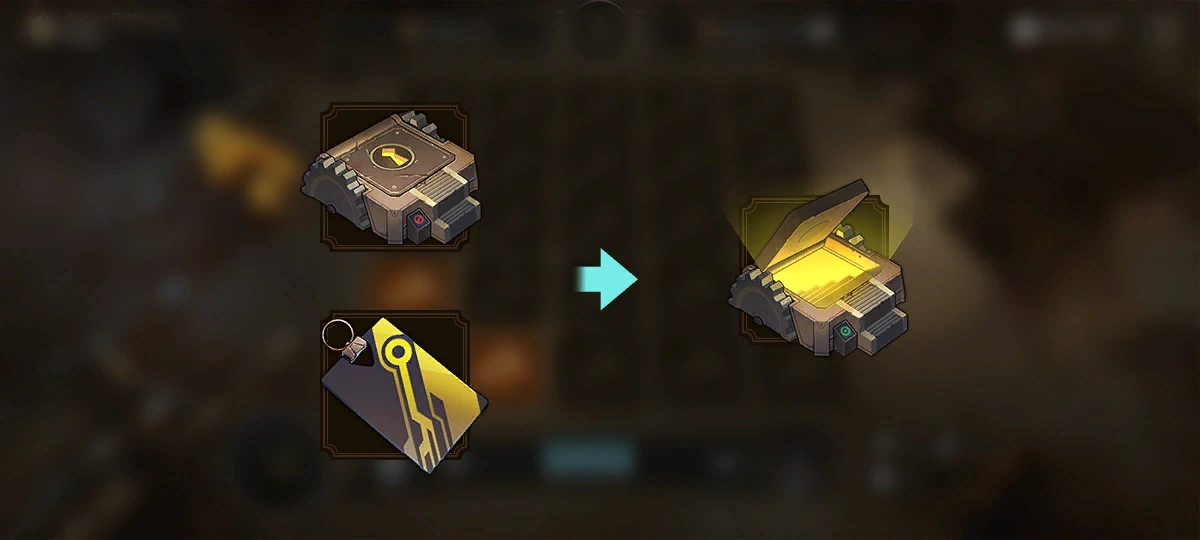 Upon finding and picking up the Door Card, the entrance to the next floor will be opened. Upon finding and picking up the Door Card, the entrance to the next floor will be opened.Upon finding and picking up the Door Card, the entrance to the next floor will be opened. |
| Trotter Effect: Gameplay Details |
Main article: Tides of War  Defeat the Trotters in this stage to obtain a large amount of Grit Value. Defeat the Trotters in this stage to obtain a large amount of Grit Value.You need to defeat the Trotter before it escapes. Defeat the Trotters in this stage to obtain a large amount of Grit Value. You need to defeat the Trotter before it escapes.  Every Trotter defeated will inflict all enemies with the Vulnerability debuff. Every Trotter defeated will inflict all enemies with the Vulnerability debuff.Make good use of the debuffs applied by defeating Trotters to quickly take down the boss during "Grit Phase 4: Power Awoken". Every Trotter defeated will inflict all enemies with the Vulnerability debuff. Make good use of the debuffs applied by defeating Trotters to quickly take down the boss during "Grit Phase 4: Power Awoken". Every Trotter defeated will inflict all enemies with random DoTs.Make good use of the DoTs applied by defeating Trotters to quickly take down the boss during "Grit Phase 4: Power Awoken". Every Trotter defeated will inflict all enemies with random DoTs. Make good use of the DoTs applied by defeating Trotters to quickly take down the boss during "Grit Phase 4: Power Awoken". |
| Transformed Curios and Exclusive Blessings |
Main article: Planar Infinity  In the Planar Infinity event, Curios or Blessings marked with the infinite icon bear special effects and are plane-exclusive Transformed Curios and Exclusive Blessings. In the Planar Infinity event, Curios or Blessings marked with the infinite icon bear special effects and are plane-exclusive Transformed Curios and Exclusive Blessings.In the Planar Infinity event, Curios or Blessings marked with the infinite icon bear special effects and are plane-exclusive Transformed Curios and Exclusive Blessings. 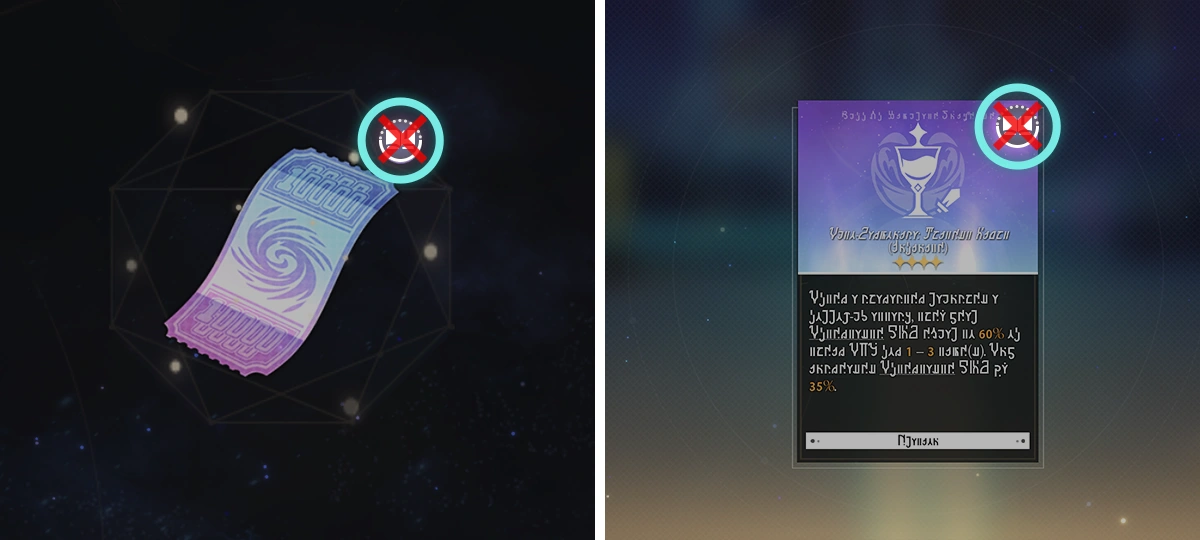 In the Planar Infinity event, all Curios, Blessings, and Occurrences encountered will not unlock Simulated Universe Index entries. In the Planar Infinity event, all Curios, Blessings, and Occurrences encountered will not unlock Simulated Universe Index entries.In the Planar Infinity event, all Curios, Blessings, and Occurrences encountered will not unlock Simulated Universe Index entries. |
| Trailblaze Guide |
Main article: Silent Galaxy  Challenging Echo of War or experiencing the Simulated Universe or the Forgotten Hall are all great ways to increase Trailblaze Level. Challenging Echo of War or experiencing the Simulated Universe or the Forgotten Hall are all great ways to increase Trailblaze Level.Challenging Echo of War or experiencing the Simulated Universe or the Forgotten Hall are all great ways to increase Trailblaze Level. |
| Trailblaze Guide |
Main article: Not Good with Farewells  Clearing Calyxes or experiencing the Simulated Universe or the Forgotten Hall are all great ways to increase Trailblaze Level. Clearing Calyxes or experiencing the Simulated Universe or the Forgotten Hall are all great ways to increase Trailblaze Level.Clearing Calyxes or experiencing the Simulated Universe or the Forgotten Hall are all great ways to increase Trailblaze Level. |
| Trailblaze Guide |
Main article: Long Wait for the Blade's Edge 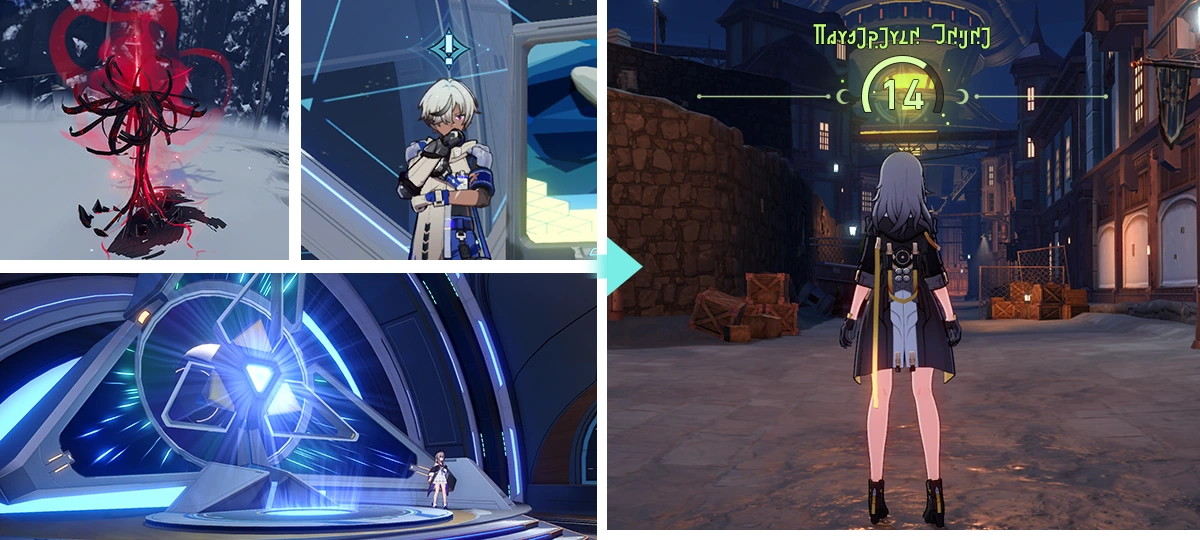 Completing missions, clearing Calyxes, and trying out Simulated Universe are all great ways to increase your Trailblaze Level. Completing missions, clearing Calyxes, and trying out Simulated Universe are all great ways to increase your Trailblaze Level.Completing missions, clearing Calyxes, and trying out Simulated Universe are all great ways to increase your Trailblaze Level. |
| Tides of War: Gameplay Details |
Main article: Tides of War 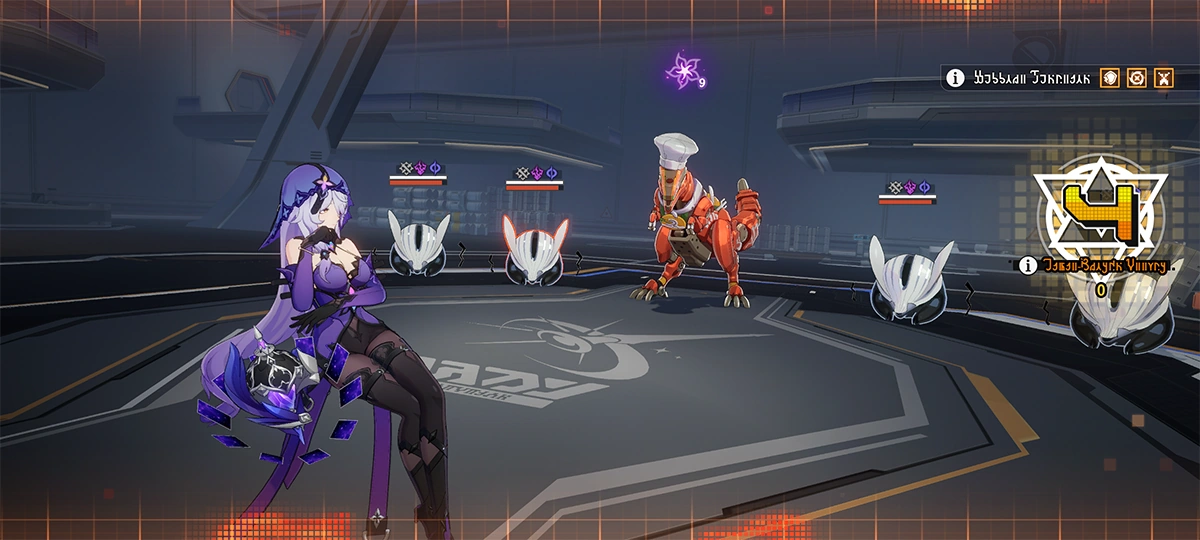 Accumulating Grit Value during battle can elevate your Grit Phase. Accumulating Grit Value during battle can elevate your Grit Phase.When entering "Grit Phase 4: Power Awoken", you can obtain powerful stage buffs and significantly improve your combat effectiveness. Accumulating Grit Value during battle can elevate your Grit Phase. When entering "Grit Phase 4: Power Awoken", you can obtain powerful stage buffs and significantly improve your combat effectiveness.  There are a total of 4 Grit Phases. With each higher phase you reach, you can additionally unlock 1 Support Function and obtain powerful stage buffs. There are a total of 4 Grit Phases. With each higher phase you reach, you can additionally unlock 1 Support Function and obtain powerful stage buffs.Before entering combat, you can choose to add different Support Functions for each stage. There are a total of 4 Grit Phases. With each higher phase you reach, you can additionally unlock 1 Support Function and obtain powerful stage buffs. Before entering combat, you can choose to add different Support Functions for each stage.  Every time a character takes action in combat, Grit Value will be accumulated. Every time a character takes action in combat, Grit Value will be accumulated.Every stage will have unique Grit Mechanics, and triggering them will greatly increase Grit Value, thus allowing you to quickly elevate your Grit Phase. Every time a character takes action in combat, Grit Value will be accumulated. Every stage will have unique Grit Mechanics, and triggering them will greatly increase Grit Value, thus allowing you to quickly elevate your Grit Phase. |
| Tales of the Fantastic |
Main article: Tales of the Fantastic  During the event, complete Hero's Journeys with Mr. Xiyan to unleash the full potential of the Protagonist Model. During the event, complete Hero's Journeys with Mr. Xiyan to unleash the full potential of the Protagonist Model.During the event, complete Hero's Journeys with Mr. Xiyan to unleash the full potential of the Protagonist Model.  There are different slots in the Protagonist Model. The Plot Armor that can be selected for each slot is different. There are different slots in the Protagonist Model. The Plot Armor that can be selected for each slot is different.There are different slots in the Protagonist Model. The Plot Armor that can be selected for each slot is different.  Slots and Plot Armors will gradually be unlocked as you progress through a Hero's Journey. Slots and Plot Armors will gradually be unlocked as you progress through a Hero's Journey.Slots and Plot Armors will gradually be unlocked as you progress through a Hero's Journey.  Using these abilities can earn you points and rewards in Legends Past and Present, and will also gradually unlock Legend of the Trailblazer sections. Using these abilities can earn you points and rewards in Legends Past and Present, and will also gradually unlock Legend of the Trailblazer sections.Using these abilities can earn you points and rewards in Legends Past and Present, and will also gradually unlock Legend of the Trailblazer sections. |
| Sword Trial |
Main article: Saga of Primaveral Blade 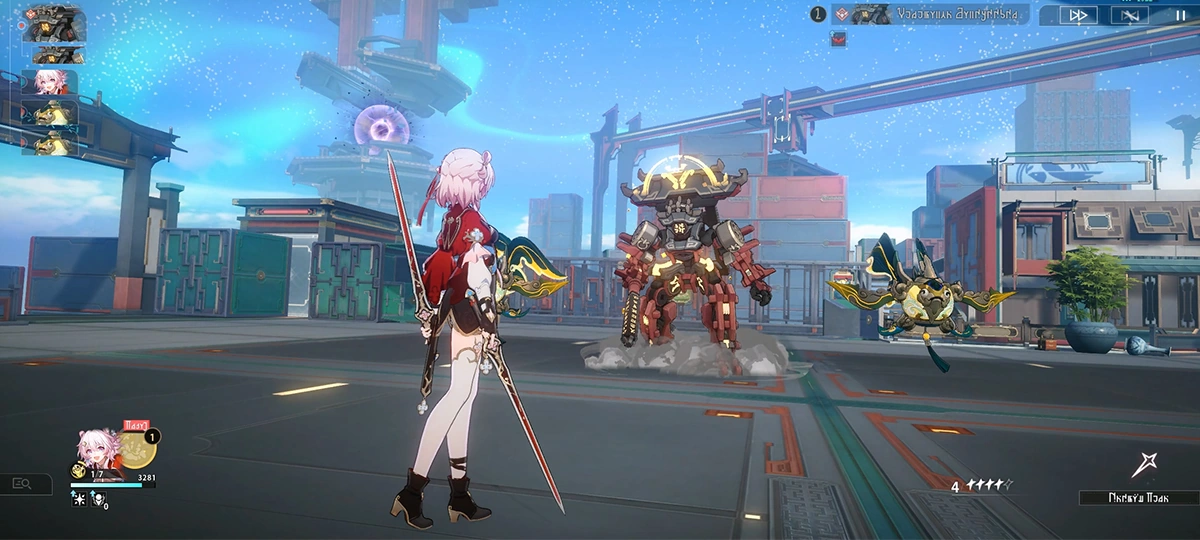 The Sword Trial must be completed by March 7th alone. The entire battle will proceed automatically, and no assistance from teammates is allowed. The Sword Trial must be completed by March 7th alone. The entire battle will proceed automatically, and no assistance from teammates is allowed.The Sword Trial must be completed by March 7th alone. The entire battle will proceed automatically, and no assistance from teammates is allowed. 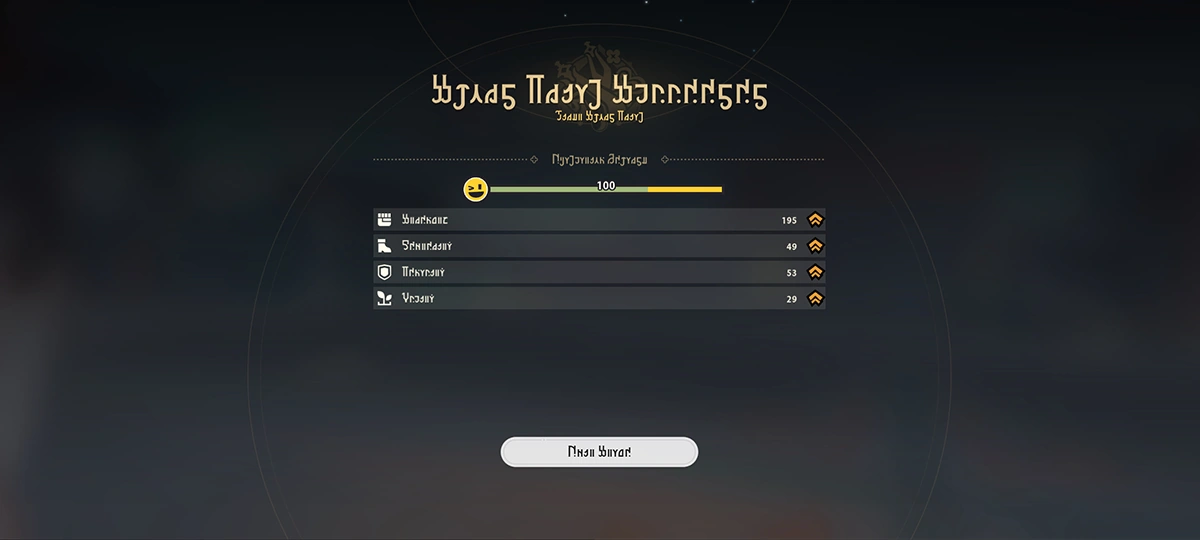 The higher March 7th's Swordart Ascension ranks, the easier it will be to pass the trial. Successfully completing the trial will enhance her stats and restore her Mood. The higher March 7th's Swordart Ascension ranks, the easier it will be to pass the trial. Successfully completing the trial will enhance her stats and restore her Mood.The higher March 7th's Swordart Ascension ranks, the easier it will be to pass the trial. Successfully completing the trial will enhance her stats and restore her Mood. |
| Supreme Leader: Gameplay Details |
Main article: Tides of War  When the ally positioned first in the Team Setup uses their Ultimate, accumulates Grit Value. When the ally positioned first in the Team Setup uses their Ultimate, accumulates Grit Value.When the ally positioned first in the Team Setup uses their Ultimate, accumulates Grit Value. 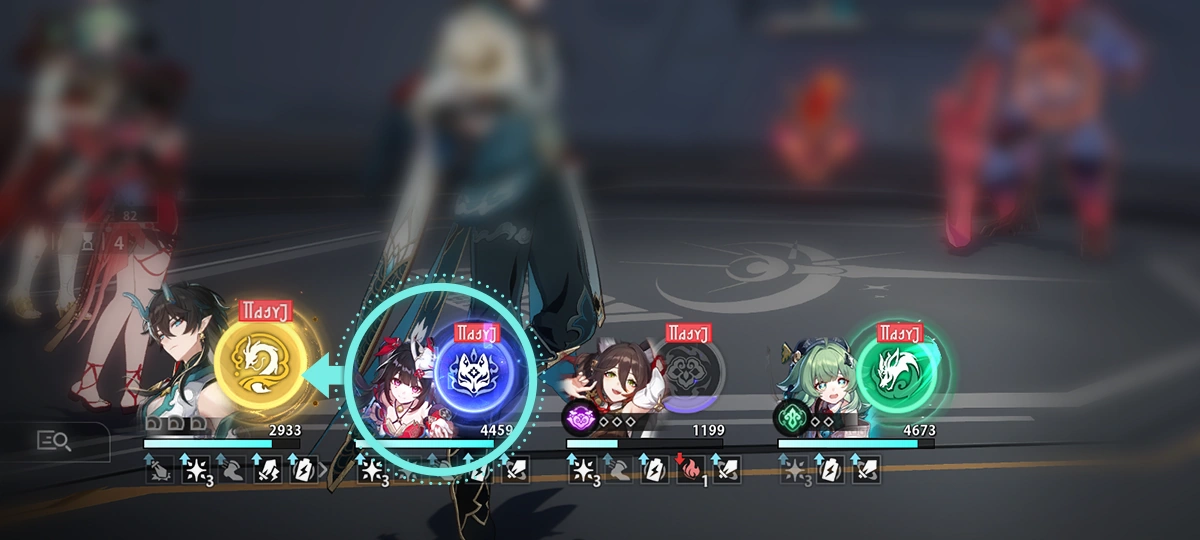 After the ally positioned second in the Team Setup uses their Ultimate, regenerates Energy for the ally positioned first, and increases their next attack's DMG. After the ally positioned second in the Team Setup uses their Ultimate, regenerates Energy for the ally positioned first, and increases their next attack's DMG.After the ally positioned second in the Team Setup uses their Ultimate, regenerates Energy for the ally positioned first, and increases their next attack's DMG.  The ally positioned first in the Team Setup gains Energy when other allies use their Ultimates, and there is a chance that the ally positioned first will have their next attack's DMG increased. The ally positioned first in the Team Setup gains Energy when other allies use their Ultimates, and there is a chance that the ally positioned first will have their next attack's DMG increased.The ally positioned first in the Team Setup gains Energy when other allies use their Ultimates, and there is a chance that the ally positioned first will have their next attack's DMG increased. |
| Stellar Shadowseeker |
Main article: Stellar Shadowseeker  March 7th's photographs have been ruined. The contents have been obscured by shadows. Search for objects covered by shadows in the photos and re-take the photo subject to help March 7th restore her photos. March 7th's photographs have been ruined. The contents have been obscured by shadows. Search for objects covered by shadows in the photos and re-take the photo subject to help March 7th restore her photos.March 7th's photographs have been ruined. The contents have been obscured by shadows. Search for objects covered by shadows in the photos and re-take the photo subject to help March 7th restore her photos. |
| Stellar Flare |
Main article: Stellar Flare 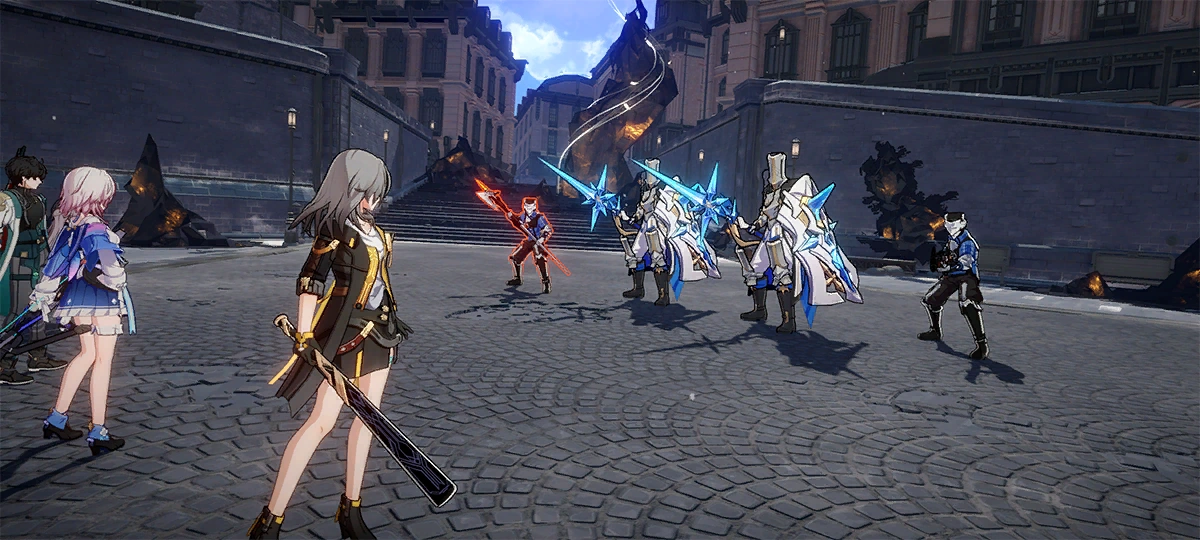 Defeat enemies within specified number of Cycles to complete the Stellar Flare challenge. Before the start of each battle, your HP, Skill Points, and Energy will be restored to a specified amount. Defeat enemies within specified number of Cycles to complete the Stellar Flare challenge. Before the start of each battle, your HP, Skill Points, and Energy will be restored to a specified amount.Defeat enemies within specified number of Cycles to complete the Stellar Flare challenge. Before the start of each battle, your HP, Skill Points, and Energy will be restored to a specified amount. 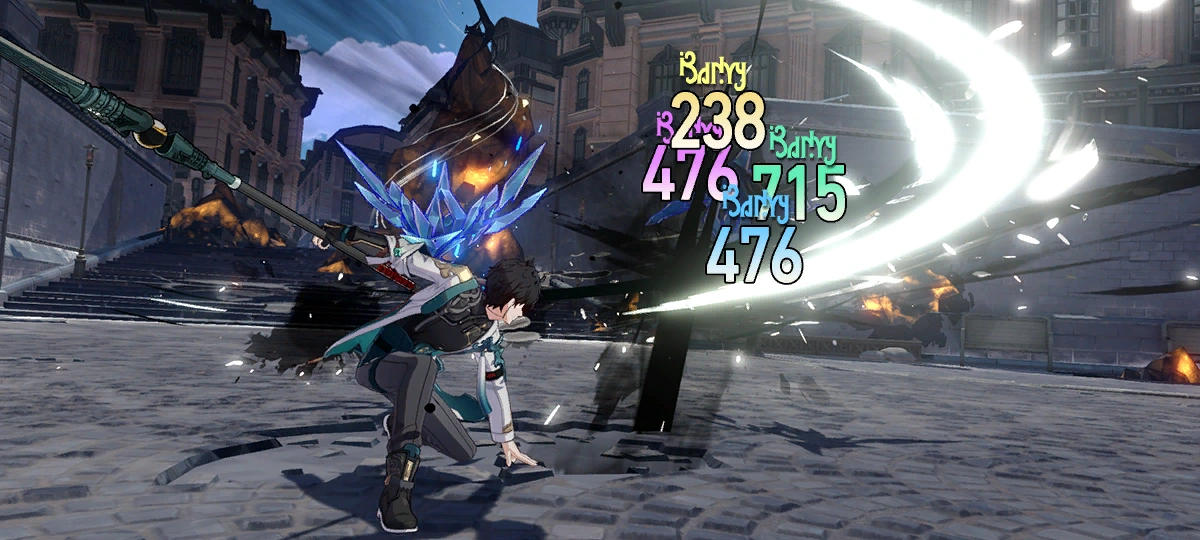 Every stage will provide unique and significant buffs to allies, as well as changes to enemies' Toughness and Weakness. Utilize these buffs and enemy traits to greatly increase combat ability and efficiency in the stage. Every stage will provide unique and significant buffs to allies, as well as changes to enemies' Toughness and Weakness. Utilize these buffs and enemy traits to greatly increase combat ability and efficiency in the stage.Every stage will provide unique and significant buffs to allies, as well as changes to enemies' Toughness and Weakness. Utilize these buffs and enemy traits to greatly increase combat ability and efficiency in the stage. 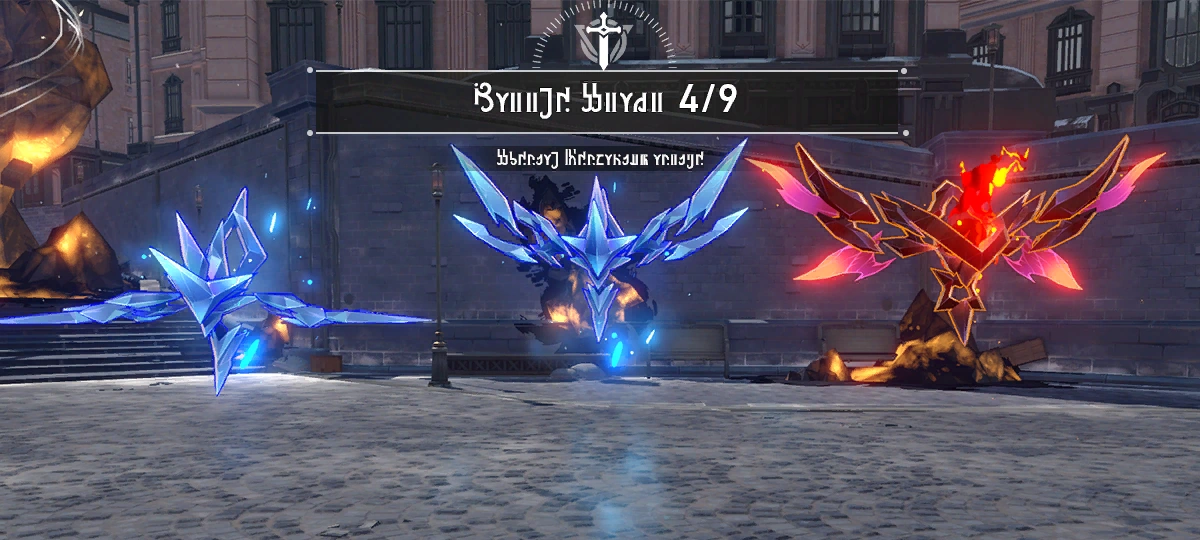 After completing challenges in the Giant Star difficulty, the Supergiant Star difficulty will be unlocked. In the Supergiant Star difficulty, you will face 9 waves of enemies, and the enemies will become stronger every 3 waves. You can claim rewards separately after eliminating the third and sixth waves of enemies. After completing challenges in the Giant Star difficulty, the Supergiant Star difficulty will be unlocked. In the Supergiant Star difficulty, you will face 9 waves of enemies, and the enemies will become stronger every 3 waves. You can claim rewards separately after eliminating the third and sixth waves of enemies.After completing challenges in the Giant Star difficulty, the Supergiant Star difficulty will be unlocked. In the Supergiant Star difficulty, you will face 9 waves of enemies, and the enemies will become stronger every 3 waves. You can claim rewards separately after eliminating the third and sixth waves of enemies. |
| Skills and Skill Points |
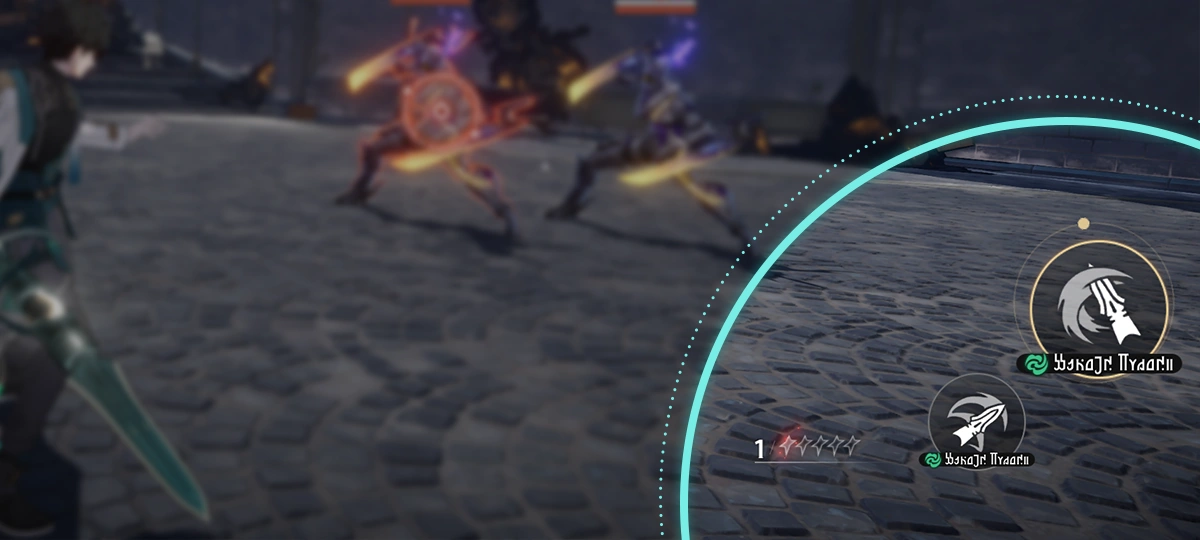 Skill Points are shared among the team. Using a Skill will consume Skill Points, while using Basic ATK can recover Skill Points. Skill Points are shared among the team. Using a Skill will consume Skill Points, while using Basic ATK can recover Skill Points.Skill Points are shared among the team. Using a Skill will consume Skill Points, while using Basic ATK can recover Skill Points. |
| Silver Wolf LV.999: Technique |
Main article: Silver Wolf LV.999 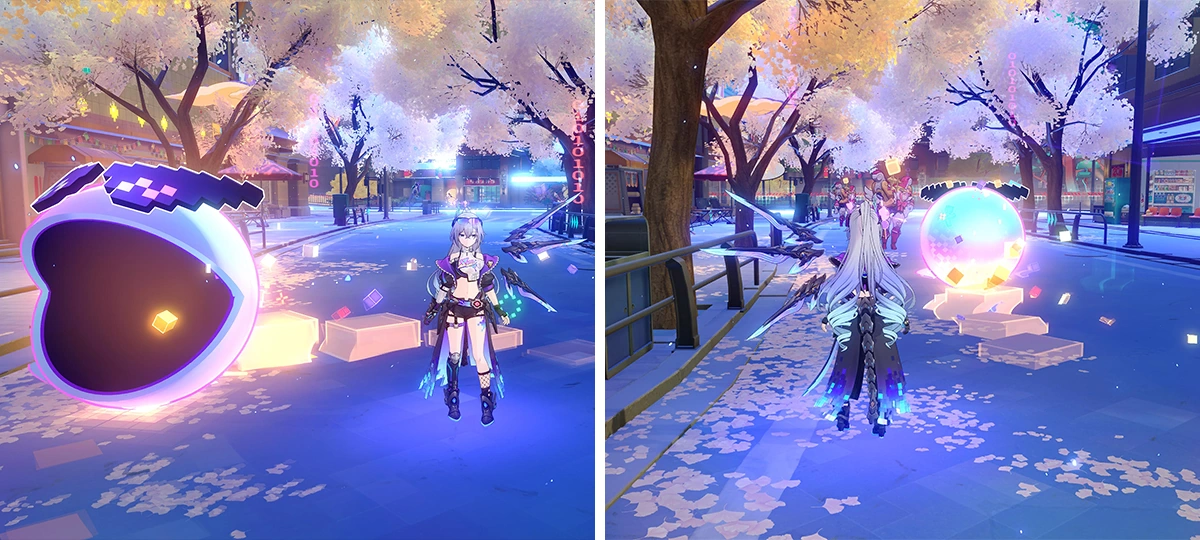 "Funky Munch Bean" will automatically search for and attack Normal Enemies. Consume 1 Technique Point to immediately defeat them without entering combat. "Funky Munch Bean" will automatically search for and attack Normal Enemies. Consume 1 Technique Point to immediately defeat them without entering combat."Funky Munch Bean" will automatically search for and attack Normal Enemies. Consume 1 Technique Point to immediately defeat them without entering combat. |
| Silver Wolf LV.999: Hidden MMR |
Main article: Silver Wolf LV.999 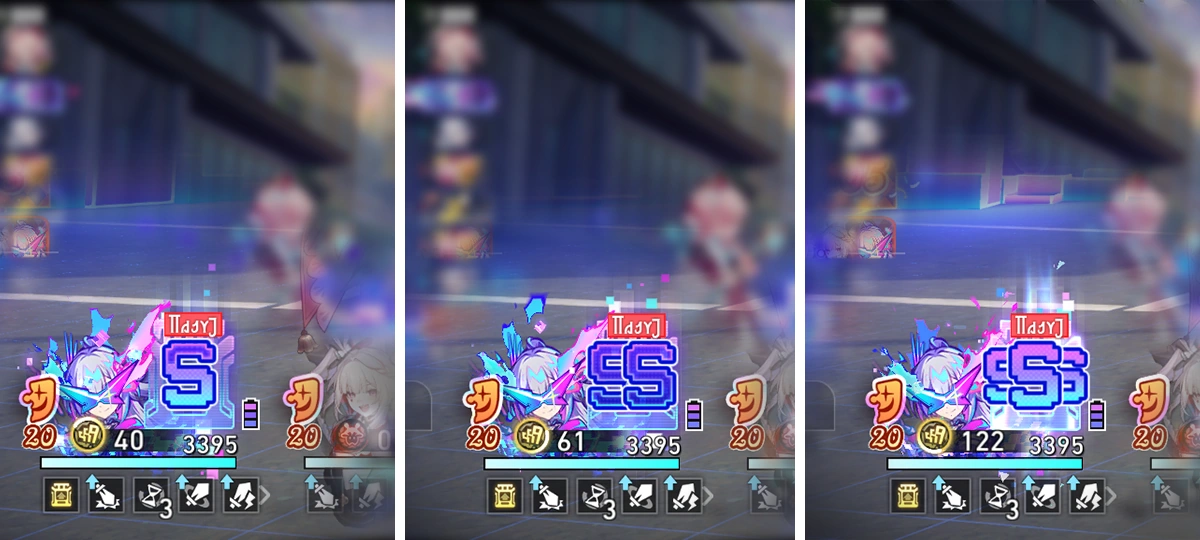 When allies gain Punchline, "Hidden MMR" is accumulated for Silver Wolf LV.999, allowing her Enhanced Basic ATK "Bonus Stage: αWolf Instant" to deal higher DMG. When allies gain Punchline, "Hidden MMR" is accumulated for Silver Wolf LV.999, allowing her Enhanced Basic ATK "Bonus Stage: αWolf Instant" to deal higher DMG.When allies gain Punchline, "Hidden MMR" is accumulated for Silver Wolf LV.999, allowing her Enhanced Basic ATK "Bonus Stage: αWolf Instant" to deal higher DMG. |
| Seafeld City Commerce Street Showdown |
Main article: Cosmicon, Roll On Again!  The annual Seafeld City "Commerce Street Showdown" kicks off! You'll take on the role of Furbobo Weekly's President and team up with brand Ambassador Silver Wolf to face off against Seafeld City's local brands in epic Cosmicon Collective battles. The annual Seafeld City "Commerce Street Showdown" kicks off! You'll take on the role of Furbobo Weekly's President and team up with brand Ambassador Silver Wolf to face off against Seafeld City's local brands in epic Cosmicon Collective battles.The annual Seafeld City "Commerce Street Showdown" kicks off! You'll take on the role of Furbobo Weekly's President and team up with brand Ambassador Silver Wolf to face off against Seafeld City's local brands in epic Cosmicon Collective battles.  "Cosmicon Collective" is a gameplay mode where you battle using character cards and their corresponding dice shown in the top-right corner of the cards. "Cosmicon Collective" is a gameplay mode where you battle using character cards and their corresponding dice shown in the top-right corner of the cards."Cosmicon Collective" is a gameplay mode where you battle using character cards and their corresponding dice shown in the top-right corner of the cards.  Defeat opponents to earn Power Tokens for redeeming cards and Power Dust for gilding cards. Defeat opponents to earn Power Tokens for redeeming cards and Power Dust for gilding cards.Defeat opponents to earn Power Tokens for redeeming cards and Power Dust for gilding cards.  In this Seafeld City "Commerce Street Showdown," the "Cosmicon Collective" will fight in a 2v1 format. Work together with Silver Wolf to defeat formidable foes! In this Seafeld City "Commerce Street Showdown," the "Cosmicon Collective" will fight in a 2v1 format. Work together with Silver Wolf to defeat formidable foes!In this Seafeld City "Commerce Street Showdown," the "Cosmicon Collective" will fight in a 2v1 format. Work together with Silver Wolf to defeat formidable foes! |
| Saga of Primaveral Blade |
Main article: Saga of Primaveral Blade 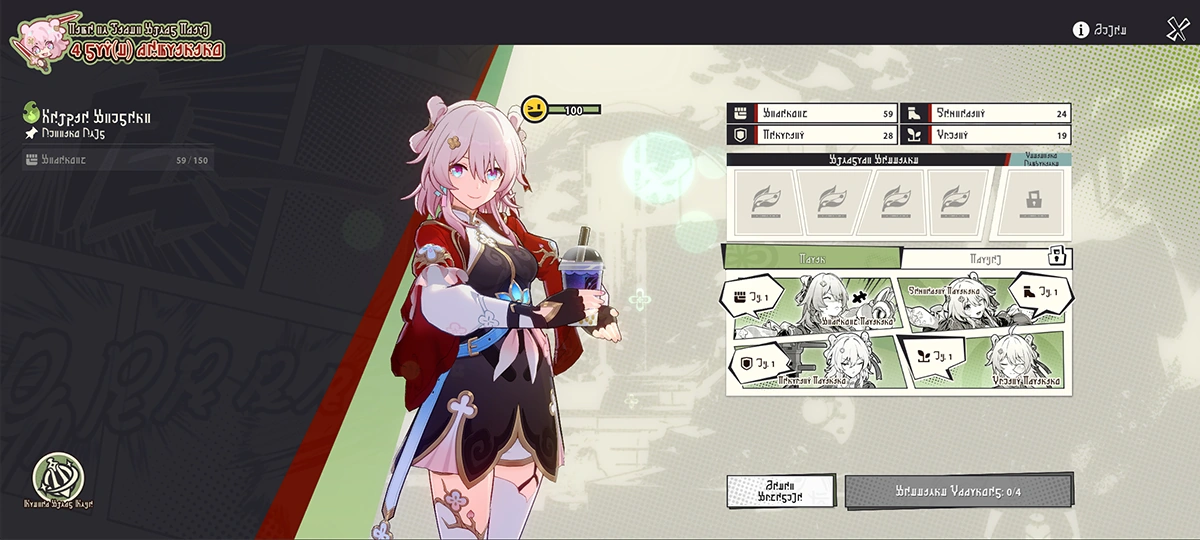 As the swordplay assistant, you will be arranging March 7th's Swordplay Sessions and helping her with mastering Sword Moves to prepare her to defeat Skott in 15 days. As the swordplay assistant, you will be arranging March 7th's Swordplay Sessions and helping her with mastering Sword Moves to prepare her to defeat Skott in 15 days.As the swordplay assistant, you will be arranging March 7th's Swordplay Sessions and helping her with mastering Sword Moves to prepare her to defeat Skott in 15 days. |
| Ruins of Time: Support of Time |
 March 7th deployed the Domain of Time for everyone, and within the Ruins of Time, Oronyx's Prayer will remain in an enhanced state. March 7th deployed the Domain of Time for everyone, and within the Ruins of Time, Oronyx's Prayer will remain in an enhanced state.March 7th deployed the Domain of Time for everyone, and within the Ruins of Time, Oronyx's Prayer will remain in an enhanced state. |
| Relic Recommendation |
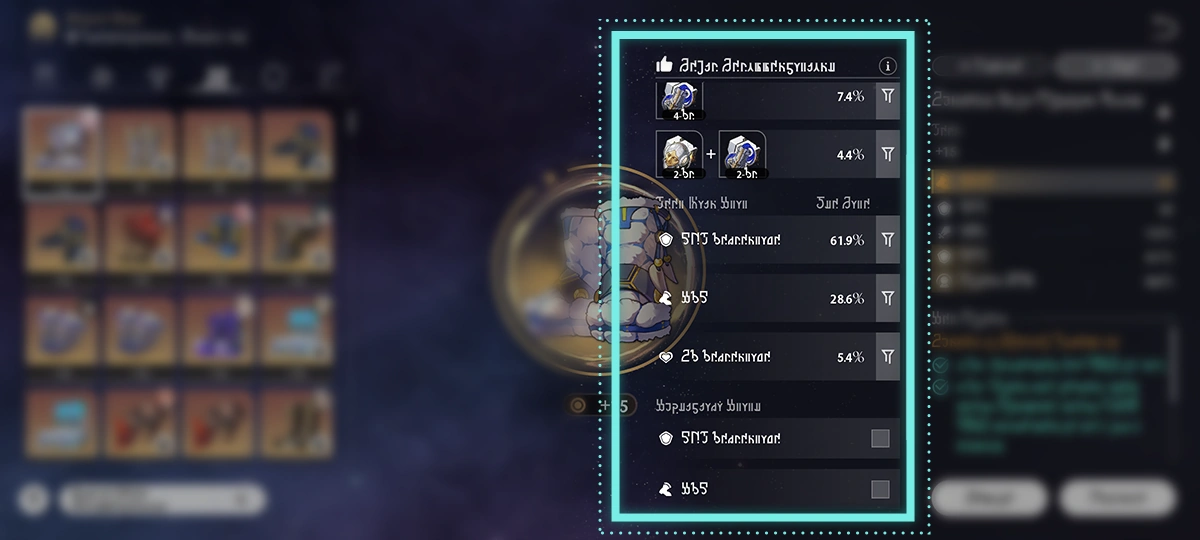 You can view the recommended Set, Main Stat, and Subsidiary Stats for the current character. The Set and Main Stat data are based on statistics from recently active players. You can view the recommended Set, Main Stat, and Subsidiary Stats for the current character. The Set and Main Stat data are based on statistics from recently active players.You can view the recommended Set, Main Stat, and Subsidiary Stats for the current character. The Set and Main Stat data are based on statistics from recently active players. 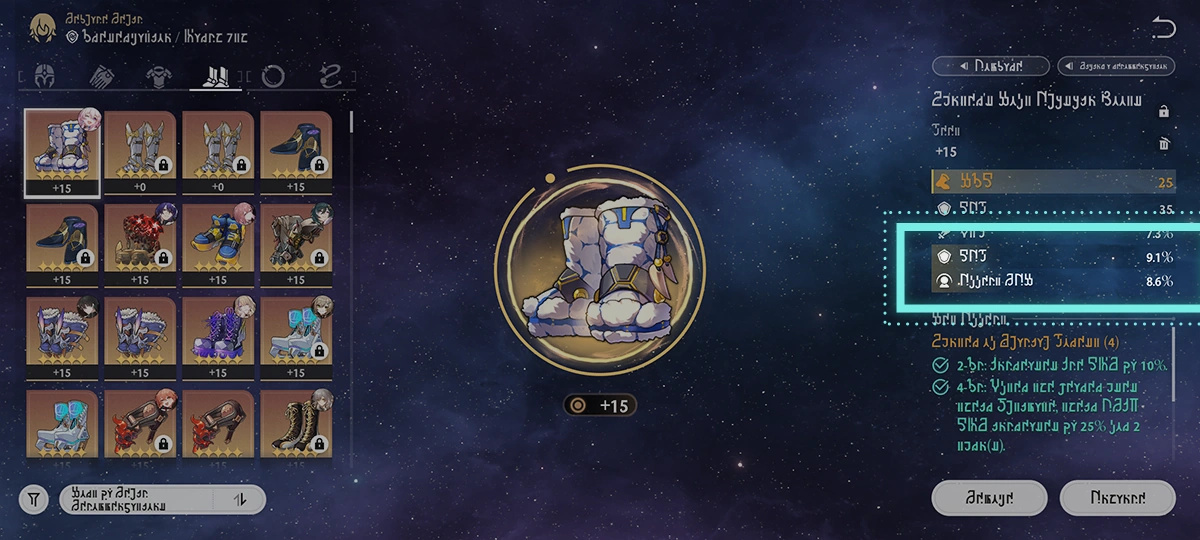 When the Relic's Main Stat or Subsidiary Stats is the recommended stat for the character currently being viewed, they would be highlighted in the Stats interface. When the Relic's Main Stat or Subsidiary Stats is the recommended stat for the character currently being viewed, they would be highlighted in the Stats interface.When the Relic's Main Stat or Subsidiary Stats is the recommended stat for the character currently being viewed, they would be highlighted in the Stats interface. |
| Relentless Adversaries |
Main article: Pure Fiction 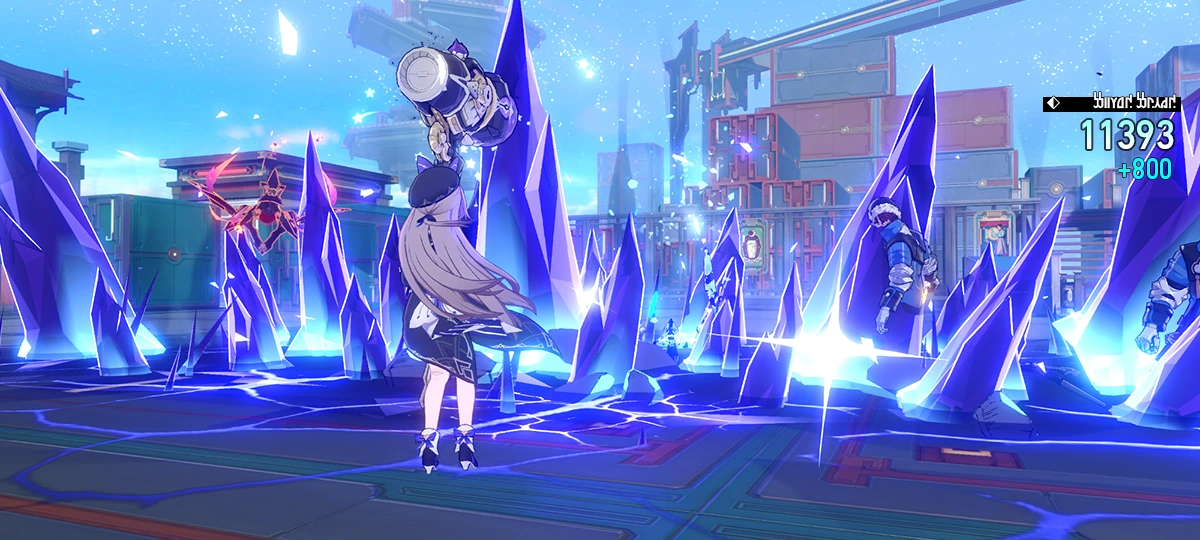 All battles in Pure Fiction have a Cycle limit, and battles finish when action cycles end or all enemies are eliminated. All battles in Pure Fiction have a Cycle limit, and battles finish when action cycles end or all enemies are eliminated.Until the battle finishes, enemies will be continually replenished once eliminated. Defeating more enemies will earn you higher scores and greater rewards. All battles in Pure Fiction have a Cycle limit, and battles finish when action cycles end or all enemies are eliminated. Until the battle finishes, enemies will be continually replenished once eliminated. Defeating more enemies will earn you higher scores and greater rewards. 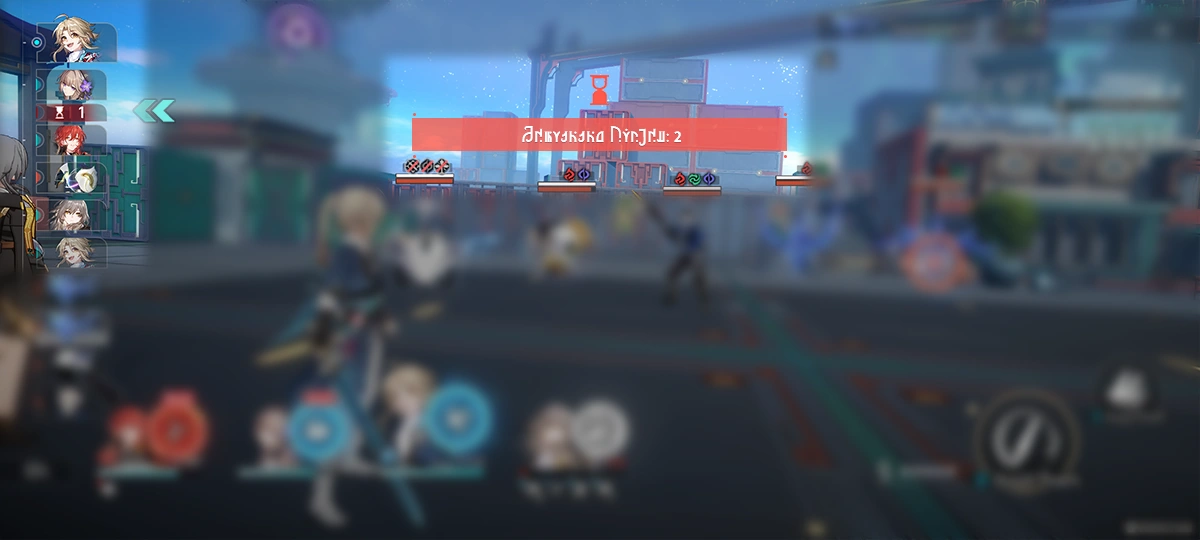 Cycles remaining from this battle will be displayed as a countdown in the Action Order shown on the left. Cycles remaining from this battle will be displayed as a countdown in the Action Order shown on the left. Dealing DMG to any enemy target before the Cycles run out or all enemies are defeated will earn you points. Cycles remaining from this battle will be displayed as a countdown in the Action Order shown on the left. Dealing DMG to any enemy target before the Cycles run out or all enemies are defeated will earn you points.  The current wave of enemies and the number of enemies defeated in the current wave will be displayed during battle. The current wave of enemies and the number of enemies defeated in the current wave will be displayed during battle.The current wave of enemies and the number of enemies defeated in the current wave will be displayed during battle.  The final score will be calculated based on the total points scored in the Node 1 and Node 2 battles. The final score will be calculated based on the total points scored in the Node 1 and Node 2 battles.The final score will be calculated based on the total points scored in the Node 1 and Node 2 battles. |
| Relentless adversaries |
Main article: Tales of the Fantastic This mechanic has a Cycle limit. Before the Cycles run out, enemies will continue to appear. Defeating more enemies will earn you higher scores and greater rewards.This mechanic has a Cycle limit. Before the Cycles run out, enemies will continue to appear. Defeating more enemies will earn you higher scores and greater rewards. The remaining Cycles will be displayed as a countdown on the Action Order shown on the left. Dealing damage to any enemy target before the Cycles run out will earn you points.The remaining Cycles will be displayed as a countdown on the Action Order shown on the left. Dealing damage to any enemy target before the Cycles run out will earn you points. 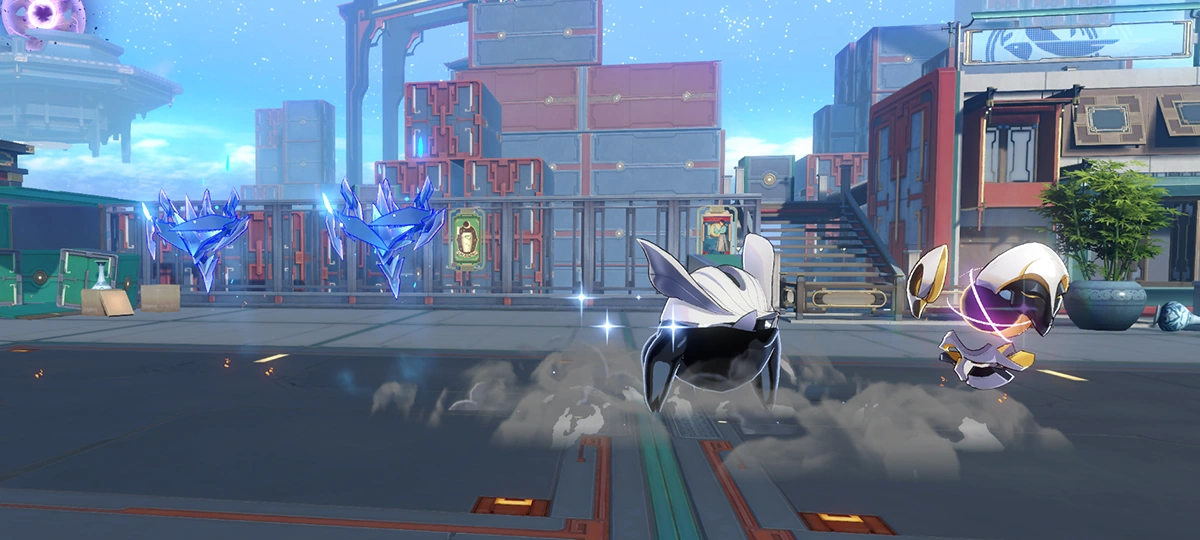 Defeating a Trotter during battle will award even higher points. Defeating a Trotter during battle will award even higher points.Defeating a Trotter during battle will award even higher points. |
| Quick Unlock |
Main article: Pure Fiction  The highest Pure Fiction stage that you passed with 3-stars will be recorded. Whenever a new period starts, the recorded stage and all prior stages will be immediately unlocked according to your past performance. No more than the first 3 stages can be immediately unlocked in this way. The highest Pure Fiction stage that you passed with 3-stars will be recorded. Whenever a new period starts, the recorded stage and all prior stages will be immediately unlocked according to your past performance. No more than the first 3 stages can be immediately unlocked in this way.The highest Pure Fiction stage that you passed with 3-stars will be recorded. Whenever a new period starts, the recorded stage and all prior stages will be immediately unlocked according to your past performance. No more than the first 3 stages can be immediately unlocked in this way.  After performing quick unlock, you can directly challenge the highest stage that you passed with 3-stars. Once you have passed that stage with 3-stars, all the previous stages will be immediately cleared with a 3-star rating, and all rewards from those stages will be delivered. After performing quick unlock, you can directly challenge the highest stage that you passed with 3-stars. Once you have passed that stage with 3-stars, all the previous stages will be immediately cleared with a 3-star rating, and all rewards from those stages will be delivered.After performing quick unlock, you can directly challenge the highest stage that you passed with 3-stars. Once you have passed that stage with 3-stars, all the previous stages will be immediately cleared with a 3-star rating, and all rewards from those stages will be delivered. |
| Quick Unlock |
Main article: Forgotten Hall 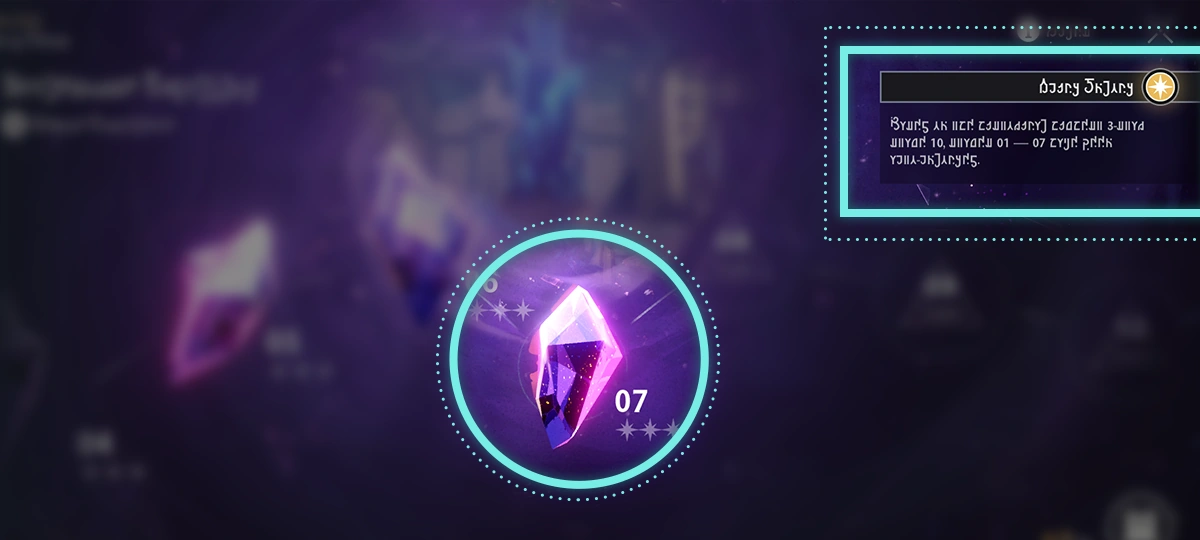 The highest Memory of Chaos stage in that you have cleared with a 3-star rating will be recorded. When any new phase starts, the corresponding stages and its prerequisite stages will all be immediately unlocked. Currently, only the first 7 stages can be quickly cleared in this way. The highest Memory of Chaos stage in that you have cleared with a 3-star rating will be recorded. When any new phase starts, the corresponding stages and its prerequisite stages will all be immediately unlocked. Currently, only the first 7 stages can be quickly cleared in this way.The highest Memory of Chaos stage in that you have cleared with a 3-star rating will be recorded. When any new phase starts, the corresponding stages and its prerequisite stages will all be immediately unlocked. Currently, only the first 7 stages can be quickly cleared in this way. 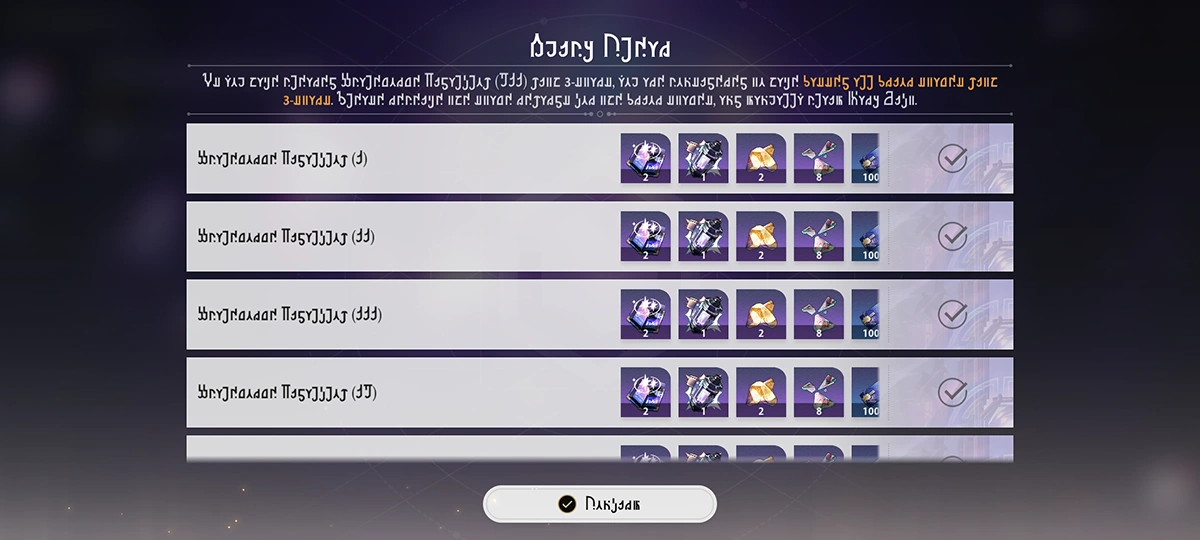 After performing quick unlock, you can directly challenge the highest stage that you passed with 3-stars. Once you have passed that stage with 3-stars, all the previous stages will be immediately cleared with a 3-star rating, and all rewards from those stages will be delivered. After performing quick unlock, you can directly challenge the highest stage that you passed with 3-stars. Once you have passed that stage with 3-stars, all the previous stages will be immediately cleared with a 3-star rating, and all rewards from those stages will be delivered.After performing quick unlock, you can directly challenge the highest stage that you passed with 3-stars. Once you have passed that stage with 3-stars, all the previous stages will be immediately cleared with a 3-star rating, and all rewards from those stages will be delivered. |
| Pure Fiction: Starward Mode |
Main article: Pure Fiction  Clear Stage 3 of Pure Fiction to unlock Starward Mode. Clear Stage 3 of Pure Fiction to unlock Starward Mode.Clearing Stage 4 in Starward Mode requires challenging 3 Nodes. Clear Stage 3 of Pure Fiction to unlock Starward Mode. Clearing Stage 4 in Starward Mode requires challenging 3 Nodes.  Clear Stage 4 in Starward Mode and score 99000 points to obtain a Prismatic Star and additional new rewards. Clear Stage 4 in Starward Mode and score 99000 points to obtain a Prismatic Star and additional new rewards.Collect a total of 12 stars and the Prismatic Star to obtain this period's Pure Fiction Limited-Time Clearance Medal. Clear Stage 4 in Starward Mode and score 99000 points to obtain a Prismatic Star and additional new rewards. Collect a total of 12 stars and the Prismatic Star to obtain this period's Pure Fiction Limited-Time Clearance Medal.  You can switch back to Regular Mode at any time to challenge Stage 4 of the regular Pure Fiction and obtain the original rewards. You can switch back to Regular Mode at any time to challenge Stage 4 of the regular Pure Fiction and obtain the original rewards.You can switch back to Regular Mode at any time to challenge Stage 4 of the regular Pure Fiction and obtain the original rewards. |
| Pure Fiction |
Main article: Pure Fiction 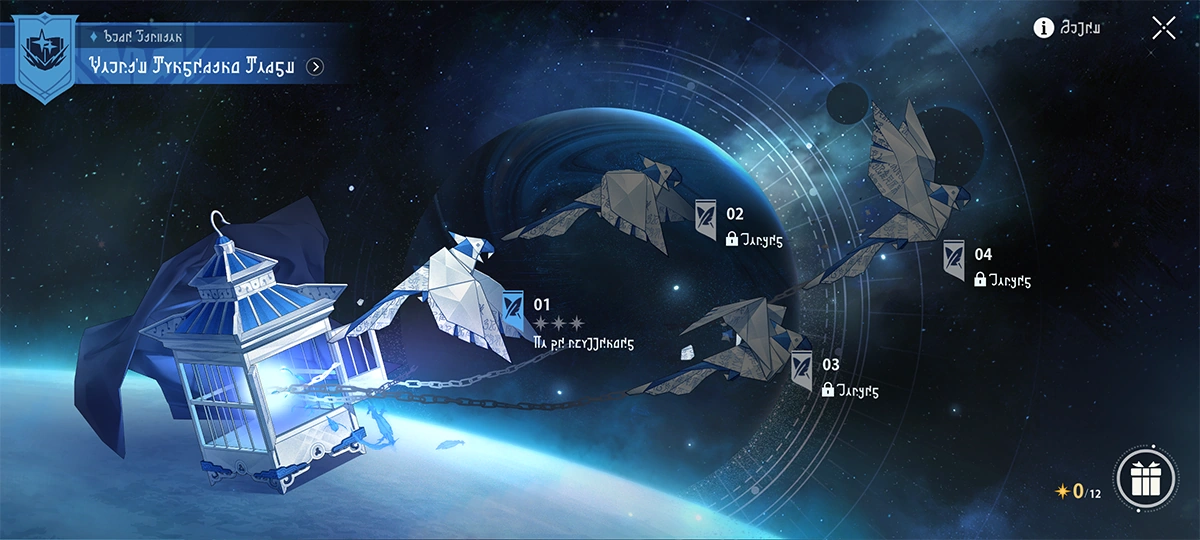 Pure Fiction is a series of highly difficult challenge stages that are refreshed regularly. Pure Fiction is a series of highly difficult challenge stages that are refreshed regularly.Pure Fiction is a series of highly difficult challenge stages that are refreshed regularly. In this game mode, enemies will continuously appear. You can earn points by dealing damage to enemies or defeating them.In this game mode, enemies will continuously appear. You can earn points by dealing damage to enemies or defeating them. 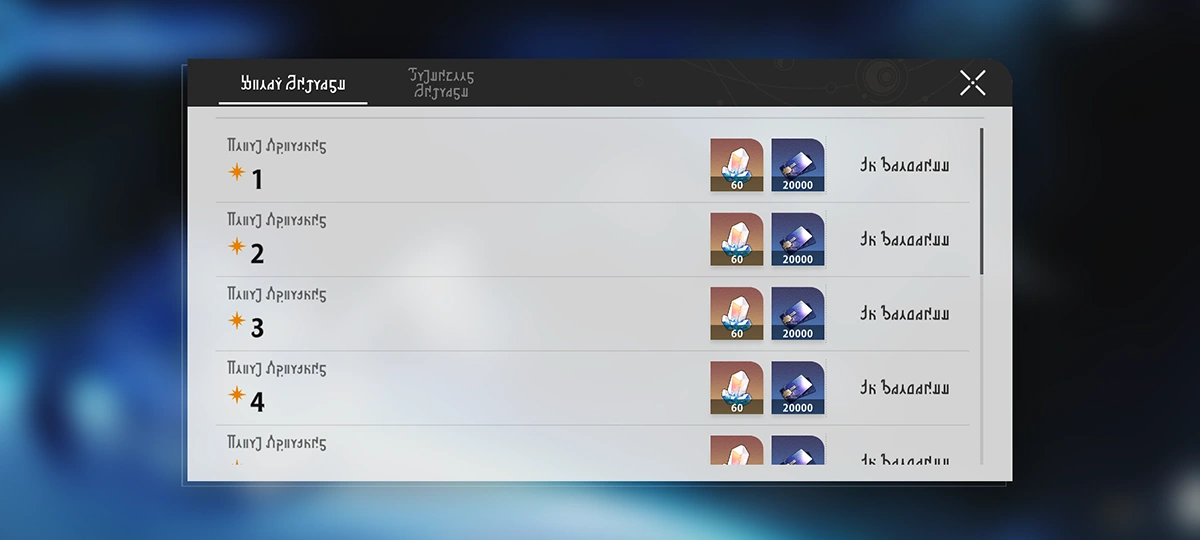 Once you have cleared Pure Fiction and earned enough points, you will receive Story Stars and Story Rewards. Once you have cleared Pure Fiction and earned enough points, you will receive Story Stars and Story Rewards.Once you have cleared Pure Fiction and earned enough points, you will receive Story Stars and Story Rewards. |
| Points Rules |
Main article: Virtual Scentventure  The stage contains action value timers. The corresponding action values will be deducted after allies and enemies take action. The stage contains action value timers. The corresponding action values will be deducted after allies and enemies take action.The stage contains action value timers. The corresponding action values will be deducted after allies and enemies take action. 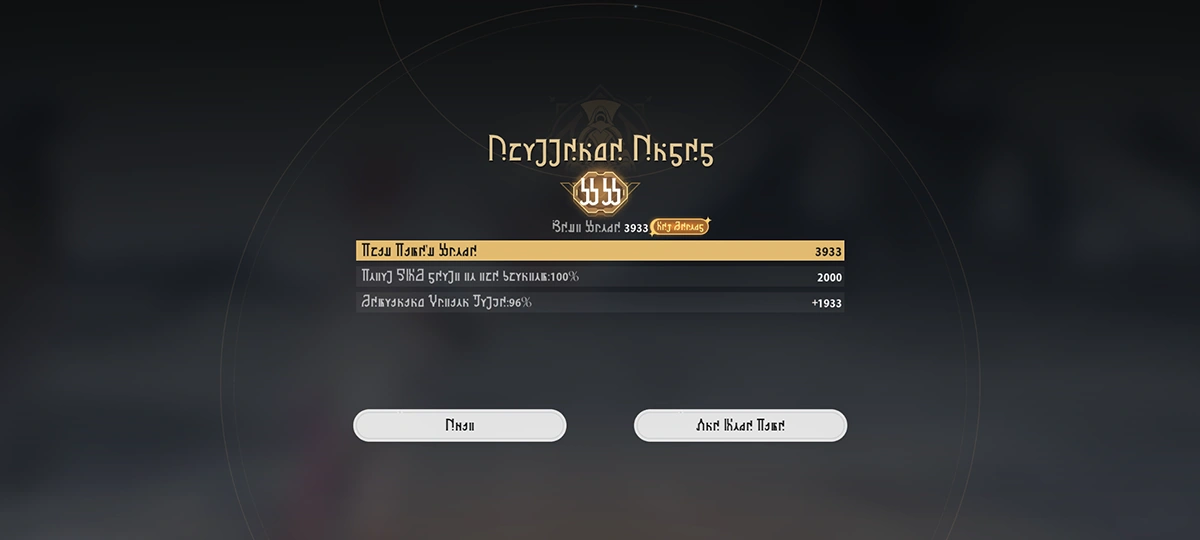 The stage finalization point is influenced by 2 factors: the percentage of HP left in the illusion, and the remaining action value after successfully defeating the illusion. If the illussion is not defeated, only its remaining HP percentage will be taken into account The stage finalization point is influenced by 2 factors: the percentage of HP left in the illusion, and the remaining action value after successfully defeating the illusion. If the illussion is not defeated, only its remaining HP percentage will be taken into accountThe stage finalization point is influenced by 2 factors: the percentage of HP left in the illusion, and the remaining action value after successfully defeating the illusion. If the illussion is not defeated, only its remaining HP percentage will be taken into account |
| Planarcadia Zone |
Main article: Wispae Amusement Park  Imagenae are special facilities found in the Planarcadia Zone. Most of these facilities' effects can grant Punchline. Imagenae are special facilities found in the Planarcadia Zone. Most of these facilities' effects can grant Punchline.Imagenae are special facilities found in the Planarcadia Zone. Most of these facilities' effects can grant Punchline.  When Punchline maxes out, the park will enter Joy Instant and immediately attract 2 visitors. During Joy Instant, all facilities will earn double Arca Coins. When Punchline maxes out, the park will enter Joy Instant and immediately attract 2 visitors. During Joy Instant, all facilities will earn double Arca Coins.When Punchline maxes out, the park will enter Joy Instant and immediately attract 2 visitors. During Joy Instant, all facilities will earn double Arca Coins. |
| Photography Exhibition |
Main article: Between the Frames...  Trailblazer and March 7th need to gather inspiration based on the exhibition's daily theme and take corresponding photos. Then, they will name the photo, upload it, and receive feedback from Mr. Reca and the viewers. Trailblazer and March 7th need to gather inspiration based on the exhibition's daily theme and take corresponding photos. Then, they will name the photo, upload it, and receive feedback from Mr. Reca and the viewers.Trailblazer and March 7th need to gather inspiration based on the exhibition's daily theme and take corresponding photos. Then, they will name the photo, upload it, and receive feedback from Mr. Reca and the viewers. |
| Perpetual Exploit: Gameplay Details |
Main article: Tides of War 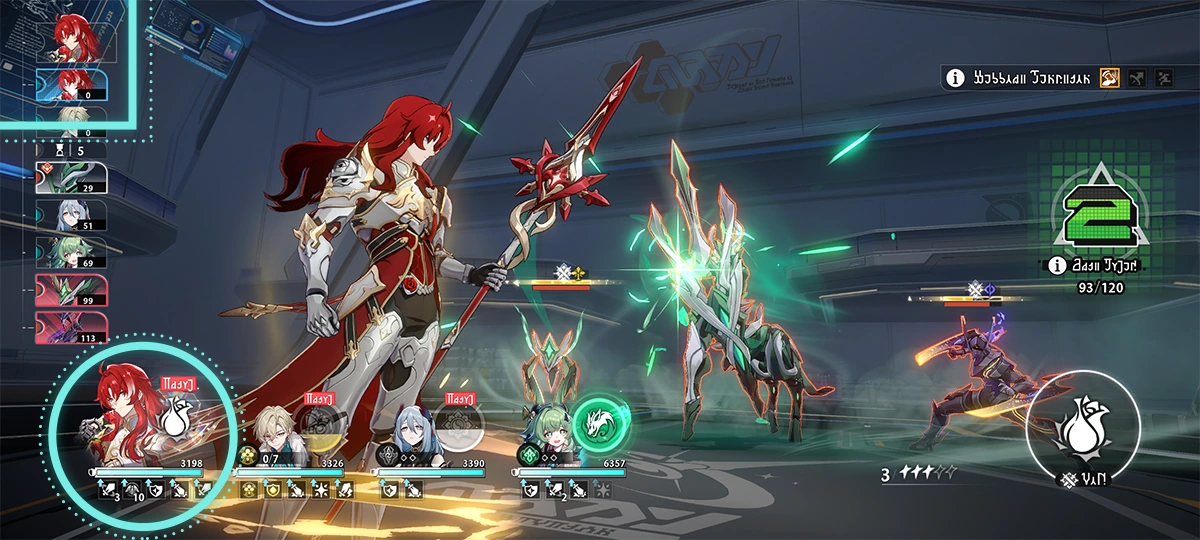 Do your best to make the same character perform consecutive actions. Do your best to make the same character perform consecutive actions.You will accumulate a large amount of Grit Value after the same character performs consecutive actions. Do your best to make the same character perform consecutive actions. You will accumulate a large amount of Grit Value after the same character performs consecutive actions. After characters cast their Ultimates, their actions are Advanced Forward by 100%.You can use Ultimates to make the same character act consecutively. After characters cast their Ultimates, their actions are Advanced Forward by 100%. You can use Ultimates to make the same character act consecutively.  After any ally performs consecutive actions, a large amount of Grit Value can be obtained. After any ally performs consecutive actions, a large amount of Grit Value can be obtained.Defeating enemies or stopping enemy actions are all viable means to have allies continue to take action. After any ally performs consecutive actions, a large amount of Grit Value can be obtained. Defeating enemies or stopping enemy actions are all viable means to have allies continue to take action. After characters cast their Ultimates, their actions are Advanced Forward by 100%.You can use Ultimates to make the same character act consecutively. After characters cast their Ultimates, their actions are Advanced Forward by 100%. You can use Ultimates to make the same character act consecutively. |
| Perilous Threshold: Gameplay Details |
Main article: Tides of War 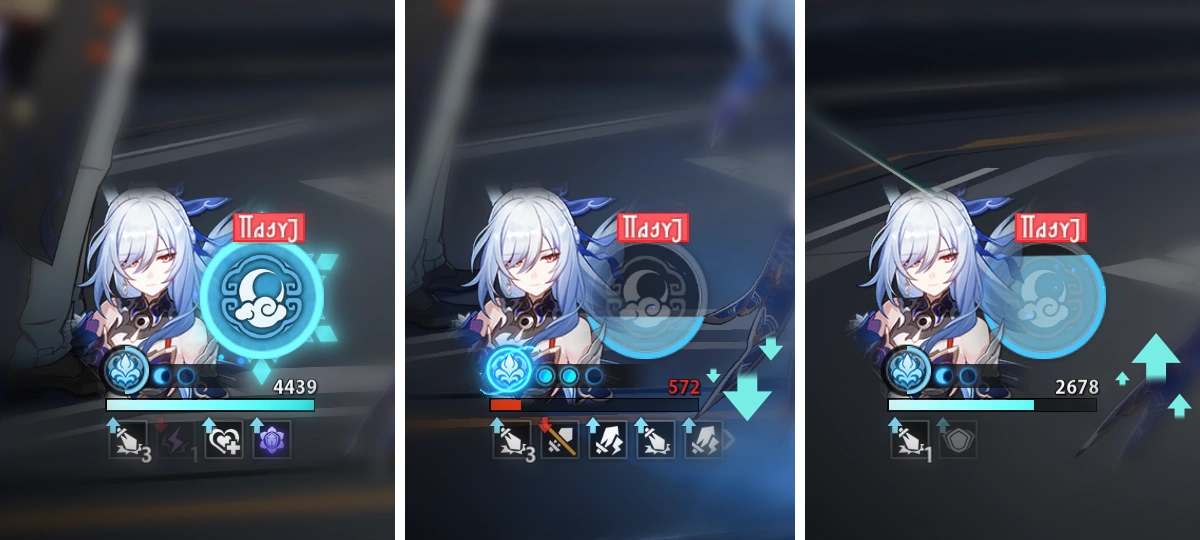 Grit Value accumulates when allies' HP increases or decreases. Grit Value accumulates when allies' HP increases or decreases.Grit Value accumulates when allies' HP increases or decreases.  During "Grit Phase 4: Power Awoken", every 1500 of HP increase or decrease grants 1 stack of buffs, up to 99 stacks. During "Grit Phase 4: Power Awoken", every 1500 of HP increase or decrease grants 1 stack of buffs, up to 99 stacks.During "Grit Phase 4: Power Awoken", every 1500 of HP increase or decrease grants 1 stack of buffs, up to 99 stacks. |
| Penacony Zone |
Main article: Wispae Amusement Park  Musical instruments are special facilities unique to the Penacony Zone. Most of these facilities have incredibly powerful effects, but can only be triggered a limited number of times per business day. Musical instruments are special facilities unique to the Penacony Zone. Most of these facilities have incredibly powerful effects, but can only be triggered a limited number of times per business day.Musical instruments are special facilities unique to the Penacony Zone. Most of these facilities have incredibly powerful effects, but can only be triggered a limited number of times per business day.  Certain facilities can increase the daily trigger count limit of other facilities' effects. Plan carefully to ensure musical facilities have adequate trigger counts to meet visitor demand. Certain facilities can increase the daily trigger count limit of other facilities' effects. Plan carefully to ensure musical facilities have adequate trigger counts to meet visitor demand.Certain facilities can increase the daily trigger count limit of other facilities' effects. Plan carefully to ensure musical facilities have adequate trigger counts to meet visitor demand. |
| Overflowing Wounds: Gameplay Details |
Main article: Tides of War 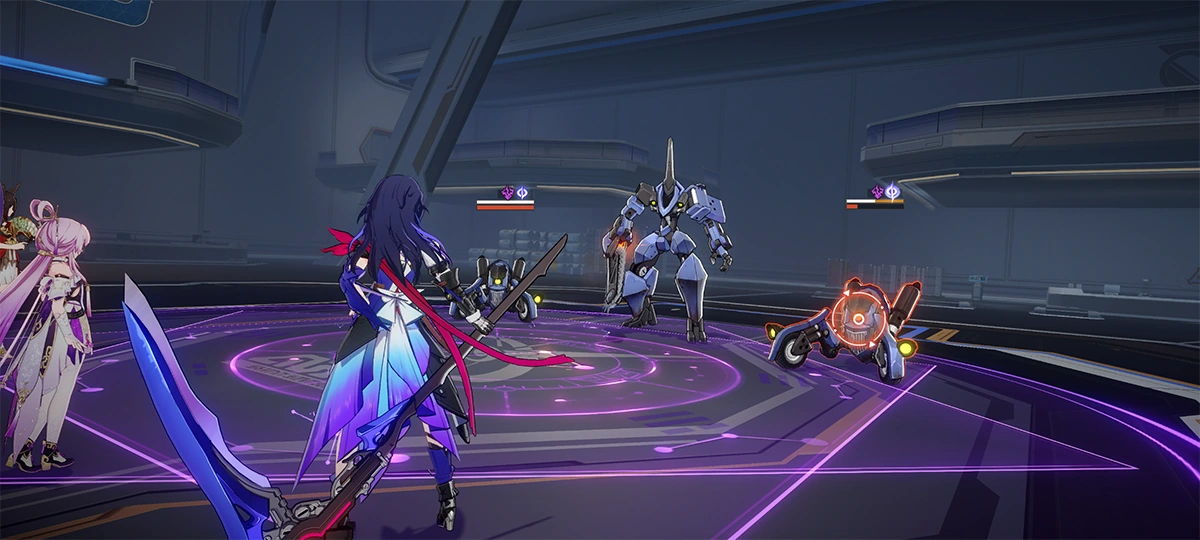 Select a non-boss enemy with low HP and use single-target DMG ability on it. Select a non-boss enemy with low HP and use single-target DMG ability on it.After defeating the enemy, deals single-target DMG with huge multipliers to the boss based on the Overflow DMG dealt to the defeated unit. Select a non-boss enemy with low HP and use single-target DMG ability on it. After defeating the enemy, deals single-target DMG with huge multipliers to the boss based on the Overflow DMG dealt to the defeated unit. 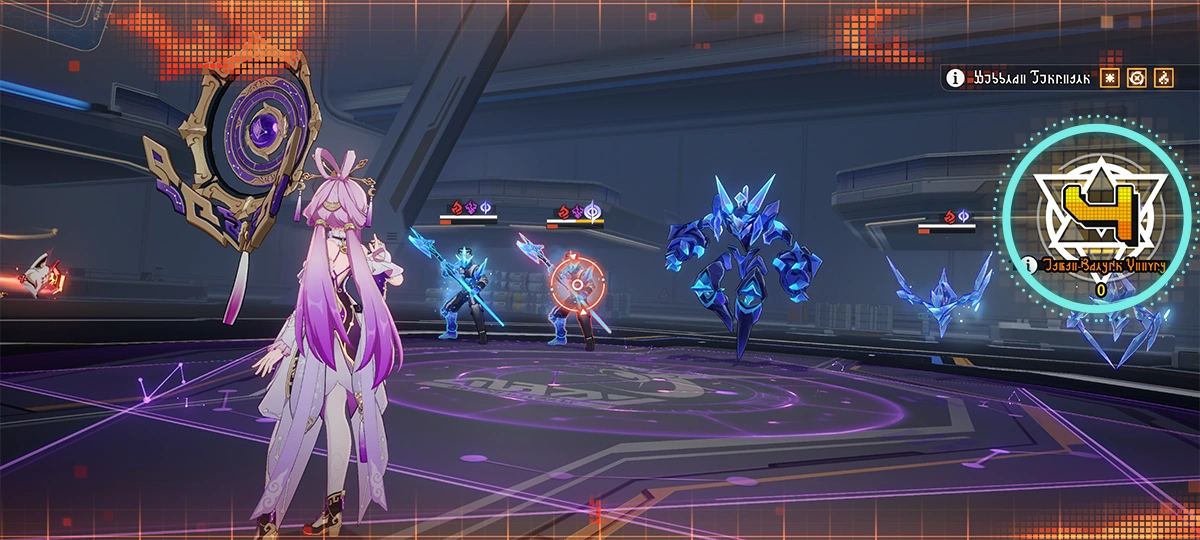 "During "Grit Phase 4: Power Awoken", non-boss enemies will have their HP drastically reduced after entering battle. "During "Grit Phase 4: Power Awoken", non-boss enemies will have their HP drastically reduced after entering battle.Attention: The boss's HP for this current stage is extremely high. You can use the Overflow DMG dealt when defeating non-boss enemies to deal high amounts of DMG to the boss. "During "Grit Phase 4: Power Awoken", non-boss enemies will have their HP drastically reduced after entering battle. Attention: The boss's HP for this current stage is extremely high. You can use the Overflow DMG dealt when defeating non-boss enemies to deal high amounts of DMG to the boss.  Use AoE abilities to attack enemies. Use AoE abilities to attack enemies.After defeating a non-boss enemy, deals DMG with huge multipliers to the boss based on the Overflow DMG dealt in this attack. Use AoE abilities to attack enemies. After defeating a non-boss enemy, deals DMG with huge multipliers to the boss based on the Overflow DMG dealt in this attack.  "During "Grit Phase 4: Power Awoken", non-boss enemies will have their HP drastically reduced after entering battle. "During "Grit Phase 4: Power Awoken", non-boss enemies will have their HP drastically reduced after entering battle.Attention: The boss's HP for this current stage is extremely high. You can use the Overflow DMG dealt when defeating non-boss enemies to deal high amounts of DMG to the boss. "During "Grit Phase 4: Power Awoken", non-boss enemies will have their HP drastically reduced after entering battle. Attention: The boss's HP for this current stage is extremely high. You can use the Overflow DMG dealt when defeating non-boss enemies to deal high amounts of DMG to the boss. |
| Oronyx's Miracle: Golden Memory Dust |
Main article: Oronyx's Miracle 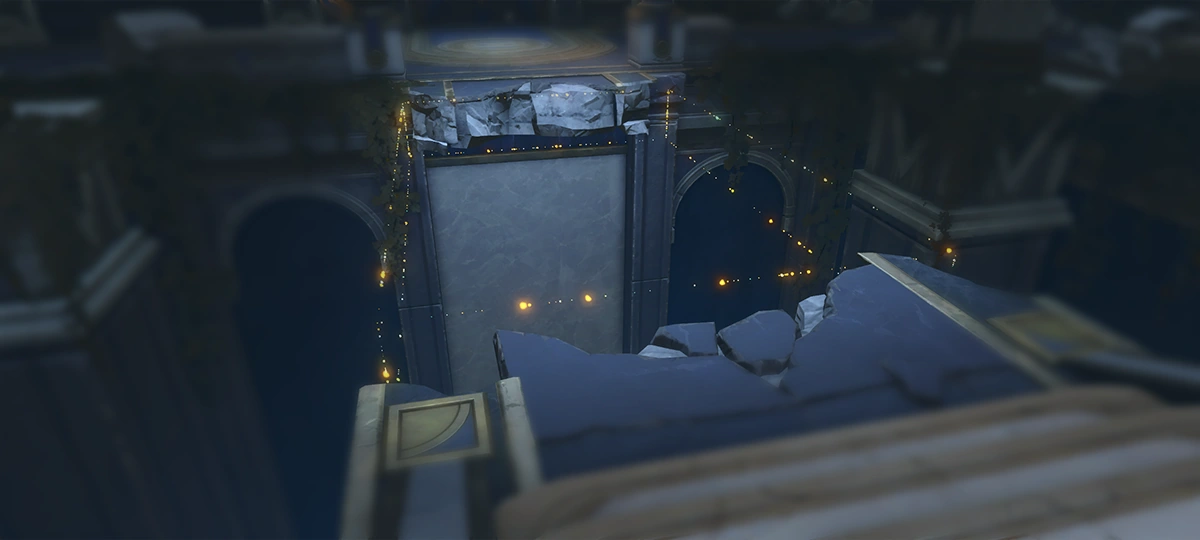 Between two different space-times, objects such as roads, obstacles, mechanisms, and treasures may appear differently. Between two different space-times, objects such as roads, obstacles, mechanisms, and treasures may appear differently.Main road differences and key targets are presented in the current space-time as golden memory dust, which can be observed to predict their appearance in the other space-time. Between two different space-times, objects such as roads, obstacles, mechanisms, and treasures may appear differently. Main road differences and key targets are presented in the current space-time as golden memory dust, which can be observed to predict their appearance in the other space-time. |
| Origami Bird Clash |
Main article: Origami Bird Clash 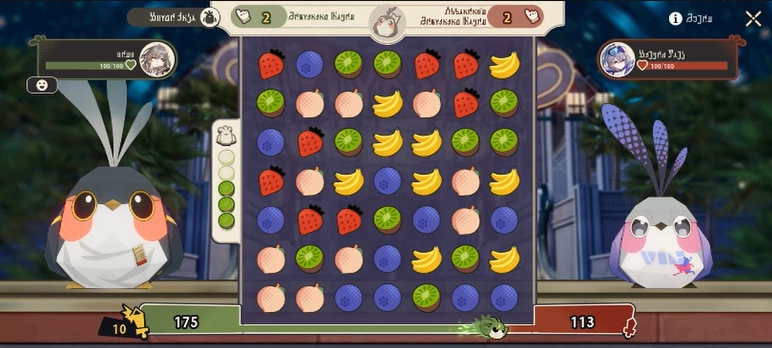 Origami Bird Clash is a Match Three battling game where you have to match and clear fruits within a certain number of moves and increase the Origami Bird's Combat Power. Origami Bird Clash is a Match Three battling game where you have to match and clear fruits within a certain number of moves and increase the Origami Bird's Combat Power.Origami Bird Clash is a Match Three battling game where you have to match and clear fruits within a certain number of moves and increase the Origami Bird's Combat Power. 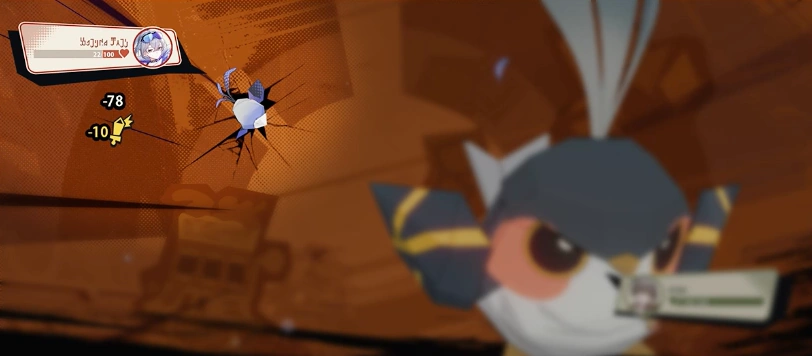 At then end of the turn, the system will calculate damage based on the Combat Power difference. If the opponent's HP is reduced to 0, you win. At then end of the turn, the system will calculate damage based on the Combat Power difference. If the opponent's HP is reduced to 0, you win.At then end of the turn, the system will calculate damage based on the Combat Power difference. If the opponent's HP is reduced to 0, you win. |
| Oneiric Memoir |
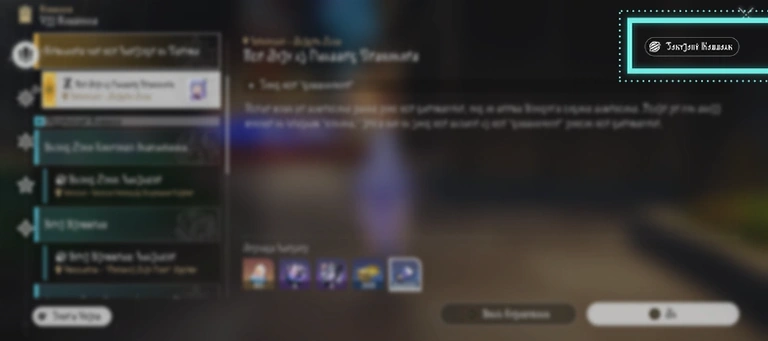 You can check all the timestamps of your experiences in the memories here at any time. You can check all the timestamps of your experiences in the memories here at any time.You can check all the timestamps of your experiences in the memories here at any time. 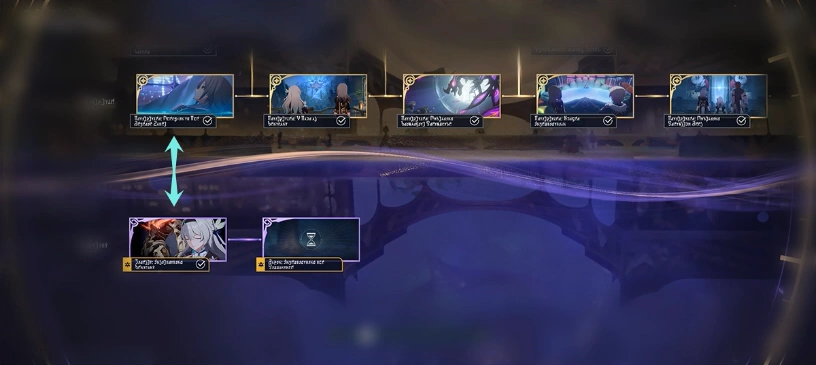 All memories are stored here in chronological order based on their own timestamps. Even different points of view follow the same sequential order. All memories are stored here in chronological order based on their own timestamps. Even different points of view follow the same sequential order.All memories are stored here in chronological order based on their own timestamps. Even different points of view follow the same sequential order. 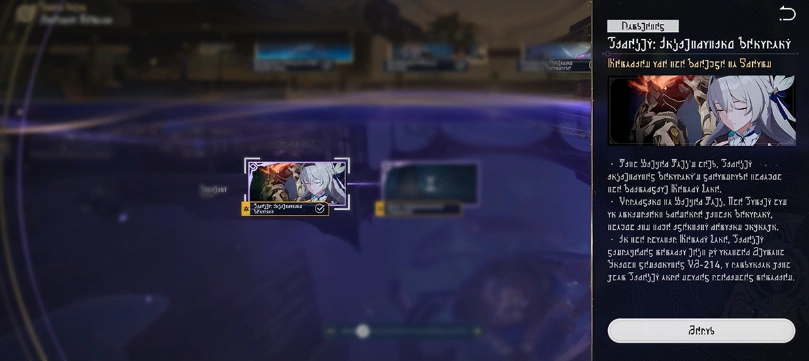 For those particularly hazy memories, you can clickclick/taptap/presspress on the corresponding node to revisit them in more detail. For those particularly hazy memories, you can clickclick/taptap/presspress on the corresponding node to revisit them in more detail.For those particularly hazy memories, you can clickclick/taptap/presspress on the corresponding node to revisit them in more detail. 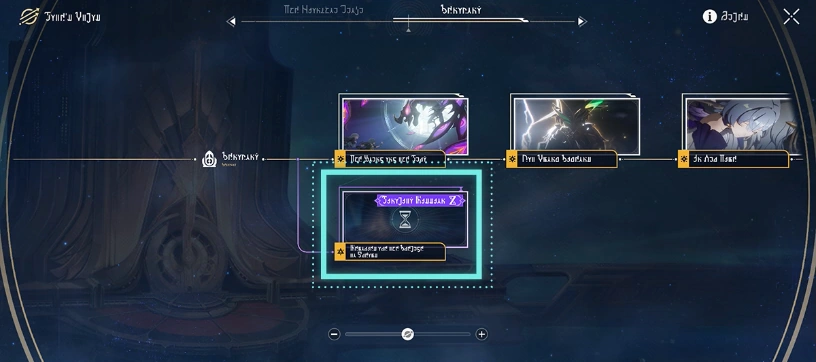 The experience you gained during the Finality Mission can also be viewed in Fate's Atlas. The experience you gained during the Finality Mission can also be viewed in Fate's Atlas.The experience you gained during the Finality Mission can also be viewed in Fate's Atlas. |
| Omni-Synthesizer (II) |
Main article: Omni-Synthesizer 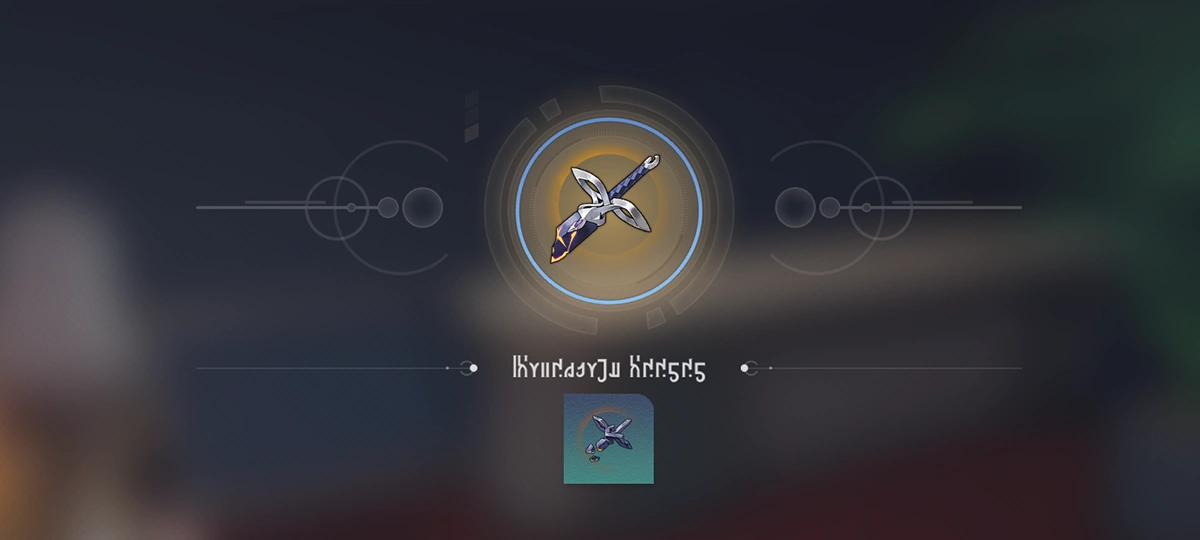 The Omni-Synthesizer can also turn low-level items into high-level items of the same category. The Omni-Synthesizer can also turn low-level items into high-level items of the same category.The Omni-Synthesizer can also turn low-level items into high-level items of the same category. |
| Nurture Creation |
Main article: Critter Pick 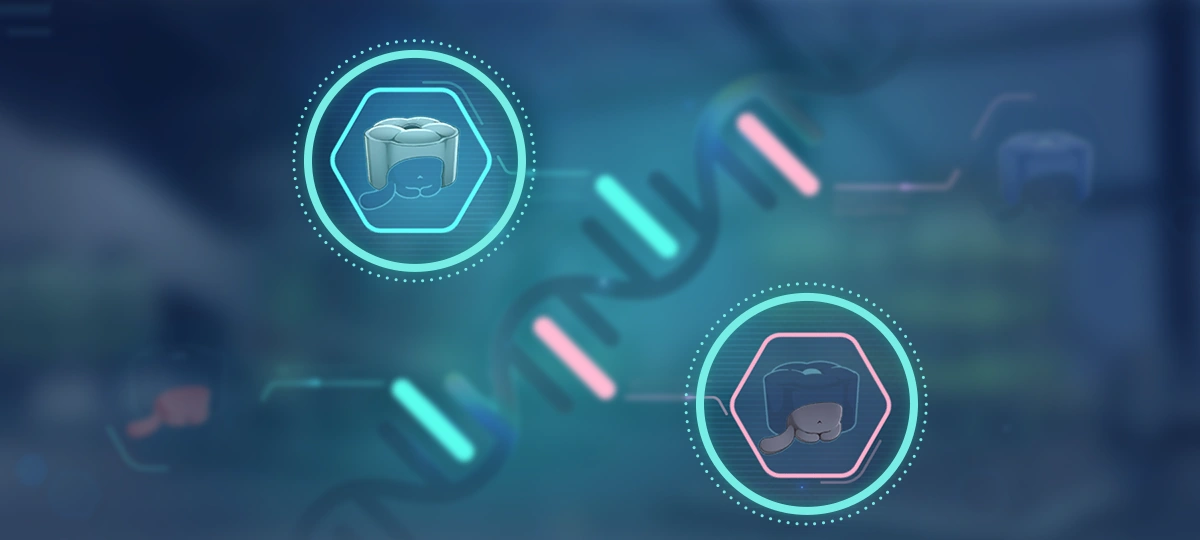 In the Lifeform Oven, the Base Traits of the two parental creations have a random chance of being inherited by new creations. In the Lifeform Oven, the Base Traits of the two parental creations have a random chance of being inherited by new creations.In the Lifeform Oven, the Base Traits of the two parental creations have a random chance of being inherited by new creations. 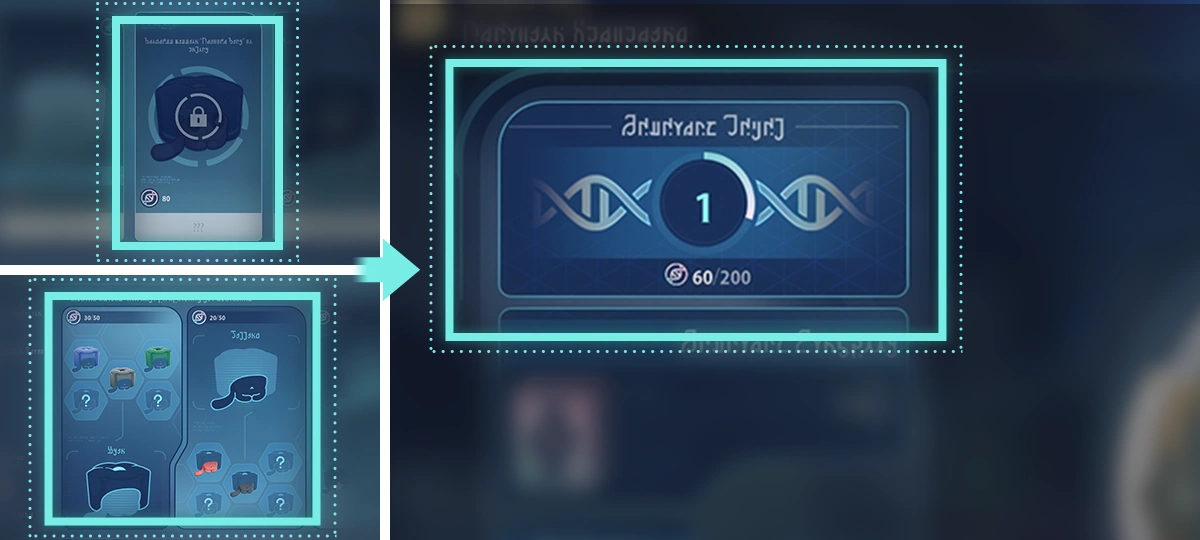 By nurturing creations and obtaining new traits or rare creations, you can increase your Research Level. By nurturing creations and obtaining new traits or rare creations, you can increase your Research Level.By nurturing creations and obtaining new traits or rare creations, you can increase your Research Level. 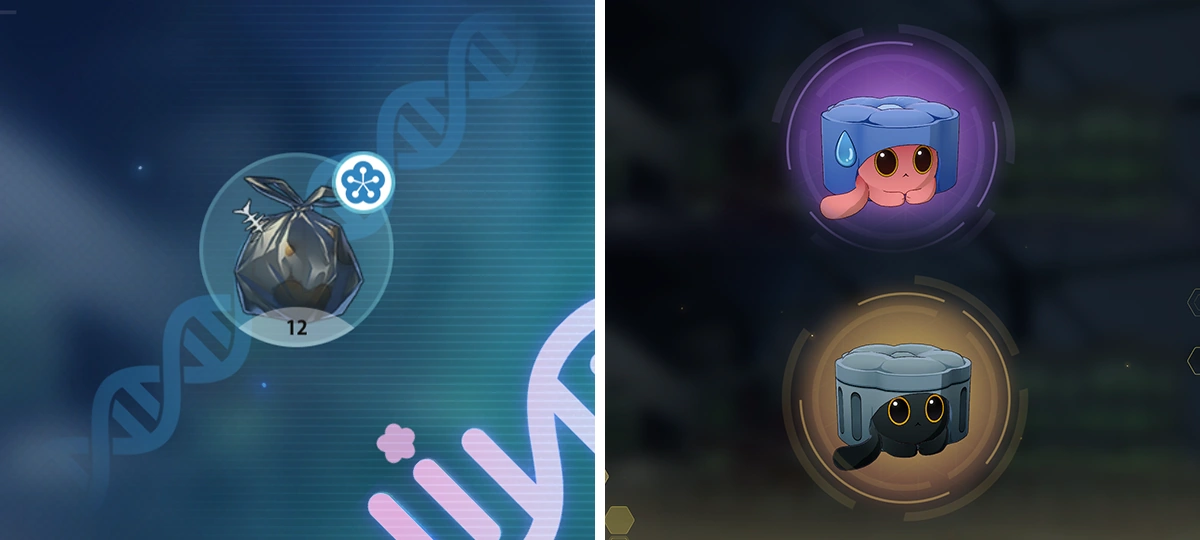 Nurturing can sometimes trigger Mutation Events. After depositing the materials needed, creations obtain Mutant Traits. Nurturing can sometimes trigger Mutation Events. After depositing the materials needed, creations obtain Mutant Traits.When triggering Special Mutations, creations can become rare creations. Nurturing can sometimes trigger Mutation Events. After depositing the materials needed, creations obtain Mutant Traits. When triggering Special Mutations, creations can become rare creations. 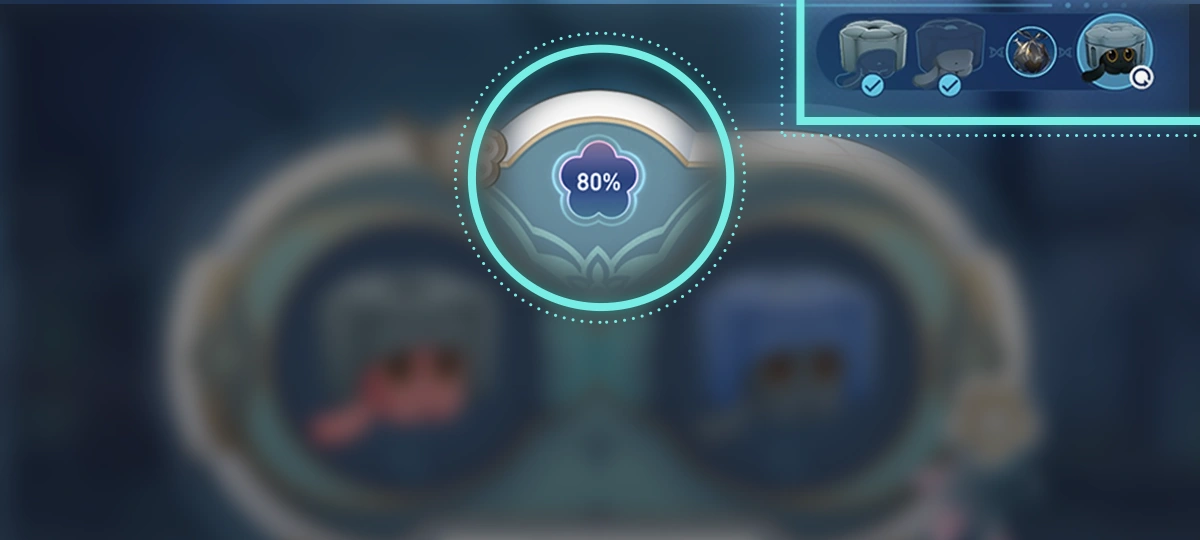 After you have all the needed Base Traits, the Lifeform Oven will be able to calculate the Resolution Rate. After you have all the needed Base Traits, the Lifeform Oven will be able to calculate the Resolution Rate.The Resolution Rate indicates the probability of a mutation occurring. After you have all the needed Base Traits, the Lifeform Oven will be able to calculate the Resolution Rate. The Resolution Rate indicates the probability of a mutation occurring. |
| Negotiation |
 At the end of negotiation, if your morale is higher than or equal to your opponent's, it is considered a successful negotiation. Otherwise, it is deemed a failure. At the end of negotiation, if your morale is higher than or equal to your opponent's, it is considered a successful negotiation. Otherwise, it is deemed a failure.At the end of negotiation, if your morale is higher than or equal to your opponent's, it is considered a successful negotiation. Otherwise, it is deemed a failure.  During the negotiation process, if either party's morale drops to zero, the negotiation immediately ends. During the negotiation process, if either party's morale drops to zero, the negotiation immediately ends.During the negotiation process, if either party's morale drops to zero, the negotiation immediately ends.  Your negotiation choices will lead to different outcomes, which can either increase or decrease your morale. As you make choices, the negotiation progresses until the number of negotiation rounds drops to 0, at which point the negotiation ends. Your negotiation choices will lead to different outcomes, which can either increase or decrease your morale. As you make choices, the negotiation progresses until the number of negotiation rounds drops to 0, at which point the negotiation ends.Your negotiation choices will lead to different outcomes, which can either increase or decrease your morale. As you make choices, the negotiation progresses until the number of negotiation rounds drops to 0, at which point the negotiation ends.  During your negotiation turn, you can use "Negotiation Strategies" to apply various negotiation techniques to help you succeed. During your negotiation turn, you can use "Negotiation Strategies" to apply various negotiation techniques to help you succeed.During your negotiation turn, you can use "Negotiation Strategies" to apply various negotiation techniques to help you succeed.  Here you can view your opponent's information. If you're unsure what to choose, click to view. Here you can view your opponent's information. If you're unsure what to choose, click to view.Here you can view your opponent's information. If you're unsure what to choose, click to view. |
| Mutation Mechanic: Weakness Break |
Main article: Dreamjolt TV  Attacks of any Type can implant a Weakness of the corresponding Type on this enemy. Attacks of any Type can implant a Weakness of the corresponding Type on this enemy.Attacks of any Type can implant a Weakness of the corresponding Type on this enemy.  Mutation Mechanic: Weakness Break Mutation Mechanic: Weakness BreakBreaking this enemy's Weakness will directly defeat them and inflict Weakness Break on all other enemy targets aside from Lordly Trashcan (Projection). Mutation Mechanic: Weakness Break Breaking this enemy's Weakness will directly defeat them and inflict Weakness Break on all other enemy targets aside from Lordly Trashcan (Projection).  After using the Weakness Break mechanic to break the Lordly Trashcan (Projection)'s Weakness, you may upgrade your Stage Buff by 1 rank. After using the Weakness Break mechanic to break the Lordly Trashcan (Projection)'s Weakness, you may upgrade your Stage Buff by 1 rank.As you increase your Stage Buff rank, the rating for the Stage Buff will also increase. After using the Weakness Break mechanic to break the Lordly Trashcan (Projection)'s Weakness, you may upgrade your Stage Buff by 1 rank. As you increase your Stage Buff rank, the rating for the Stage Buff will also increase. |
| Mutation Mechanic: Quake Counter |
Main article: Dreamjolt TV 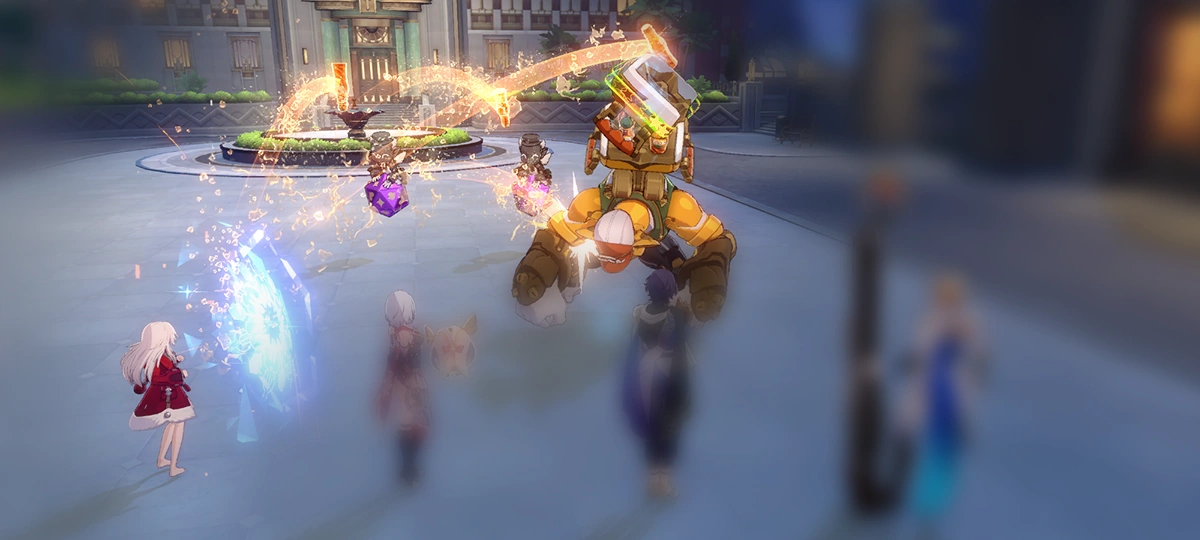 Mutation Mechanic: Quake Counter Mutation Mechanic: Quake CounterCharacters gain Shield after taking action. While Shielded, characters can rebound this enemy's attacks, triggering the Quake Counter mechanic and dealing Blast DMG. Mutation Mechanic: Quake Counter Characters gain Shield after taking action. While Shielded, characters can rebound this enemy's attacks, triggering the Quake Counter mechanic and dealing Blast DMG.  Mutation Mechanic: Quake Counter Mutation Mechanic: Quake CounterAttacking this enemy Advances Forward its action, making it possible to rebound more of its attacks. Mutation Mechanic: Quake Counter Attacking this enemy Advances Forward its action, making it possible to rebound more of its attacks.  After rebounding the attack of Dreamjolt Troupe's Sweet Gorilla (Projection) to trigger the Quake Counter mechanic, you may upgrade the Stage Buff by 1 rank. After rebounding the attack of Dreamjolt Troupe's Sweet Gorilla (Projection) to trigger the Quake Counter mechanic, you may upgrade the Stage Buff by 1 rank.As you increase your Stage Buff rank, the rating for the Stage Buff will also increase. After rebounding the attack of Dreamjolt Troupe's Sweet Gorilla (Projection) to trigger the Quake Counter mechanic, you may upgrade the Stage Buff by 1 rank. As you increase your Stage Buff rank, the rating for the Stage Buff will also increase. |
| Mutation Mechanic: Grin Sweep |
Main article: Dreamjolt TV 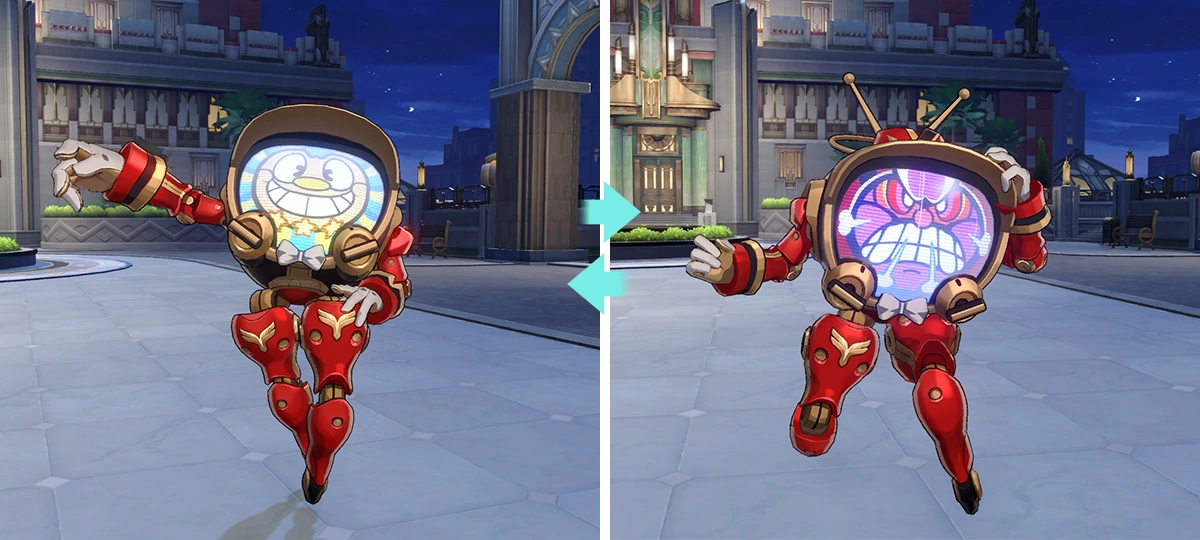 Attacking this enemy can make it switch between Surprise Channel and Fright Channel. Attacking this enemy can make it switch between Surprise Channel and Fright Channel.Attacking this enemy can make it switch between Surprise Channel and Fright Channel.  Mutation Mechanic: Grin Sweep Mutation Mechanic: Grin SweepWhen 3 or more of these enemies in the Surprise Channel are adjacent to each other, triggers the Grin Sweep effect, immediately defeating them. Mutation Mechanic: Grin Sweep When 3 or more of these enemies in the Surprise Channel are adjacent to each other, triggers the Grin Sweep effect, immediately defeating them.  After switching 3 or more adjacent Dreamjolt Troupe's Mr. Domescreen (Projection) to the Surprise Channel to trigger Grin Sweep, you may upgrade the Stage Buff by 1 rank. After switching 3 or more adjacent Dreamjolt Troupe's Mr. Domescreen (Projection) to the Surprise Channel to trigger Grin Sweep, you may upgrade the Stage Buff by 1 rank.As you increase your Stage Buff rank, the rating for the Stage Buff will also increase. After switching 3 or more adjacent Dreamjolt Troupe's Mr. Domescreen (Projection) to the Surprise Channel to trigger Grin Sweep, you may upgrade the Stage Buff by 1 rank. As you increase your Stage Buff rank, the rating for the Stage Buff will also increase. |
| Mutation Mechanic: Combo Blast |
Main article: Dreamjolt TV 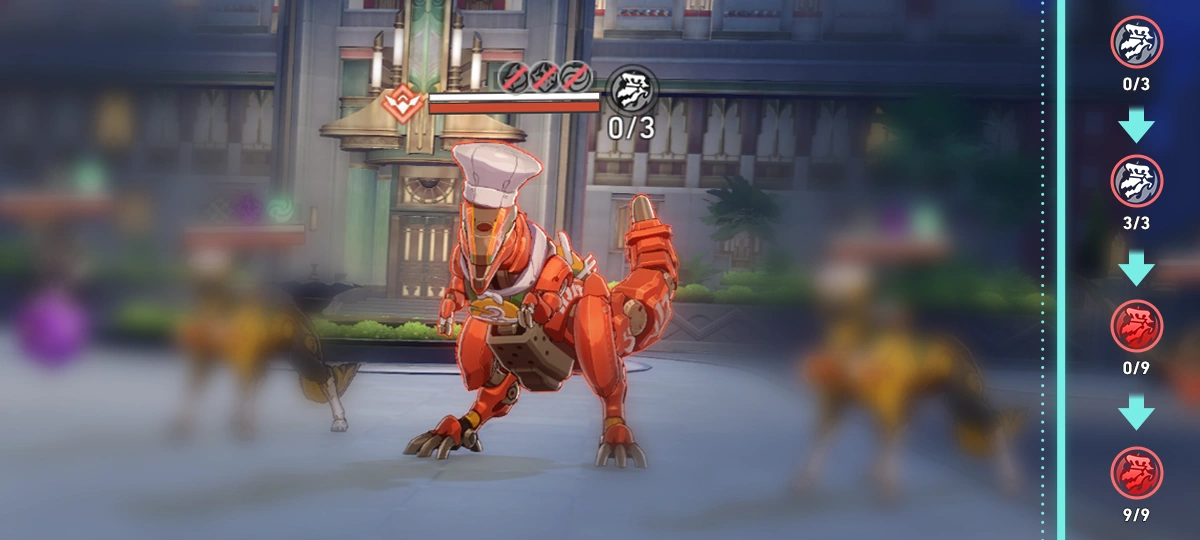 Mutation Mechanic: Combo Blast Mutation Mechanic: Combo BlastAttacking this enemy or dealing DoT to it increases Stove Overheating stacks. When a certain number of stacks is reached, triggers Combo Blast, dealing DMG to all enemies and regenerating Energy for all allies. Mutation Mechanic: Combo Blast Attacking this enemy or dealing DoT to it increases Stove Overheating stacks. When a certain number of stacks is reached, triggers Combo Blast, dealing DMG to all enemies and regenerating Energy for all allies.  By attacking or inflicting DoT on Dreamjolt Troupe's Beyond Overcooked (Projection) to trigger the Combo Blast mechanic, you may upgrade the Stage Buff by 1 rank. By attacking or inflicting DoT on Dreamjolt Troupe's Beyond Overcooked (Projection) to trigger the Combo Blast mechanic, you may upgrade the Stage Buff by 1 rank.As you increase your Stage Buff rank, the rating for the Stage Buff will also increase. By attacking or inflicting DoT on Dreamjolt Troupe's Beyond Overcooked (Projection) to trigger the Combo Blast mechanic, you may upgrade the Stage Buff by 1 rank. As you increase your Stage Buff rank, the rating for the Stage Buff will also increase. |
| Multi-Conditional Photoshoot |
Main article: A Startlement of Fur and Feathers 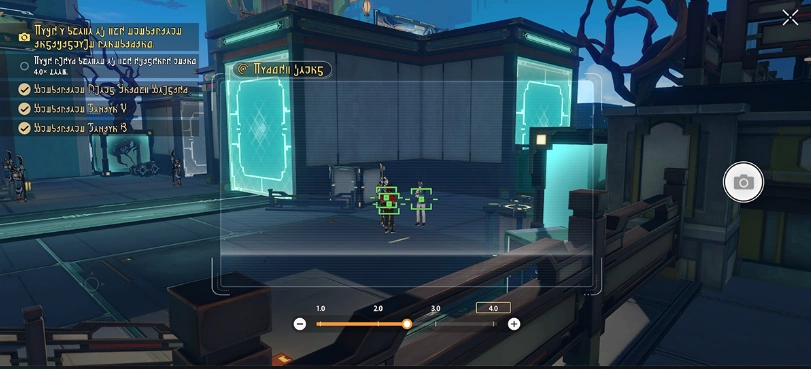 During this mission, more conditions need to be met to complete the photoshoot. During this mission, more conditions need to be met to complete the photoshoot.During this mission, more conditions need to be met to complete the photoshoot.  The required objectives are listed in the top left corner of the photoshoot interface. The required objectives are listed in the top left corner of the photoshoot interface.The required objectives are listed in the top left corner of the photoshoot interface.  When all the photoshoot requirements are met, you can press the shutter to complete this shoot. Try to meet all the requirements if you can. When all the photoshoot requirements are met, you can press the shutter to complete this shoot. Try to meet all the requirements if you can.When all the photoshoot requirements are met, you can press the shutter to complete this shoot. Try to meet all the requirements if you can. |
| Memory Exploration |
Main article: Memory Backtrack 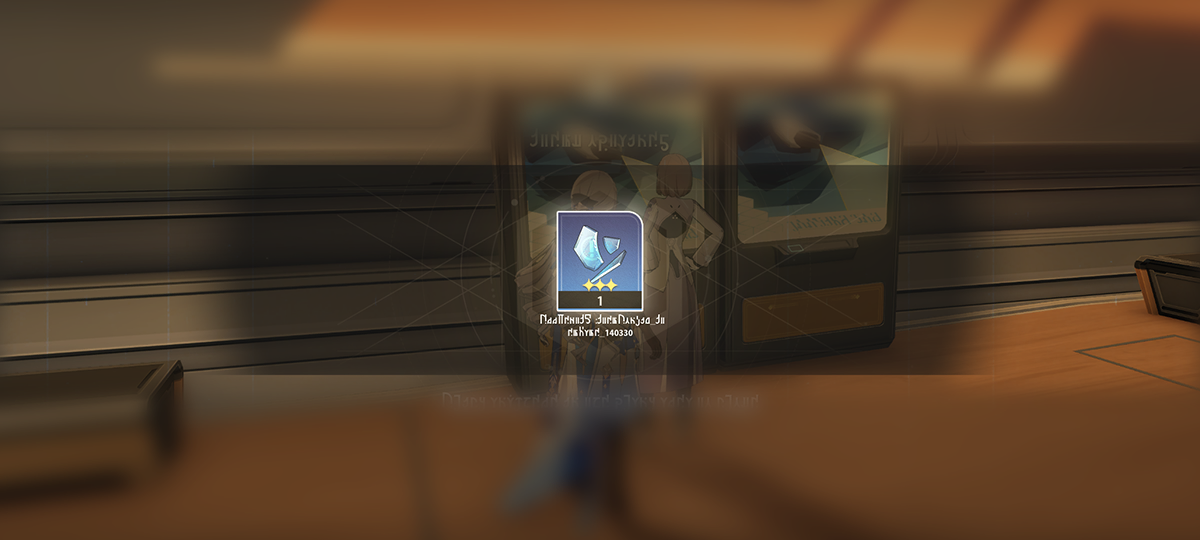 Explore your memories and obtain crucial clues in the form of Cognition Chasms through conducting key conversations with characters. Collect enough Cognition Chasms to exculpate yourself. Explore your memories and obtain crucial clues in the form of Cognition Chasms through conducting key conversations with characters. Collect enough Cognition Chasms to exculpate yourself.Explore your memories and obtain crucial clues in the form of Cognition Chasms through conducting key conversations with characters. Collect enough Cognition Chasms to exculpate yourself.  In Memory Sorting, the fragmented information you recall as you explore your memories will be promptly recorded and updated, which can help you reconstruct the entire timeline. In Memory Sorting, the fragmented information you recall as you explore your memories will be promptly recorded and updated, which can help you reconstruct the entire timeline.In Memory Sorting, the fragmented information you recall as you explore your memories will be promptly recorded and updated, which can help you reconstruct the entire timeline. |
| Cosmic Home Décor Guide |
Main article: Cosmic Home Décor Guide 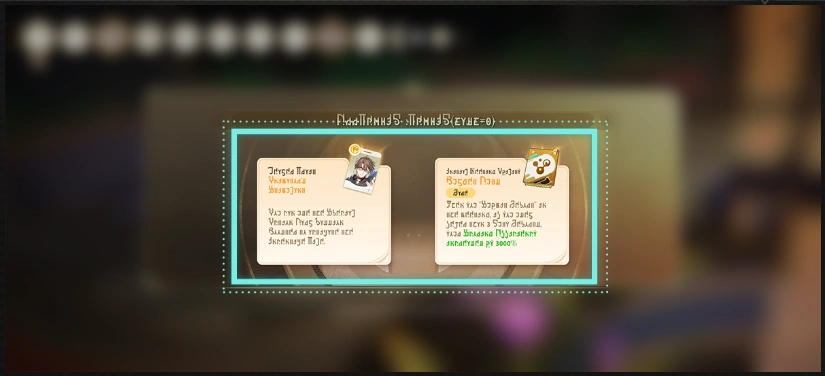 When Welt is the leader, you can gain the special Passion Booster Action Card. After using this card, you can create an Incentive Tile in the schedule. When Welt is the leader, you can gain the special Passion Booster Action Card. After using this card, you can create an Incentive Tile in the schedule.When Welt is the leader, you can gain the special Passion Booster Action Card. After using this card, you can create an Incentive Tile in the schedule. |
| Cosmic Home Décor Guide |
Main article: Cosmic Home Décor Guide  When the Trailblazer is the leader, areas beyond the next 5 tiles in the schedule will be shrouded in fog, but your Inspiration Tile refreshment rate will be greatly increased. At the same time, the Meeting Abilities you get will all be enhanced. When the Trailblazer is the leader, areas beyond the next 5 tiles in the schedule will be shrouded in fog, but your Inspiration Tile refreshment rate will be greatly increased. At the same time, the Meeting Abilities you get will all be enhanced.When the Trailblazer is the leader, areas beyond the next 5 tiles in the schedule will be shrouded in fog, but your Inspiration Tile refreshment rate will be greatly increased. At the same time, the Meeting Abilities you get will all be enhanced. |
| Cosmic Home Décor Guide |
Main article: Cosmic Home Décor Guide 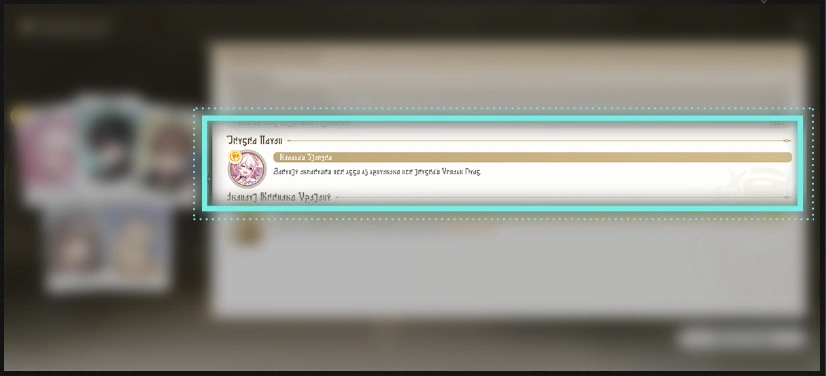 Every Duty Squad's leader will have a unique Leader Trait. This can be useful during duties. Every Duty Squad's leader will have a unique Leader Trait. This can be useful during duties.Every Duty Squad's leader will have a unique Leader Trait. This can be useful during duties. 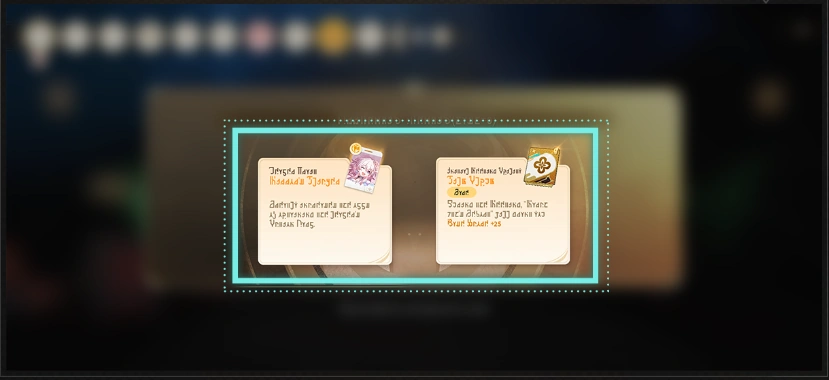 When March 7th is leader, the chance you'll get Action Cards corresponding to March 7th increases. When March 7th is leader, the chance you'll get Action Cards corresponding to March 7th increases.When March 7th is leader, the chance you'll get Action Cards corresponding to March 7th increases. |
| Cosmic Home Décor Guide |
Main article: Cosmic Home Décor Guide 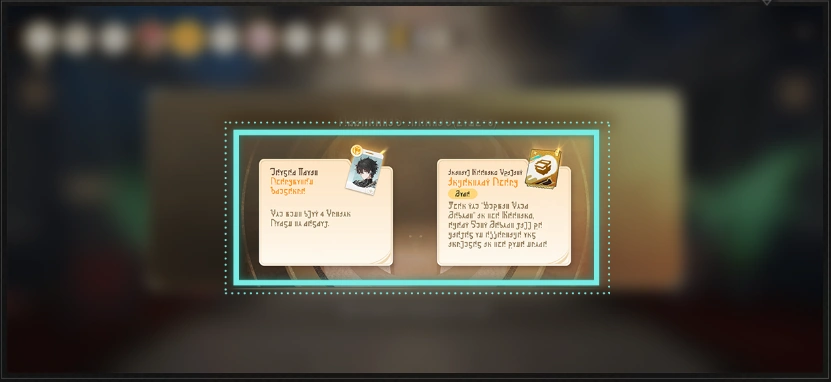 When Dan Heng is the leader, Action Cards can only be redrawn after they are all used. At the same time, before the final Dinner Meeting, you'll gain the special Passenger Paragons Action Card. When Dan Heng is the leader, Action Cards can only be redrawn after they are all used. At the same time, before the final Dinner Meeting, you'll gain the special Passenger Paragons Action Card.When Dan Heng is the leader, Action Cards can only be redrawn after they are all used. At the same time, before the final Dinner Meeting, you'll gain the special Passenger Paragons Action Card.  The Passenger Paragons card can elevate all members' Duty Level to match the highest Duty Level within the team. The Passenger Paragons card can elevate all members' Duty Level to match the highest Duty Level within the team.The Passenger Paragons card can elevate all members' Duty Level to match the highest Duty Level within the team. |
| Interrupt Enemies' Charged Attacks |
 Some enemies will unleash a powerful Charged ATK during their next action once they finish Charging. Some enemies will unleash a powerful Charged ATK during their next action once they finish Charging.Some enemies will unleash a powerful Charged ATK during their next action once they finish Charging. 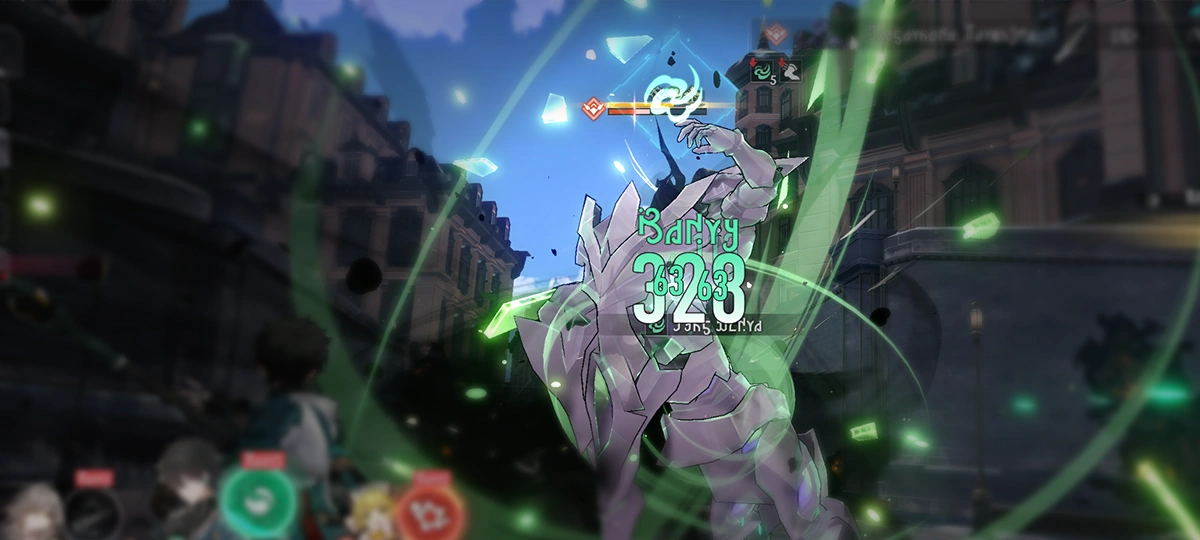 Upon inflicting Weakness Break on an enemy, their Charged ATK will be interrupted. Upon inflicting Weakness Break on an enemy, their Charged ATK will be interrupted.Upon inflicting Weakness Break on an enemy, their Charged ATK will be interrupted. |
| How to Play |
Main article: Express Renovation Escapade  The Creation Meow Box will randomly release 3 creations each week. Once they've escaped the box, these creations will hide somewhere in the Party Car. The Creation Meow Box will randomly release 3 creations each week. Once they've escaped the box, these creations will hide somewhere in the Party Car.Resets every Monday at 04:00 (server time). The Creation Meow Box will randomly release 3 creations each week. Once they've escaped the box, these creations will hide somewhere in the Party Car. Resets every Monday at 04:00 (server time).  The Party Car has multiple hiding spots. When a creation hides, its tail will stick out, and it'll squeak when a Trailblazer gets close. The Party Car has multiple hiding spots. When a creation hides, its tail will stick out, and it'll squeak when a Trailblazer gets close.Each Trailblazer can catch up to 9 creations per week (including repeating creations). The Party Car has multiple hiding spots. When a creation hides, its tail will stick out, and it'll squeak when a Trailblazer gets close. Each Trailblazer can catch up to 9 creations per week (including repeating creations).  When a dark-colored creation hides, it'll leave a dark tail sticking out. When a light-colored creation hides, it'll leave a light tail sticking out. When a dark-colored creation hides, it'll leave a dark tail sticking out. When a light-colored creation hides, it'll leave a light tail sticking out.When a dark-colored creation hides, it'll leave a dark tail sticking out. When a light-colored creation hides, it'll leave a light tail sticking out. You can search in your own Party Car, or catch more creations by visiting Friends' or Strangers' Party Cars.You can search in your own Party Car, or catch more creations by visiting Friends' or Strangers' Party Cars.  Up to 13 creations can be placed in the Creation Placement Zone. Up to 13 creations can be placed in the Creation Placement Zone.Up to 13 creations can be placed in the Creation Placement Zone.  Capture the same creation 3 times to unlock the Stack-a-Cake placement mode. Capture the same creation 3 times to unlock the Stack-a-Cake placement mode.Capture the same creation 3 times to unlock the Stack-a-Cake placement mode.  After capturing the same creation 6 times, you can unlock the Meow Meow Tower placement mode. After capturing the same creation 6 times, you can unlock the Meow Meow Tower placement mode.After capturing the same creation 6 times, you can unlock the Meow Meow Tower placement mode. |
| How to Place Creations? |
Main article: Express Renovation Escapade Up to 13 creations can be placed in the Creation Placement Zone.Up to 13 creations can be placed in the Creation Placement Zone. Capture the same creation 3 times to unlock the Stack-a-Cake placement mode.Capture the same creation 3 times to unlock the Stack-a-Cake placement mode. After capturing the same creation 6 times, you can unlock the Meow Meow Tower placement mode.After capturing the same creation 6 times, you can unlock the Meow Meow Tower placement mode. |
| How do you catch a creation that's hiding? |
Main article: Express Renovation Escapade The Creation Meow Box will randomly release 3 creations each week. Once they've escaped the box, these creations will hide somewhere in the Party Car.Resets every Monday at 04:00 (server time). The Creation Meow Box will randomly release 3 creations each week. Once they've escaped the box, these creations will hide somewhere in the Party Car. Resets every Monday at 04:00 (server time). The Party Car has multiple hiding spots. When a creation hides, its tail will stick out, and it'll squeak when a Trailblazer gets close.Each Trailblazer can catch up to 9 creations per week (including repeating creations). The Party Car has multiple hiding spots. When a creation hides, its tail will stick out, and it'll squeak when a Trailblazer gets close. Each Trailblazer can catch up to 9 creations per week (including repeating creations). When a dark-colored creation hides, it'll leave a dark tail sticking out. When a light-colored creation hides, it'll leave a light tail sticking out.When a dark-colored creation hides, it'll leave a dark tail sticking out. When a light-colored creation hides, it'll leave a light tail sticking out. |
| Heliobus Fiendfire |
Main article: A Foxian Tale of the Haunted 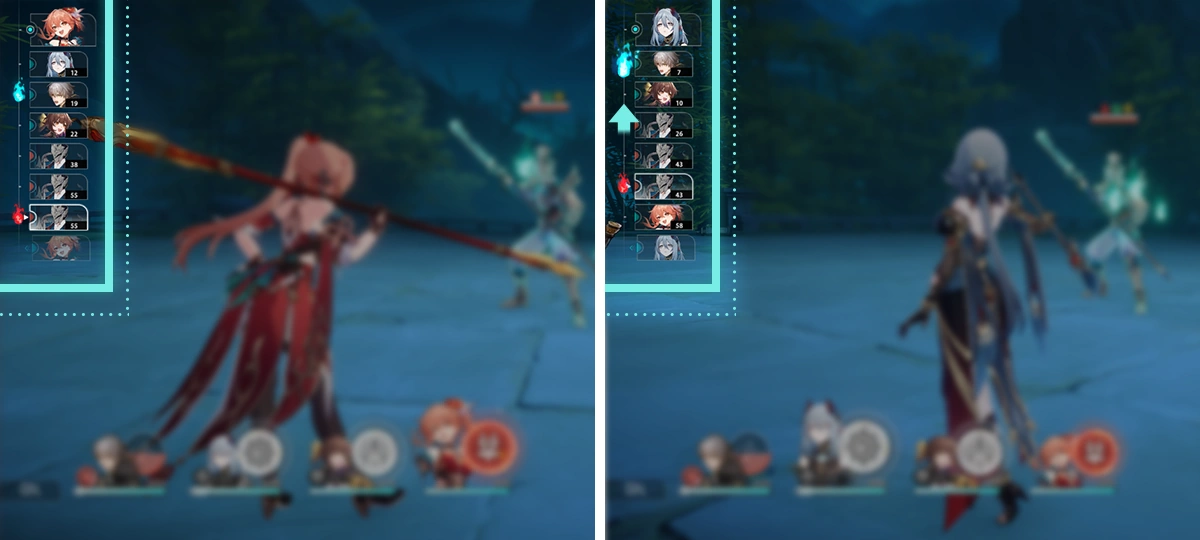 Every few turns, Fiendfire will appear in the Action Order. Every few turns, Fiendfire will appear in the Action Order.When any turn ends, it will cause the Fiendfire to shift towards the top of the Action Order. When Fiendfire reaches the top of the Action Order, it takes effect on the unit that is currently taking action. Every few turns, Fiendfire will appear in the Action Order. When any turn ends, it will cause the Fiendfire to shift towards the top of the Action Order. When Fiendfire reaches the top of the Action Order, it takes effect on the unit that is currently taking action. 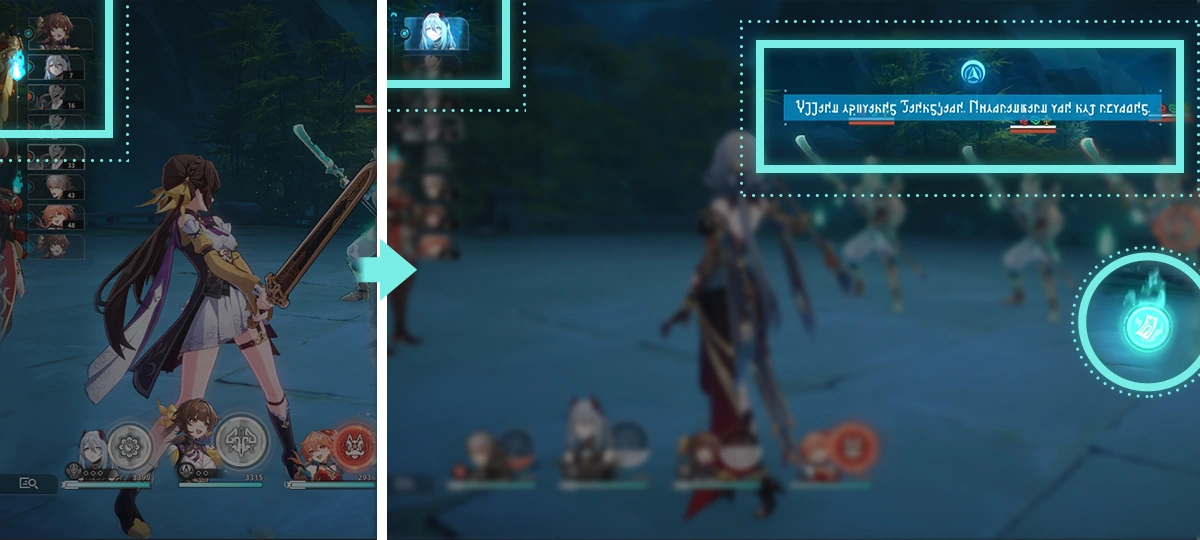 When Fiendfire appears next to allies, it will appear as a green flame. When Fiendfire appears next to allies, it will appear as a green flame.When it takes effect, it can replenish the Lunaumbra Gourd's exorcismics energy. When Fiendfire appears next to allies, it will appear as a green flame. When it takes effect, it can replenish the Lunaumbra Gourd's exorcismics energy. 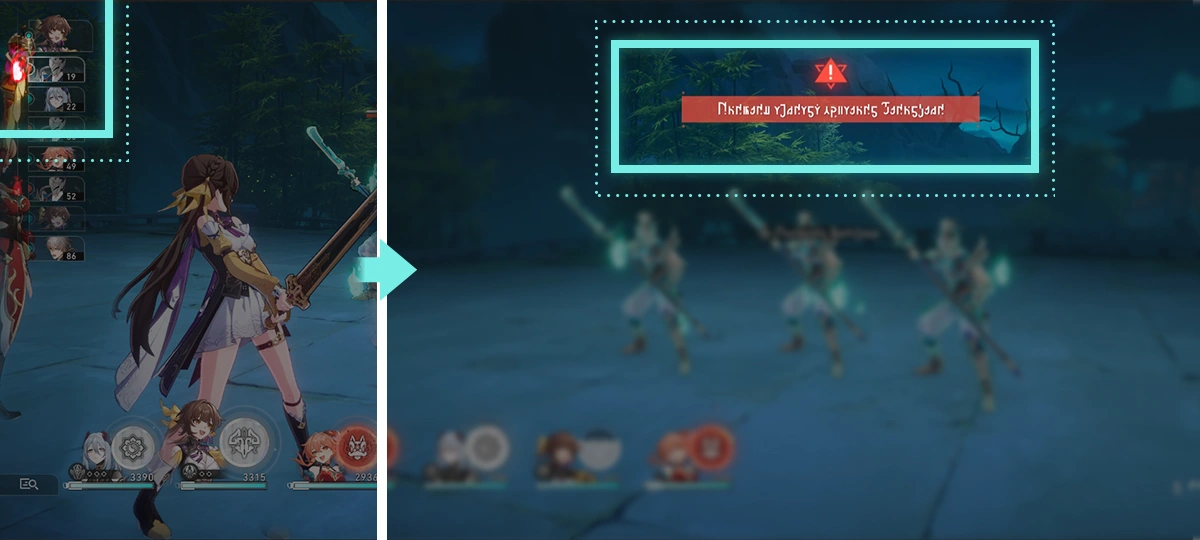 When Fiendfire appears next to enemies, it will appear as a red flame. When Fiendfire appears next to enemies, it will appear as a red flame.When it takes effect, it can greatly enhance the enemy that receives it. When Fiendfire appears next to enemies, it will appear as a red flame. When it takes effect, it can greatly enhance the enemy that receives it. 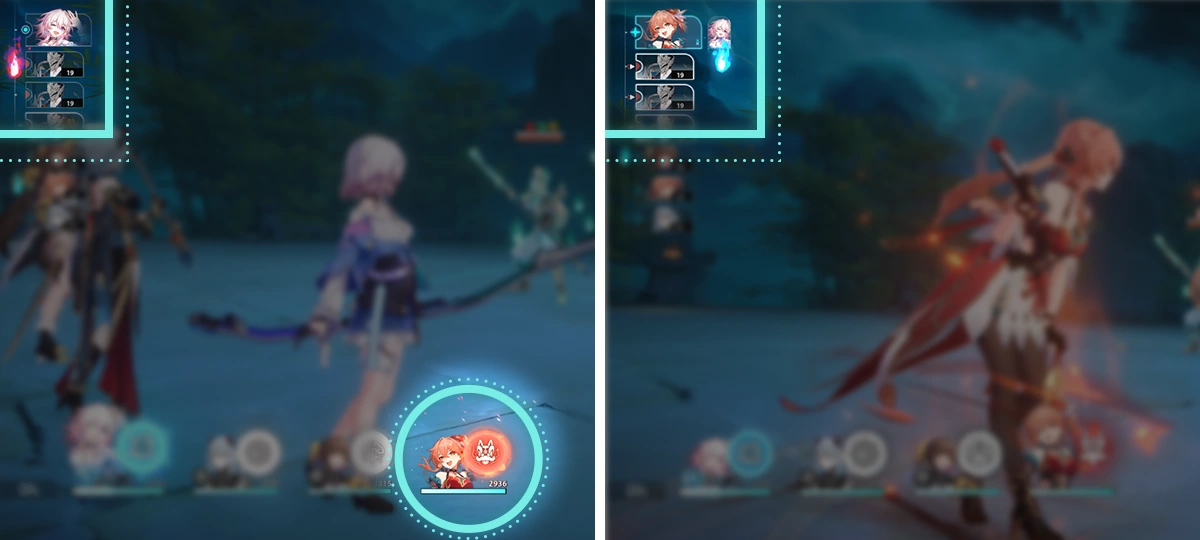 After an Ultimate is used, Fiendfire will immediately shift towards the top of the Action Order. After an Ultimate is used, Fiendfire will immediately shift towards the top of the Action Order.Using an Ultimate when the red Fiendfire is just about to reach the top of the Action Order will enable the team to capture the Fiendfire. After an Ultimate is used, Fiendfire will immediately shift towards the top of the Action Order. Using an Ultimate when the red Fiendfire is just about to reach the top of the Action Order will enable the team to capture the Fiendfire. |
| Hazy Memories |
Main article: Memory Backtrack  Due to the presence of certain hazy memories, some content will appear as ■■■ in conversations as you explore your memories. Due to the presence of certain hazy memories, some content will appear as ■■■ in conversations as you explore your memories.Due to the presence of certain hazy memories, some content will appear as ■■■ in conversations as you explore your memories.  Using Cognition Chasm has a chance of restoring relevant hazy memories. Using Cognition Chasm has a chance of restoring relevant hazy memories.Using Cognition Chasm has a chance of restoring relevant hazy memories. |
| Fuel Voucher Details |
Main article: Fuel Vouchers 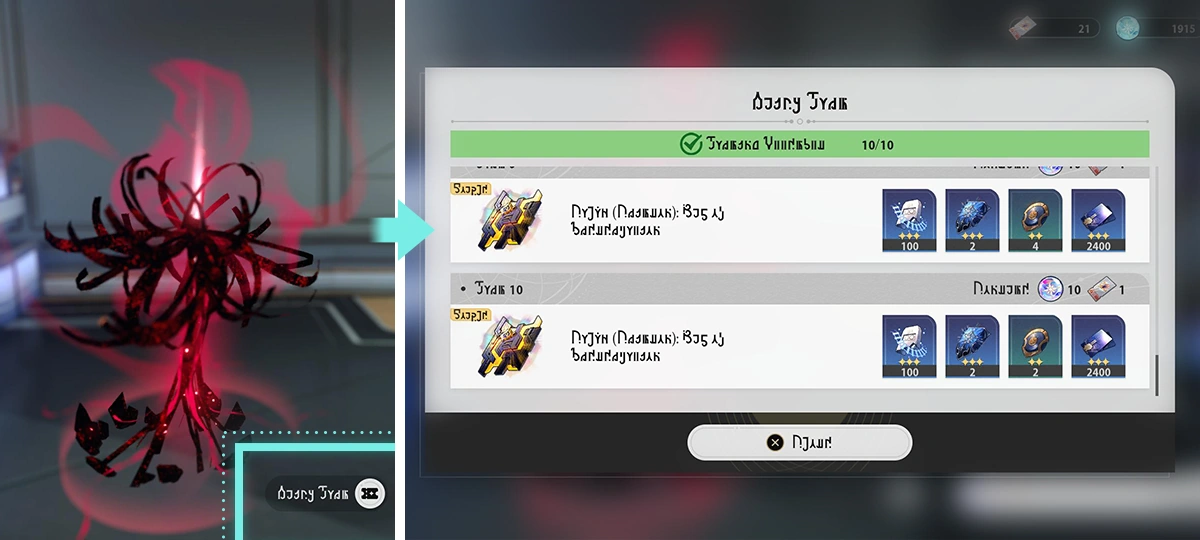 Using a Fuel Voucher lets you quickly farm upgrade materials from Calyx / Stagnant Shadows. Using a Fuel Voucher lets you quickly farm upgrade materials from Calyx / Stagnant Shadows.Using a Fuel Voucher lets you quickly farm upgrade materials from Calyx / Stagnant Shadows.  On the Character Build Screen, you can use Quick Farm to obtain missing Calyx / Stagnant Shadow materials. On the Character Build Screen, you can use Quick Farm to obtain missing Calyx / Stagnant Shadow materials.On the Character Build Screen, you can use Quick Farm to obtain missing Calyx / Stagnant Shadow materials.  When you trigger Starlit Homecoming, you'll get a set number of Fuel Vouchers. Any unused vouchers will be removed once Starlit Homecoming ends. When you trigger Starlit Homecoming, you'll get a set number of Fuel Vouchers. Any unused vouchers will be removed once Starlit Homecoming ends.When you trigger Starlit Homecoming, you'll get a set number of Fuel Vouchers. Any unused vouchers will be removed once Starlit Homecoming ends. |
| Forgotten Hall: Starward Mode |
Main article: Forgotten Hall  Clear Stage 11 of Forgotten Hall to unlock Starward Mode. Clear Stage 11 of Forgotten Hall to unlock Starward Mode.Clearing Stage 12 in Starward Mode requires challenging 3 Nodes. Clear Stage 11 of Forgotten Hall to unlock Starward Mode. Clearing Stage 12 in Starward Mode requires challenging 3 Nodes.  Clear Stage 12 of Starward Mode with 3 stars and 33 or more Cycles remaining to obtain the Prismatic Star and additional new rewards. Clear Stage 12 of Starward Mode with 3 stars and 33 or more Cycles remaining to obtain the Prismatic Star and additional new rewards.Accumulate 36 stars and the Prismatic Star to obtain this period's Forgotten Hall Limited-Time Clearance Medal. Clear Stage 12 of Starward Mode with 3 stars and 33 or more Cycles remaining to obtain the Prismatic Star and additional new rewards. Accumulate 36 stars and the Prismatic Star to obtain this period's Forgotten Hall Limited-Time Clearance Medal.  You can switch back to Regular Mode at any time to challenge Stage 12 of the regular Forgotten Hall and obtain the original rewards. You can switch back to Regular Mode at any time to challenge Stage 12 of the regular Forgotten Hall and obtain the original rewards.You can switch back to Regular Mode at any time to challenge Stage 12 of the regular Forgotten Hall and obtain the original rewards. |
| Folded Space |
Main article: Mundane Troubles  The folded space results from the spatial distortion during the spread of the infernal fire. Trying to pass through it may result in a drift in the spatial coordinates, with you transported to somewhere unexpected The folded space results from the spatial distortion during the spread of the infernal fire. Trying to pass through it may result in a drift in the spatial coordinates, with you transported to somewhere unexpectedThe folded space results from the spatial distortion during the spread of the infernal fire. Trying to pass through it may result in a drift in the spatial coordinates, with you transported to somewhere unexpected  The folded space that the space station uses to counter escaped Curios. It can effectively cut off space to hinder standard travel The folded space that the space station uses to counter escaped Curios. It can effectively cut off space to hinder standard travelThe folded space that the space station uses to counter escaped Curios. It can effectively cut off space to hinder standard travel |
| Firefly: Technique |
Main article: Firefly  Firefly can use her Technique to leap into the air and move about freely Firefly can use her Technique to leap into the air and move about freelyFirefly can use her Technique to leap into the air and move about freely  When the free movement times out or when (tappingtapping/pressingpressing/clickingclicking) the Technique button again, uses a Plunging Attack to hit all enemies within the Technique's range and applies Fire Weakness on them When the free movement times out or when (tappingtapping/pressingpressing/clickingclicking) the Technique button again, uses a Plunging Attack to hit all enemies within the Technique's range and applies Fire Weakness on themWhen the free movement times out or when (tappingtapping/pressingpressing/clickingclicking) the Technique button again, uses a Plunging Attack to hit all enemies within the Technique's range and applies Fire Weakness on them |
| Final Trial |
Main article: Planar Infinity 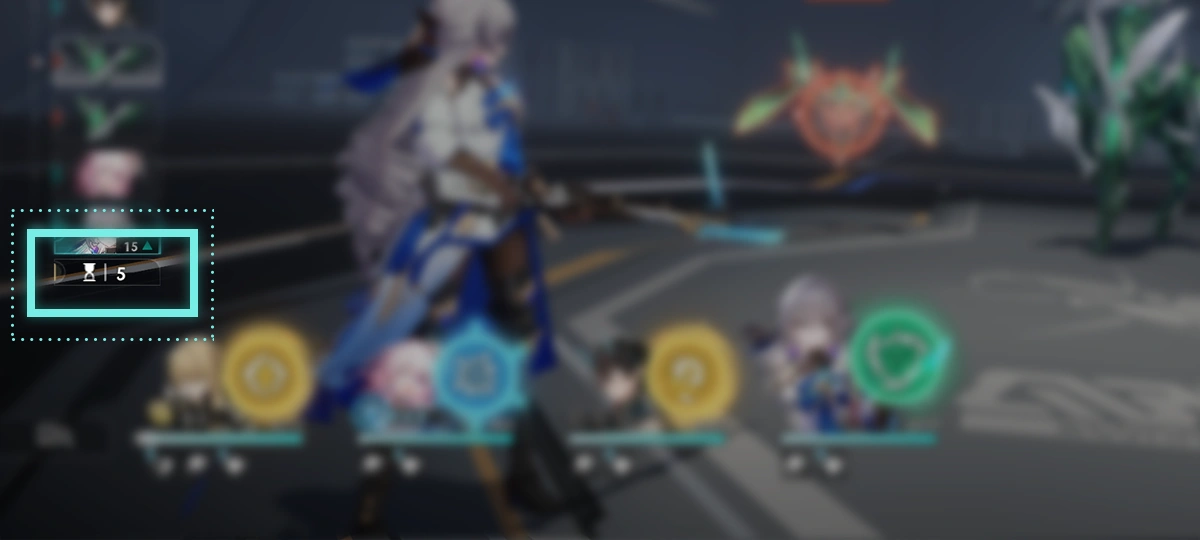 The Final Trial is a continuous battle with a countdown timer of 6 Cycles. Boss enemies in the trial will have their special battle mechanics. The Final Trial is a continuous battle with a countdown timer of 6 Cycles. Boss enemies in the trial will have their special battle mechanics.The Final Trial is a continuous battle with a countdown timer of 6 Cycles. Boss enemies in the trial will have their special battle mechanics. 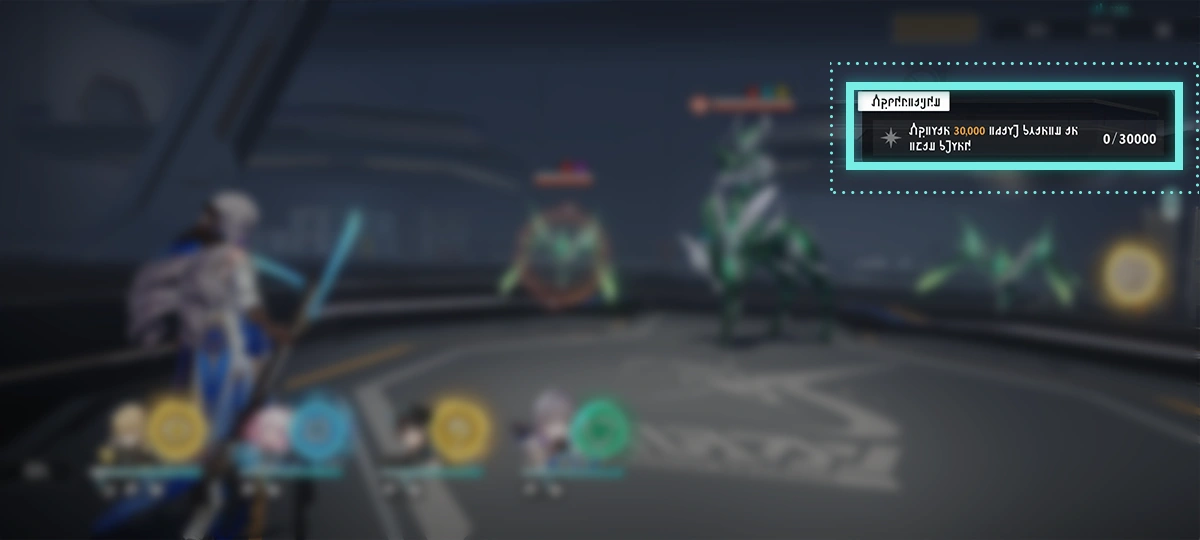 Dealing damage and defeating enemies will award Trial Points. Dealing damage and defeating enemies will award Trial Points.If there are remaining Cycles when the trial is cleared, extra Trial Points will be awarded. Dealing damage and defeating enemies will award Trial Points. If there are remaining Cycles when the trial is cleared, extra Trial Points will be awarded.  After completing the Final Trial, the Save File for this challenge attempt will not be deleted. Planes with a Save File can be selected again to re-attempt the Final Trial. After completing the Final Trial, the Save File for this challenge attempt will not be deleted. Planes with a Save File can be selected again to re-attempt the Final Trial.After completing the Final Trial, the Save File for this challenge attempt will not be deleted. Planes with a Save File can be selected again to re-attempt the Final Trial. |
| Film Editing Gameplay Details |
Main article: Clockie: Dreamjoy Memoir  Every chapter needs to pass Internal Screening before they are released, and different films have different Emotion Targets Every chapter needs to pass Internal Screening before they are released, and different films have different Emotion TargetsEvery chapter needs to pass Internal Screening before they are released, and different films have different Emotion Targets  Place Time Dice in the Story Snippets to affect the film's emotion Place Time Dice in the Story Snippets to affect the film's emotionPlace Time Dice in the Story Snippets to affect the film's emotion  Different colored Story Snippets will cause different Audience Emotions to change, resulting in varied effects Different colored Story Snippets will cause different Audience Emotions to change, resulting in varied effectsDifferent colored Story Snippets will cause different Audience Emotions to change, resulting in varied effects |
| Everwinter City Museum Ledger of Curiosities: RevitaScore |
Main article: Everwinter City Museum Ledger of Curiosities  The museum's Revitalization Stage and obtained RevitaScore are shown here The museum's Revitalization Stage and obtained RevitaScore are shown hereThe museum's Revitalization Stage and obtained RevitaScore are shown here 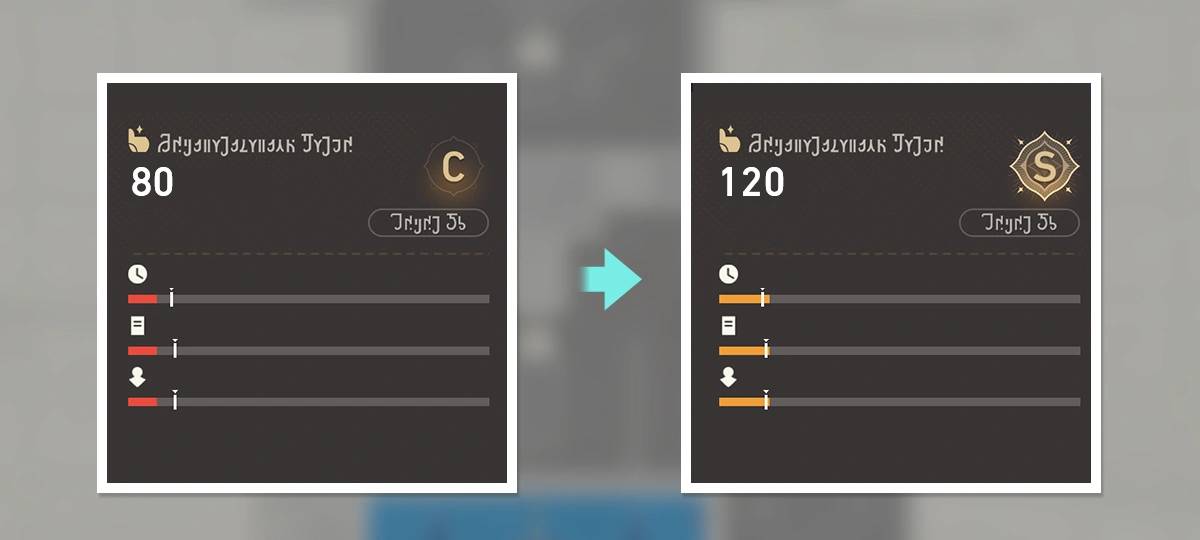 Management benefits are influenced by three parameters. The higher the museum is ranked, the more benefits it will bring in. Management benefits are influenced by three parameters. The higher the museum is ranked, the more benefits it will bring in.Management benefits are influenced by three parameters. The higher the museum is ranked, the more benefits it will bring in. |
| Everwinter City Museum Ledger of Curiosities: Exhibition Area Level Up |
Main article: Everwinter City Museum Ledger of Curiosities |
| Everwinter City Museum Ledger of Curiosities: Exhibit Collection |
Main article: Everwinter City Museum Ledger of Curiosities  To [sic] key to revitalizing the museum lies in finding the lost exhibits. Continue operations to keep finding clues! To [sic] key to revitalizing the museum lies in finding the lost exhibits. Continue operations to keep finding clues!To [sic] key to revitalizing the museum lies in finding the lost exhibits. Continue operations to keep finding clues! 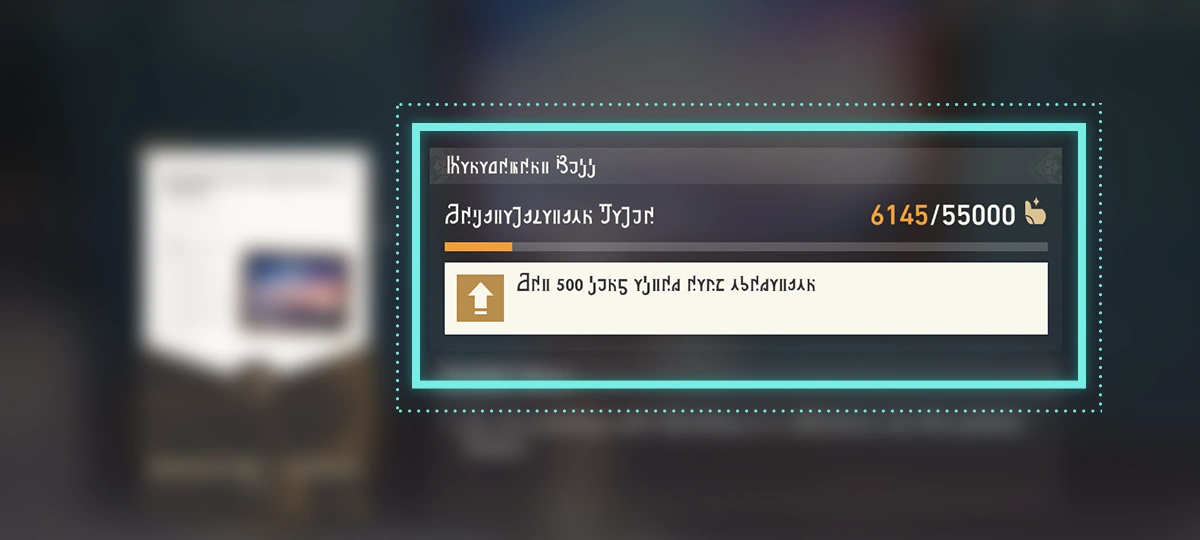 Exhibits can bring extra benefits and special boosts! Exhibits can bring extra benefits and special boosts!Exhibits can bring extra benefits and special boosts! |
| Evade Monsters |
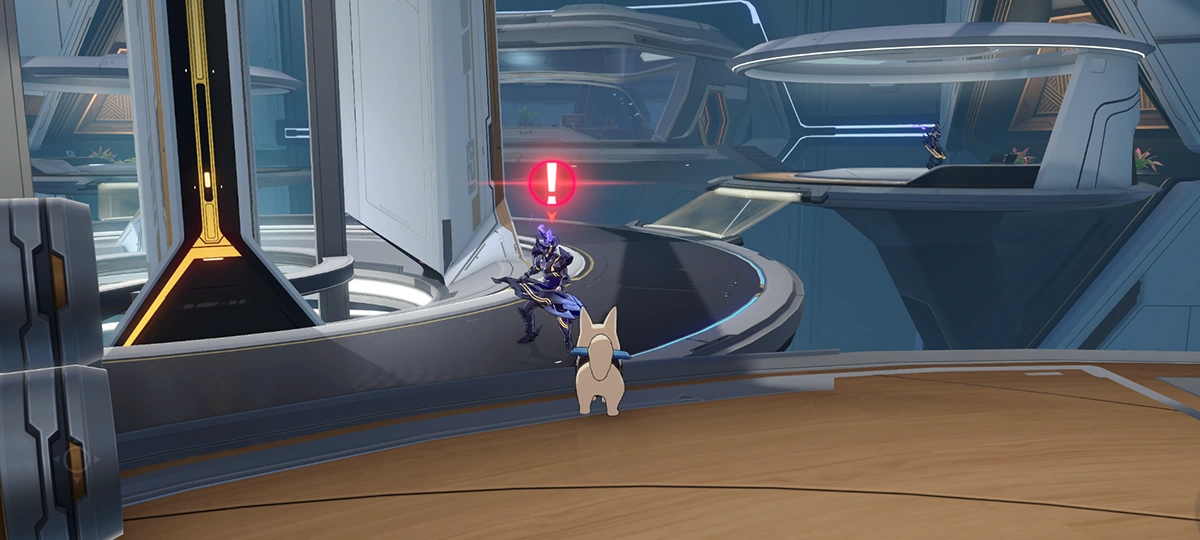 While controlling Peppy in Sync Mode, if Peppy gets detected by any nearby monsters, it will activate its emergency escape device and return to the nearest safe area. While controlling Peppy in Sync Mode, if Peppy gets detected by any nearby monsters, it will activate its emergency escape device and return to the nearest safe area.While controlling Peppy in Sync Mode, if Peppy gets detected by any nearby monsters, it will activate its emergency escape device and return to the nearest safe area.  Please observe the monsters' path and utilize objects in the map to obstruct their line of sight. Reach the destination without being detected by the monsters. Please observe the monsters' path and utilize objects in the map to obstruct their line of sight. Reach the destination without being detected by the monsters.Please observe the monsters' path and utilize objects in the map to obstruct their line of sight. Reach the destination without being detected by the monsters. |
| Energy and Ultimate |
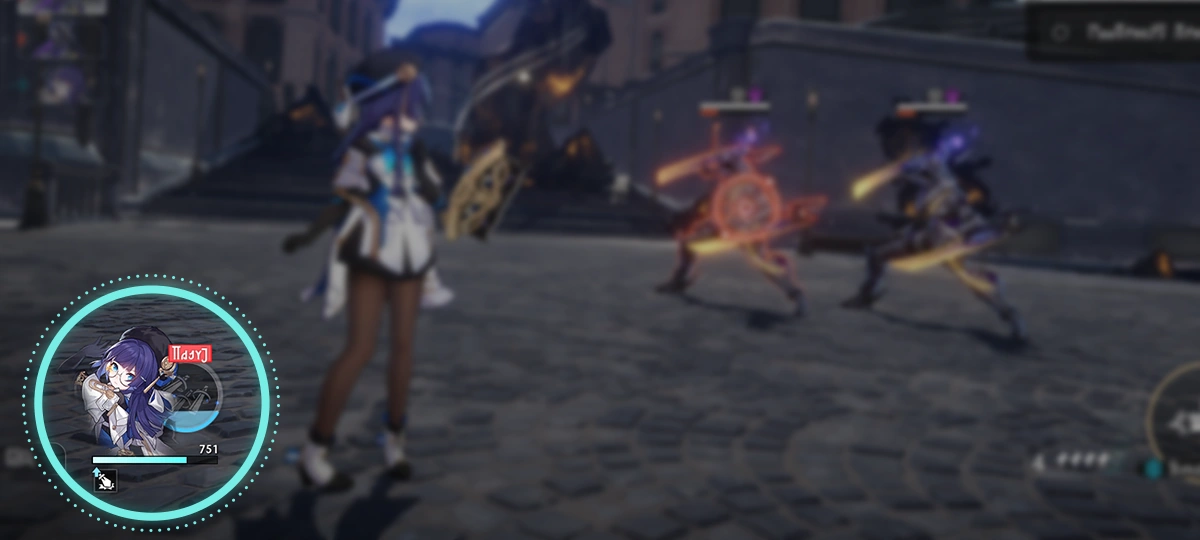 Regenerate Energy in battle when using abilities, defeating enemies, or receiving attacks. Regenerate Energy in battle when using abilities, defeating enemies, or receiving attacks.Regenerate Energy in battle when using abilities, defeating enemies, or receiving attacks.  Ultimates can be used when a character's Energy is fully charged. Ultimates can be unleashed at any time as an extra action. Ultimates can be used when a character's Energy is fully charged. Ultimates can be unleashed at any time as an extra action.Ultimates can be used when a character's Energy is fully charged. Ultimates can be unleashed at any time as an extra action. |
| Dreamy Slots Gameplay Details |
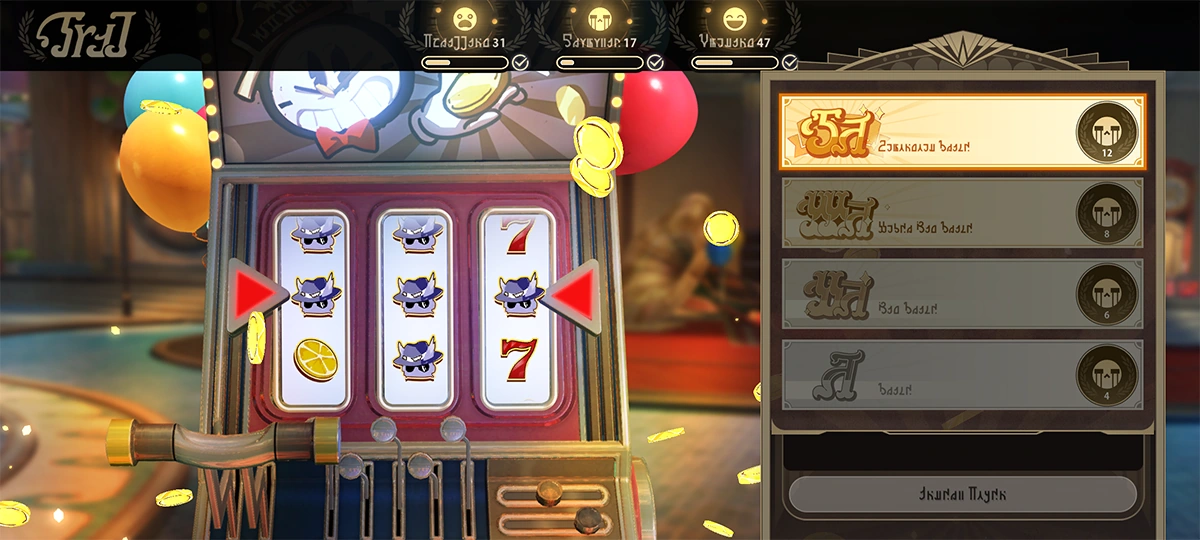 Lucky Scene allows you to draw different results in Dreamy Slots, potentially granting a large amount of Audience Emotions Lucky Scene allows you to draw different results in Dreamy Slots, potentially granting a large amount of Audience EmotionsLucky Scene allows you to draw different results in Dreamy Slots, potentially granting a large amount of Audience Emotions |
| Dreamjolt TV: Gameplay Details |
Main article: Dreamjolt TV  In the Dreamjolt TV event, a total of 5 TV screens have been hacked. Locate the screens and fight the culprits to foil the mastermind's plan. In the Dreamjolt TV event, a total of 5 TV screens have been hacked. Locate the screens and fight the culprits to foil the mastermind's plan.In the Dreamjolt TV event, a total of 5 TV screens have been hacked. Locate the screens and fight the culprits to foil the mastermind's plan. All enemies hacking the TV screens have their own unique Mutation Mechanics. You need to exploit these Mutation Mechanics to defeat the enemies and gain more potent Stage Buffs, which allows you to effectively take down more enemies and earn more points.All enemies hacking the TV screens have their own unique Mutation Mechanics. You need to exploit these Mutation Mechanics to defeat the enemies and gain more potent Stage Buffs, which allows you to effectively take down more enemies and earn more points. |
| Dreamjolt TV: Final Showdown |
Main article: Dreamjolt TV  Defeat more enemies during the Final Showdown phase to earn more points. Defeat more enemies during the Final Showdown phase to earn more points.You will earn additional points if you have any remaining Cycles. Defeat more enemies during the Final Showdown phase to earn more points. You will earn additional points if you have any remaining Cycles.  Your Stage Buff rank will not be upgraded during the Final Showdown phase. Your Stage Buff rank will not be upgraded during the Final Showdown phase.Your Stage Buff rank will not be upgraded during the Final Showdown phase. |
| Divergent Universe: Golden Blood's Boons |
Main articles: Divergent Universe: Protean Hero/Golden Blood's Boons and Divergent Universe 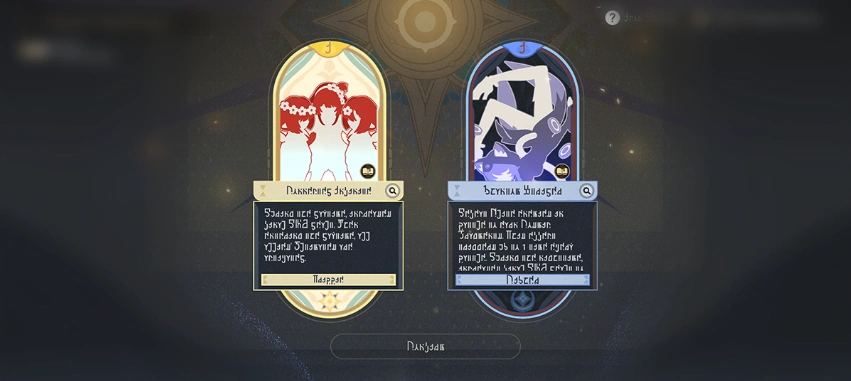 In the Divergent Universe, you can enhance your combat effectiveness by selecting Golden Blood's Boons. In the Divergent Universe, you can enhance your combat effectiveness by selecting Golden Blood's Boons.In the Divergent Universe, you can enhance your combat effectiveness by selecting Golden Blood's Boons. 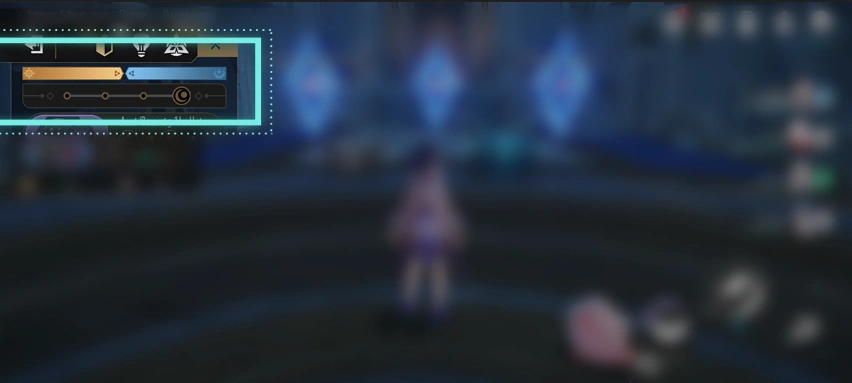 You can select Golden Blood's Boons once for every 4 domains entered. You can select Golden Blood's Boons once for every 4 domains entered.You can select Golden Blood's Boons once for every 4 domains entered. 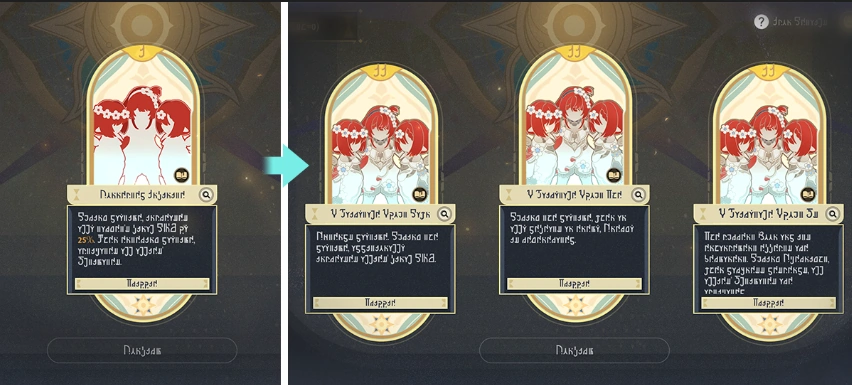 Golden Blood's Boons are separated into basic buffs and enhancement buffs. You must already have a basic buff before you can choose to get the corresponding enhancement buffs. Golden Blood's Boons are separated into basic buffs and enhancement buffs. You must already have a basic buff before you can choose to get the corresponding enhancement buffs.Golden Blood's Boons are separated into basic buffs and enhancement buffs. You must already have a basic buff before you can choose to get the corresponding enhancement buffs. |
| Divergent Universe: Excessive Conversion |
Main articles: Divergent Universe: The Human Comedy and Divergent Universe  In Divergent Universe, after defeating the Boss Enemy, you will enter the Excessive Conversion challenge. In Divergent Universe, after defeating the Boss Enemy, you will enter the Excessive Conversion challenge.In Divergent Universe, after defeating the Boss Enemy, you will enter the Excessive Conversion challenge. 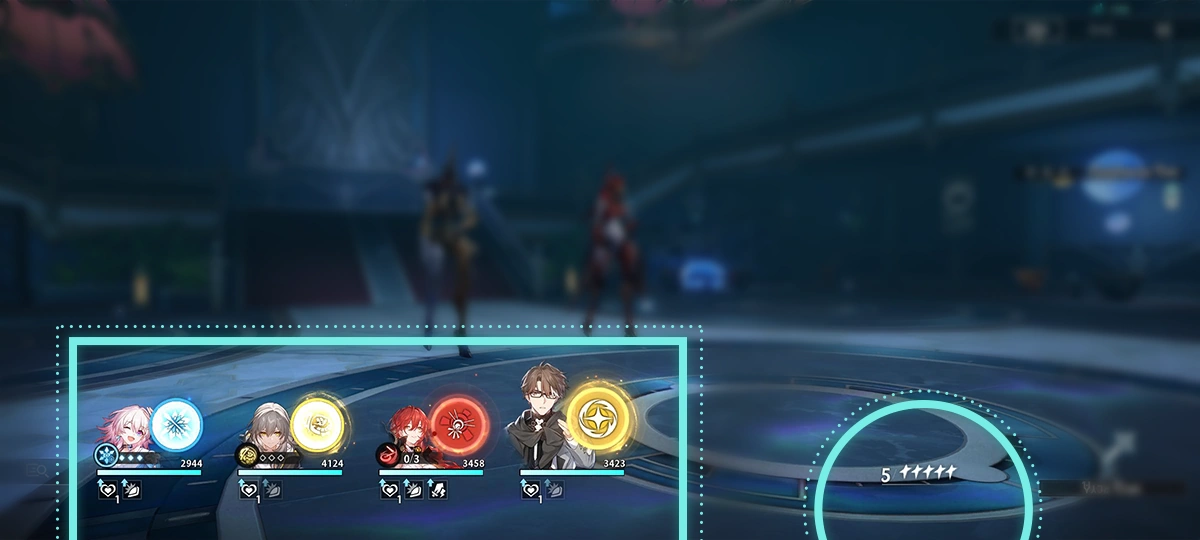 When entering the Excessive Conversion challenge, all allies will activate their Ultimates and recover 5 Skill Points. When entering the Excessive Conversion challenge, all allies will activate their Ultimates and recover 5 Skill Points.When entering the Excessive Conversion challenge, all allies will activate their Ultimates and recover 5 Skill Points. 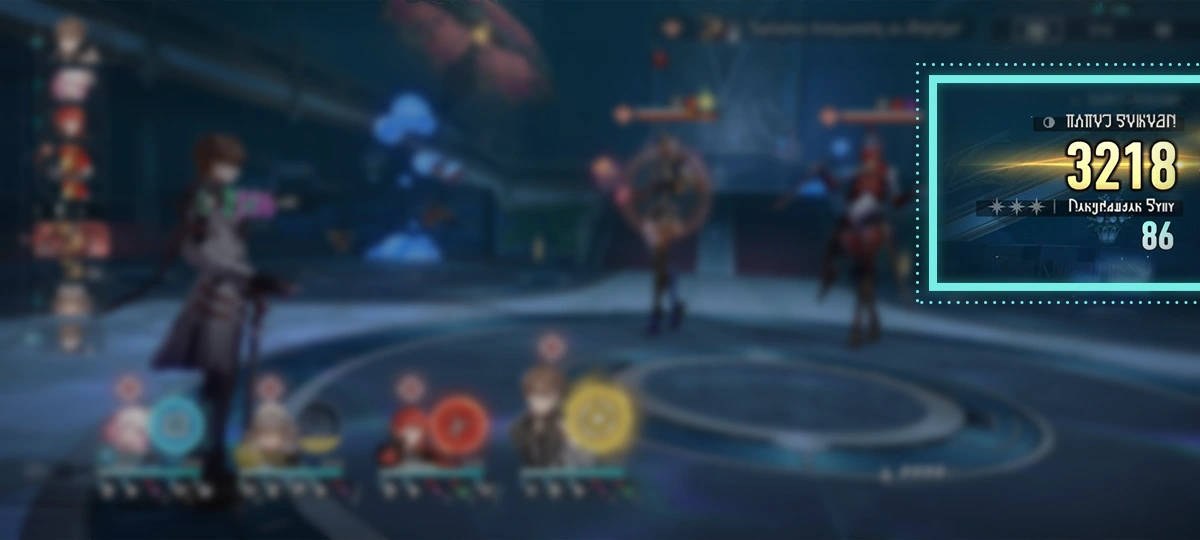 During Excessive Conversion, reduce the enemy's HP to obtain Conversion Data. During Excessive Conversion, reduce the enemy's HP to obtain Conversion Data.During Excessive Conversion, reduce the enemy's HP to obtain Conversion Data. 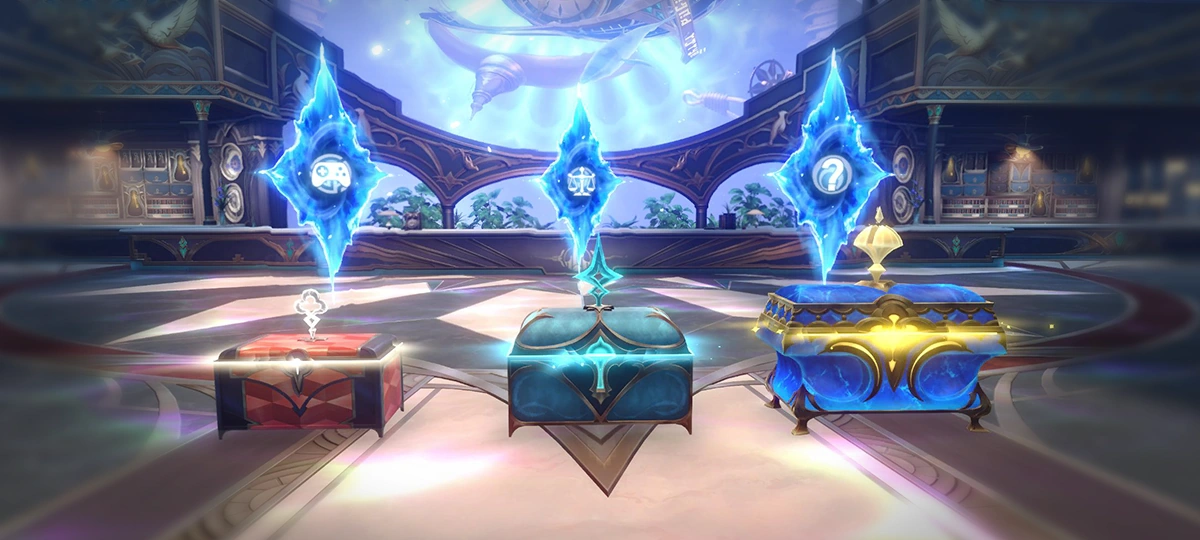 Complete the challenge goals to obtain treasure chests. The more challenge goals you complete, the better the rewards. Complete the challenge goals to obtain treasure chests. The more challenge goals you complete, the better the rewards.Complete the challenge goals to obtain treasure chests. The more challenge goals you complete, the better the rewards.  If you are defeated by the enemy during the Excessive Conversion challenge, you will still be regarded as having won the battle and your data will be finalized based on Conversion Data. If you are defeated by the enemy during the Excessive Conversion challenge, you will still be regarded as having won the battle and your data will be finalized based on Conversion Data.If you are defeated by the enemy during the Excessive Conversion challenge, you will still be regarded as having won the battle and your data will be finalized based on Conversion Data. |
| Divergent Universe: Day and Night |
Main articles: Divergent Universe: Protean Hero and Divergent Universe 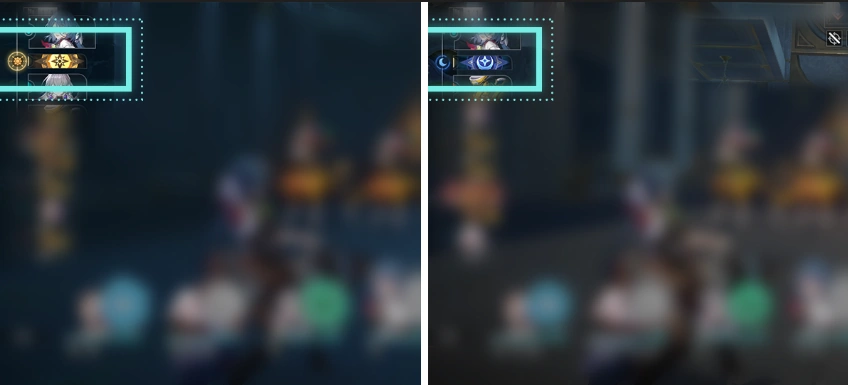 The entire battle will cycle between Day and Night. The entire battle will cycle between Day and Night.The entire battle will cycle between Day and Night. 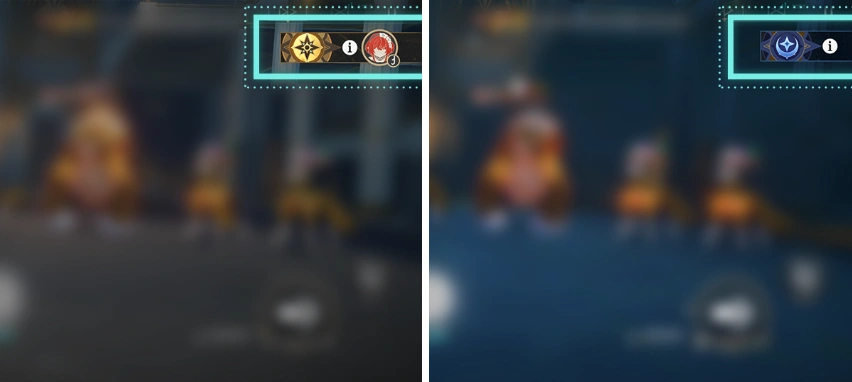 Day and Night each have their own basic effects. Selecting Golden Blood's Boons can grant you additional buffs. Day and Night each have their own basic effects. Selecting Golden Blood's Boons can grant you additional buffs.Day and Night each have their own basic effects. Selecting Golden Blood's Boons can grant you additional buffs. 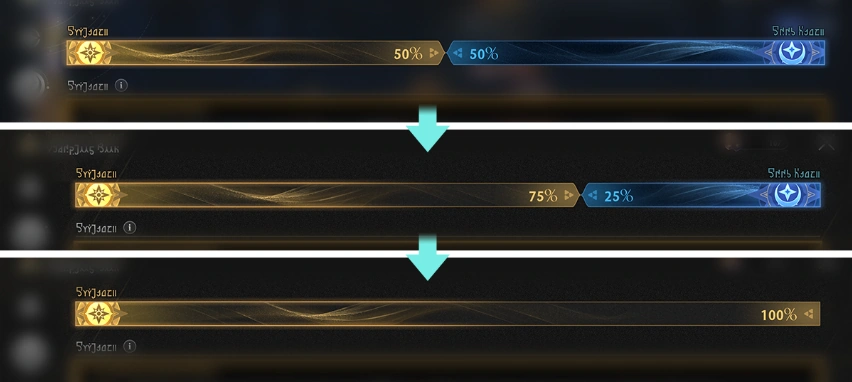 After selecting specific Boons, you can change the ratio of Day and Night and may even be able to make one state permanent. After selecting specific Boons, you can change the ratio of Day and Night and may even be able to make one state permanent.After selecting specific Boons, you can change the ratio of Day and Night and may even be able to make one state permanent. |
| Display Area Setup |
Main article: Express Renovation Escapade  You can showcase mementos from your Trailblazing journey in Collection Showcase. These will appear on your Trailblazer Profile once set up. You can showcase mementos from your Trailblazing journey in Collection Showcase. These will appear on your Trailblazer Profile once set up.You can showcase mementos from your Trailblazing journey in Collection Showcase. These will appear on your Trailblazer Profile once set up.  The medal zone showcases proof of glory earned from Challenges and records your unlocked Paths. The medal zone showcases proof of glory earned from Challenges and records your unlocked Paths.The medal zone showcases proof of glory earned from Challenges and records your unlocked Paths.  The figure zone is for displaying mementos you've picked up on your travels, and you can place special items in the center spot too! The figure zone is for displaying mementos you've picked up on your travels, and you can place special items in the center spot too!The figure zone is for displaying mementos you've picked up on your travels, and you can place special items in the center spot too!  The Wall of Photos lets you showcase companions, photos, and Light Cones archived in the data bank. The Wall of Photos lets you showcase companions, photos, and Light Cones archived in the data bank.The Wall of Photos lets you showcase companions, photos, and Light Cones archived in the data bank. |
| Debuff Dispel |
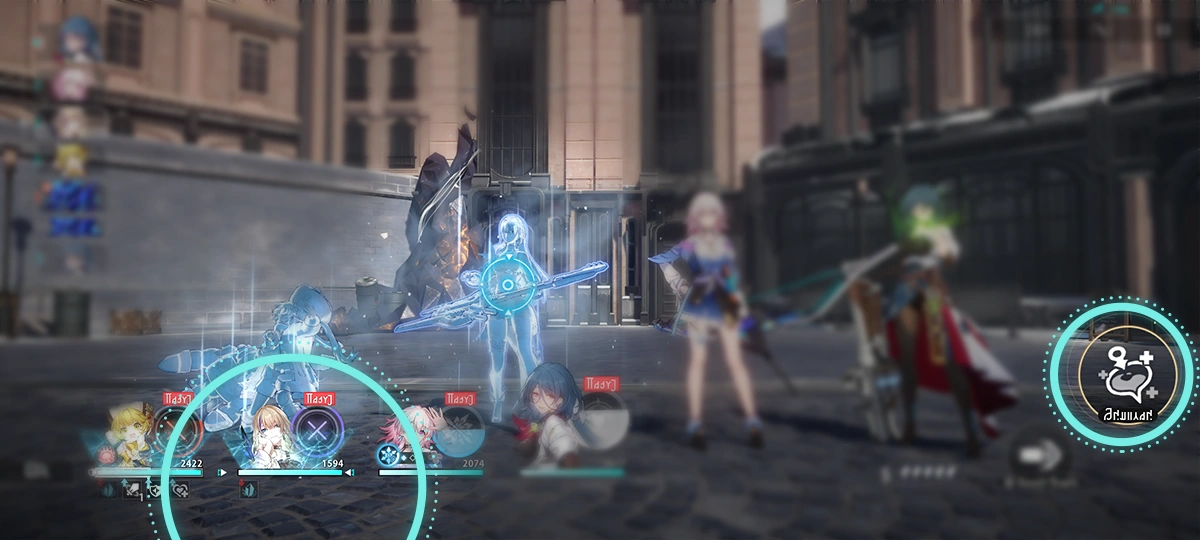 Certain characters have abilities that can dispel allies' debuffs. This can play a vital role when allies are inflicted with debuffs. Certain characters have abilities that can dispel allies' debuffs. This can play a vital role when allies are inflicted with debuffs.Certain characters have abilities that can dispel allies' debuffs. This can play a vital role when allies are inflicted with debuffs. |
| Curio |
Main article: Simulated Universe/Curio 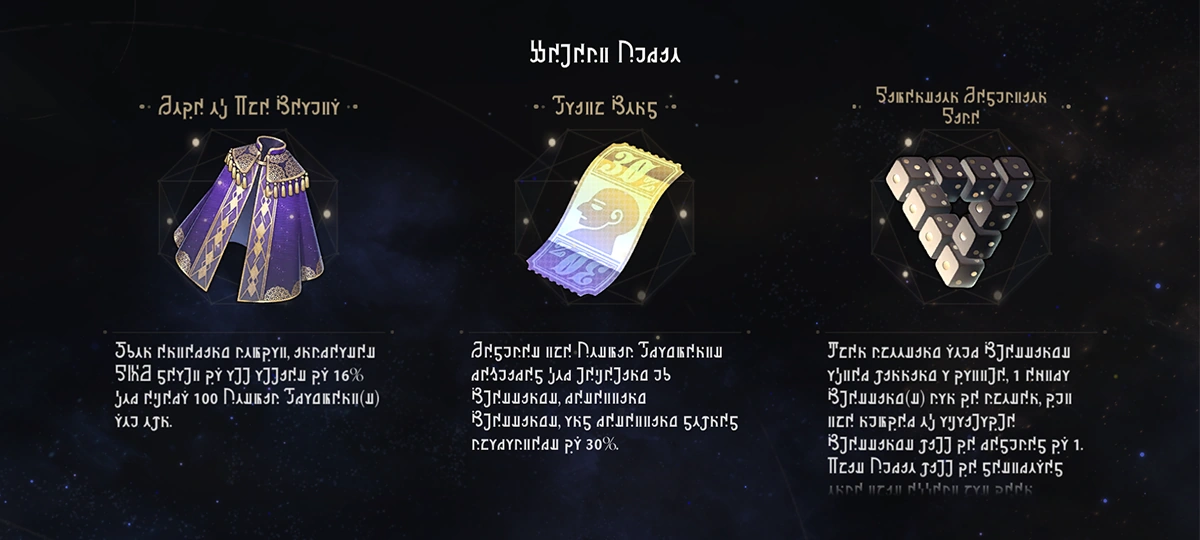 Curios with various effects can be encountered in the Simulated Universe. Collect Curios to Enhance your team. Curios with various effects can be encountered in the Simulated Universe. Collect Curios to Enhance your team.Curios with various effects can be encountered in the Simulated Universe. Collect Curios to Enhance your team. |
| Cosmodyssey |
Main article: Cosmodyssey 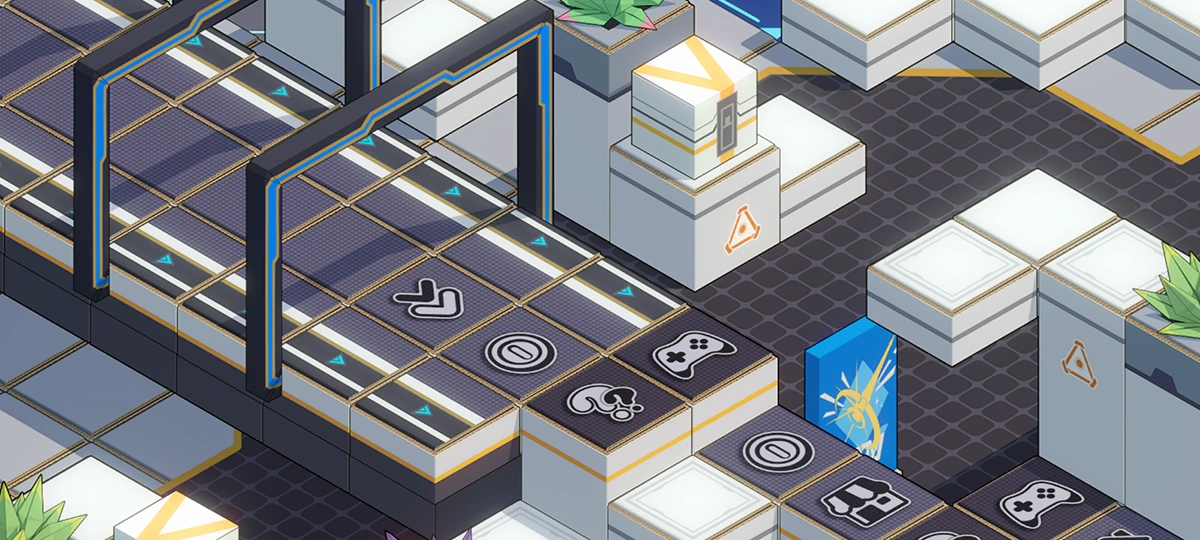 In Cosmodyssey, you need to roll dice to advance on the map. Trailblazers can obtain Trailblaze Funds through a variety of game modes. In Cosmodyssey, you need to roll dice to advance on the map. Trailblazers can obtain Trailblaze Funds through a variety of game modes.In Cosmodyssey, you need to roll dice to advance on the map. Trailblazers can obtain Trailblaze Funds through a variety of game modes. 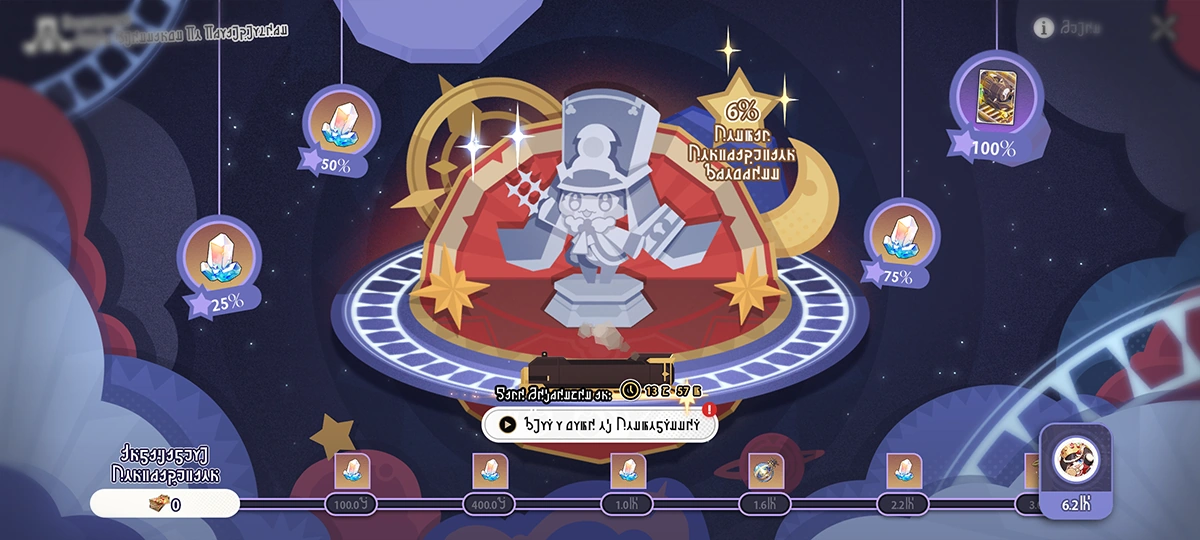 Trailblazers can contribute their Trailblaze Funds to Pom-Pom. The more funds they contribute, the more personal rewards they unlock. Trailblazers can contribute their Trailblaze Funds to Pom-Pom. The more funds they contribute, the more personal rewards they unlock.Contributions from all Trailblazers will gradually unlock Cosmic Contribution rewards. Trailblazers can contribute their Trailblaze Funds to Pom-Pom. The more funds they contribute, the more personal rewards they unlock. Contributions from all Trailblazers will gradually unlock Cosmic Contribution rewards. |
| Cosmicon, Roll On!: Event Gameplay |
Main article: Cosmicon, Roll On!  Defeat opponents in matches to earn Power Tokens and Power Dust as rewards. When fighting against the Mogura Gang, you can also obtain special "Victorious Power Tokens" as an extra bonus. Defeat opponents in matches to earn Power Tokens and Power Dust as rewards. When fighting against the Mogura Gang, you can also obtain special "Victorious Power Tokens" as an extra bonus.Defeat opponents in matches to earn Power Tokens and Power Dust as rewards. When fighting against the Mogura Gang, you can also obtain special "Victorious Power Tokens" as an extra bonus.  Power Tokens and Victorious Power Tokens can be used to exchange for new cards and Prismatic Dice in the Store, while Power Dust can be used to "Gild" your obtained cards. Power Tokens and Victorious Power Tokens can be used to exchange for new cards and Prismatic Dice in the Store, while Power Dust can be used to "Gild" your obtained cards.Power Tokens and Victorious Power Tokens can be used to exchange for new cards and Prismatic Dice in the Store, while Power Dust can be used to "Gild" your obtained cards.  You can gain Collective Experience to increase your Experience Level. After reaching certain levels, you'll receive the "Power Analyst Certificate," which allows Trailblazers to equip different Prismatic Dice on character cards. You can gain Collective Experience to increase your Experience Level. After reaching certain levels, you'll receive the "Power Analyst Certificate," which allows Trailblazers to equip different Prismatic Dice on character cards.You can gain Collective Experience to increase your Experience Level. After reaching certain levels, you'll receive the "Power Analyst Certificate," which allows Trailblazers to equip different Prismatic Dice on character cards. |
| Cosmicon Collective: Rules |
Main article: Cosmicon, Roll On! 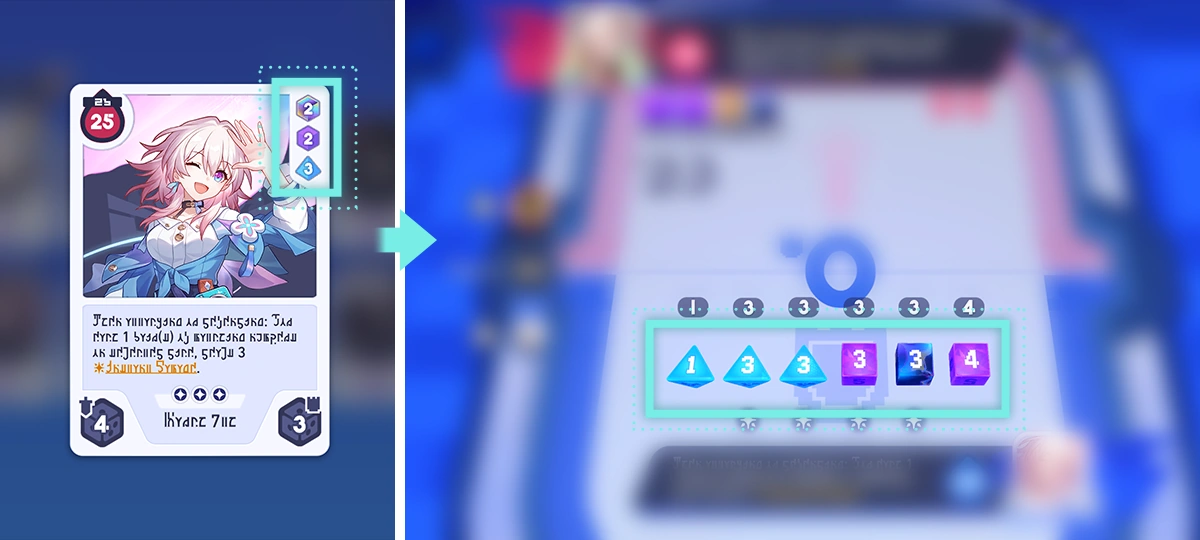 "Cosmicon Collective" is a gameplay mode where you battle using character cards and their corresponding dice shown in the top-right corner of the cards. "Cosmicon Collective" is a gameplay mode where you battle using character cards and their corresponding dice shown in the top-right corner of the cards."Cosmicon Collective" is a gameplay mode where you battle using character cards and their corresponding dice shown in the top-right corner of the cards.  In each attack-defense cycle, the attacker selects a corresponding number of dice based on their Attack Level, and the sum of dice values becomes their ATK. The defender selects a corresponding number of dice based on their Defense Level, and the sum of dice values becomes their DEF. In each attack-defense cycle, the attacker selects a corresponding number of dice based on their Attack Level, and the sum of dice values becomes their ATK. The defender selects a corresponding number of dice based on their Defense Level, and the sum of dice values becomes their DEF.In each attack-defense cycle, the attacker selects a corresponding number of dice based on their Attack Level, and the sum of dice values becomes their ATK. The defender selects a corresponding number of dice based on their Defense Level, and the sum of dice values becomes their DEF.  The remaining points after subtracting DEF from ATK will deal corresponding HP DMG to the defender, after which the roles of attacker and defender will switch. The remaining points after subtracting DEF from ATK will deal corresponding HP DMG to the defender, after which the roles of attacker and defender will switch.The remaining points after subtracting DEF from ATK will deal corresponding HP DMG to the defender, after which the roles of attacker and defender will switch.  Reduce your opponent's HP to 0 to win the match. Reduce your opponent's HP to 0 to win the match.Reduce your opponent's HP to 0 to win the match. |
| Cosmic Home Décor Guide |
Main article: Cosmic Home Décor Guide  You can gradually liven up your room by renovating and customizing it. You can gradually liven up your room by renovating and customizing it.You can gradually liven up your room by renovating and customizing it.  Completing renovations to increase the renovation progress of the room and raise your Décor Rating. This will earn you Renovation Subsidy. Completing renovations to increase the renovation progress of the room and raise your Décor Rating. This will earn you Renovation Subsidy.Completing renovations to increase the renovation progress of the room and raise your Décor Rating. This will earn you Renovation Subsidy. |
| Cosmic Home Décor Guide |
Main article: Cosmic Home Décor Guide  Select an Action Card to progress your duty schedule, raise the corresponding member's Duty Level, and obtain Express Funds. Select an Action Card to progress your duty schedule, raise the corresponding member's Duty Level, and obtain Express Funds.Select an Action Card to progress your duty schedule, raise the corresponding member's Duty Level, and obtain Express Funds.  Different Action Cards entail varying workloads. After selecting an Action Card, the schedule will advance by a set number of steps to reach the corresponding tile. Different Action Cards entail varying workloads. After selecting an Action Card, the schedule will advance by a set number of steps to reach the corresponding tile.Different Action Cards entail varying workloads. After selecting an Action Card, the schedule will advance by a set number of steps to reach the corresponding tile.  During the duty periods, you will encounter three types of Action Cards: "Normal," "Rare," and "Special." Rare Action Cards grant more Duty Experience and Express Funds, while Special Action Cards provide various special effects. During the duty periods, you will encounter three types of Action Cards: "Normal," "Rare," and "Special." Rare Action Cards grant more Duty Experience and Express Funds, while Special Action Cards provide various special effects.During the duty periods, you will encounter three types of Action Cards: "Normal," "Rare," and "Special." Rare Action Cards grant more Duty Experience and Express Funds, while Special Action Cards provide various special effects.  An effect will be triggered based on the tile you stop on. When selecting Action Cards, do your best to end up on advantageous tiles. An effect will be triggered based on the tile you stop on. When selecting Action Cards, do your best to end up on advantageous tiles.An effect will be triggered based on the tile you stop on. When selecting Action Cards, do your best to end up on advantageous tiles.  Dinner Meetings will be held periodically in the schedule, and you can gain a large amount of Express Funds based on your report results. Treat that as your main goal. Dinner Meetings will be held periodically in the schedule, and you can gain a large amount of Express Funds based on your report results. Treat that as your main goal.Dinner Meetings will be held periodically in the schedule, and you can gain a large amount of Express Funds based on your report results. Treat that as your main goal. |
| Cosmic Home Décor Guide |
Main article: Cosmic Home Décor Guide 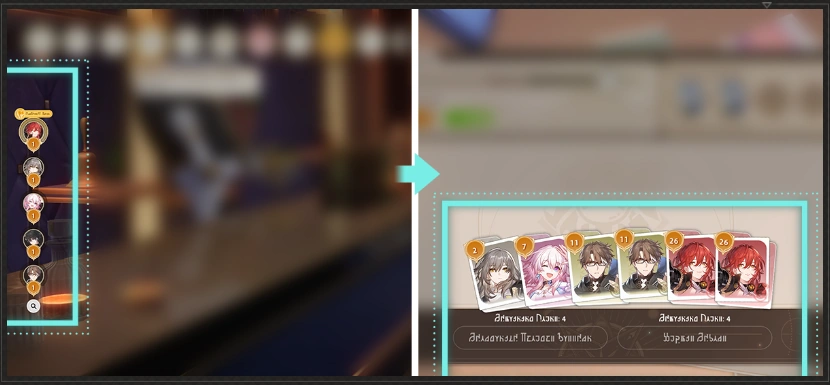 During the Dinner Meeting phase, you can select and submit Duty Reports to obtain Express Funds based on the score received from Pom-Pom. During the Dinner Meeting phase, you can select and submit Duty Reports to obtain Express Funds based on the score received from Pom-Pom.During the Dinner Meeting phase, you can select and submit Duty Reports to obtain Express Funds based on the score received from Pom-Pom.  The higher your members' Duty Level, the higher the base score of their corresponding Duty Report will be as well. The higher your members' Duty Level, the higher the base score of their corresponding Duty Report will be as well.The higher your members' Duty Level, the higher the base score of their corresponding Duty Report will be as well. 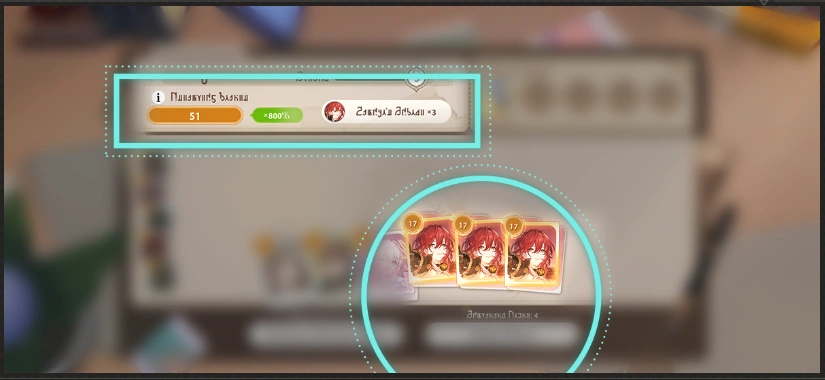 When submitting similar reports, you can create a report bundle, increase your score efficiency, and obtain higher scores from Pom-Pom. When submitting similar reports, you can create a report bundle, increase your score efficiency, and obtain higher scores from Pom-Pom.When submitting similar reports, you can create a report bundle, increase your score efficiency, and obtain higher scores from Pom-Pom.  Using "Mental Reset", you can discard selected reports and draw the same number of new ones. Please note that each team member has a limit on the total number of reports. Using "Mental Reset", you can discard selected reports and draw the same number of new ones. Please note that each team member has a limit on the total number of reports.Using "Mental Reset", you can discard selected reports and draw the same number of new ones. Please note that each team member has a limit on the total number of reports.  Get as high of a score as you can from Pom-Pom within the limited number of "Mental Reset" and "Submit Report" attempts. Do your best to earn Express Funds! Get as high of a score as you can from Pom-Pom within the limited number of "Mental Reset" and "Submit Report" attempts. Do your best to earn Express Funds!Get as high of a score as you can from Pom-Pom within the limited number of "Mental Reset" and "Submit Report" attempts. Do your best to earn Express Funds! |
| Cosmic Home Décor Guide |
Main article: Cosmic Home Décor Guide 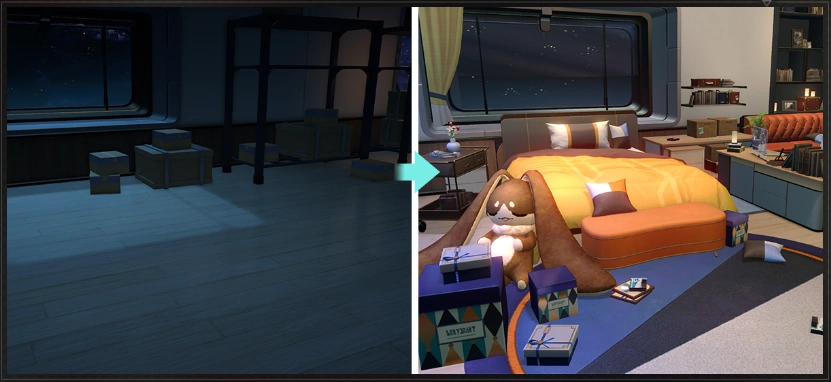 You can gradually liven up your room by renovating and customizing it. You can gradually liven up your room by renovating and customizing it.You can gradually liven up your room by renovating and customizing it.  Renovating the room requires Express Funds. These can be obtained through scheduled actions during duties. Renovating the room requires Express Funds. These can be obtained through scheduled actions during duties.Renovating the room requires Express Funds. These can be obtained through scheduled actions during duties. 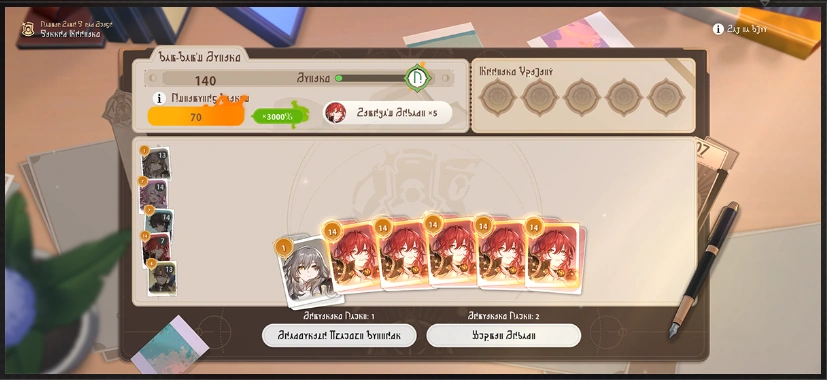 At the same time, during the Dinner Meeting phase of every duty period, you can choose to submit the Duty Reports and additionally obtain Express Funds based on the score from Pom-Pom. At the same time, during the Dinner Meeting phase of every duty period, you can choose to submit the Duty Reports and additionally obtain Express Funds based on the score from Pom-Pom.At the same time, during the Dinner Meeting phase of every duty period, you can choose to submit the Duty Reports and additionally obtain Express Funds based on the score from Pom-Pom. |
| Co-Op Mode: Tactics Card |
Main article: Cosmicon, Roll On Again!  At the start of every 2 turns, you'll enter the Tactics Segment, where you can purchase Tactics Cards. At the start of every 2 turns, you'll enter the Tactics Segment, where you can purchase Tactics Cards.At the start of every 2 turns, you'll enter the Tactics Segment, where you can purchase Tactics Cards.  You can hold up to 3 Tactics Cards at a time. (TapTap/PressPress/ClickClick) a Tactics Card to discard it. You can hold up to 3 Tactics Cards at a time. (TapTap/PressPress/ClickClick) a Tactics Card to discard it.You can hold up to 3 Tactics Cards at a time. (TapTap/PressPress/ClickClick) a Tactics Card to discard it.  Tactics Cards can only be used during the Swap Phase, with Attack-type and Defense-type Tactics Cards usable only when attacking or defending respectively. Tactics Cards can only be used during the Swap Phase, with Attack-type and Defense-type Tactics Cards usable only when attacking or defending respectively.Tactics Cards can only be used during the Swap Phase, with Attack-type and Defense-type Tactics Cards usable only when attacking or defending respectively.  Purchasing and refreshing Tactics Cards consumes Tactics Points. In Co-Op Mode, players can earn Tactics Points by dealing DMG, successfully defending, launching Counters, and more. Purchasing and refreshing Tactics Cards consumes Tactics Points. In Co-Op Mode, players can earn Tactics Points by dealing DMG, successfully defending, launching Counters, and more.Purchasing and refreshing Tactics Cards consumes Tactics Points. In Co-Op Mode, players can earn Tactics Points by dealing DMG, successfully defending, launching Counters, and more. |
| Co-Op Mode: Swap Dice |
Main article: Cosmicon, Roll On Again!  In Co-Op Mode, after you and your teammate select dice during the Rolling Phase, your action doesn't end immediately. Instead, you'll enter the Swap Phase. In Co-Op Mode, after you and your teammate select dice during the Rolling Phase, your action doesn't end immediately. Instead, you'll enter the Swap Phase.In Co-Op Mode, after you and your teammate select dice during the Rolling Phase, your action doesn't end immediately. Instead, you'll enter the Swap Phase.  During the Swap Phase, dice not selected by you and your teammates will be placed in the Swap Pool. You can drag your own dice to swap them with dice in the Swap Pool. During the Swap Phase, dice not selected by you and your teammates will be placed in the Swap Pool. You can drag your own dice to swap them with dice in the Swap Pool.During the Swap Phase, dice not selected by you and your teammates will be placed in the Swap Pool. You can drag your own dice to swap them with dice in the Swap Pool. After you and your teammates have both finished taking actions, the dice in your pool will be used to deal DMG to the formidable foe.After you and your teammates have both finished taking actions, the dice in your pool will be used to deal DMG to the formidable foe. |
| Co-Op Mode: Basic Rules |
Main article: Cosmicon, Roll On Again!  Allies have 3 Shared HP. When any card's HP drops to 0, 1 Shared HP will be consumed, then that card will be restored to 1 HP and continue battling. Allies have 3 Shared HP. When any card's HP drops to 0, 1 Shared HP will be consumed, then that card will be restored to 1 HP and continue battling.Allies have 3 Shared HP. When any card's HP drops to 0, 1 Shared HP will be consumed, then that card will be restored to 1 HP and continue battling.  However, when the ally's Shared HP is depleted to 0, the battle is considered lost. However, when the ally's Shared HP is depleted to 0, the battle is considered lost.However, when the ally's Shared HP is depleted to 0, the battle is considered lost.  Formidable foe cards have multiple phases that grow progressively stronger. Break through all phases of a formidable foe card to win the battle. Formidable foe cards have multiple phases that grow progressively stronger. Break through all phases of a formidable foe card to win the battle.Formidable foe cards have multiple phases that grow progressively stronger. Break through all phases of a formidable foe card to win the battle. |
| Co-op Challenge |
Main article: Cosmicon, Roll On Again! 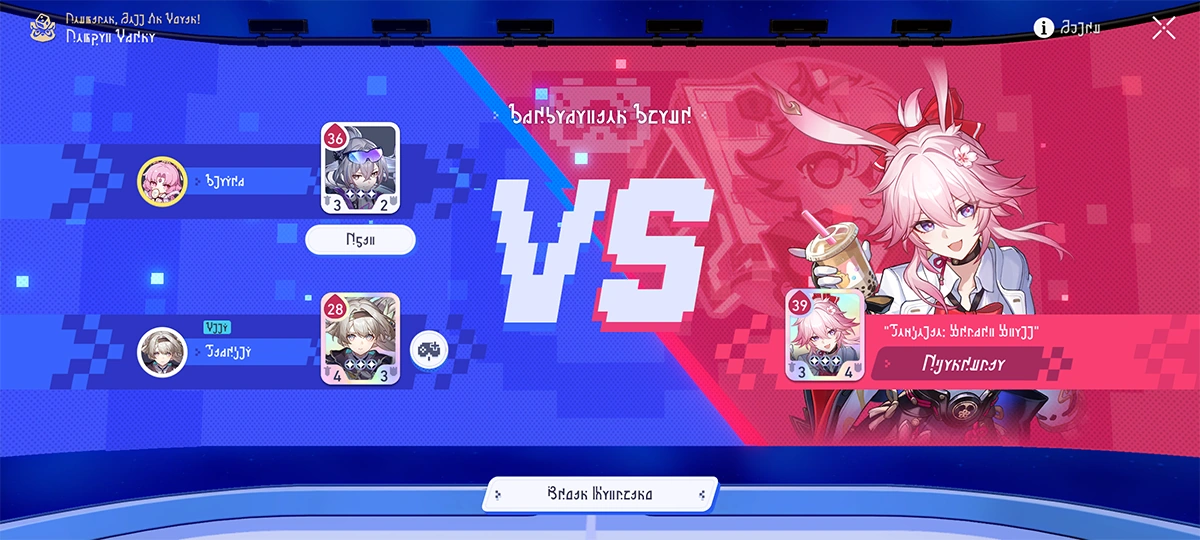 In Co-Op Challenges, you can team up with other Trailblazers to take on formidable foes. These enemies use more powerful cards compared to story battles. In Co-Op Challenges, you can team up with other Trailblazers to take on formidable foes. These enemies use more powerful cards compared to story battles.In Co-Op Challenges, you can team up with other Trailblazers to take on formidable foes. These enemies use more powerful cards compared to story battles. 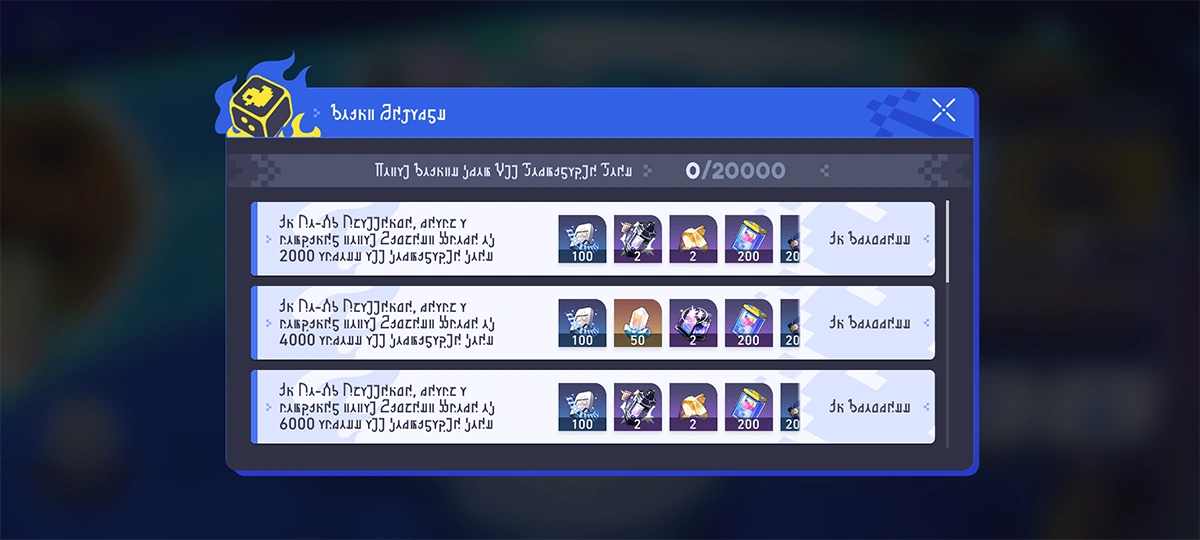 Participate in Co-Op Challenges to earn Co-Op Score. Based on the total of your highest scores obtained against each formidable foe, you can receive rewards such as Stellar Jades, development materials, and more. Participate in Co-Op Challenges to earn Co-Op Score. Based on the total of your highest scores obtained against each formidable foe, you can receive rewards such as Stellar Jades, development materials, and more.Participate in Co-Op Challenges to earn Co-Op Score. Based on the total of your highest scores obtained against each formidable foe, you can receive rewards such as Stellar Jades, development materials, and more. 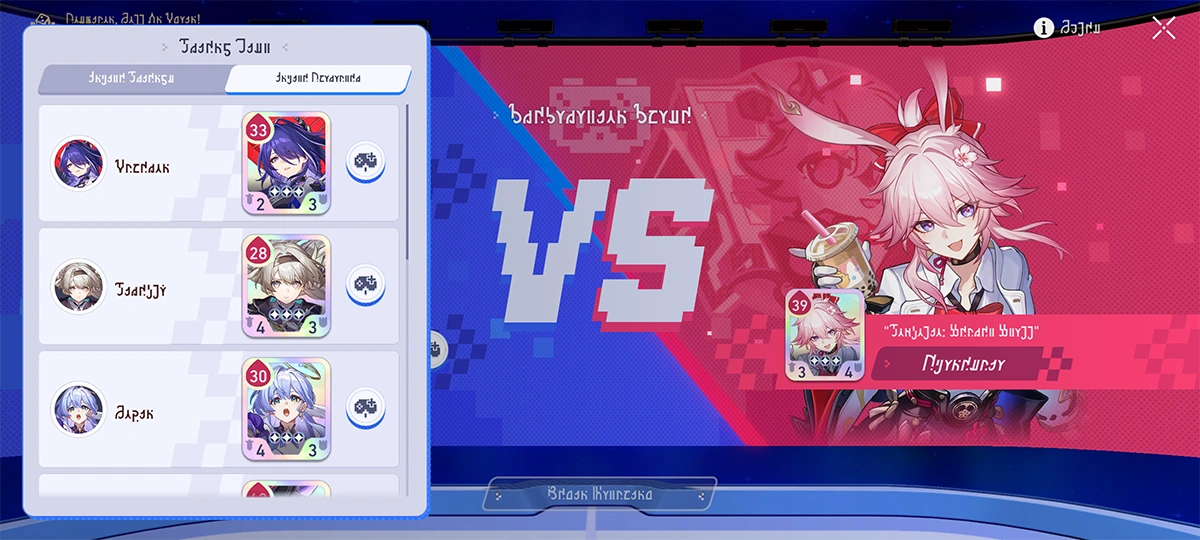 Besides inviting Friends, you can also invite other characters to take on formidable foes. Besides inviting Friends, you can also invite other characters to take on formidable foes.Besides inviting Friends, you can also invite other characters to take on formidable foes. |
| Clockie's Extras: Movie Mode |
 The film's length is limited in Movie Mode. The progress bar below indicates the filming progress. The film's length is limited in Movie Mode. The progress bar below indicates the filming progress.The film's length is limited in Movie Mode. The progress bar below indicates the filming progress.  Audience Score will be accumulated by conducting Action Scenes, picking up supplies, or slamming into opponents or obstacles while invulnerable. Trigger the events above as many times as you can to achieve the target Audience Score! Audience Score will be accumulated by conducting Action Scenes, picking up supplies, or slamming into opponents or obstacles while invulnerable. Trigger the events above as many times as you can to achieve the target Audience Score!Audience Score will be accumulated by conducting Action Scenes, picking up supplies, or slamming into opponents or obstacles while invulnerable. Trigger the events above as many times as you can to achieve the target Audience Score! |
| Cirrus |
Main article: Sojourners' Ghastly Reverie 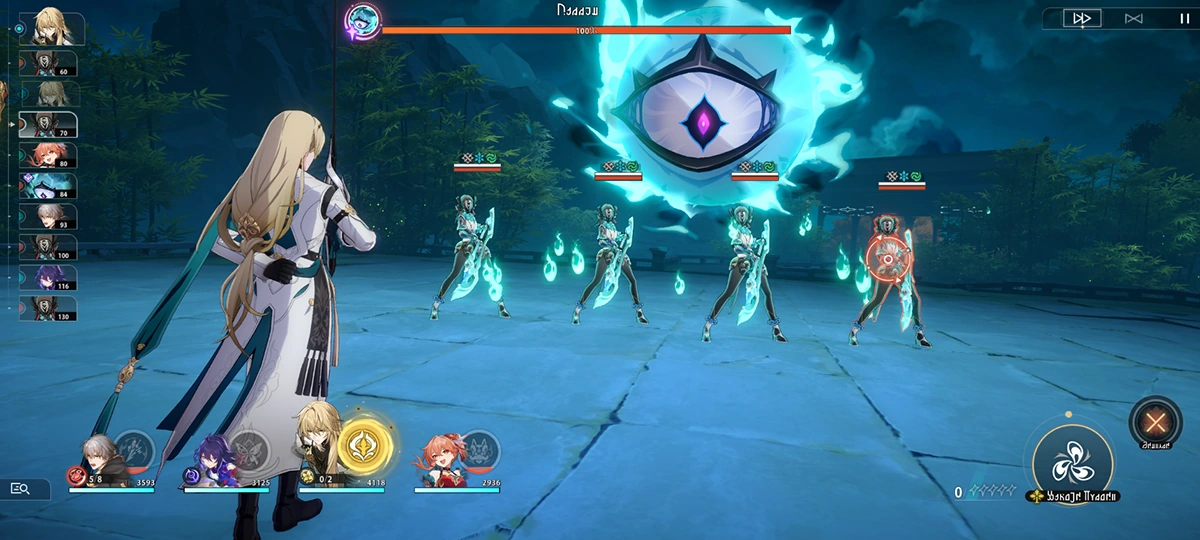 Cirrus cannot be selected or directly attacked. When any other enemy targets have been eliminated, Cirrus will lose some HP. Cirrus cannot be selected or directly attacked. When any other enemy targets have been eliminated, Cirrus will lose some HP.Cirrus cannot be selected or directly attacked. When any other enemy targets have been eliminated, Cirrus will lose some HP. 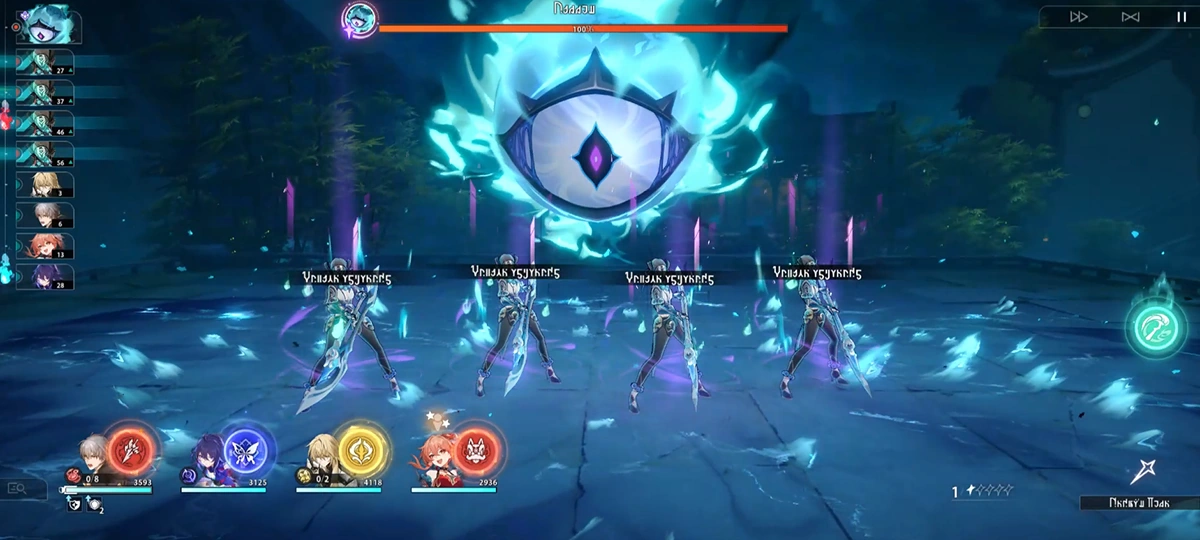 When Cirrus uses their ability "Rapid Gambit," all enemies will immediately take action. When Cirrus uses their ability "Rapid Gambit," all enemies will immediately take action.When Cirrus uses their ability "Rapid Gambit," all enemies will immediately take action. |
| Change in Action Order |
 Action Order shows the order in which allies and enemies take action. The character at the top of the order will take action first. Action Order shows the order in which allies and enemies take action. The character at the top of the order will take action first.Action Order shows the order in which allies and enemies take action. The character at the top of the order will take action first.  Some characters' abilities can cause actions to be advanced forward or delayed. Inflicting Weakness Break on enemies will also cause their action to be delayed. Some characters' abilities can cause actions to be advanced forward or delayed. Inflicting Weakness Break on enemies will also cause their action to be delayed.Some characters' abilities can cause actions to be advanced forward or delayed. Inflicting Weakness Break on enemies will also cause their action to be delayed. |
| Castorice: Technique |
Main article: Castorice  After Castorice uses her Technique, she can continually Daze enemies in her path. After Castorice uses her Technique, she can continually Daze enemies in her path.Use the Technique again will attack enemies in a radius and summon Netherwing to enter battle. After Castorice uses her Technique, she can continually Daze enemies in her path. Use the Technique again will attack enemies in a radius and summon Netherwing to enter battle.  Netherwing can consume its own HP to continuously blast all enemies. Netherwing can consume its own HP to continuously blast all enemies.When Netherwing's HP is under 25%, it can continue blasting to trigger self-destruct. Netherwing can consume its own HP to continuously blast all enemies. When Netherwing's HP is under 25%, it can continue blasting to trigger self-destruct. |
| Buff Dispel |
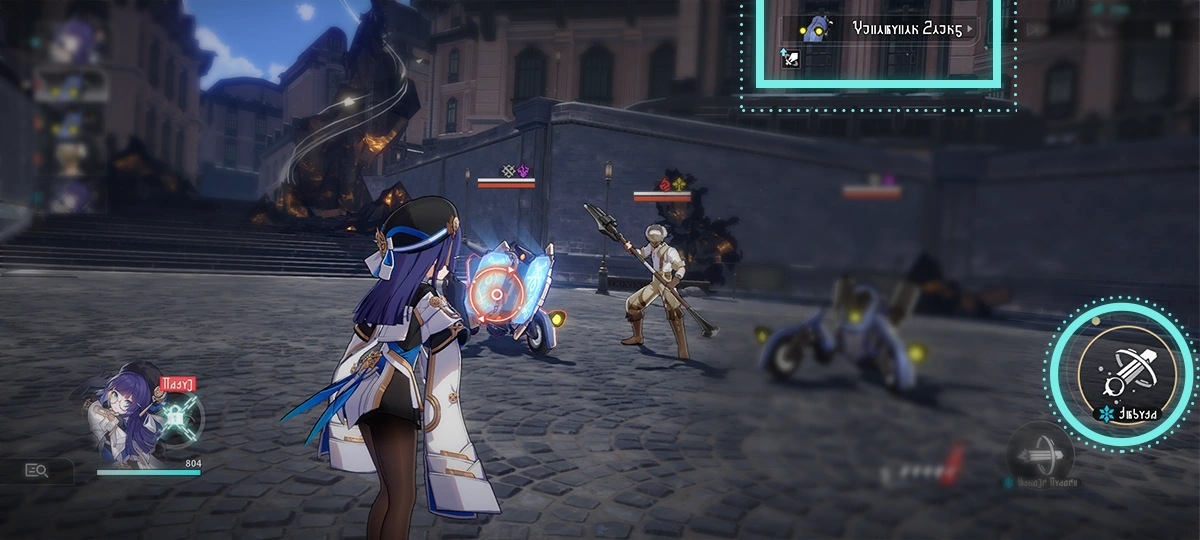 Certain characters have abilities that can dispel enemies' buffs. This can be very useful when fighting buffed enemies. Certain characters have abilities that can dispel enemies' buffs. This can be very useful when fighting buffed enemies.Certain characters have abilities that can dispel enemies' buffs. This can be very useful when fighting buffed enemies. |
| Boulder Town Super League |
Main article: Boulder Town Super League  In the Boulder Town Super League, Trailblazers can challenge different tournaments to win the corresponding tournament rewards. In the Boulder Town Super League, Trailblazers can challenge different tournaments to win the corresponding tournament rewards.In the Boulder Town Super League, Trailblazers can challenge different tournaments to win the corresponding tournament rewards.  After choosing to participate in the tournament, the opponent lineup will be determined in a random drawing, and different buffs can be obtained by defeating different opponents. After random selection begins, your team lineup will be locked. All characters' HP and Energy will be reset at the start of every battle. Equilibrium Level will influence enemy strength in the event. After choosing to participate in the tournament, the opponent lineup will be determined in a random drawing, and different buffs can be obtained by defeating different opponents. After random selection begins, your team lineup will be locked. All characters' HP and Energy will be reset at the start of every battle. Equilibrium Level will influence enemy strength in the event.After choosing to participate in the tournament, the opponent lineup will be determined in a random drawing, and different buffs can be obtained by defeating different opponents. After random selection begins, your team lineup will be locked. All characters' HP and Energy will be reset at the start of every battle. Equilibrium Level will influence enemy strength in the event.  If you complete the "Limited Time Challenge" during the event period, you can also get extra rewards. If you complete the "Limited Time Challenge" during the event period, you can also get extra rewards.If you complete the "Limited Time Challenge" during the event period, you can also get extra rewards. |
| Boulder Town Martial Exhibition |
Main article: Boulder Town Martial Exhibition  While competing in the Boulder Town Martial Exhibition, players can now freely choose the buffs they receive each round, instead of having fixed ones. While competing in the Boulder Town Martial Exhibition, players can now freely choose the buffs they receive each round, instead of having fixed ones.While competing in the Boulder Town Martial Exhibition, players can now freely choose the buffs they receive each round, instead of having fixed ones. |
| Aurum Alley's Hustle and Bustle: Logistics Planning |
Main article: Aurum Alley's Hustle and Bustle 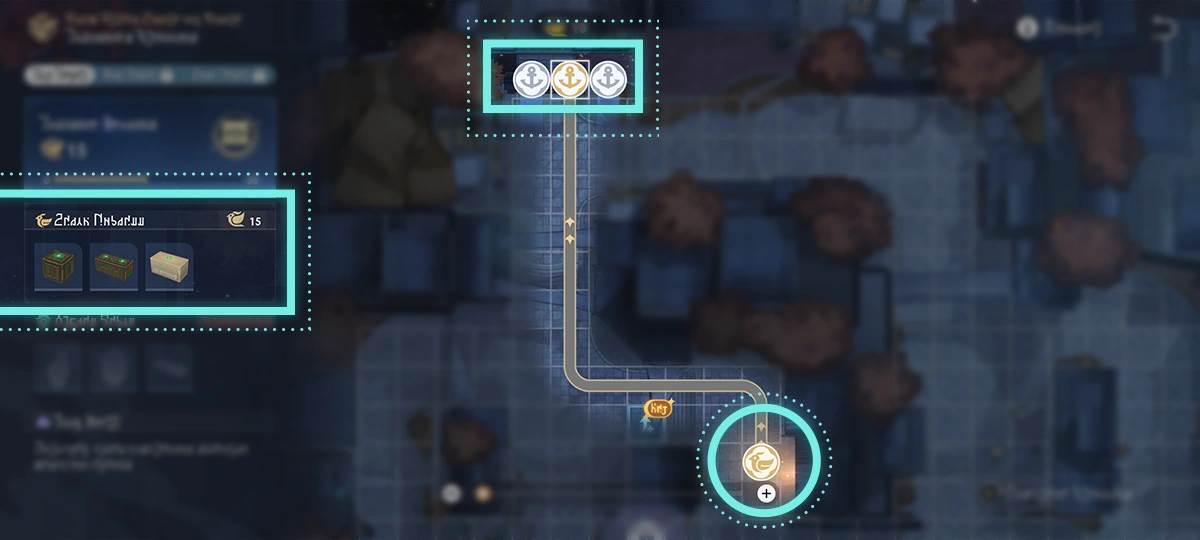 Plan a route from the store to the docks to provide the docks with goods and orders Plan a route from the store to the docks to provide the docks with goods and ordersPlan a route from the store to the docks to provide the docks with goods and orders  Start from the store or the end of the route, and hold and drag to form a route to the docks. The shorter the route, the higher the score Start from the store or the end of the route, and hold and drag to form a route to the docks. The shorter the route, the higher the scoreStart from the store or the end of the route, and hold and drag to form a route to the docks. The shorter the route, the higher the score  Plan a route and use the route advantages to increase the logistic score of the route Plan a route and use the route advantages to increase the logistic score of the routePlan a route and use the route advantages to increase the logistic score of the route  Complete specific Streetside Events to generate new route advantages in the courier network and obtain higher logistic score Complete specific Streetside Events to generate new route advantages in the courier network and obtain higher logistic scoreComplete specific Streetside Events to generate new route advantages in the courier network and obtain higher logistic score |
| Aurum Alley's Hustle and Bustle: Inventory Arrangement |
Main article: Aurum Alley's Hustle and Bustle  Complete Inventory Arrangement on freight starskiffs and reach shipping targets to earn Merchant Guild's funds Complete Inventory Arrangement on freight starskiffs and reach shipping targets to earn Merchant Guild's fundsComplete Inventory Arrangement on freight starskiffs and reach shipping targets to earn Merchant Guild's funds  Select goods to perform rapid arrangement. Drag or rotate the goods to change their positions Select goods to perform rapid arrangement. Drag or rotate the goods to change their positionsSelect goods to perform rapid arrangement. Drag or rotate the goods to change their positions 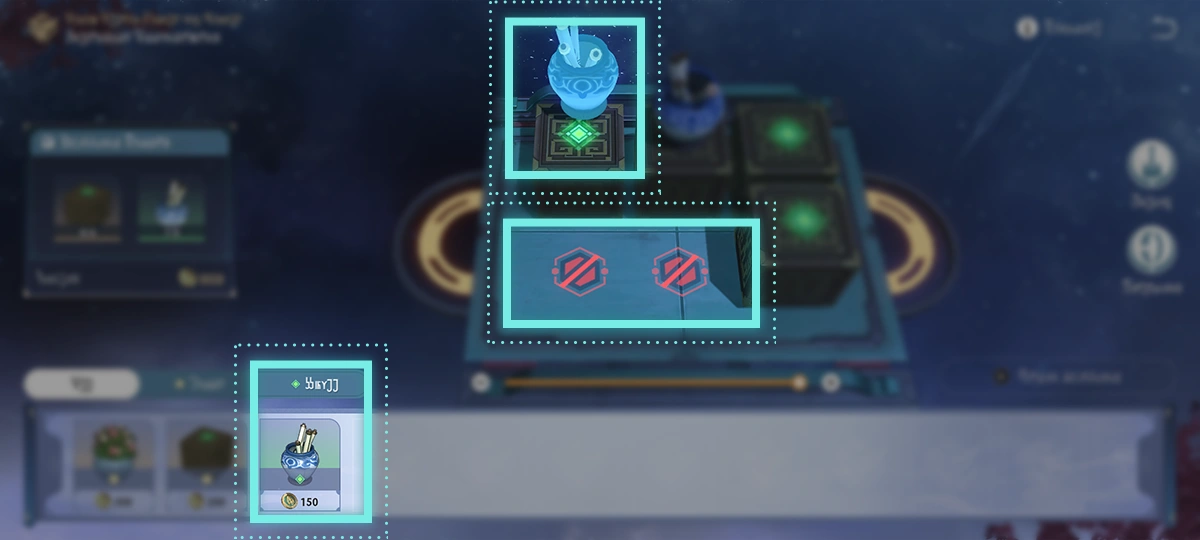 Specific types of goods only fit in specific types of Placement Spots. Profit from a single inventory arrangement can be increased by skillfully overlaying goods on top of each other Specific types of goods only fit in specific types of Placement Spots. Profit from a single inventory arrangement can be increased by skillfully overlaying goods on top of each otherSpecific types of goods only fit in specific types of Placement Spots. Profit from a single inventory arrangement can be increased by skillfully overlaying goods on top of each other |
| Assignments |
Main article: Assignments  After assignments (up to 4) are added, the rewards based on the selected assignments will be automatically accumulated per hour. After assignments (up to 4) are added, the rewards based on the selected assignments will be automatically accumulated per hour.After assignments (up to 4) are added, the rewards based on the selected assignments will be automatically accumulated per hour.  Assignment rewards can be stored for 30 hours at most. Once the limit is reached, no more accumulation. Please claim your assignment rewards in time. Assignment rewards can be stored for 30 hours at most. Once the limit is reached, no more accumulation. Please claim your assignment rewards in time.Assignment rewards can be stored for 30 hours at most. Once the limit is reached, no more accumulation. Please claim your assignment rewards in time. |
| As I've Written |
Main article: As I've Written  Using "Nameless Recollection," heroes' stories can be written down in "As I've Written." Using "Nameless Recollection," heroes' stories can be written down in "As I've Written."Using "Nameless Recollection," heroes' stories can be written down in "As I've Written."  Progressing the Trailblaze Mission grants "Nameless Recollections" Progressing the Trailblaze Mission grants "Nameless Recollections"Progressing the Trailblaze Mission grants "Nameless Recollections" |
| Apocalyptic Shadow: Starward Mode |
Main article: Apocalyptic Shadow 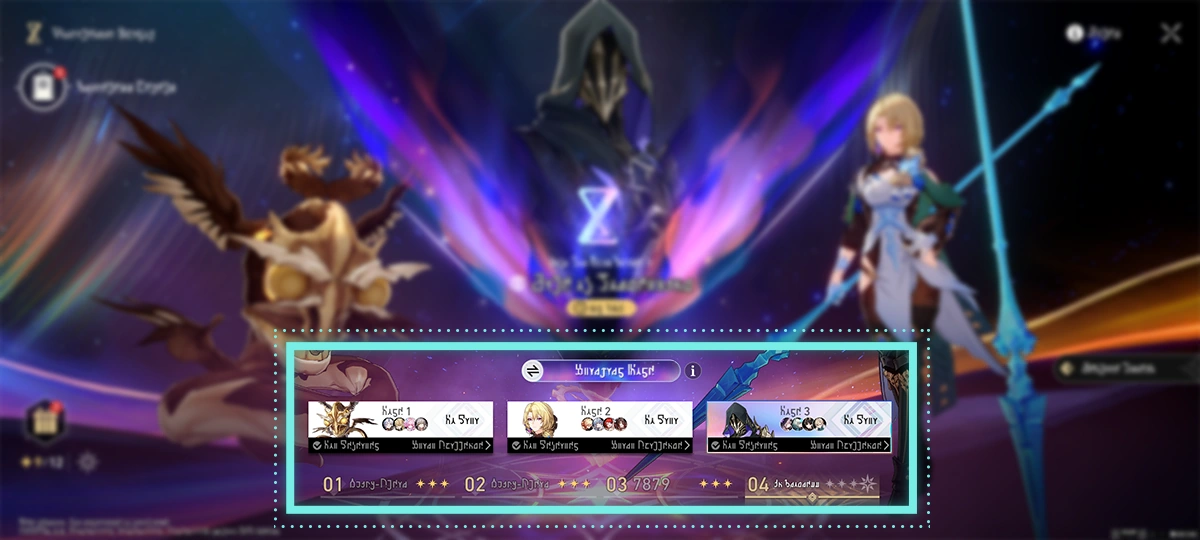 Clear Apocalyptic Shadow Difficulty 3 to unlock Starward Mode. Clear Apocalyptic Shadow Difficulty 3 to unlock Starward Mode.Clearing Starward Mode Difficulty 4 requires challenging 3 Nodes. Clear Apocalyptic Shadow Difficulty 3 to unlock Starward Mode. Clearing Starward Mode Difficulty 4 requires challenging 3 Nodes.  Clear Difficulty 4 in Starward Mode and score 10200 points to obtain a Prismatic Star and additional new rewards. Clear Difficulty 4 in Starward Mode and score 10200 points to obtain a Prismatic Star and additional new rewards.Collect a total of 12 Stars and the Prismatic Star to obtain this period's Apocalyptic Shadow Limited-Time Clearance Medal. Clear Difficulty 4 in Starward Mode and score 10200 points to obtain a Prismatic Star and additional new rewards. Collect a total of 12 Stars and the Prismatic Star to obtain this period's Apocalyptic Shadow Limited-Time Clearance Medal.  You can switch back to Regular Mode at any time to challenge Difficulty 4 of the regular Apocalyptic Shadow and obtain the original rewards. You can switch back to Regular Mode at any time to challenge Difficulty 4 of the regular Apocalyptic Shadow and obtain the original rewards.You can switch back to Regular Mode at any time to challenge Difficulty 4 of the regular Apocalyptic Shadow and obtain the original rewards. |
| Anomaly Arbitration |
Main article: Anomaly Arbitration  Anomaly Arbitration is a series of extremely challenging stages that regularly updates its content and rewards. Anomaly Arbitration is a series of extremely challenging stages that regularly updates its content and rewards.Anomaly Arbitration is a series of extremely challenging stages that regularly updates its content and rewards. 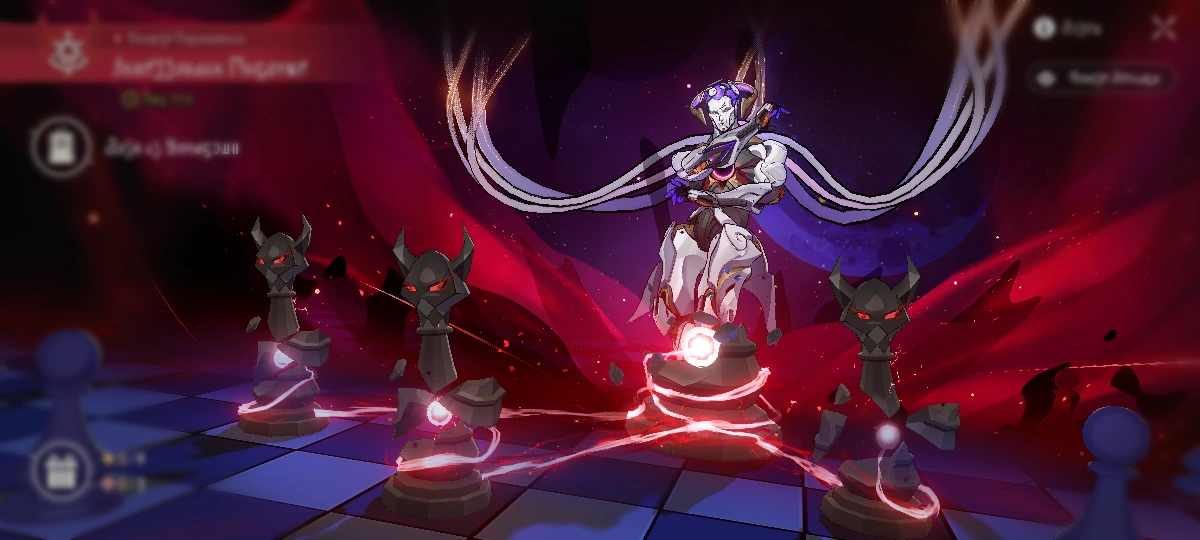 Anomaly Arbitration features Knight and King stages. When the Knight Stages are not cleared, the King will be protected by guards, making it significantly more difficult. Anomaly Arbitration features Knight and King stages. When the Knight Stages are not cleared, the King will be protected by guards, making it significantly more difficult.Anomaly Arbitration features Knight and King stages. When the Knight Stages are not cleared, the King will be protected by guards, making it significantly more difficult.  After clearing all Knight Stages, the King will be weakened without its guards. After clearing all Knight Stages, the King will be weakened without its guards.After clearing all Knight Stages, the King will be weakened without its guards. |
| Aetherium Wars |
Main article: Aetherium Wars 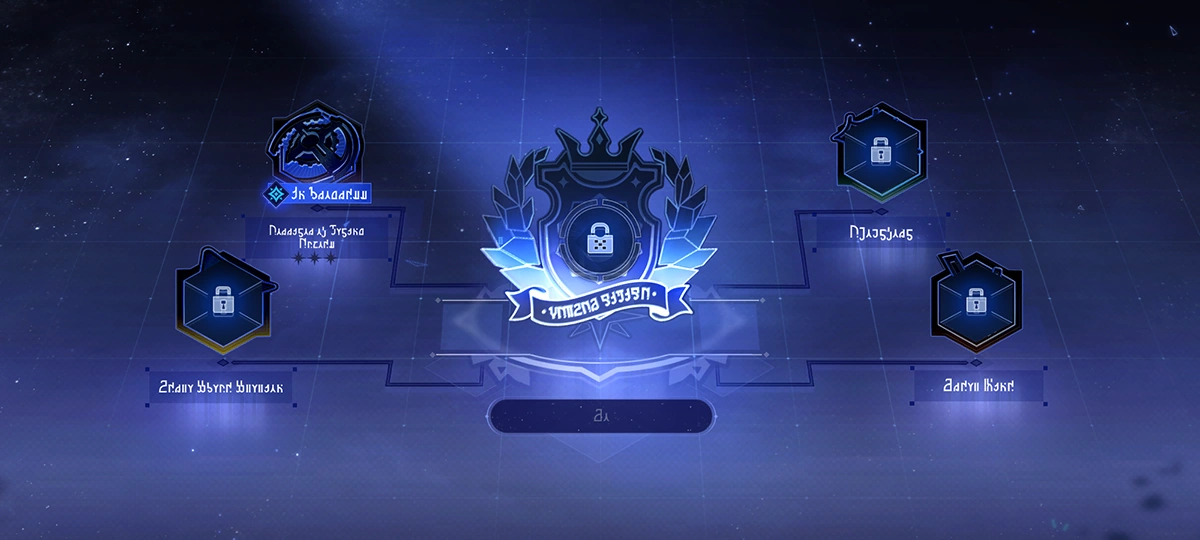 Successively challenge four Victory Zone trials and defeat the championship contenders to win Mastery Marks. Collect 4 Mastery Marks to qualify for the tournament Successively challenge four Victory Zone trials and defeat the championship contenders to win Mastery Marks. Collect 4 Mastery Marks to qualify for the tournamentSuccessively challenge four Victory Zone trials and defeat the championship contenders to win Mastery Marks. Collect 4 Mastery Marks to qualify for the tournament 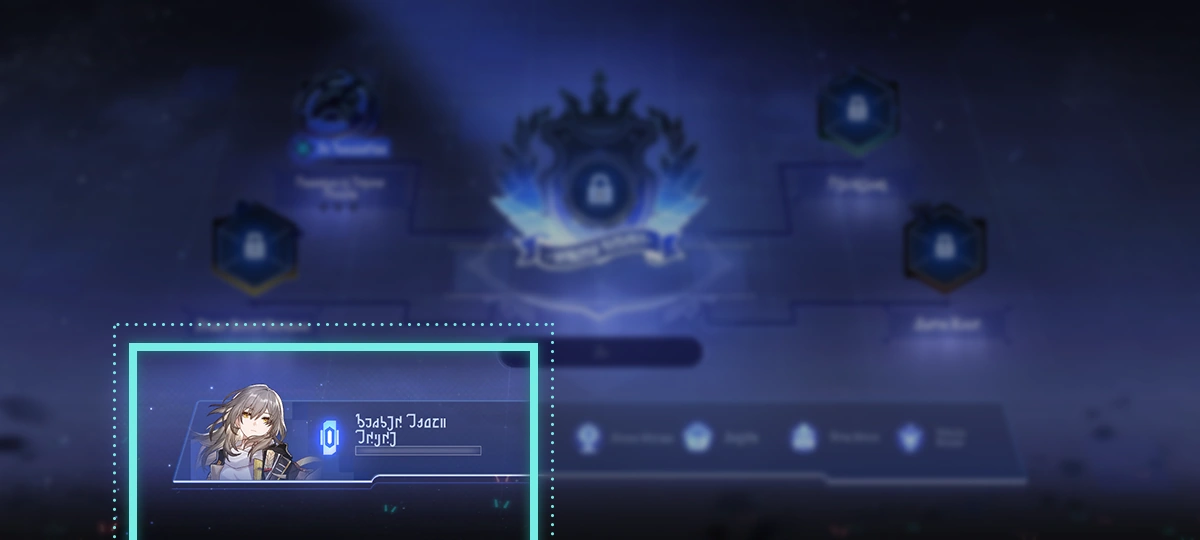 Complete various missions in Aetherium Wars to raise your Victory Rating and unlock rewards Complete various missions in Aetherium Wars to raise your Victory Rating and unlock rewardsComplete various missions in Aetherium Wars to raise your Victory Rating and unlock rewards 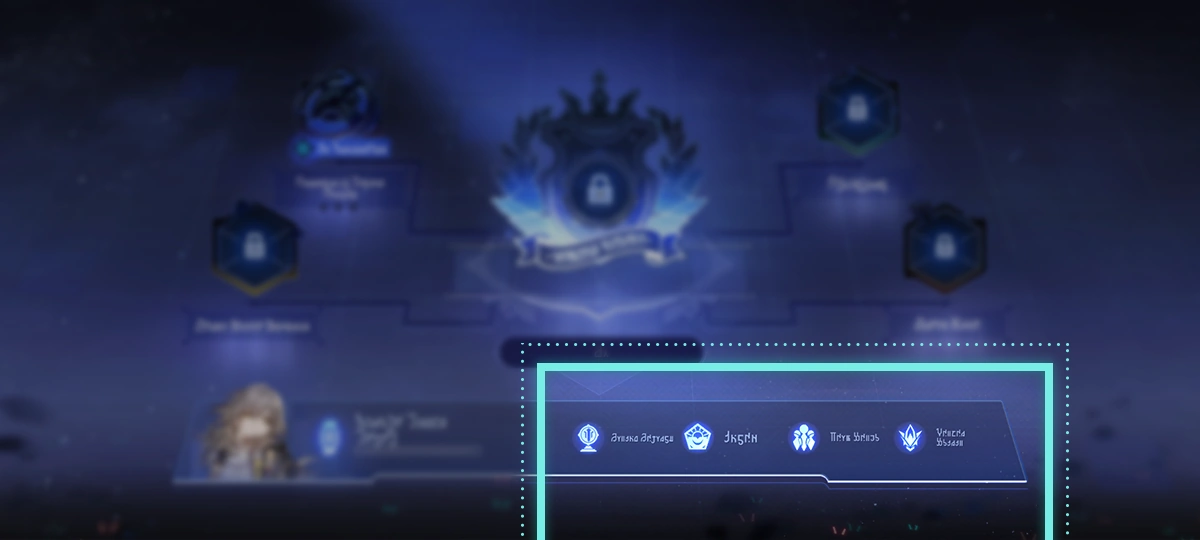 The terminal has other functions as well. You can check how to build your Aether Spirits The terminal has other functions as well. You can check how to build your Aether SpiritsThe terminal has other functions as well. You can check how to build your Aether Spirits 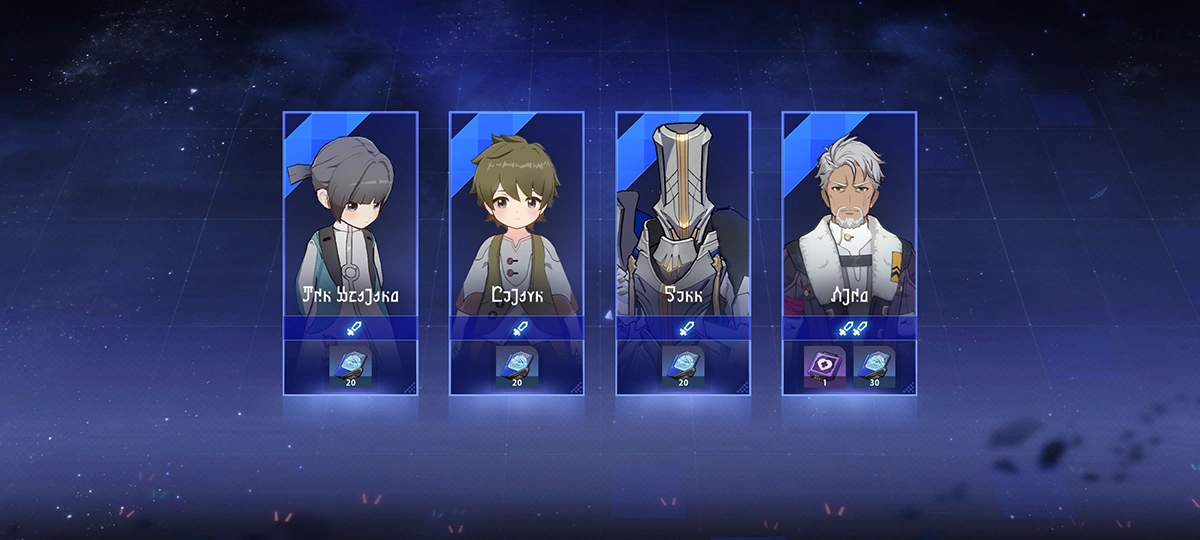 There are other Aetherium Wars players in the world. Heading into matches and claiming victory will continuously unlock new opponents for you. There are other Aetherium Wars players in the world. Heading into matches and claiming victory will continuously unlock new opponents for you.There are other Aetherium Wars players in the world. Heading into matches and claiming victory will continuously unlock new opponents for you. 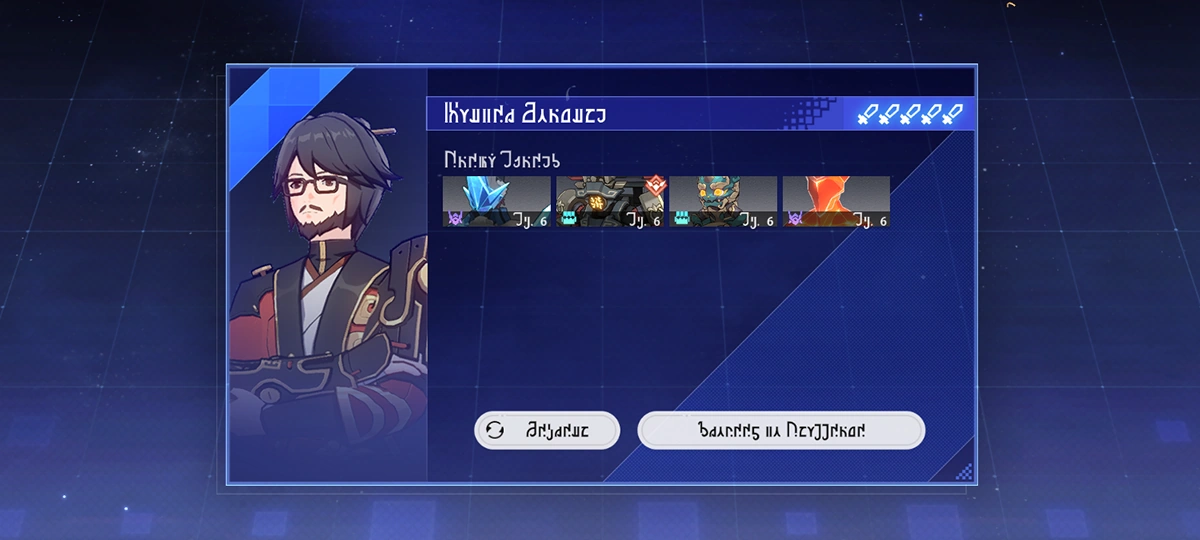 After you complete all challenges, you will also unlock exhibition matches, which will allow you to re-challenge elite opponents that were encountered before. After you complete all challenges, you will also unlock exhibition matches, which will allow you to re-challenge elite opponents that were encountered before.After you complete all challenges, you will also unlock exhibition matches, which will allow you to re-challenge elite opponents that were encountered before. |
| Aether Spirit Battle |
Main article: Aetherium Wars 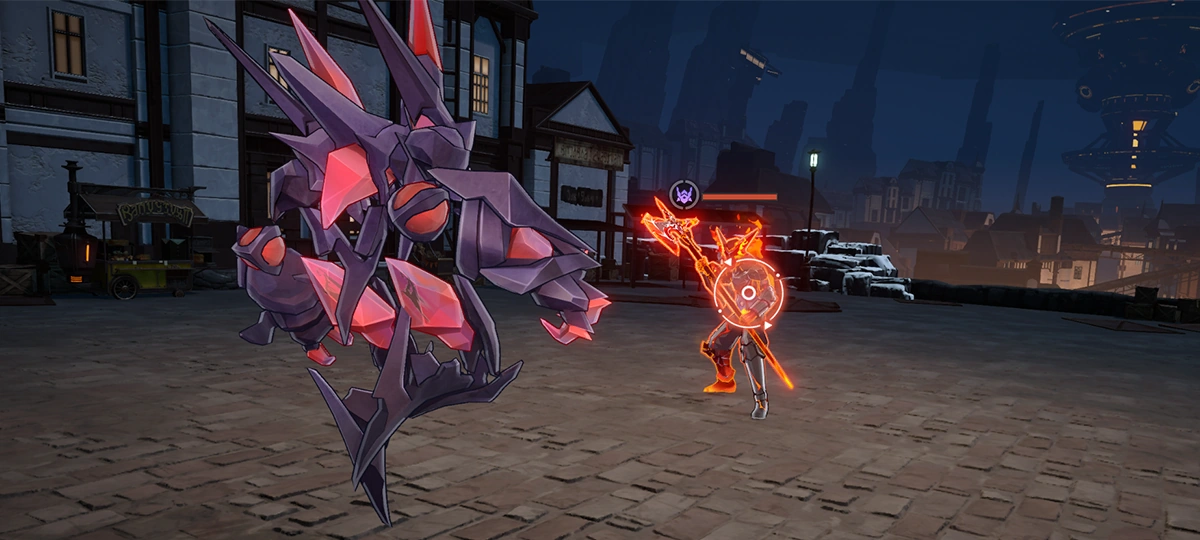 In Aetherium Wars, you and your opponent will engage in battle using Aether Spirits In Aetherium Wars, you and your opponent will engage in battle using Aether SpiritsIn Aetherium Wars, you and your opponent will engage in battle using Aether Spirits  Aether Spirits can be sorted into the Mechanical, Humanoid, and Aberrant types that counteract each other. Utilizing their counteracting relationship is the key to victory. Aether Spirits can be sorted into the Mechanical, Humanoid, and Aberrant types that counteract each other. Utilizing their counteracting relationship is the key to victory.Aether Spirits can be sorted into the Mechanical, Humanoid, and Aberrant types that counteract each other. Utilizing their counteracting relationship is the key to victory. |
| Acheron: Technique |
Main article: Acheron 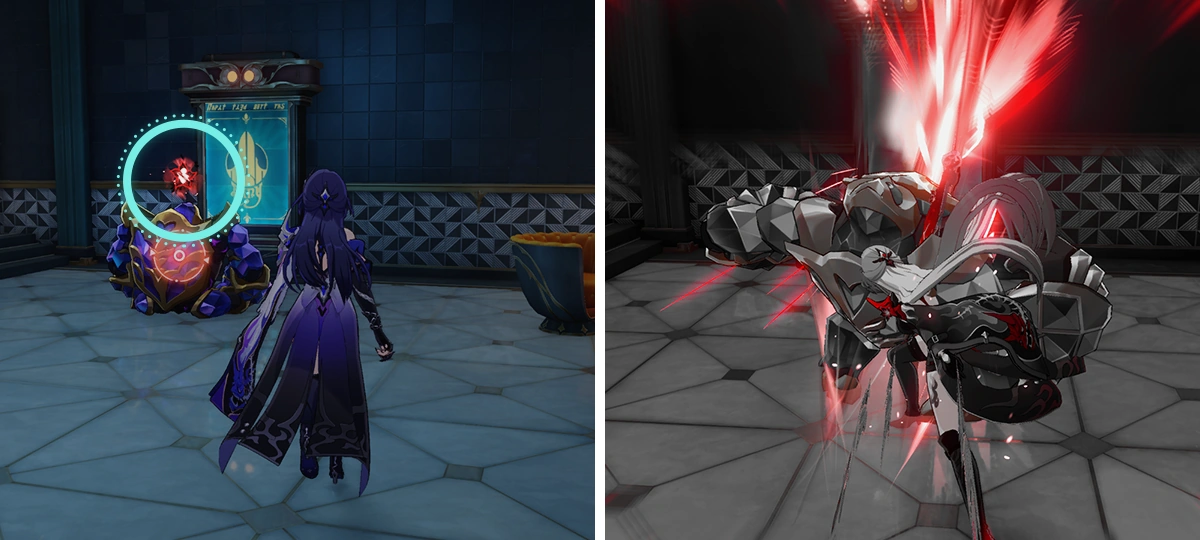 During exploration, using Acheron's Technique to attack normal enemies will instantly defeat them without entering combat. When not hitting enemies, no Technique Points are consumed. During exploration, using Acheron's Technique to attack normal enemies will instantly defeat them without entering combat. When not hitting enemies, no Technique Points are consumed.During exploration, using Acheron's Technique to attack normal enemies will instantly defeat them without entering combat. When not hitting enemies, no Technique Points are consumed. |
| Accommodate Creations |
Main article: Critter Pick 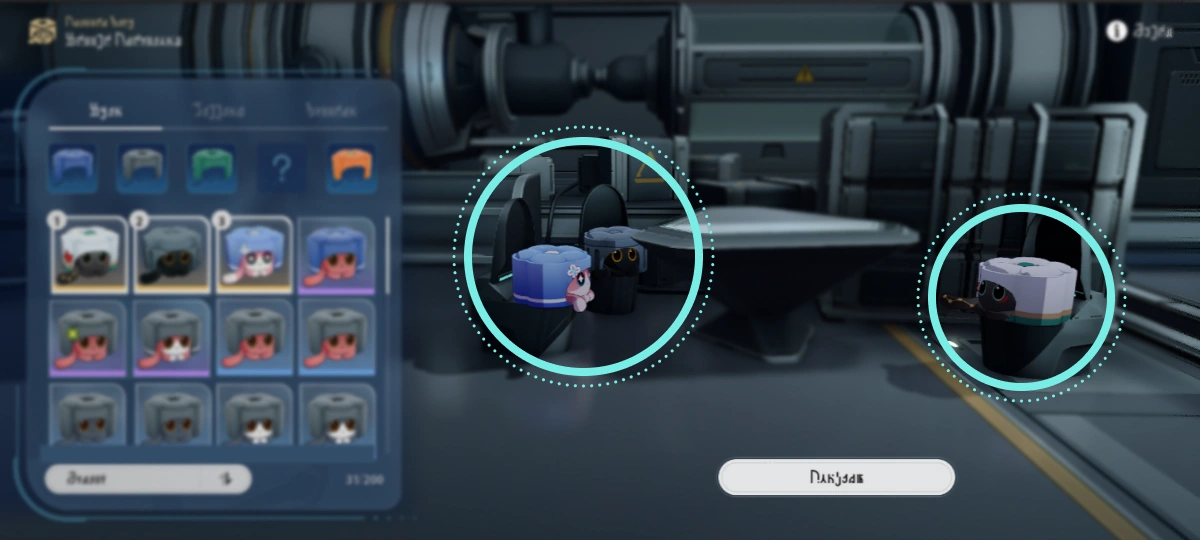 You may place your favorite creations in different areas. You may place your favorite creations in different areas.Similar creations tend to get along better when placed together. You may place your favorite creations in different areas. Similar creations tend to get along better when placed together. |
| Abyss of Fate: Scales of Justice |
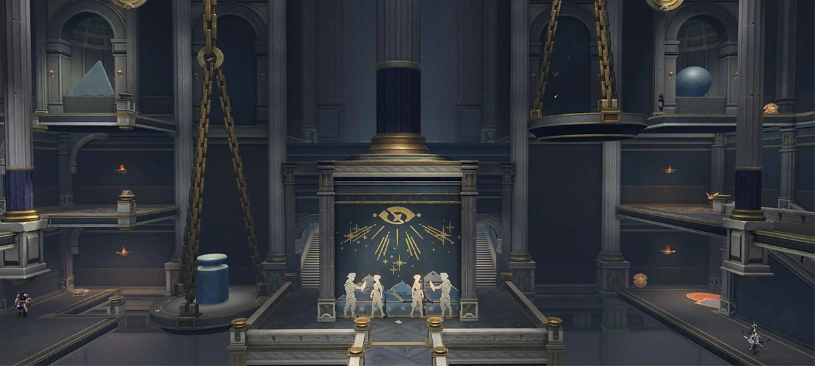 Use the Scales of Justice in the map to complete Oronyx's test. Use the Scales of Justice in the map to complete Oronyx's test.Use the Scales of Justice in the map to complete Oronyx's test.  Control the Hand of Zagreus to find and take the appropriately weighted items available in the map, then place them on the plate on the right side of the scale to try to solve Oronyx's puzzle. Control the Hand of Zagreus to find and take the appropriately weighted items available in the map, then place them on the plate on the right side of the scale to try to solve Oronyx's puzzle.Control the Hand of Zagreus to find and take the appropriately weighted items available in the map, then place them on the plate on the right side of the scale to try to solve Oronyx's puzzle. |
| "Planar Infinity" Special Store |
Main article: Planar Infinity  During exploration of Ordinary Planes, stores in "Domain — Respite" are all Special Stores that provide different store functions. During exploration of Ordinary Planes, stores in "Domain — Respite" are all Special Stores that provide different store functions.During exploration of Ordinary Planes, stores in "Domain — Respite" are all Special Stores that provide different store functions.  Speak with Herta and Screwllum to prepare for the highly challenging Final Trial battles. Speak with Herta and Screwllum to prepare for the highly challenging Final Trial battles.Speak with Herta and Screwllum to prepare for the highly challenging Final Trial battles.  You can consume all your Cosmic Fragments within Domain — Respite to buy a great number of Blessings. You can consume all your Cosmic Fragments within Domain — Respite to buy a great number of Blessings.You can consume all your Cosmic Fragments within Domain — Respite to buy a great number of Blessings. 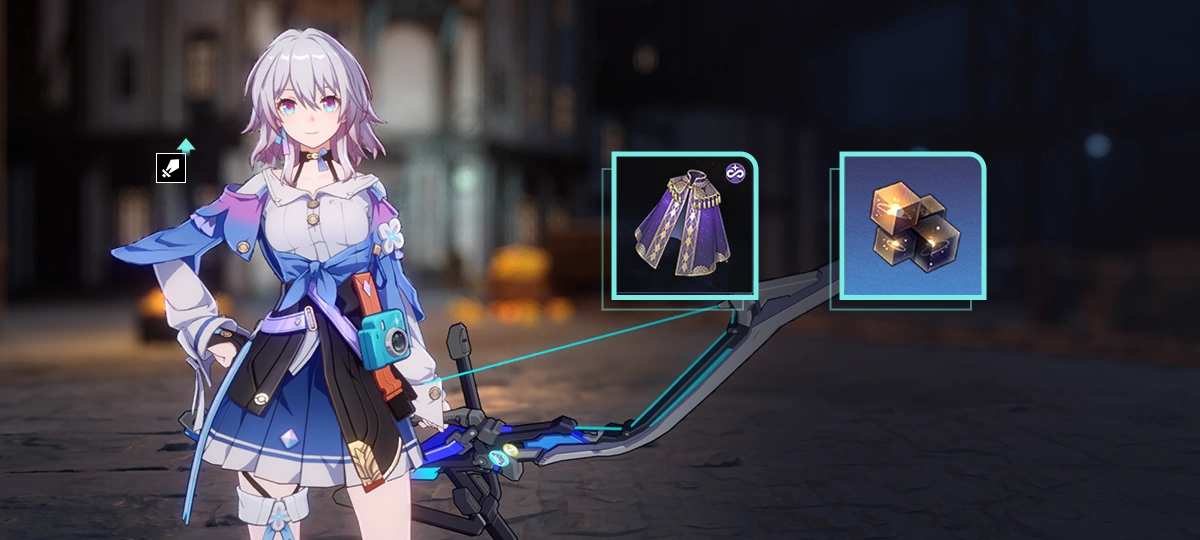 Consumed Cosmic Fragments can still provide the Robe of The Beauty (Infinite) with DMG Boosts. Consumed Cosmic Fragments can still provide the Robe of The Beauty (Infinite) with DMG Boosts.Consumed Cosmic Fragments can still provide the Robe of The Beauty (Infinite) with DMG Boosts.  The store within Domain — Respite can Enhance event-limited Blessings. In each store, all Blessings can be Enhanced 1 time. The store within Domain — Respite can Enhance event-limited Blessings. In each store, all Blessings can be Enhanced 1 time.The store within Domain — Respite can Enhance event-limited Blessings. In each store, all Blessings can be Enhanced 1 time. |
| "Planar Infinity" Plane Rules |
Main article: Planar Infinity  In the Planar Infinity event, each plane comprises Ordinary Planes and the Final Trial. In the Planar Infinity event, each plane comprises Ordinary Planes and the Final Trial.In the Planar Infinity event, each plane comprises Ordinary Planes and the Final Trial.  Ordinary Planes are made up of 7 different explorable domains. You can accumulate a vast amount of Blessings and Curios in Ordinary Planes before challenging the highly difficult Final Trial. Ordinary Planes are made up of 7 different explorable domains. You can accumulate a vast amount of Blessings and Curios in Ordinary Planes before challenging the highly difficult Final Trial.Ordinary Planes are made up of 7 different explorable domains. You can accumulate a vast amount of Blessings and Curios in Ordinary Planes before challenging the highly difficult Final Trial.  After clearing the Ordinary Planes, the Final Trial will be unlocked. After clearing the Ordinary Planes, the Final Trial will be unlocked.The Final Trial is made up of multiple waves of extremely difficult battles that give increasingly greater amount of Trial Points and rewards the more waves you defeat. After clearing the Ordinary Planes, the Final Trial will be unlocked. The Final Trial is made up of multiple waves of extremely difficult battles that give increasingly greater amount of Trial Points and rewards the more waves you defeat. |
| "Infinite Expansion Upgrade" Plane Rules |
Main article: Planar Infinity  All kinds of event-limited Blessings corresponding to each Path can be obtained in this plane. All kinds of event-limited Blessings corresponding to each Path can be obtained in this plane.All kinds of event-limited Blessings corresponding to each Path can be obtained in this plane.  Repeatedly obtain the same event-limited Blessings to enhance them for up to 9 times. Repeatedly obtain the same event-limited Blessings to enhance them for up to 9 times.Enhance event-limited Blessings to higher levels to prepare for the Final Trial. Repeatedly obtain the same event-limited Blessings to enhance them for up to 9 times. Enhance event-limited Blessings to higher levels to prepare for the Final Trial. |
| "Infinite Expansion Nurture" Plane Rules |
Main article: Planar Infinity 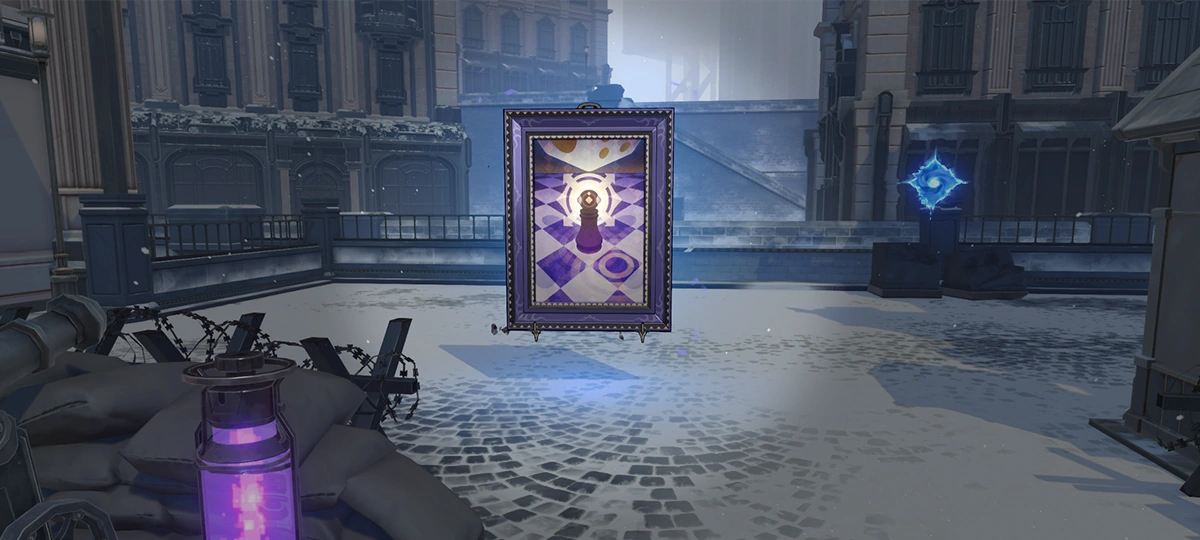 All domains in this plane are Domain — Occurrence (except Domain — Boss). Additional Blessing can be obtained after completing Occurrences. All domains in this plane are Domain — Occurrence (except Domain — Boss). Additional Blessing can be obtained after completing Occurrences.All domains in this plane are Domain — Occurrence (except Domain — Boss). Additional Blessing can be obtained after completing Occurrences.  In this plane, you are guaranteed to encounter Ruan Mei's new "World Slice." In this plane, you are guaranteed to encounter Ruan Mei's new "World Slice."In this plane, you are guaranteed to encounter Ruan Mei's new "World Slice." |
| "Infinite Expansion Fragment" Plane Rules |
Main article: Planar Infinity  Entering a new domain, achieving victory in battle, or destroying destructible objects will all get you a large number of Cosmic Fragments in this plane. Entering a new domain, achieving victory in battle, or destroying destructible objects will all get you a large number of Cosmic Fragments in this plane.Entering a new domain, achieving victory in battle, or destroying destructible objects will all get you a large number of Cosmic Fragments in this plane. The Robe of The Beauty (Infinite) has been modified. All Cosmic Fragments that have been obtained within the plane can now provide a DMG Boost effect for all allies' attacks.Obtain more Cosmic Fragments to prepare for the Final Trial. The Robe of The Beauty (Infinite) has been modified. All Cosmic Fragments that have been obtained within the plane can now provide a DMG Boost effect for all allies' attacks. Obtain more Cosmic Fragments to prepare for the Final Trial. |
| "Infinite Expansion Curio" Plane Rules |
Main article: Planar Infinity  Many destructible objects exist within the planes. Destroy them to obtain a large number of Curios. Many destructible objects exist within the planes. Destroy them to obtain a large number of Curios.Many destructible objects exist within the planes. Destroy them to obtain a large number of Curios.  While in a "Domain — Respite", you can gain Blessings equal in number to the number of Curios you already possess to handle the Final Trial that you must face after clearing all Ordinary Plane stages. While in a "Domain — Respite", you can gain Blessings equal in number to the number of Curios you already possess to handle the Final Trial that you must face after clearing all Ordinary Plane stages.While in a "Domain — Respite", you can gain Blessings equal in number to the number of Curios you already possess to handle the Final Trial that you must face after clearing all Ordinary Plane stages. |
| "Infinite Expansion Bait" Plane Rules |
Main article: Planar Infinity  A large number of Trotters have appeared in the plane. Capture them and obtain more Blessings. A large number of Trotters have appeared in the plane. Capture them and obtain more Blessings.A large number of Trotters have appeared in the plane. Capture them and obtain more Blessings. |
| "Hacking Callcard" |
Main article: Starhunt Game  Scan the hacking callcard graffiti in the domain to decipher the attack algorithm used by Silver Wolf. Collect hacking callcards to increase Simulated Calculation's intensity level. Scan the hacking callcard graffiti in the domain to decipher the attack algorithm used by Silver Wolf. Collect hacking callcards to increase Simulated Calculation's intensity level.Scan the hacking callcard graffiti in the domain to decipher the attack algorithm used by Silver Wolf. Collect hacking callcards to increase Simulated Calculation's intensity level.  Simulated Calculation will deal Quantum DMG to all enemies every turn. This DMG depletes Toughness of all enemies regardless of Weakness Type. Simulated Calculation will deal Quantum DMG to all enemies every turn. This DMG depletes Toughness of all enemies regardless of Weakness Type.Simulated Calculation will deal Quantum DMG to all enemies every turn. This DMG depletes Toughness of all enemies regardless of Weakness Type. |
| Moment of Slumbernana: Epic Hunt |
 In the Moment of Slumbernana, using Rappa's Technique will cause her to go into the Graffiti state that continues to Sprint and wakes the Slumbernana Monkey with whom she collided. Try to collide with more Slumbernana Monkeys. The more Slumbernana Monkeys she wakes up, the greater the buff in the final battle with Profnana Primon. In the Moment of Slumbernana, using Rappa's Technique will cause her to go into the Graffiti state that continues to Sprint and wakes the Slumbernana Monkey with whom she collided. Try to collide with more Slumbernana Monkeys. The more Slumbernana Monkeys she wakes up, the greater the buff in the final battle with Profnana Primon.In the Moment of Slumbernana, using Rappa's Technique will cause her to go into the Graffiti state that continues to Sprint and wakes the Slumbernana Monkey with whom she collided. Try to collide with more Slumbernana Monkeys. The more Slumbernana Monkeys she wakes up, the greater the buff in the final battle with Profnana Primon. |
| Feixiao: Technique |
Main article: Feixiao 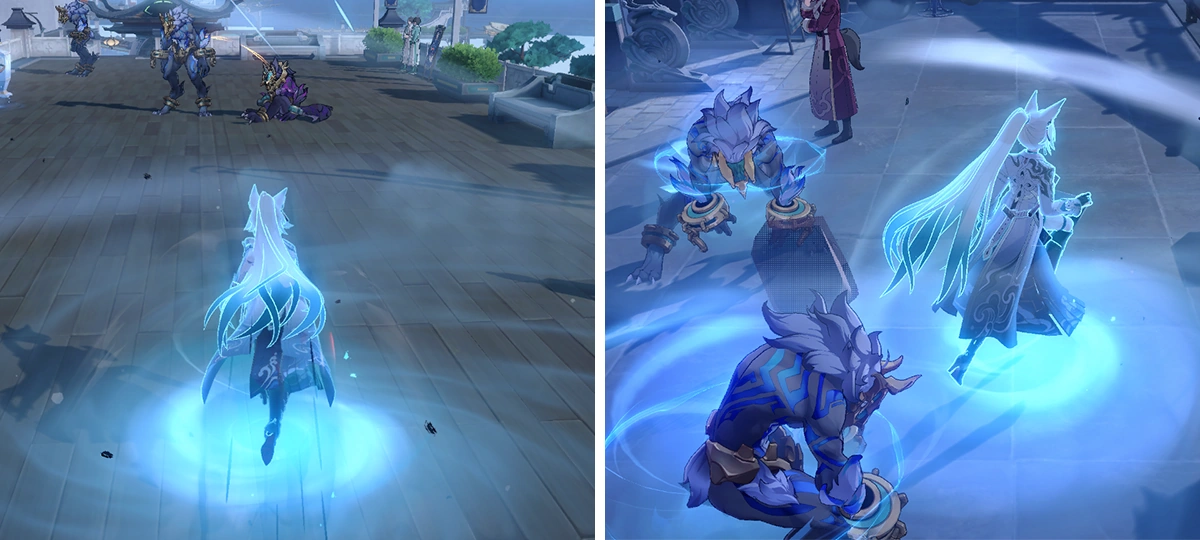 After Feixiao uses her Technique, she grants herself a movement speed boost and will pull enemies along her as she travels. The more enemies are pulled, the higher the DMG upon entering battle. After Feixiao uses her Technique, she grants herself a movement speed boost and will pull enemies along her as she travels. The more enemies are pulled, the higher the DMG upon entering battle.After Feixiao uses her Technique, she grants herself a movement speed boost and will pull enemies along her as she travels. The more enemies are pulled, the higher the DMG upon entering battle. |
| West Wind Compass |
Main article: West Wind Compass  Observe the starting point, finish point, the direction of the arrow on the compass, and the distribution of red obstacles. Rotate the rings on the compass to reach the finish point without running into obstacles by following the arrow's directions upon leaving the starting point. Observe the starting point, finish point, the direction of the arrow on the compass, and the distribution of red obstacles. Rotate the rings on the compass to reach the finish point without running into obstacles by following the arrow's directions upon leaving the starting point.Observe the starting point, finish point, the direction of the arrow on the compass, and the distribution of red obstacles. Rotate the rings on the compass to reach the finish point without running into obstacles by following the arrow's directions upon leaving the starting point.  The red fan-shaped zone represents obstacles that block the path, and the route cannot pass through them. Be sure to avoid them when connecting the route. The red fan-shaped zone represents obstacles that block the path, and the route cannot pass through them. Be sure to avoid them when connecting the route.The red fan-shaped zone represents obstacles that block the path, and the route cannot pass through them. Be sure to avoid them when connecting the route.  Use the Select button to choose a specific ring, and use the Rotate button to turn it. When a route has been connected, a hint will appear on the compass. Tap the Confirm Route button to finalize your route. Use the Select button to choose a specific ring, and use the Rotate button to turn it. When a route has been connected, a hint will appear on the compass. Tap the Confirm Route button to finalize your route.Use the Select button to choose a specific ring, and use the Rotate button to turn it. When a route has been connected, a hint will appear on the compass. Tap the Confirm Route button to finalize your route. 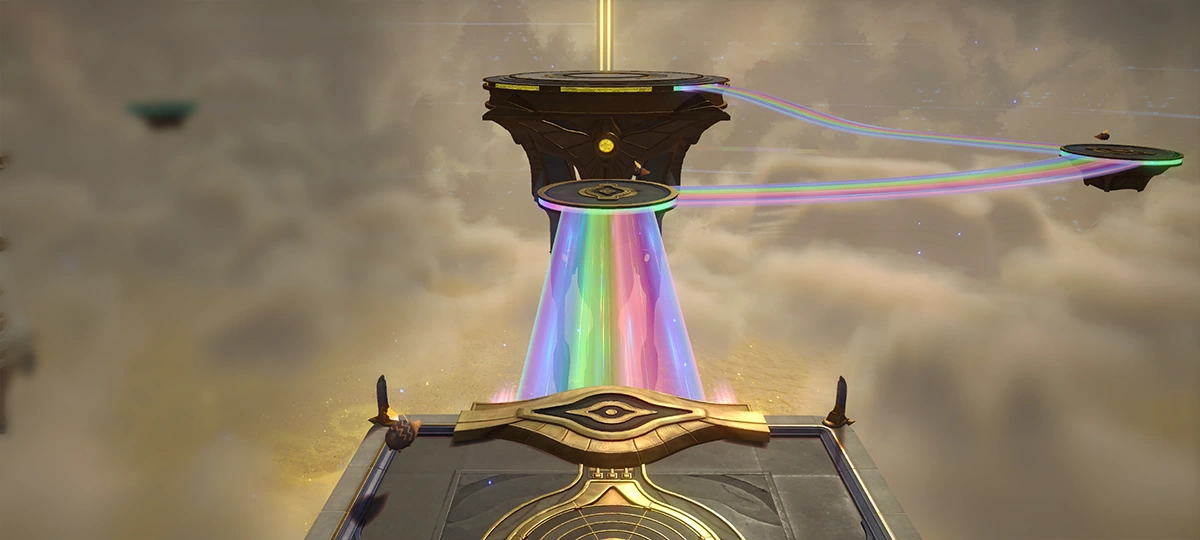 After confirming a route on the compass, a mechanism will be triggered. A rainbow path will be added to the map according to the specified state of the compass. After confirming a route on the compass, a mechanism will be triggered. A rainbow path will be added to the map according to the specified state of the compass.After confirming a route on the compass, a mechanism will be triggered. A rainbow path will be added to the map according to the specified state of the compass.  If there are treasure icons on the connected route, you can obtain them by traveling to their corresponding positions in the location. There are multiple ways to connect routes with a single compass, but there's normally only one type of route that passes through all the treasures. Interact with the compass again to edit the route. If there are treasure icons on the connected route, you can obtain them by traveling to their corresponding positions in the location. There are multiple ways to connect routes with a single compass, but there's normally only one type of route that passes through all the treasures. Interact with the compass again to edit the route.If there are treasure icons on the connected route, you can obtain them by traveling to their corresponding positions in the location. There are multiple ways to connect routes with a single compass, but there's normally only one type of route that passes through all the treasures. Interact with the compass again to edit the route. |
| Warring Expedition |
Main article: Warring Expedition  Go back to the areas you have explored and experience different stories or challenges to get corresponding rewards. During your exploration, you will not be able to change your Team Lineup, and the Exploration Progress will be reset after exiting. Go back to the areas you have explored and experience different stories or challenges to get corresponding rewards. During your exploration, you will not be able to change your Team Lineup, and the Exploration Progress will be reset after exiting.Go back to the areas you have explored and experience different stories or challenges to get corresponding rewards. During your exploration, you will not be able to change your Team Lineup, and the Exploration Progress will be reset after exiting. |
| Map Mechanism and Special Tiles |
Main article: Snack Dash  Slow Tile: Creation will get stuck to the ground, preventing them from jumping, and their speed is slowed Slow Tile: Creation will get stuck to the ground, preventing them from jumping, and their speed is slowedSlow Tile: Creation will get stuck to the ground, preventing them from jumping, and their speed is slowed  Slippery Tile: Creations will continue sliding for a distance after each jump. Slippery Tile: Creations will continue sliding for a distance after each jump.Slippery Tile: Creations will continue sliding for a distance after each jump.  Push Plate: The Push Plate pushes outwards every once in a while Push Plate: The Push Plate pushes outwards every once in a whilePush Plate: The Push Plate pushes outwards every once in a while  Bumper Mechanism: When a creation lands on the Bumper, it is launched a certain distance in a specific direction Bumper Mechanism: When a creation lands on the Bumper, it is launched a certain distance in a specific directionBumper Mechanism: When a creation lands on the Bumper, it is launched a certain distance in a specific direction  Teleportation Pot: After a creation enters a Teleportation Pot, it will be randomly teleported to another Teleportation Pot Teleportation Pot: After a creation enters a Teleportation Pot, it will be randomly teleported to another Teleportation PotTeleportation Pot: After a creation enters a Teleportation Pot, it will be randomly teleported to another Teleportation Pot  Conveyor Belt: Creations that land on the Conveyor Belt will not jump, but will move along with the Conveyor Belt Conveyor Belt: Creations that land on the Conveyor Belt will not jump, but will move along with the Conveyor BeltConveyor Belt: Creations that land on the Conveyor Belt will not jump, but will move along with the Conveyor Belt  Bubble: Creations that touch a Bubble will be trapped inside until they are struck by another creation, or until the Bubble bursts after a period of time Bubble: Creations that touch a Bubble will be trapped inside until they are struck by another creation, or until the Bubble bursts after a period of timeBubble: Creations that touch a Bubble will be trapped inside until they are struck by another creation, or until the Bubble bursts after a period of time  Slope: Creations that land on the Slope will slide down the decline. Slope: Creations that land on the Slope will slide down the decline.Slope: Creations that land on the Slope will slide down the decline. |
| Support Tips |
Main article: Snack Dash  In the Support Segment, (taptap/presspress/clickclick) the top-right corner to view the arena. In the Support Segment, (taptap/presspress/clickclick) the top-right corner to view the arena.The contestants' abilities determine their advantageous terrain, so carefully observing the arena before placing your support is the only way to find the contestant most likely to win. In the Support Segment, (taptap/presspress/clickclick) the top-right corner to view the arena. The contestants' abilities determine their advantageous terrain, so carefully observing the arena before placing your support is the only way to find the contestant most likely to win. |
| Arena Items |
Main article: Snack Dash  During the match, players can use arena items to influence the game. After using any item, all items will enter cooldown. During the match, players can use arena items to influence the game. After using any item, all items will enter cooldown.During the match, players can use arena items to influence the game. After using any item, all items will enter cooldown.  Trash Bag can be dragged and used anywhere on the field. After a brief delay, it stuns creations within its range. Best used against creations at the front of the pack to halt their momentum. Trash Bag can be dragged and used anywhere on the field. After a brief delay, it stuns creations within its range. Best used against creations at the front of the pack to halt their momentum.Trash Bag can be dragged and used anywhere on the field. After a brief delay, it stuns creations within its range. Best used against creations at the front of the pack to halt their momentum. |
| Arena Items |
Main article: Snack Dash  The Signal Jammer can be dragged on a Bumper or Push Plate to temporarily stop them from operating. Stopping a Bumper prevents the creations on it from being bounced out, and stopping a Push Plate prevents it from pushing creations off the track. The Signal Jammer can be dragged on a Bumper or Push Plate to temporarily stop them from operating. Stopping a Bumper prevents the creations on it from being bounced out, and stopping a Push Plate prevents it from pushing creations off the track.The Signal Jammer can be dragged on a Bumper or Push Plate to temporarily stop them from operating. Stopping a Bumper prevents the creations on it from being bounced out, and stopping a Push Plate prevents it from pushing creations off the track.  Universal Bait can be dragged and used anywhere on the field, continuously attracting nearby creations. It's perfect for placing near a field mechanism or special tiles to create unexpected effects. Universal Bait can be dragged and used anywhere on the field, continuously attracting nearby creations. It's perfect for placing near a field mechanism or special tiles to create unexpected effects.Universal Bait can be dragged and used anywhere on the field, continuously attracting nearby creations. It's perfect for placing near a field mechanism or special tiles to create unexpected effects. |
| Victory Rewards |
Main article: Snack Dash  In each race segment, if the player's supported contestant wins the segment, snacks will be returned based on the amount of snacks spent on the support and the racer's victory bonus. In each race segment, if the player's supported contestant wins the segment, snacks will be returned based on the amount of snacks spent on the support and the racer's victory bonus.In each race segment, if the player's supported contestant wins the segment, snacks will be returned based on the amount of snacks spent on the support and the racer's victory bonus.  If your supported contestant wins 2nd or 3rd place, the amount of snacks returned would be reduced respectively. If your supported contestant wins 2nd or 3rd place, the amount of snacks returned would be reduced respectively.If the contestant you supported doesn't place in the top three, no snacks will be returned. If your supported contestant wins 2nd or 3rd place, the amount of snacks returned would be reduced respectively. If the contestant you supported doesn't place in the top three, no snacks will be returned. |
| Snack Dash |
Main article: Snack Dash 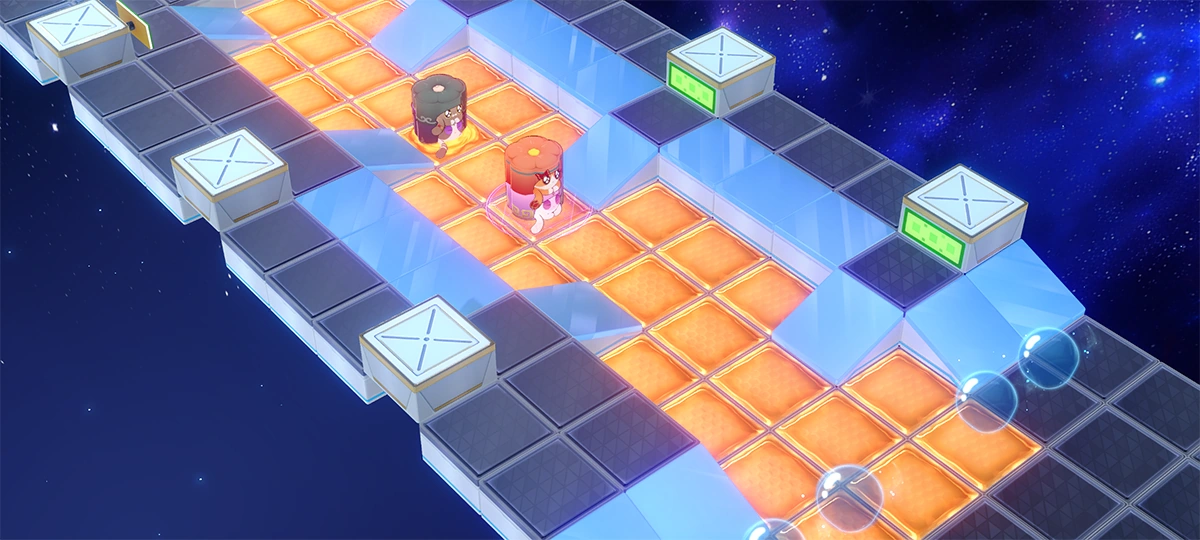 Snack Dash is an obstacle race event spontaneously organized by the creations, where 8 players can participate as spectators and cheer for the contestants. Snack Dash is an obstacle race event spontaneously organized by the creations, where 8 players can participate as spectators and cheer for the contestants.Snack Dash is an obstacle race event spontaneously organized by the creations, where 8 players can participate as spectators and cheer for the contestants. Cheering requires Bounce-Bounce Snacks, but at the end of each round, if the contestant you cheered for ranks in the top three, you'll receive massive snack rewards based on their winning profits.Cheering requires Bounce-Bounce Snacks, but at the end of each round, if the contestant you cheered for ranks in the top three, you'll receive massive snack rewards based on their winning profits. During the match, players can use arena items to influence the game. After using any item, all items will enter cooldown.During the match, players can use arena items to influence the game. After using any item, all items will enter cooldown.  After each match, you'll earn Spectator Points. Higher-tier matches award more points, and you can claim Spectator Rewards by accumulating points. After each match, you'll earn Spectator Points. Higher-tier matches award more points, and you can claim Spectator Rewards by accumulating points.After each match, you'll earn Spectator Points. Higher-tier matches award more points, and you can claim Spectator Rewards by accumulating points.  After watching your first match in the advanced arena, Snack Exchange will be unlocked, allowing you to exchange excess "Bounce-Bounce Snacks" for rewards such as Trick Snacks and Tears of Souls. After watching your first match in the advanced arena, Snack Exchange will be unlocked, allowing you to exchange excess "Bounce-Bounce Snacks" for rewards such as Trick Snacks and Tears of Souls.After watching your first match in the advanced arena, Snack Exchange will be unlocked, allowing you to exchange excess "Bounce-Bounce Snacks" for rewards such as Trick Snacks and Tears of Souls. |
