Tutorial/Enemies
Last updated 2024-11-19
There are 153 tutorials that focus on enemies, their behaviours, ways of beating them, and their background:
Large Cryo Slime - New Entry  |
|---|
Main article: Large Cryo Slime  A slime that uses a frozen Cryo shield to protect itself. If you use Pyro or other reactive elemental attacks, perhaps you can break through its defenses... |
| Large Geo Slime - New Entry |
Main article: Large Geo Slime 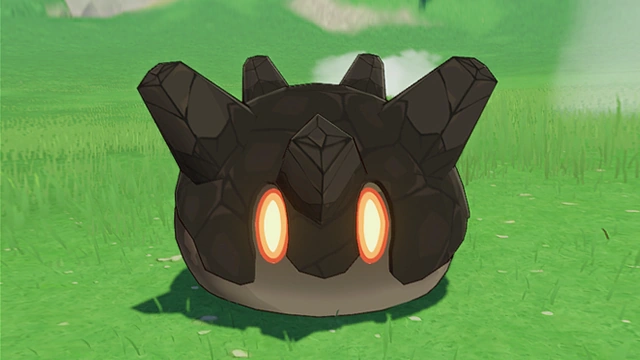 A slime that uses a sturdy Geo shield to protect itself. If you use heavy Geo attacks, a claymore, or strong explosions, you should be able to break through its defenses... |
| Eye of the Storm - New Entry |
Main article: Eye of the Storm 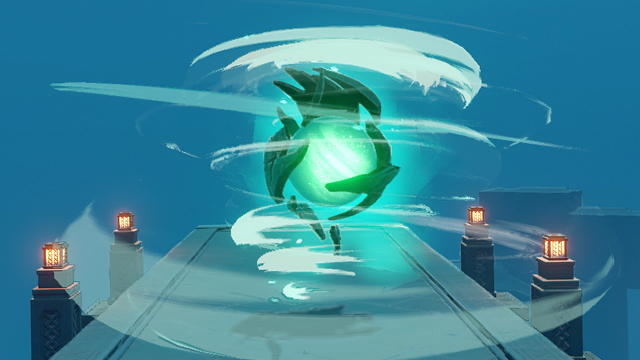 A dangerous opponent that can summon a Hurricane Sphere to deal sustained DMG. Try using the Wind Current generated in the center to swiftly leave the ground. |
| Pyro Hypostasis - New Entry |
Main article: Pyro Hypostasis 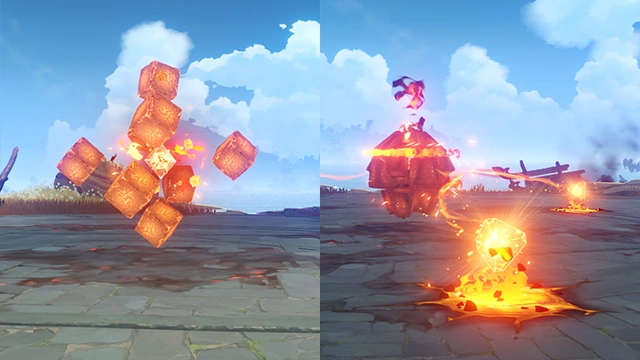 Protects itself with a cubical shell that is elementally inert. Has two states: Ignited and Extinguished. In the Ignited state, the Pyro Hypostasis's core is not exposed and it continuously regenerates HP. Only after Extinguishing it with the right elemental reactions will you have an opportunity to strike. In the Extinguished state, the Pyro Hypostasis will generate Fire Seeds in an attempt to re-ignite. |
| Hydro Hypostasis - New Entry |
Main article: Hydro Hypostasis 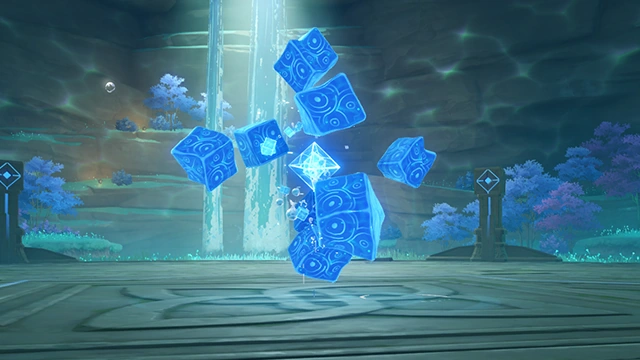 Protects itself with a cubical shell that is elementally inert. Attacks are only effective when its elemental core is exposed. When HP is low, it splits into three crystalline "water droplets"that will move towards its core.Destroy these water droplets in time to prevent the revival of the Hydro Hypostasis. |
| Anemo Hypostasis - New Entry |
Main article: Anemo Hypostasis 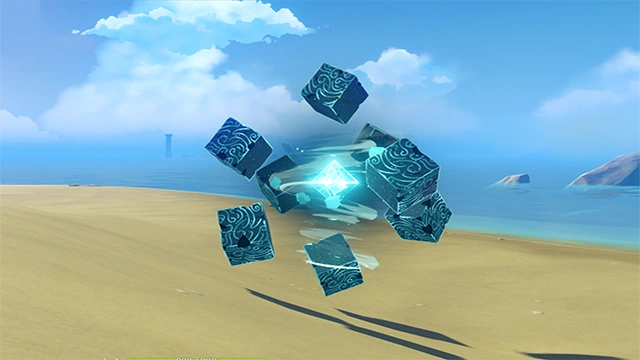 Elemental creatures who protect themselves from incoming attack with their durable shell. Find an opportune moment to land a blow to their elemental core. They are able to control their elemental orb in fights and restore their health when they feel threatened. If you fail to utilize the upcurrents to absorb these orbs, the battle will be significantly harder. |
| Electro Hypostasis - New Entry |
Main article: Electro Hypostasis 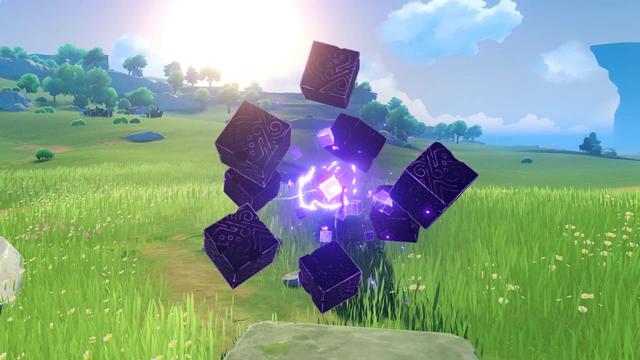 Protects itself with a cubical shell that is elementally inert. Attacks are only effective when its elemental core is exposed. When HP is low, it splits into three crystalline prisms that can absorb elemental energy. Make sure to destroy them all. |
| Cryo Hypostasis - New Entry |
Main article: Cryo Hypostasis 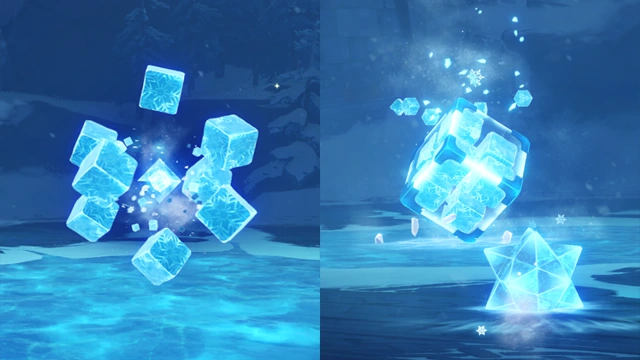 Elemental creatures who protect themselves from incoming attack with their durable shell. Find an opportune moment to land a blow to their elemental core. At critical moments, they will enter a shielded regenerative state, firing Frostfruits to attack its foes while restoring its own HP. Use Charged Attacks to redirect the Frostfruits back at the Cryo Hypostasis to knock it out of its regenerative state swiftly. |
| Geo Hypostasis - New Entry |
Main article: Geo Hypostasis 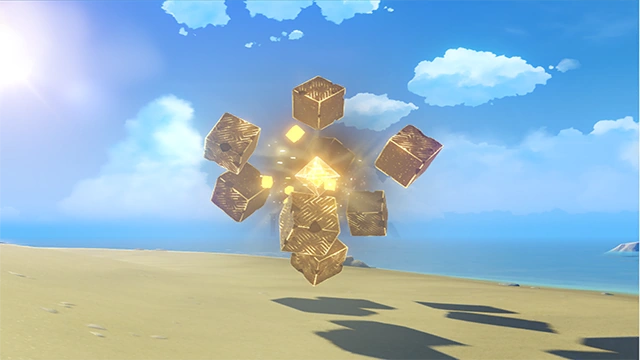 Elemental creatures who protect themselves from incoming attack with their durable shell. Find an opportune moment to land a blow to their elemental core. They are able to create Geo constructs in fights and restore their health when they feel threatened. You must be able to efficiently destroy these constructs if you want to defeat these creatures. |
| Dendro Hypostasis - New Entry |
Main article: Dendro Hypostasis 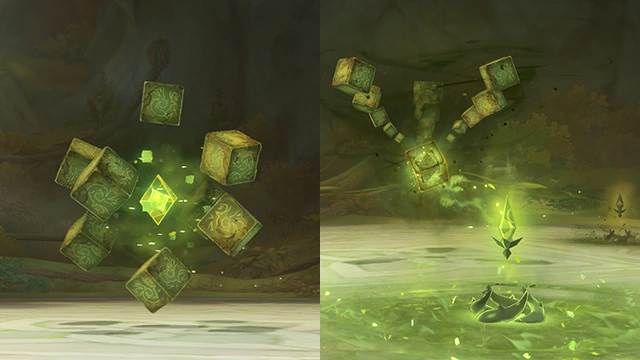 A hypostasis that uses an inert shell to defend itself. It now displays abnormalities due to having been corrupted by some unknown influence. You must seize moments where its elemental core is exposed to attack effectively. When it is in danger, it will release Restorative Piths that have the properties of Tri-Lakshana Creatures. Use Dendro to revive these Piths and induce a Normal State in them to continuously cleanse the Dendro Hypostasis, and use Electro to trigger their Activated state and speed up the cleansing process. Using Dendro attacks on the Dendro Hypostasis' core can also help to cleanse the creature. Complete the cleansing process to complete the challenge. |
| Oceanids - New Entry |
Main article: Rhodeia of Loch  A noble elemental lifeform that dwells within bodies of pure water. In combat, it will expend and condense its life force into Hydro Mimics that attack its enemies. Although they are all aligned with Hydro, different elements that react with Hydro are effective against different Hydro Mimics. Defeat these Mimics rapidly to overcome the Oceanid with ease. |
| Thunder Manifestation - New Entry |
Main article: Thunder Manifestation 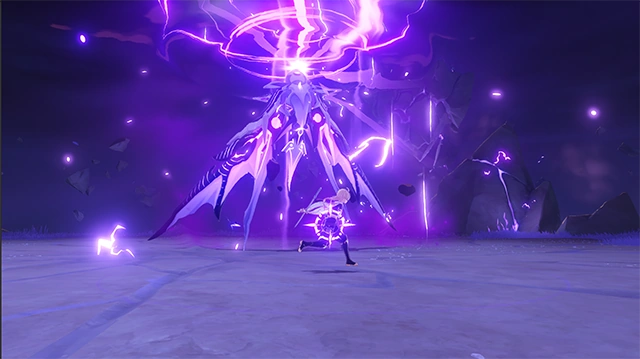 An elemental life form created as the avatar of thunderous indignation. It uses lightning attacks and its Strike Probes to lock on to its foes. If a locked-on target is present, the Thunder Manifestation will enter an enraged state and prioritize the annihilation of that target. |
| Pyro Specter - New Entry |
Main article: Pyro Specter  High elemental concentrations have resulted in the creation of this floating creature. When it takes a single grievous hit, it will build up Fury. When a Specter hits maximum Fury, it will expand, becoming larger and stronger, and it will explode violently when defeated. |
| Hydro Specter - New Entry |
Main article: Hydro Specter  High elemental concentrations have resulted in the creation of this floating creature. When it takes a single grievous hit, it will build Fury. When a Specter hits maximum Fury, it will expand, becoming larger and stronger, and it will explode violently when defeated. |
| Anemo Specter - New Entry |
Main article: Anemo Specter  High elemental concentrations have resulted in the creation of this floating creature. When it takes a single grievous hit, it will build Fury. When a Specter hits maximum Fury, it will expand, becoming larger and stronger, and it will explode violently when defeated. |
| Electro Specter - New Entry |
Main article: Electro Specter  High elemental concentrations have resulted in the creatiopn of this floating creature. When it takes a single grievous hit, it will build up Fury. When a Specter hits maximum Fury, it will expand, becoming larger and stronger, and it will explode violently when defeated. |
| Dendro Specter - New Entry |
Main article: Dendro Specter  High elemental concentrations have resulted in the creation of this floating creature. When it takes a single grievous hit, it will build Fury. When a Specter hits maximum Fury, it will expand, becoming larger and stronger, and it will explode violently when defeated. |
| Cryo Specter - New Entry |
Main article: Cryo Specter  High elemental concentrations have resulted in the creation of this floating creature. When it takes a single grievous hit, it will build up Fury. When a Specter hits maximum Fury, it will expand, becoming larger and stronger, and it will explode violently when defeated. |
| Geo Specter - New Entry |
Main article: Geo Specter  High elemental concentrations have resulted in the creation of this floating creature. When it takes a single grievous hit, it will build Fury. When a Specter hits maximum Fury, it will expand, becoming larger and stronger, and it will explode violently when defeated. |
| Wooden Shield Hilichurl Guard - New Entry |
Main article: Wooden Shield Hilichurl Guard 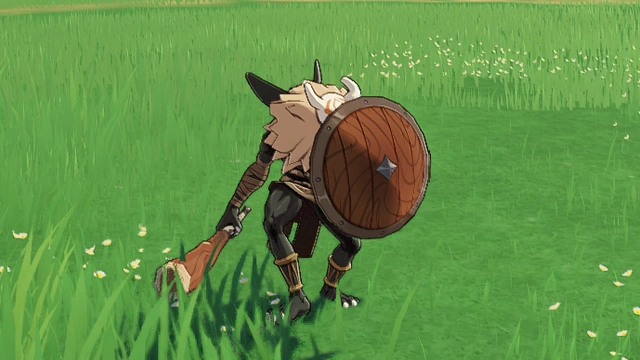 Wards off attacks using a wooden shield, which is comprised of Dendro. Maybe there's a way to set it on fire. |
| Rock Shield Hilichurl Guard - New Entry |
Main article: Rock Shield Hilichurl Guard  Protects itself using a shield with Geo attributes (unlike the shields wielded by Wooden Shield Hilichurl Guards). Use heavy attacks such as Geo Elemental Attacks, Claymores, and Overloaded to break the shield. |
| Wooden Shieldwall Mitachurl - New Entry |
Main article: Wooden Shieldwall Mitachurl 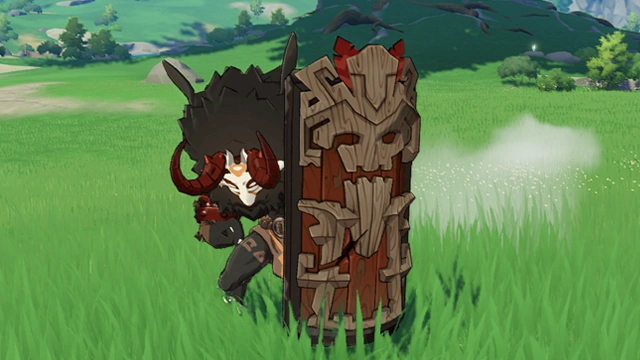 Wards off attacks using a large wooden shield, which is comprised of Dendro. Maybe there's a way to set it on fire. |
| Rock Shieldwall Mitachurl - New Entry |
Main article: Rock Shieldwall Mitachurl  Protects itself using a shield with Geo attributes (unlike the shields wielded by Wooden Shieldwall Mitachurls). Use heavy attacks such as Geo Elemental Attacks, Claymores, and Overloaded to break the shield. |
| Ice Shieldwall Mitachurl - New Entry |
Main article: Ice Shieldwall Mitachurl  A mitachurl that uses a Cryo shield to protect itself. Its shield will regenerate in Subzero Climate. Attack with Pyro or other elements that can react with Cryo to crush its defenses. |
| Geo Samachurl - New Entry |
Main article: Geo Samachurl 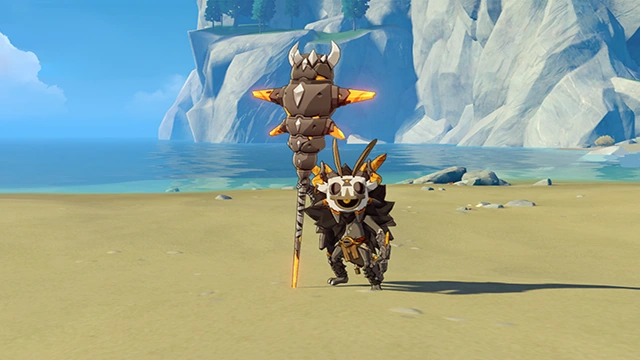 Uses Geo attributes to form a solid stone pillar to separate itself from harm. The stone pillar can be destroyed with heavy Geo attacks, Claymore attacks, or strong explosions. If you can defeat it swiftly, its magical power will also vanish. |
| Anemo Hilichurl Rogue - Exploration Knowledge |
Main article: Anemo Hilichurl Rogue 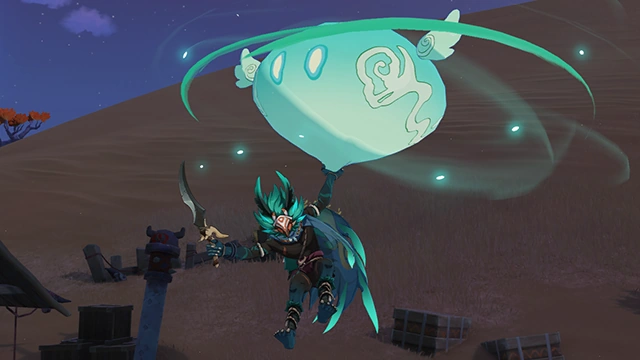 A mysterious hilichurl warrior that can manipulate Anemo to a certain degree. In battle, such hilichurls will enter a hovering state with the aid of Anemo Slimes. Attack these Anemo Slimes to shoot the Rogues down. |
| Hydro Hilichurl Rogue - New Entry |
Main article: Hydro Hilichurl Rogue  A mysterious hilichurl warrior that can manipulate Hydro to a certain degree. Such hilichurls will use Hydro Slimes in battle to launch Mist Bubbles. Burst these Hydro Slimes to cause their effects to rebound on the Rogues. |
| Pyro Abyss Mage - New Entry |
Main article: Pyro Abyss Mage  Uses a Pyro shield to protect itself. Perhaps you can break down its defenses with Electro or other Elemental Attacks that react with Pyro. |
| Hydro Abyss Mage - New Entry |
Main article: Hydro Abyss Mage  Uses a Hydro shield to protect itself. Perhaps you can break down its defenses with Cryo or other Elemental Attacks that react with Hydro. |
| Cryo Abyss Mage - New Entry |
Main article: Cryo Abyss Mage  Uses a Cryo shield to protect itself. Perhaps you can break down its defenses with Pyro or other Elemental Attacks that react with Cryo. |
| Abyss Herald: Wicked Torrents - New Entry |
Main article: Abyss Herald: Wicked Torrents  An Abyss Order monster that uses a dark power to command warped torrents in battle. Some of its attacks increase the CD of characters' skills if they are currently in cooldown. |
| Abyss Lector: Fathomless Flames - New Entry |
Main article: Abyss Lector: Fathomless Flames 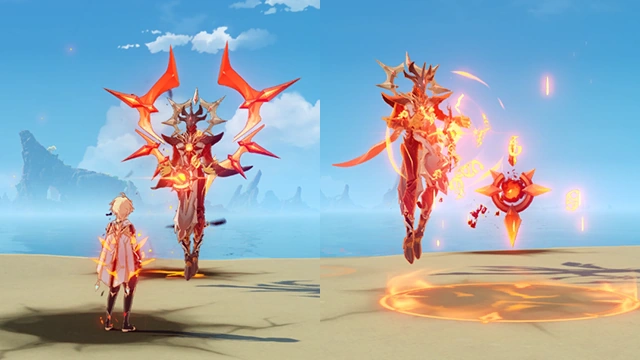 A monster of the Abyss Order who sings of the warmth of the dark flames. Some of its attacks will apply the brand of the abyssal flame when they deal DMG to characters. These brands will explode after a short while, causing the whole party to lose large amounts of HP. You may be able to use Shields to prevent the brand from being applied. Your active character can succumb to HP loss resulting from the brands' explosions. When the Abyss Lector: Fathomless Flames enters a state where it is defended by a shield of abyssal fire, destroy its Darkfire Furnace to deplete its shield more easily. |
| Abyss Lector: Violet Lightning - New Entry |
Main article: Abyss Lector: Violet Lightning  A creature of the Abyss Order that calls upon thunder and lightning in praise of the darkness. It possesses some ability to disrupt elemental powers, and some of its attacks will drain characters' Elemental Energy when dealing DMG to them. |
| Abyss Herald: Frost Fall - New Entry |
Main article: Abyss Herald: Frost Fall  An Abyss Order monster that uses a dark power to command ice and frost in battle. Some of its attacks decrease the Stamina of characters while dealing DMG against them. |
| Iniquitous Baptist - New Entry |
Main article: Iniquitous Baptist 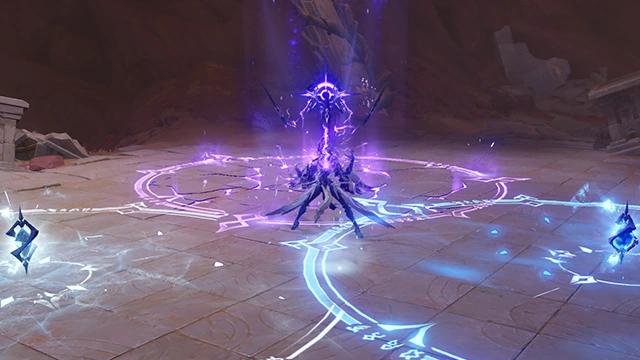 A creature of the Abyss Order that can manipulate multiple elements at once and use shields of the corresponding elements to defend against damage. In battle, it will create Elemental Rings, through which it will channel a powerful attack. Use Reactions to destroy all the Rings to prevent the oncoming catastrophe. |
| Rockfond Rifthound Whelp - New Entry |
Main article: Rockfond Rifthound Whelp 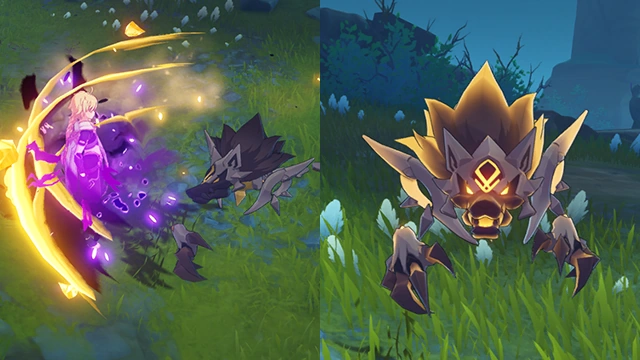 A monster from another world that has the power to corrode material. The Rifthound Whelp's attacks can apply stacks of the "Corrosion" status, which will cause all characters in the party to continually lose HP Additionally, when they take elemental damage from their respective element, Rifthound Whelps will enter an Elemental Devourer state that will allow them to fight more fiercely at the cost of lessened RES to that particular element. |
| Thundercraven Rifthound Whelp - New Entry |
Main article: Thundercraven Rifthound Whelp 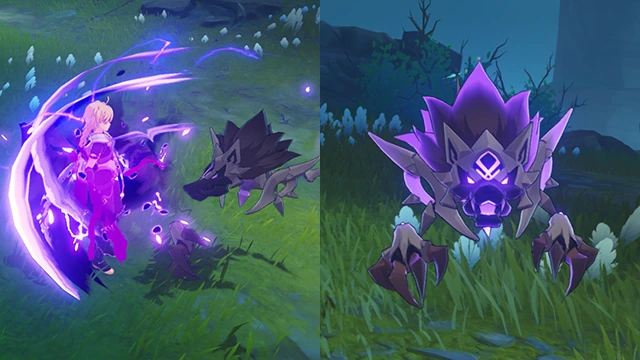 A monster from another world that has the power to corrode material. The Rifthound Whelp's attacks can apply stacks of the "Corrosion" status, which will cause all characters in the party to continually lose HP Additionally, when they take elemental damage from their respective element, Rifthound Whelps will enter an Elemental Devourer state that will allow them to fight more fiercely at the cost of lessened RES to that particular element. |
| Rockfond Rifthound - New Entry |
Main article: Rockfond Rifthound 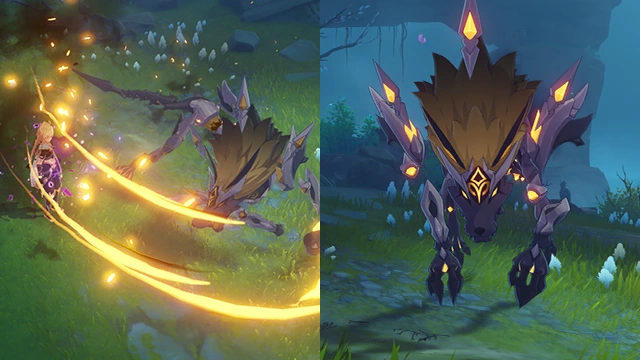 This is the mature form of a Rifthound Whelp... or so it would seem. However, these monsters do not have natural life cycles, and their growth remains a mystery. The Rifthound attacks can apply stacks of the "Corrosion" status, which will cause all characters in the party to continually lose HP. Additionally, when they take elemental damage from their respective element, Rifthounds will enter an Elemental Devourer state that will allow them to fight more fiercely at the cost of lessened RES to that particular element. |
| Thundercraven Rifthound - New Entry |
Main article: Thundercraven Rifthound 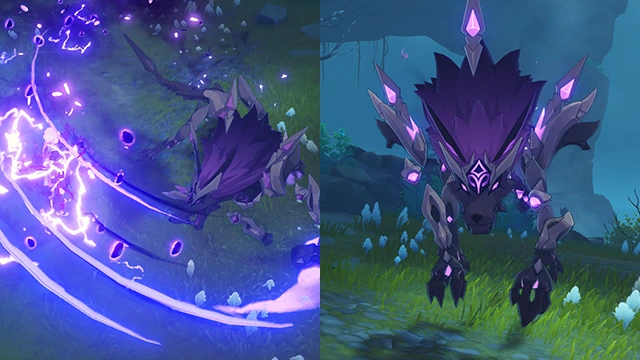 This is the mature form of a Rifthound Whelp... or so it would seem. However, these monsters do not have natural life cycles, and their growth remains a mystery. The Rifthound attacks can apply stacks of the "Corrosion" status, which will cause all characters in the party to continually lose HP. Additionally, when they take elemental damage from their respective element, Rifthounds will enter an Elemental Devourer state that will allow them to fight more fiercely at the cost of lessened RES to that particular element. |
| Golden Wolflord - New Entry |
Main article: Golden Wolflord 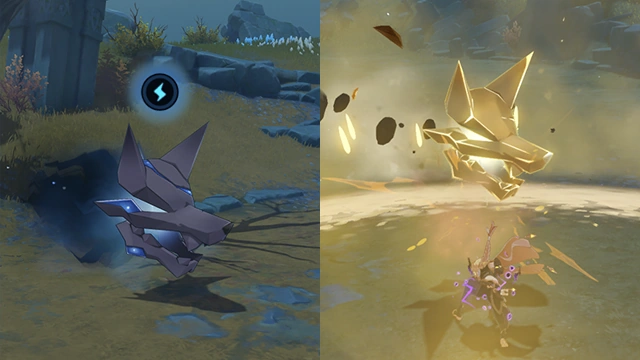 The king of the Riftwolves. The Golden Wolflord's attacks can apply stacks of "Corrosion" status, which will cause all characters in the party to continuously lose HP. In combat, the Wolflord will summon Rifthound Skulls to provide it with shields. It can also enter the Elemental Devourer state, which will decrease its Geo RES and increase its offensive capabilities. Attack the Rifthound Skulls with Geo DMG to destroy the Golden Wolflord's shields swiftly. |
| Fatui Skirmisher - Pyroslinger Bracer - New Entry |
Main article: Fatui Skirmisher - Pyroslinger Bracer  Fatui Skirmishers that shoot Pyro projectiles in battle. They receive some kind of elemental buff. Perhaps using an element that reacts with Pyro could make quick work of their buff... |
| Fatui Skirmisher - Hydrogunner Legionnaire - New Entry |
Main article: Fatui Skirmisher - Hydrogunner Legionnaire  Fatui Skirmishers that shoot Hydro projectiles in battle. They receive some kind of elemental buff. Perhaps using an element that reacts with Hydro could make quick work of their buff... |
| Fatui Skirmisher - Anemoboxer Vanguard - New Entry |
Main article: Fatui Skirmisher - Anemoboxer Vanguard 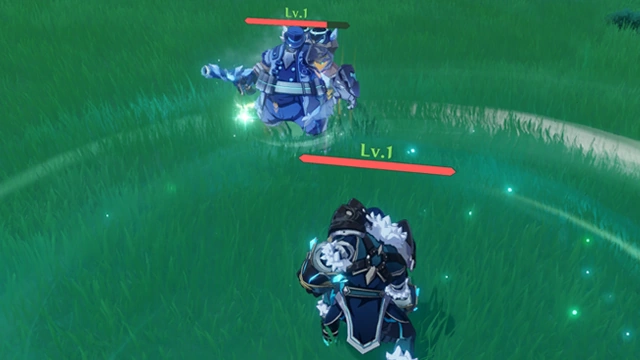 Fatui Skirmishers that manipulate Anemo energy to support fellow Fatui in battle. They use restorative Anemo powers on weakened allied skirmishers who've lost their elemental buffs, allowing them to quickly jump back into the fray. |
| Fatui Skirmisher - Electrohammer Vanguard - New Entry |
Main article: Fatui Skirmisher - Electrohammer Vanguard  Fatui Skirmishers that wield a hammer flowing with Electro energy in battle. They receive some kind of elemental buff. Perhaps using an element that reacts with Electro could make quick work of their buff... |
| Fatui Skirmisher - Cryogunner Legionnaire - New Entry |
Main article: Fatui Skirmisher - Cryogunner Legionnaire  Fatui Skirmishers that shoot Cryo projectiles in battle. They receive some kind of elemental buff. Perhaps using an element that reacts with Cryo could make quick work of their buff... |
| Fatui Skirmisher - Geochanter Bracer - New Entry |
Main article: Fatui Skirmisher - Geochanter Bracer  Fatui Skirmishers that wield staffs to manipulate Geo energy and summon crystallized shields. They receive some kind of elemental buff. Perhaps using an element that reacts with Geo could make quick work of their buff... |
| Mirror Maiden - New Entry |
Main article: Mirror Maiden  A Fatui Maiden who wields a water mirror in combat. Some attacks apply the Refraction status to character. When nearby characters are affected by Refraction, she enters the Polarization state, in which she is stronger. |
| Ruin Guard - New Entry |
Main article: Ruin Guard 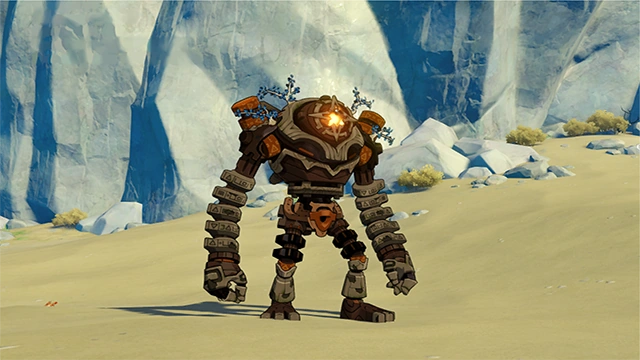 The key weak spots are where the core is exposed on the head and the back. Try to hit one of them. |
| Ruin Hunter - New Entry |
Main article: Ruin Hunter  A formidable mechanical being found in the ruins. When suspended in mid-air, it is highly dangerous — but also exposes the core on its head. |
| Ruin Grader - New Entry |
Main article: Ruin Grader 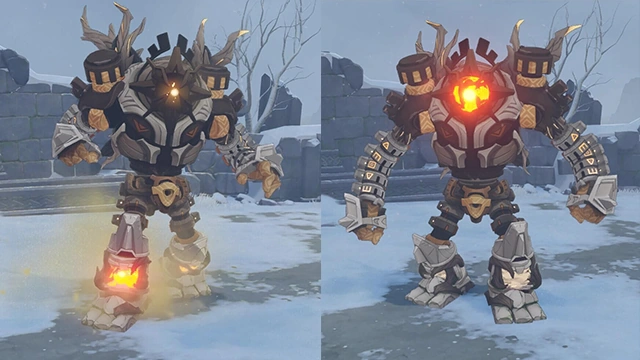 While performing certain attacks, the Ruin Grader will expose the cores on its head and feet. If you can take advantage of that and promptly attack its cores, defeating it should be much easier. |
| Perpetual Mechanical Array - New Entry |
Main article: Perpetual Mechanical Array 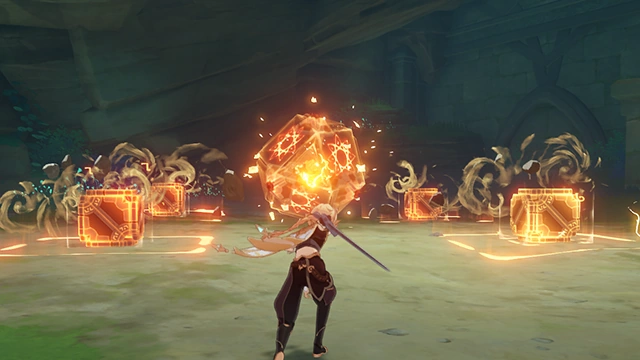 A mysterious ruin machine that can reconfigure itself into various forms. In battle, the Perpetual Mechanical Array will enter the Absolute Defense state, in which it splits and summons several different kinds of Ruin Sentinels. After defeating the enhanced Ruin Sentinels, Absolute Defense state will be removed and it will enter a weakened state. |
| Ruin Serpent - New Entry |
Main article: Ruin Serpent 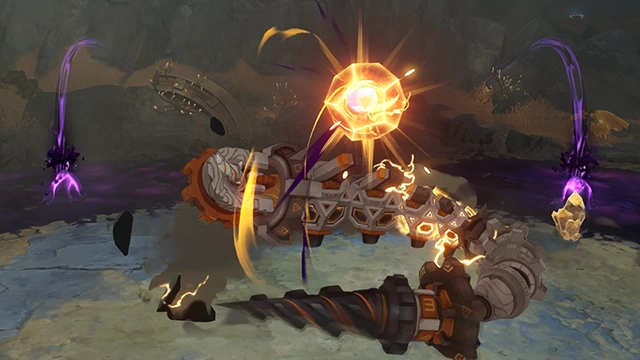 A bizarrely-shaped Ruin Machine. It will create Oozing Concretions in battle and will attempt to draw power from them under certain circumstances, which will allow it to unleash devastating attacks. Use the Blooming Light from your Lumenstone Adjuvant to destroy the Oozing Concretions feeding power to the Ruin Serpent to knock it out of this state and cause the energy cores on its body to cease functioning. Once 4 such cores malfunction, the Ruin Serpent will enter a weakened state. |
| Ruin Drake: Earthguard - New Entry |
Main article: Ruin Drake: Earthguard 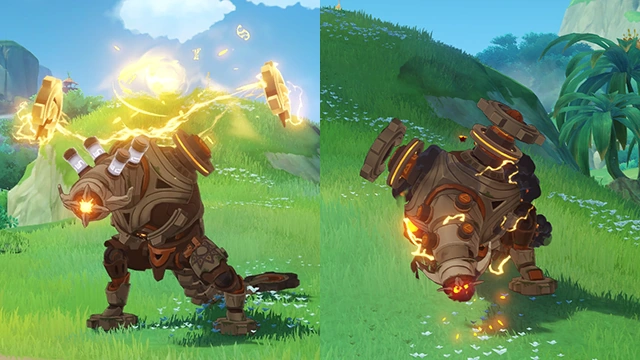 A ruin machine that can absorb energy and hurl it back as an attack. The Ruin Drake: Earthguard can periodically release a dangerous torrent of energy and increase its own Elemental RES against the previous main type of Elemental DMG it suffered. When it is preparing to unleash this energy torrent or when it is preparing for a special sprint attack, the core on its head will be exposed... Take this opportunity to attack the core, and you may be able to immobilize this creature and undo its Elemental RES boost... |
| Ruin Drake: Skywatch - New Entry |
Main article: Ruin Drake: Skywatch 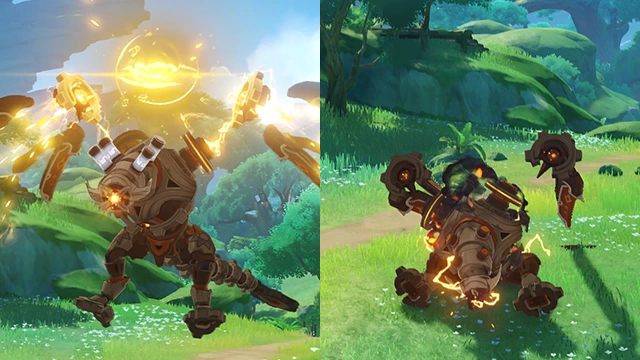 A ruin machine that can absorb energy and hurl it back as an attack. The Ruin Drake: Skywatch can periodically release a dangerous torrent of energy and increase its own Elemental RES against the previous main type of Elemental DMG it suffered. Under various circumstances, the cores all over its body be exposed. Take this opportunity to attack those cores, and you may be able to immobilize this creature and undo its Elemental RES boost... |
| Aeonblight Drake - New Entry |
Main article: Aeonblight Drake 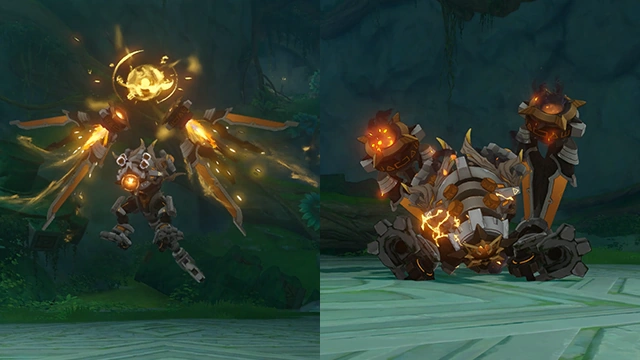 A ruin machine that can absorb energy and hurl it back as an attack. This machine has even greater abilities than the Ruin Drake, being able to attack from the air and on the ground. The Aeonblight Drake can periodically release a dangerous torrent of energy and increase its own Elemental RES against the previous main type of Elemental DMG it has suffered. Under various circumstances, the cores all over its body will be exposed. Take such opportunities to attack those cores, and you may be able to immobilize this creature and remove its Elemental RES boost. Whenever this creature recovers from paralysis, it will switch between aerial and ground-attack forms. |
| Primal Construct - New Entry |
Main article: Primal Construct 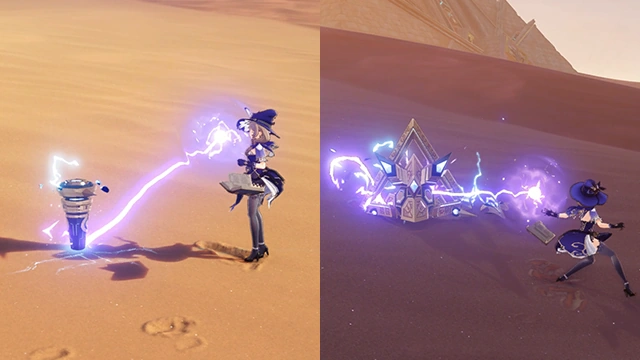 These ancient machines, which come from the desert, are quite distinct from the Ruin Machines. In combat, these Primal Constructs will fire their components out while their cores enter an "invisible" state that hides them and increases their RES. Use Catalyze reactions to strike these cores or use Electro attacks on them during such times as the fired components have been destroyed and need to recover to cancel this invisibility and cause the cores to be immobilized due to excessive overclocking. |
| Algorithm of Semi-Intransient Matrix of Overseer Network - New Entry |
Main article: Algorithm of Semi-Intransient Matrix of Overseer Network 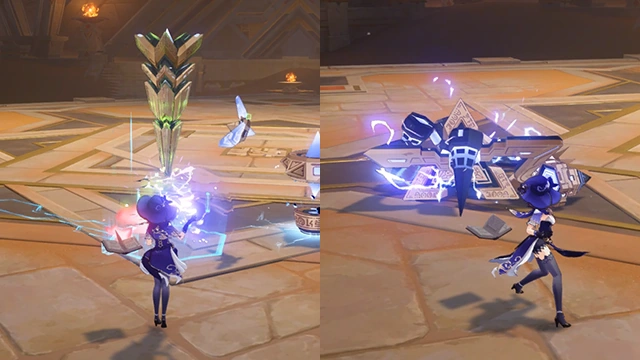 This ancient aggregation of machinery hails from the desert and has quirks that modern-day civilizations cannot comprehend. In battle, the Algorithm of Semi-Intransient Matrix of Overseer Network will fire its components out while its core enters an "invisible" state that hides it and increases its RES. Use Catalyze reactions to strike this core, or use Electro attacks on it during such times as the fired components have been destroyed and need to recover to cancel this invisibility and cause the core to be immobilized due to overclocking. If you fail to cancel the core's invisibility for too long, the Algorithm of Semi-Intransient Matrix of Overseer Network will begin to display its power by using a mighty overclocked attack... |
| Pyro Regisvine - New Entry |
Main article: Pyro Regisvine  Massive elemental plants that grow deep underground. They use their brightly colored flowers to lure in their prey, attacking anyone that treads too closely. Perhaps the fruit that appears like a Pyro core growing near their roots could be an effective means of dealing damage... |
| Cryo Regisvine - New Entry |
Main article: Cryo Regisvine 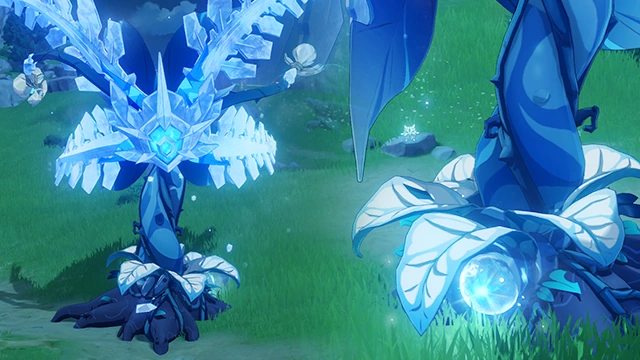 Carnivorous plants that use the alluring appearance of their flowers to deceive their prey. Their vine-like stalks are surprisingly tough to cut through. Perhaps the organ shaped like a Cryo core growing near their roots could be the key to defeating them... |
| Electro Regisvine - New Entry |
Main article: Electro Regisvine 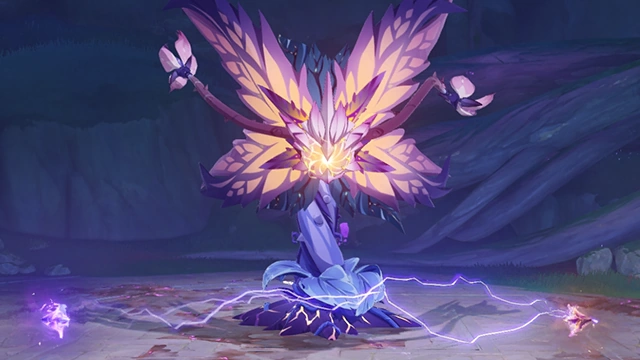 A predatory plant in the same vein as the Cryo and Pyro Regisvines, this creature can create an organ that resembles Electro Cores at its roots or corolla. When this type of organ starts to shift, its state will change, condensing into either a Waxing Stamen and a Waning Stamen. When the two types of stamens are present at the same time, they will attract one another and then unleash a powerful electrical explosion when they make contact. Destroying these stamens quickly is key to an easier battle experience. |
| Geovishap Hatchling - New Entry |
Main article: Geovishap Hatchling  A small and very nimble lizard hatchling. When its attacks are deflected by a character with a shield, it seems to be paralyzed for a moment by the recoil... |
| Geovishap - New Monster |
Main article: Geovishap  A bulky, adult Geovishap. In one of its modes of attack, if it hits a character with a shield and fails to break the shield, it will be stunned for a moment by the recoil... |
| Primo Geovishap - New Monster |
Main article: Primo Geovishap 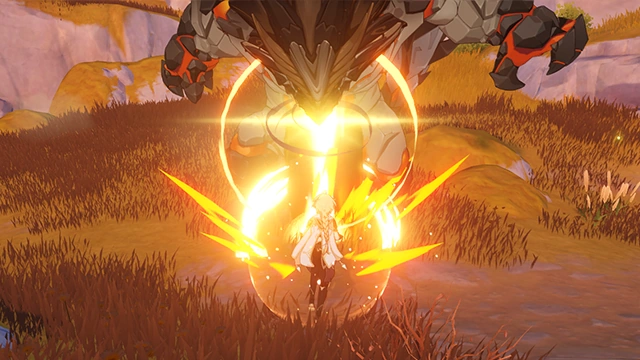 A Primo Geovishap awoken from a centuries-long slumber that can absorb different kinds of elemental power to unleash a Primordial Shower infused with Hydro, Pyro, Cryo, or Electro. If this attack hits a character protected by a shield, the Primo Geovishap will take some DMG in return. If the shield's elemental type is Geo or it matches that of the Primordial Shower, the amount of reflected DMG will be increased... |
| Primordial Bathysmal Vishap - New Entry |
Main article: Primordial Bathysmal Vishap  A predator that lies in wait within the pitch-dark watery depths. It appears to have adapted to some unknown power out in the deep seas, such that it can use elements other than Hydro... When it faces strong foes, it will use its powerful Cleansing Shower. Characters hit by this attack will lose a certain amount of Elemental Energy. If they do not have sufficient Elemental Energy, they will lose HP. |
| Rimebiter Bathysmal Vishap - New Entry |
Main article: Rimebiter Bathysmal Vishap 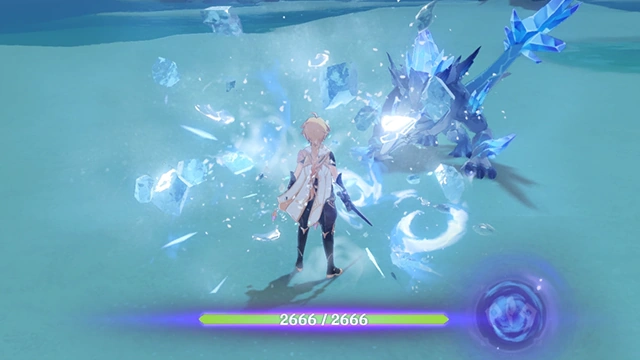 A predator that lies in wait within the pitch-dark watery depths. It appears to have adapted to some unknown power out in the deep seas, such that it can use elements other than Hydro... When it faces strong foes, it will use its powerful Cleansing Shower. Characters hit by this attack will lose a certain amount of Elemental Energy. If they do not have sufficient Elemental Energy, they will lose HP. |
| Bolteater Bathysmal Vishap - New Entry |
Main article: Bolteater Bathysmal Vishap 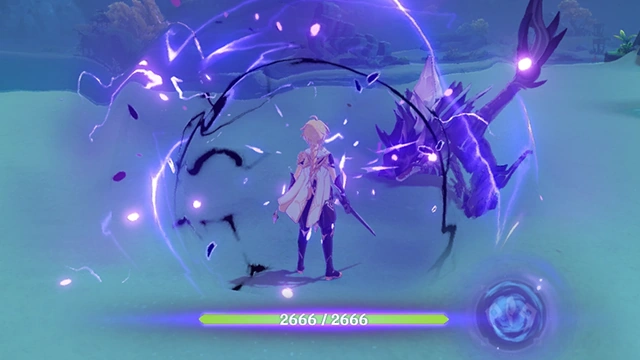 A predator that lies in wait within the pitch-dark watery depths. It appears to have adapted to some unknown power out in the deep seas, such that it can use elements other than Hydro... When it faces strong foes, it will use its powerful Cleansing Shower. Characters hit by this attack will lose a certain amount of Elemental Energy. If they do not have sufficient Elemental Energy, they will lose HP. |
| Shadowy Husk: Standard Bearer - New Entry |
Main article: Shadowy Husk: Standard Bearer  An enigmatic, pitch-black standard bearer. Its attacks will create shields for itself and nearby Shadowy Husks at the cost of its HP after they hit characters defended by shields. |
| Shadowy Husk: Line Breaker - New Entry |
Main article: Shadowy Husk: Line Breaker  An enigmatic, pitch-black lancer. Its attacks will release healing waves that will continuously heal HP for itself and nearby Shadowy Husks at the cost of its HP if they hit characters defended by shields. This HP recovery effect can be stacked multiple times. |
| Shadowy Husk: Defender - New Entry |
Main article: Shadowy Husk: Defender 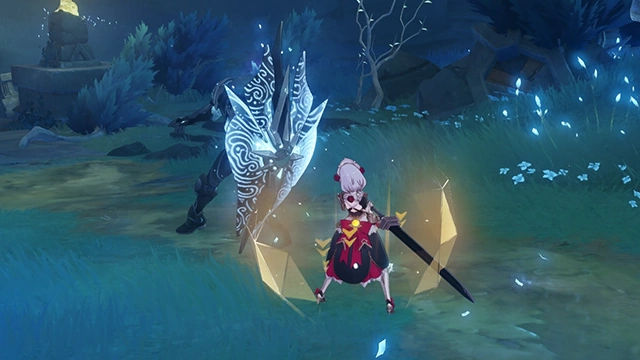 An enigmatic, pitch-black archer. It will switch weapons for a certain amount of time, deploying a shield that blocks DMG if its attacks hit characters defended by shields. It will gain an ATK increase during this period at the cost of its HP. The ATK increase that Shadowy Husk: Defender gains in this way can be stacked multiple times. |
| Black Serpent Knight: Windcutter - New Entry |
Main article: Black Serpent Knight: Windcutter 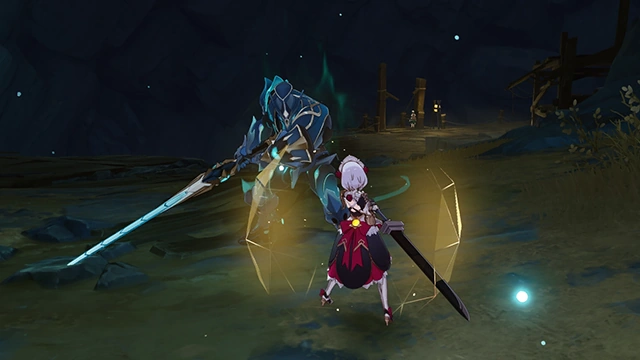 This seems to have once been a trusted guard of high standing in some land who wielded the power of the winds. Its attacks become faster and stronger when they hit shielded characters, at the cost of its own health. |
| Black Serpent Knight: Rockbreaker Ax - New Entry |
Main article: Black Serpent Knight: Rockbreaker Ax  This seems to have once been a trusted guard of high standing in some land who wielded the power of Geo. Its attacks become stronger and fiercer when they hit shielded characters, at the cost of its own health. |
| Fungus - New Entry |
Main article: Fungus  A monster with basic intelligence that evolved from spores. When first hit by Electro or Pyro attacks, it will enter either an Activated or a Scorched state based on the elemental attack type used. Defeat this transformed fungus to obtain different types of rewards... |
| Jadeplume Terrorshroom - New Entry |
Main article: Jadeplume Terrorshroom 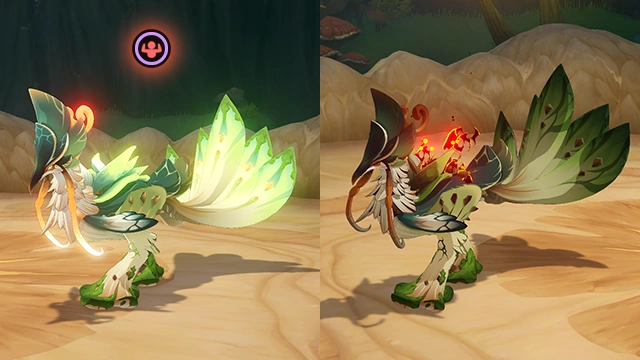 An evolved Fungus. When it is hit by Electro attacks and Catalyze reactions, it will accumulate Activation. When it is hit by Pyro attacks, it will lose Activation progress. When it accumulates sufficient Activation, it will enter an Activated state. An activated Jadeplume Terrorshroom will unleash more fearsome attacks until it becomes exhausted. When it is not Activated, the Jadeplume Terrorshroom can be put into a Burning state via the use of Pyro, which will cause it to become Scorched. It will then spread spores around to create Fungi in an attempt to escape this status. |
| Eremite Desert Clearwater - New Entry |
Main article: Eremite Desert Clearwater  These sword-dancers may be found in the many scattered mercenary groups that hail from the desert. They will unleash the ominous spirit sealed in their weapons after taking a certain amount of damage to enter an Infused Form that greatly boosts their combat capabilities. Once this Infused Form ends, they will enter a weakened state for a time once this Infused Form ends. |
| Eremite Sunfrost - New Entry |
Main article: Eremite Sunfrost  These agile warriors may be found in the many scattered mercenary groups that hail from the desert. They will unleash the ominous spirit sealed in their weapons after taking a certain amount of damage to enter an Infused Form that greatly boosts their combat capabilities. Once this Infused Form ends, they will enter a weakened state for a time once this Infused Form ends. |
| Eremite Daythunder - New Entry |
Main article: Eremite Daythunder  These warriors form the backbone of the many scattered mercenary groups that hail from the desert. They will unleash the ominous spirit sealed in their weapons after taking a certain amount of damage to enter an Infused Form that greatly boosts their combat capabilities. Once this Infused Form ends, they will enter a weakened state for a time once this Infused Form ends. |
| Eremite Galehunter - New Entry |
Main article: Eremite Galehunter 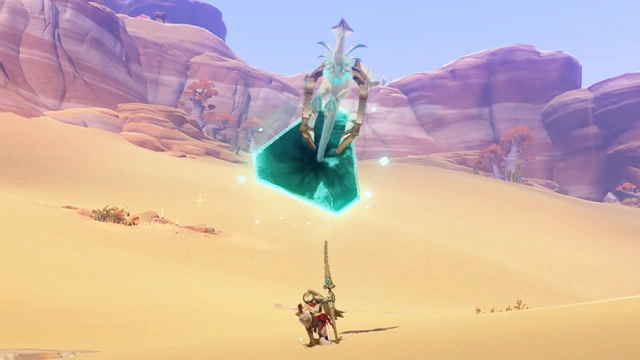 This huntress may be found in one of the many scattered mercenary groups that hail from the desert. She will unleash the Spirit of Omen: Wind Glede contained within her body to fight alongside her after taking a certain amount of damage. This will cause her to enter an Infused Form. If the Glede is defeated, she will enter a weakened state for a fixed amount of time thereafter. |
| Eremite Stone Enchanter - New Entry |
Main article: Eremite Stone Enchanter 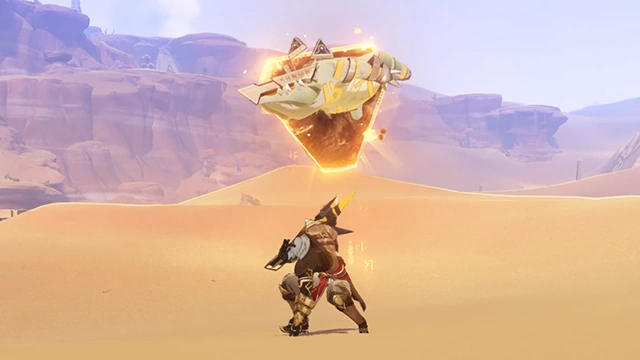 This warrior may be found in one of the many scattered mercenary groups that hail from the desert. He will unleash the Spirit of Omen: Stone Drake contained within his body to fight alongside him after taking a certain amount of damage. This will cause him to enter an Infused Form. If the drake's spirit is defeated, he will enter a weakened state for a fixed amount of time thereafter. |
| Eremite Scorching Loremaster - New Entry |
Main article: Eremite Scorching Loremaster 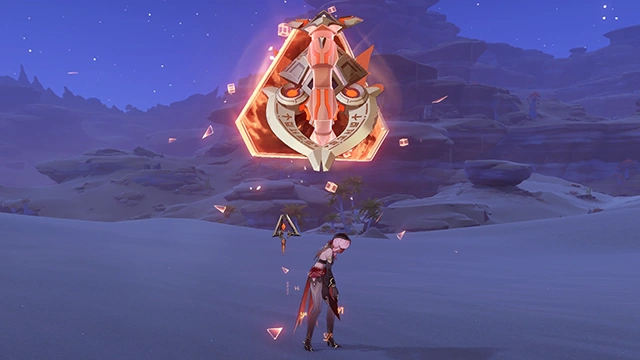 This oracle may be found in one of the many scattered mercenary groups that hail from the desert. She will unleash the Spirit of Omen: Pyro Scorpion contained within her body after taking a certain amount of damage. This will cause her to enter an Infused Form. If the Scorpion is defeated, she will enter a weakened state for a fixed amount of time thereafter. |
| Eremite Floral Ring-Dancer - New Entry |
Main article: Eremite Floral Ring-Dancer 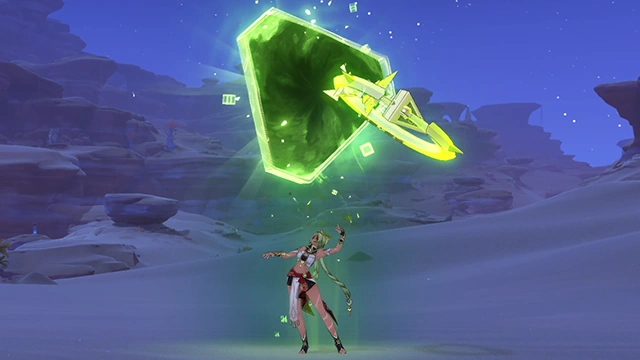 This dancer may be found in one of the many scattered mercenary groups that hail from the desert. She will unleash the Spirit of Omen: Dendro Spirit-Serpent contained within her weapon to fight alongside her after taking a certain amount of damage. This will cause her to enter an Infused Form. If the Spirit-Serpent is defeated, she will enter a weakened state for a fixed amount of time thereafter. |
| Consecrated Red Vulture - New Entry |
Main article: Consecrated Red Vulture 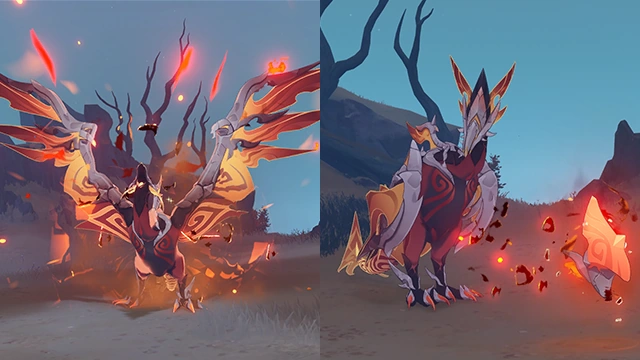 A scavenger bird that was warped and transformed by its consumption of the body of a mighty life-form. During combat, it will enter the powerful Phagocytic form. Some of its attacks will unleash Phagocytic Energy Blocks. Use the corresponding elemental attacks to destroy these Energy Blocks to absorb the power within them, which can then be unleashed when attacking the Consecrated Red Vulture, dealing significant DMG and paralyzing the creature temporarily. |
| Consecrated Scorpion - New Entry |
Main article: Consecrated Scorpion  An arthropod that was warped and transformed by its consumption of the body of a mighty life-form. During combat, it will enter the powerful Phagocytic form. Some of its attacks will unleash Phagocytic Energy Blocks. Use the corresponding elemental attacks to destroy these Energy Blocks to absorb the power within them, which can then be unleashed when attacking the Consecrated Scorpion, dealing significant DMG and paralyzing the creature temporarily. |
| Consecrated Flying Serpent - New Entry |
Main article: Consecrated Flying Serpent 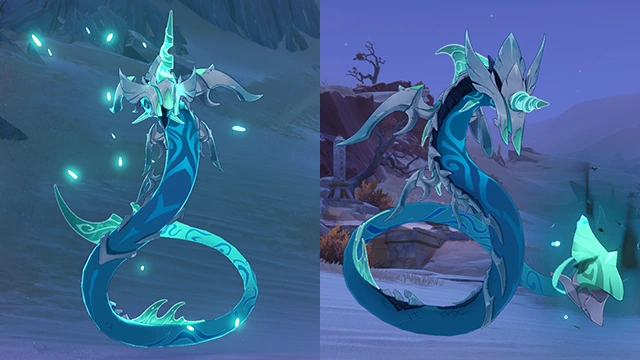 A reptile that was warped and transformed by its consumption of the body of a mighty life-form. During combat, it will enter the powerful Phagocytic form. Some of its attacks will unleash Phagocytic Energy Blocks. Use the corresponding elemental attacks to destroy these Energy Blocks to absorb the power within them, which can then be unleashed when attacking the Consecrated Flying Serpent, dealing significant DMG and paralyzing the creature temporarily. |
| Consecrated Horned Crocodile - New Entry |
Main article: Consecrated Horned Crocodile 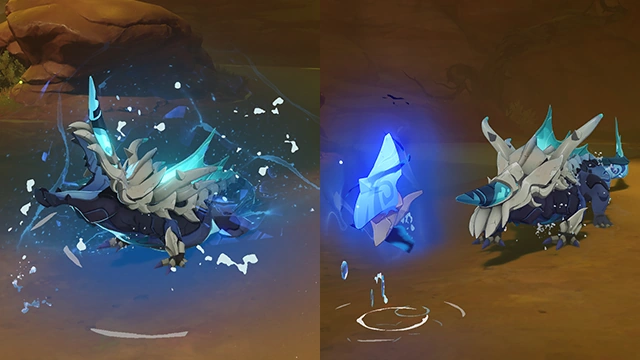 A reptile that was warped and transformed by its consumption of the body of a mighty life-form. During combat, it will enter the powerful Phagocytic form. Some of its attacks will unleash Phagocytic Energy Blocks. Use the corresponding elemental attacks to destroy these Energy Blocks to absorb the power within them, which can then be unleashed when attacking the Consecrated Horned Crocodile, dealing significant DMG and paralyzing the creature temporarily. |
| Consecrated Fanged Beast - New Entry |
Main article: Consecrated Fanged Beast 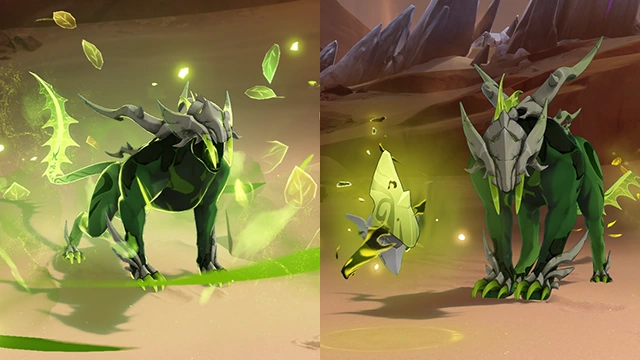 A predator that was warped and transformed by its consumption of the body of a mighty life-form. During combat, it will enter the powerful Phagocytic form. Some of its attacks will unleash Phagocytic Energy Blocks. Use the corresponding elemental attacks to destroy these Energy Blocks to absorb the power within them, which can then be unleashed when attacking the Consecrated Fanged Beast, dealing significant DMG and paralyzing the creature temporarily. |
| Setekh Wenut - New Entry |
Main article: Setekh Wenut 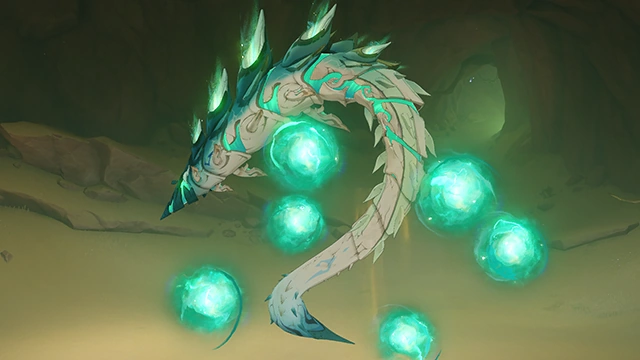 An apex predator deep in the desert that can use the power of Anemo to a certain extent, which allows it to leave the ground when in combat and enter a floating state. While floating, it can fire Windbite Bullets. If these bullets are not destroyed in time, they will be converted into a high-density curtain of such bullets. Attacks from elements that may react with Anemo can destroy Windbite Bullets, which temporarily decrease the corresponding Elemental RES of the Setekh Wenut. After 2 Windbite Bullets are destroyed in succession, the Setekh Wenut will be brought down from its floating state. |
| Icewind Suite: Dirge of Coppelia - New Entry |
Main article: Icewind Suite  Next up is a fantastical performance to be delivered by the clockwork meka Coppelia. At the climax of the performance, Coppelia will halt at the center of the dance floor and expose her artificed clockwork component charged with ousia, thereby drastically increasing the efficiency of her exertions and summoning countless whirlwinds of dirge. During this phase, using pneuma-imbued attacks will reduce her offensive capabilities and overload her, thus progressing the performance. |
| Icewind Suite: Nemesis of Coppelius - New Entry |
Main article: Icewind Suite  Next up is a fantastical performance to be delivered by the clockwork meka Coppelius. At the climax of the performance, Coppelius will halt at the center of the dance floor and expose his artificed clockwork component charged with pneuma, thereby drastically increasing the efficiency of his exertions, granting him a shield, and generating three retributive Frosthearts. During this phase, using ousia-imbued attacks will effectively break his shield and overload him, thus progressing the performance. |
| Large Shatterstone Breacher Primus - New Entry |
Main article: Large Shatterstone Breacher Primus 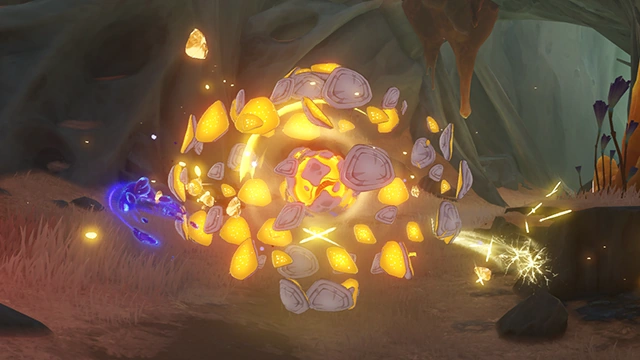 A strange life form that shares nothing in common with any other land-dwelling creature. In battle, it will enter a stressed state and unleash a fierce Stonefall attack while under the protection of a Geo shield. If the shield is broken during this period, it will cause the life form to fall into a paralyzed state. Aside from the usual methods of using Elemental Reactions, attacks imbued with ousia or pneuma can also efficiently pierce the defenses of the Breacher Primus. |
| Shatterstone Breacher Primus - New Entry |
Main article: Shatterstone Breacher Primus 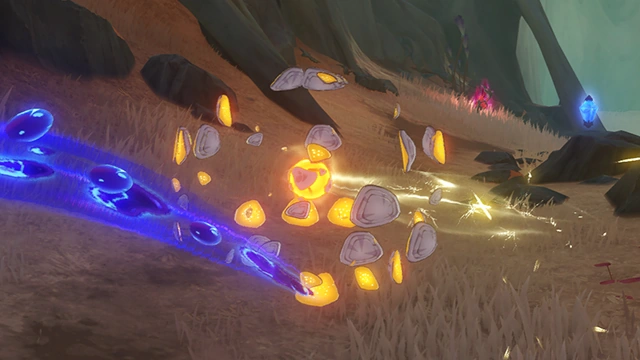 A strange life form that shares nothing in common with any other land-dwelling creature. In battle, it will enter a stressed state and unleash a fierce Stonefall attack while under the protection of a Geo shield. If the shield is broken during this period, it will cause the life form to fall into a paralyzed state. Aside from the usual methods of using Elemental Reactions, attacks imbued with ousia or pneuma can also efficiently pierce the defenses of the Breacher Primus. |
| Large Overgrown Breacher Primus - New Entry |
Main article: Large Overgrown Breacher Primus 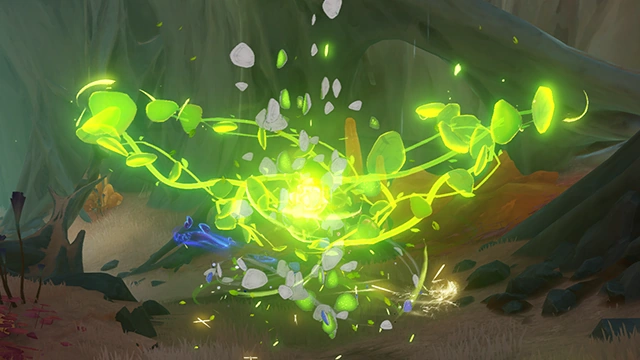 A strange life form that shares nothing in common with any other land-dwelling creature. In battle, it will enter a stressed state and unleash a fierce Lushmissile while under the protection of a Dendro shield. If the shield is broken during this period, it will cause the life form to fall into a paralyzed state. Aside from the usual methods of using Elemental Reactions, attacks imbued with ousia or pneuma can also efficiently pierce the defenses of the Breacher Primus. |
| Overgrown Breacher Primus - New Entry |
Main article: Overgrown Breacher Primus 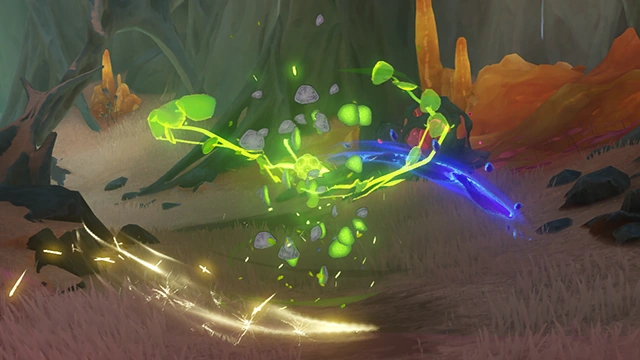 A strange life form that shares nothing in common with any other land-dwelling creature. In battle, it will enter a stressed state and unleash a fierce Lushmissile while under the protection of a Dendro shield. If the shield is broken during this period, it will cause the life form to fall into a paralyzed state. Aside from the usual methods of using Elemental Reactions, attacks imbued with ousia or pneuma can also efficiently pierce the defenses of the Breacher Primus. |
| Recon Log Mek - New Entry |
Main article: Recon Log Mek  A machine created from the union between Fontaine's intricate device and special energy technologies. Based on whether it's imbued with ousia or pneuma energy, the machine will operate differently in battle. When either energy is annihilated upon being attacked by its opposite, an Overloaded state will be induced, causing the machine to lose energy and necessitating the use of emergency power to sustain low-end combat actions. |
| Arithmetic Enhancer Mek - New Entry |
Main article: Arithmetic Enhancer Mek 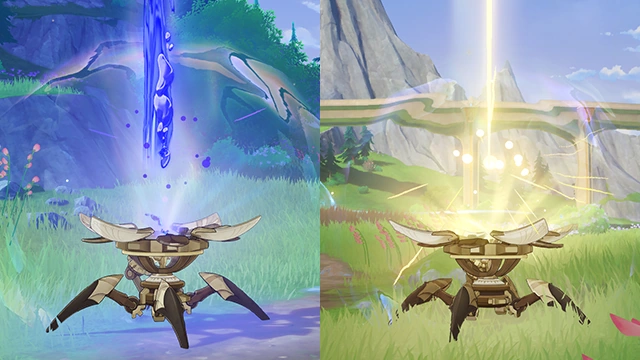 A machine created to complement the energy defects and increase the operational efficiency of clockwork meka. The ousia or pneuma energies have different enhancive effects, and this machine can also periodically generate energy, allowing it to replenish the power of nearby disabled clockwork meka that shares a similar energy source. After their energy is annihilated by an attack charged with the opposite signature, it will induce an Overloaded state and cause the machine to lose energy, requiring the machine to spend time on Self-Repairs before it can restore its energy generation functions. |
| Underwater Survey Mek - New Entry |
Main article: Underwater Survey Mek 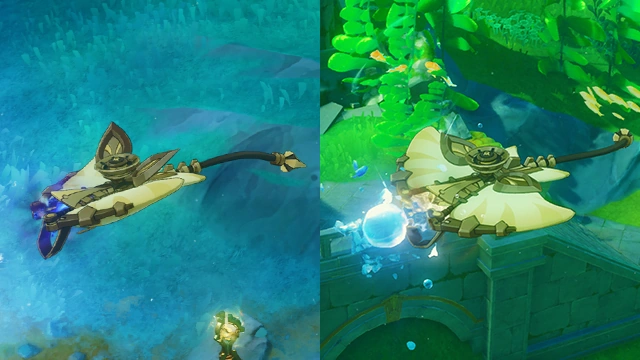 A machine created from the union between Fontaine's intricate device and special energy technologies. Based on whether it's imbued with ousia or pneuma energy, the machine will operate differently in battle. When either energy is annihilated upon being attacked by its opposite, an Overloaded state will be induced, causing the machine to lose energy and its combat capabilities. |
| Geological Survey Mek - New Entry |
Main article: Geological Survey Mek 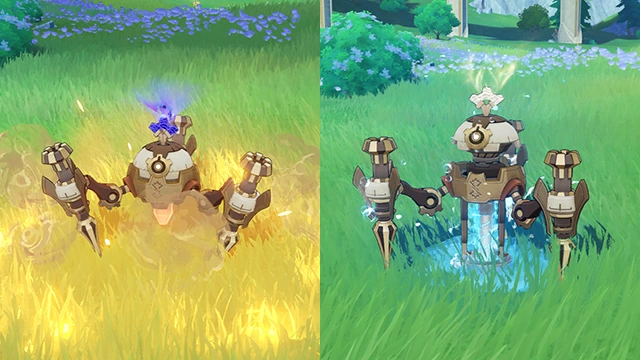 A machine created from the union between Fontaine's intricate device and special energy technologies. Based on whether it's imbued with ousia or pneuma energy, the machine will operate differently in battle. When either energy is annihilated upon being attacked by its opposite, an Overloaded state will be induced, causing the machine to lose energy and necessitating the use of emergency power to sustain low-end combat actions. |
| Underwater Patrol Mek - New Entry |
Main article: Underwater Patrol Mek 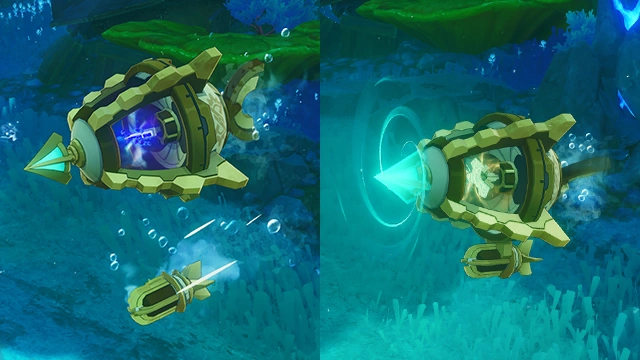 A machine created from the union between Fontaine's intricate device and special energy technologies. Based on whether it's imbued with ousia or pneuma energy, the machine will operate differently in battle. When either energy is annihilated upon being attacked by its opposite, an Overloaded state will be induced, causing the machine to lose energy and its combat capabilities. |
| Nimble Harvester Mek - New Entry |
Main article: Nimble Harvester Mek 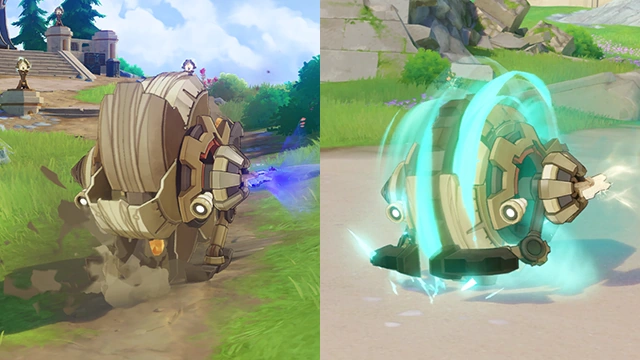 A machine created from the union between Fontaine's intricate device and special energy technologies. Based on whether it's imbued with ousia or pneuma energy, the machine will operate differently in battle. When either energy is annihilated upon being attacked by its opposite, an Overloaded state will be induced, causing the machine to lose energy and necessitating the use of emergency power to sustain low-end combat actions. |
| Area Alert Mek - New Entry |
Main article: Area Alert Mek  A machine created from the union between Fontaine's intricate device and special energy technologies. Based on whether it's imbued with ousia or pneuma energy, the machine will operate differently in battle. When either energy is annihilated upon being attacked by its opposite, an Overloaded state will be induced, causing the machine to lose energy and its combat capabilities. |
| Assault Specialist Mek - New Entry |
Main article: Assault Specialist Mek  A machine created from the union between Fontaine's intricate device and special energy technologies. Based on whether it's imbued with ousia or pneuma energy, the machine will operate differently in battle. When either energy is annihilated upon being attacked by its opposite, an Overloaded state will be induced, causing the machine to lose energy and necessitating the use of emergency power to sustain low-end combat actions. |
| Suppression Specialist Mek - New Entry |
Main article: Suppression Specialist Mek 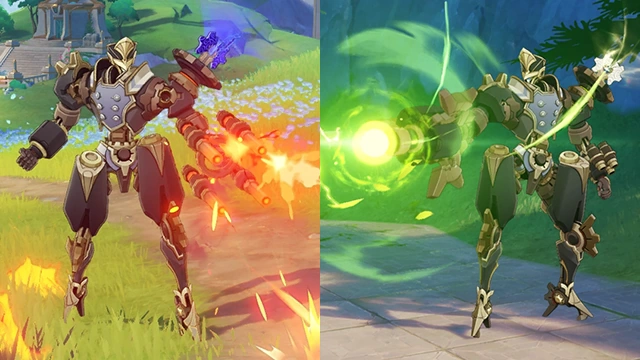 A machine created from the union between Fontaine's intricate device and special energy technologies. Based on whether it's imbued with ousia or pneuma energy, the machine will operate differently in battle. When either energy is annihilated upon being attacked by its opposite, an Overloaded state will be induced, causing the machine to lose energy and necessitating the use of emergency power to sustain low-end combat actions. |
| Annihilation Specialist Mek - New Entry |
Main article: Annihilation Specialist Mek  A machine created from the union between Fontaine's intricate device and special energy technologies. Based on whether it's imbued with ousia or pneuma energy, the machine will operate differently in battle. When either energy is annihilated upon being attacked by its opposite, an Overloaded state will be induced, causing the machine to lose energy and necessitating the use of emergency power to sustain low-end combat actions. |
| Construction Specialist Mek - New Entry |
Main article: Construction Specialist Mek 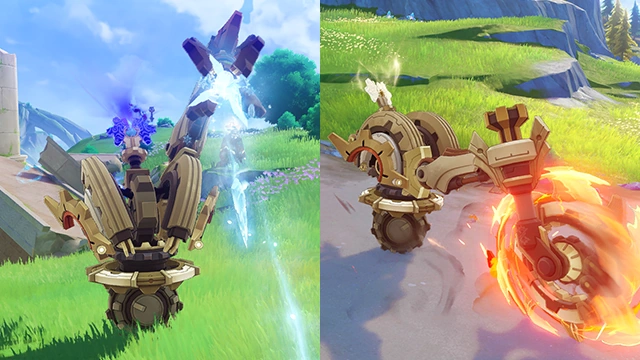 A machine created from the union between Fontaine's intricate device and special energy technologies. Based on whether it's imbued with ousia or pneuma energy, the machine will operate differently in battle. When either energy is annihilated upon being attacked by its opposite, an Overloaded state will be induced, causing the machine to lose energy and necessitating the use of emergency power to sustain low-end combat actions. |
| Sternshield Crab - New Entry |
Main article: Sternshield Crab 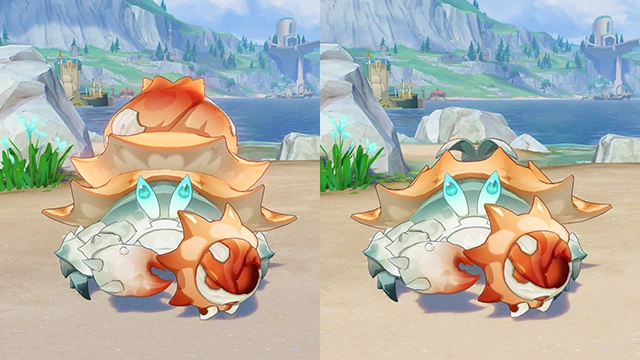 An aquatic life form that has embarked on a unique evolutionary track due to Fontaine's environmental factors. When under the effects of Pyro, it can unleash fiercer elemental attacks and possesses even stronger defensive capabilities. If you use Elemental Reactions to remove its Elemental Shield, things should be easier to handle. |
| Bubbler Seahorse - New Entry |
Main article: Bubbler Seahorse 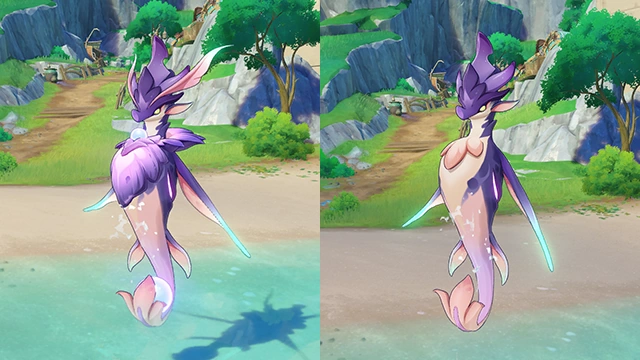 An aquatic life form that has embarked on a unique evolutionary track due to Fontaine's environmental factors. When under the effects of Electro, it can unleash fiercer elemental attacks and possesses even stronger defensive capabilities. If you use Elemental Reactions to remove its Elemental Shield, things should be easier to handle. |
| Cherubic Sea Hare - New Entry |
Main article: Cherubic Sea Hare  An aquatic life form that has embarked on a unique evolutionary track due to Fontaine's environmental factors. When under the effects of Cryo, it can unleash fiercer elemental attacks and possesses stronger defensive capabilities. If you use Elemental Reactions to remove its Elemental Shield, things should be easier to handle. |
| Emperor of Fire and Iron - New Entry |
Main article: Emperor of Fire and Iron 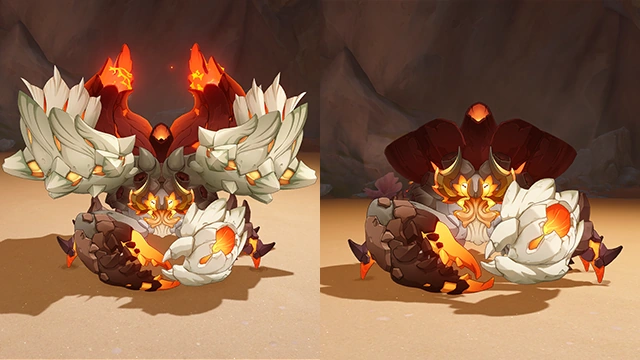 An Armored Crablord that has survived for countless eons and surpassed almost all other Fontemer Aberrants. The twin molten horns located high up on its body are Pyro-aligned organs that can unleash more vicious elemental attacks and grant it even stronger defensive capabilities. When the Armored Crablord unleashes certain attacks, its twin molten horns are closer to the ground. This provides for a great opportunity to use Elemental Reactions to remove the Pyro element within. |
| Deepwater Assault Mek - New Entry |
Main article: Deepwater Assault Mek  A machine created from the union between Fontaine's intricate device and special energy technologies. Based on whether it's imbued with ousia or pneuma energy, the machine will operate differently in battle. When either energy is annihilated upon being attacked by its opposite, an Overloaded state will be induced, causing the machine to lose energy and its combat capabilities. |
| Frost Operative - New Entry |
Main article: Frost Operative  An elite Fatui special agent who can manipulate Cryo in battle. In combat, they will use the Hunt Down skill to attach a Life Bond to characters they hit. While Life Bond is active, the character will take continuous DMG, and Hunt Down will deal more DMG to them. |
| Wind Operative - New Entry |
Main article: Wind Operative  An elite Fatui special agent who can manipulate Anemo in battle. In combat, they will use the Hunt Down skill to attach a Life Bond to characters they hit. While Life Bond is active, the character will take continuous DMG, and Hunt Down will deal more DMG to them. |
| Millennial Pearl Seahorse - New Entry |
Main article: Millennial Pearl Seahorse  A lonesome lord of seahorses that has gained the form of a fantastical beast and has surpassed almost all other Fontemer Aberrants. The Xenomare Pearl beneath its head is a crystallization of Electro that will allow it to use more powerful elemental attacks and possess stronger defensive abilities. Other than using Elemental Reactions to destroy the Xenomare Pearl, you can also destroy the Resonant Coral Orbs it creates while guiding Fontemer Hoarthunder to deal effective DMG to said Pearl.  A lonesome lord of seahorses that has gained the form of a fantastical beast and has surpassed almost all other Fontemer Aberrants. The Xenomare Pearl beneath its head is a crystallization of Electro that will allow it to use more powerful elemental attacks and possess stronger defensive abilities. Other than using Elemental Reactions to destroy the Xenomare Pearl, you can also destroy the Resonant Coral Orbs it creates while guiding Fontemer Hoarthunder to deal effective DMG to said Pearl. |
| Experimental Field Generator - Gameplay Tutorial |
Main article: Experimental Field Generator 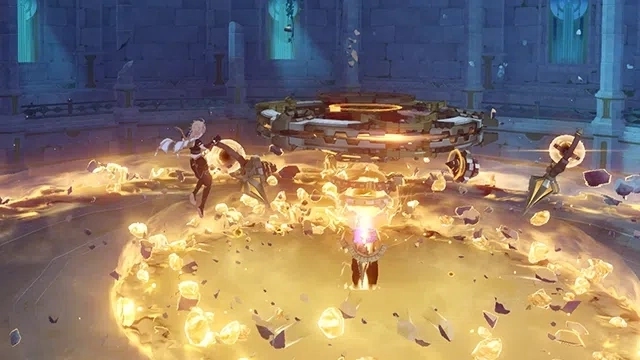 A large and out-of-control Fontaine Research Institute of Kinetic Energy Engineering device. During combat, it will channel ousia energy to unleash a Gravity Reduction Field. Characters within this field can jump significantly higher. When the device is in this state, its Gravity Reduction Field will shut down if its core is annihilated by Pneuma attacks. |
| Hydro Tulpa - New Entry |
Main article: Hydro Tulpa 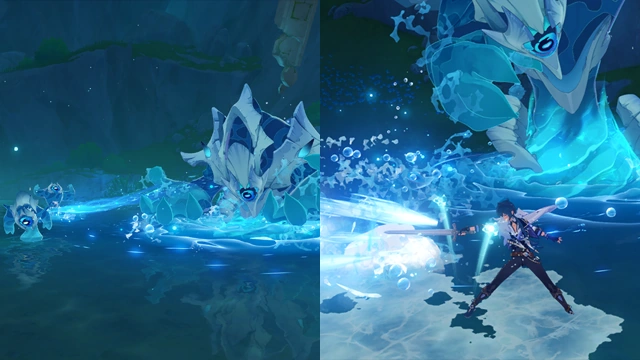 The gigantic combined form of many water droplets. During the challenge, small Half-Tulpas will constantly appear and fight against their opponents. The Hydro Tulpa will absorb these Half-Tulpas into itself to grow stronger. You can use attacks or Elemental Reactions to disrupt this absorption process. |
| Local Legend - New Entry |
Main article: Local Legend  This special mark is the main point of distinction between Local Legends and ordinary enemies. The combat power of Local Legends far surpasses that of ordinary enemies, so stay exceptionally vigilant when facing them. |
| Solitary Suanni - New Entry |
Main article: Solitary Suanni 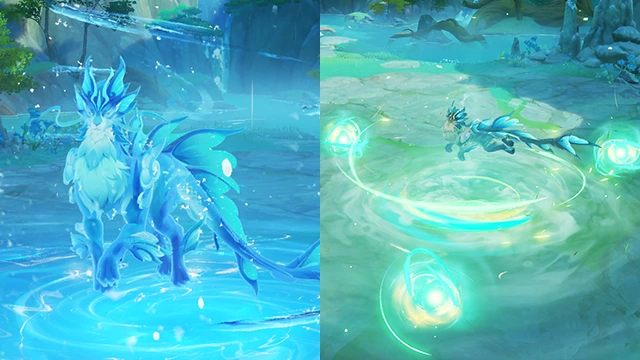 An illuminated beast that dwells deep within the mountains that can use Hydro and Anemo simultaneously in battle. Render it Frozen while it is gathering Hydro-aligned adeptal energy, before using Shatter, Melt, or other Elemental Reactions to break the ice and cause it to enter an immobile state. When it is gathering Anemo-aligned adeptal energy, use attacks from Elements that can react with Anemo to destroy the Spiritwind Pearls summoned during the process to achieve the same advantage. |
| Xuanwen Beast - New Entry |
Main article: Xuanwen Beast 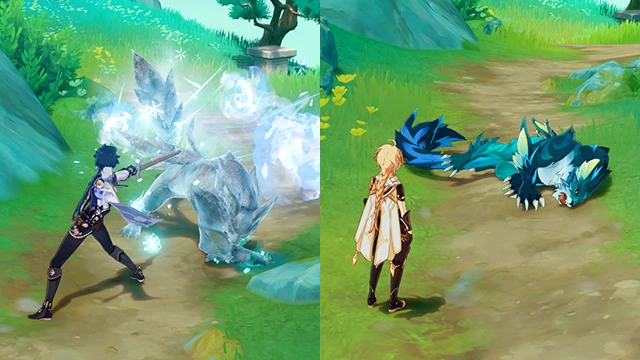 An illuminated beast that dwells deep within the mountains. Use Elemental Reactions to freeze this creature and use Shatter, Melt, and other Elemental Reactions to break the ice and render it immobile temporarily. |
| Legatus Golem - New Entry |
Main article: "Statue of Marble and Brass" 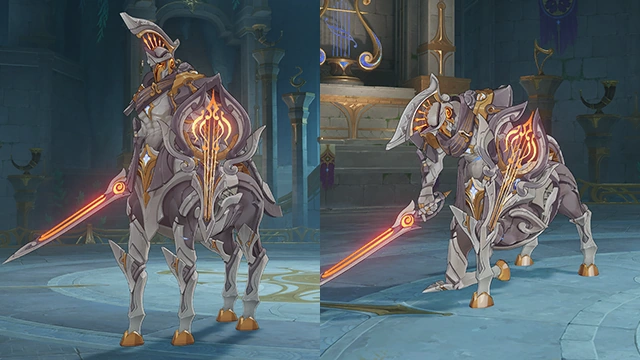 This ancient Legatus Golem uses its sturdy marble body to defend against attack while using music and searing flames to obliterate its foes. Use methods suited to dealing with Geo to break through its defenses. Apart from this, it will also set up resonators in combat that will assist its attacks. Destroy these resonators to deplete its shielding effectively. |
| Praetorian Golem - New Entry |
Main article: Praetorian Golem 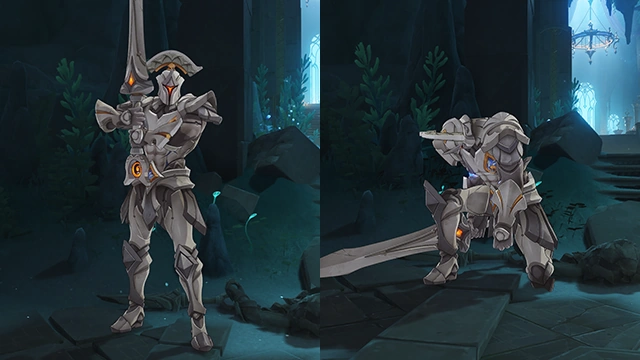 An ancient golem infused with will that uses its resilient marble body in battle. Use methods suited to dealing with Geo to effectively defeat its defenses. |
| Rock-Cavernous Wayob Manifestation - New Entry |
Main article: Rock-Cavernous Wayob Manifestation 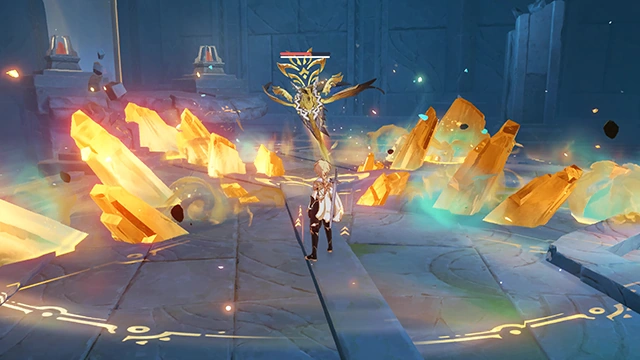 The Wayob worshipped by the various tribes of Natlan manifest themselves in the form of these obsidian totems. In battle, the Wayob Manifestation will deploy its Arena: Moment of Trial, creating a shield for itself and absorbing the Elemental Energy of all characters in the Arena. Characters in the Arena deal greatly increased DMG. If the shield is broken before the Arena expires, they will also regain a large amount of Energy. However, if they fail to break the shield, the Manifestation will generate a barrier based on the value of the remaining Elemental Shield. |
| Flow-Inverted Wayob Manifestation - New Entry |
Main article: Flow-Inverted Wayob Manifestation 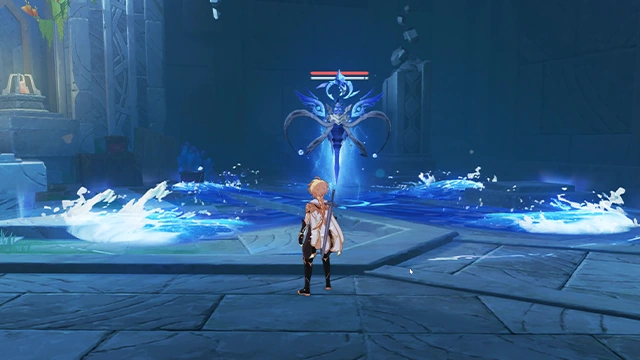 The Wayob worshipped by the various tribes of Natlan manifest themselves in the form of these obsidian totems. In battle, the Wayob Manifestation will deploy its Arena: Moment of Trial, creating a shield for itself and absorbing the Elemental Energy of all characters in the Arena. Characters in the Arena deal greatly increased DMG. If the shield is broken before the Arena expires, they will also regain a large amount of Energy. However, if they fail to break the shield, the Manifestation will generate a barrier based on the value of the remaining Elemental Shield. |
| Foliar-Swift Wayob Manifestation - New Entry |
Main article: Foliar-Swift Wayob Manifestation 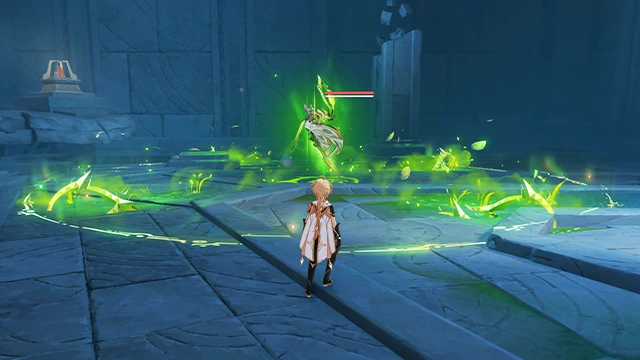 The Wayob worshipped by the various tribes of Natlan manifest themselves in the form of these obsidian totems. In battle, the Wayob Manifestation will deploy its Arena: Moment of Trial, creating a shield for itself and absorbing the Elemental Energy of all characters in the Arena. Characters in the Arena deal greatly increased DMG. If the shield is broken before the Arena expires, they will also regain a large amount of Energy. However, if they fail to break the shield, the Manifestation will generate a barrier based on the value of the remaining Elemental Shield. |
| Eroding Avatar of Lava - New Entry |
Main article: Eroding Avatar of Lava  A strange monster that needs to constantly absorb thermal energy to survive. However, it seems to damage itself should it absorb too much. After you use Pyro attacks to cause it to fully enter an Overburn state, it will rapidly disintegrate. |
| Secret Source Automaton: Hunter-Seeker - New Entry |
Main article: Secret Source Automaton: Hunter-Seeker  An ancient mechanical creation that wanders Natlan to this day, though its function is not known. When characters enter and maintain the Nightsoul's Blessing state, the Secret Source Automaton: Hunter-Seeker will start progressing through its Adaptive Countermeasures. Once those are complete, the Hunter-Seeker will unleash its special cluster laser. Still, risk and opportunity go hand-in-hand, so perhaps you might take this opportunity to deal immense damage to it... |
| Goldflame Qucusaur Tyrant - New Entry |
Main article: Holawaqa Ngoubou 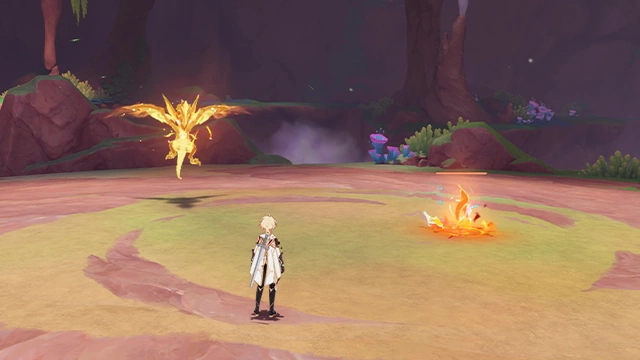 A Qucusaurus whose extraordinary form is a result of being unable to withstand the great power it has been granted. It will fly into the air during combat and enter the "Golden Flame" energy-gathering form, creating a Ward around itself and launching a Flamewind Feather towards the ground that summons a flamewind. If you cannot destroy the Flamewind Feather before the Qucusaurus dives down into it, the creature will use a Phlogiston Current to return to the skies. This will persist until it is exhausted and returns to its original form. It seems, then, that destroying the Flamewind Feather using Elements that react with Pyro may be the key to victory... |
| Gluttonous Yumkasaur Mountain King - New Entry |
Main article: Kongamato 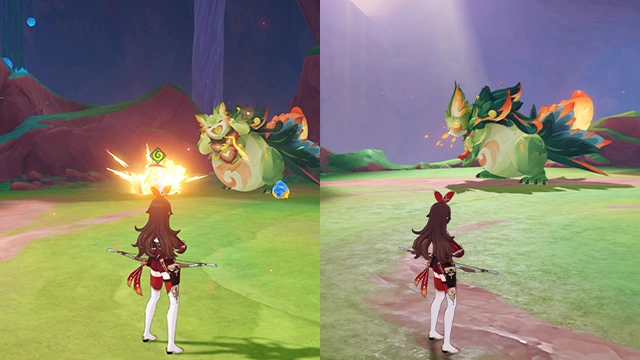 A Yumkasaurus that has experienced numerous impressive battles. It is not some abnormal mutant but has grown into its current shape due to its gluttony. It will collect Flamegranates during combat and spit them out as bombs. However, if you can use Pyro to ignite the Flamegranates before the Gluttonous Yumkasaur Mountain King can swallow them, who knows what might happen... |
| Secret Source Automaton: Configuration Device - New Entry |
Main article: Secret Source Automaton: Configuration Device  A machine with terrifying destructive capabilities. When characters enter and maintain the Nightsoul's Blessing state, the Secret Source Automaton: Configuration Device will start progressing through its Adaptive Countermeasures. Once those are complete, the Configuration Device will start preparing its Boltsphere Cannon. During this time, the Configuration Device will start up its Accretion Mechanism to dig into Solid Phlogiston and collect phlogiston. The Accretion Mechanism will generate an energy field. If you wish to destroy the Mechanism and interrupt the charging of the Boltsphere Cannon, you must first climb the Solid Phlogiston and enter the energy field. |
| Tenebrous Mimiflora - New Entry |
Main article: Tenebrous Mimiflora 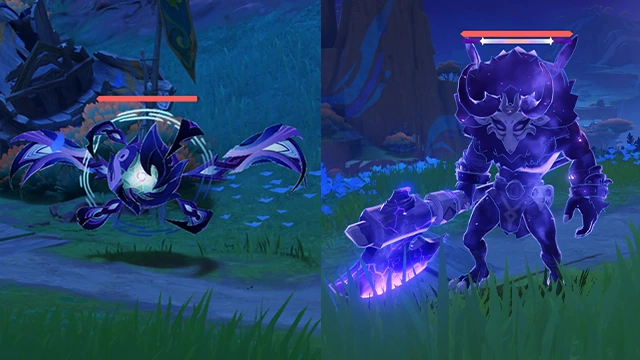 An Abyssal monster that has descended to this world from the deep, dark depths of a twisted and alien world, the Tenebrous Mimiflora can mimic various phenomena, and can deploy a Void Ward in combat. Some of its attacks can cause stackable Attrition that, after a time, will cause your active character to lose HP. Use a specific number of Elemental attacks to destroy this creature's Ward. Nightsoul-aligned Elemental attacks can break through its defenses more effectively. |
| Biting-Cold Wayob Manifestation - New Entry |
Main article: Biting-Cold Wayob Manifestation 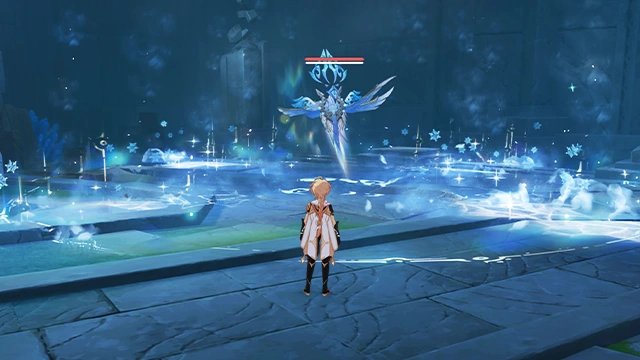 The Wayob worshipped by the various tribes of Natlan manifest themselves in the form of these obsidian totems. In battle, the Wayob Manifestation will deploy its Arena: Moment of Trial, creating a Shield for itself and absorbing the Elemental Energy of all characters in the Arena. Characters in the Arena deal greatly increased DMG. If the Shield is broken before the Arena expires, they will also regain a large amount of Energy. However, if they fail to break the Shield, the Manifestation will generate an Elemental Ward based on the value of the remaining Shield. |
| Burning-Aflame Wayob Manifestation - New Entry |
Main article: Burning-Aflame Wayob Manifestation 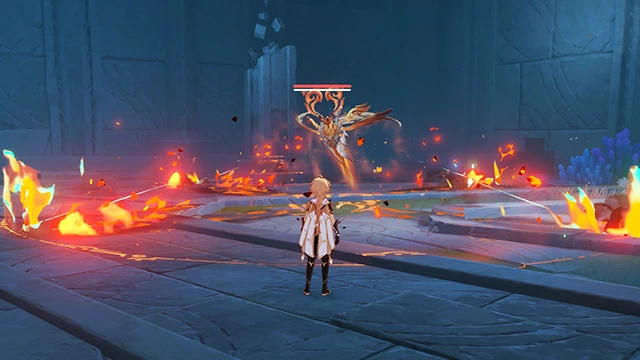 The Wayob worshipped by the various tribes of Natlan manifest themselves in the form of these obsidian totems. In battle, the Wayob Manifestation will deploy its Arena: Moment of Trial, creating a Shield for itself and absorbing the Elemental Energy of all characters in the Arena. Characters in the Arena deal greatly increased DMG. If the Shield is broken before the Arena expires, they will also regain a large amount of Energy. However, if they fail to break the Shield, the Manifestation will generate an Elemental Ward based on the value of the remaining Shield. |
| Tenebrous Papilla - New Entry |
Main article: Tenebrous Papilla 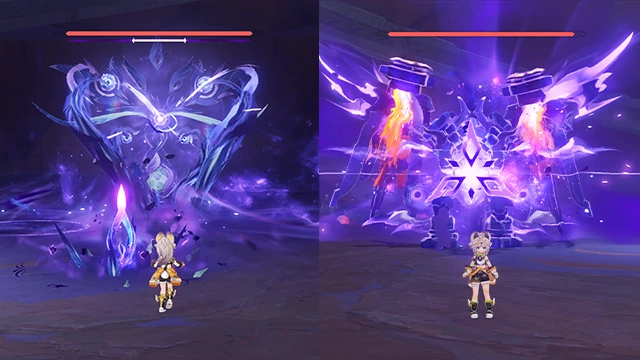 A great black monster that has come from the abyssal dark, eroding the memories of the earth. It can warp itself and transform into a formidable foe. Some of its attacks can cause stackable Attrition that, after a time, will cause your active character to lose HP. During combat, the Tenebrous Papilla will use Beseech the Dark to grant itself a Void Ward. At this time, use a certain number of elemental attacks to break the Ward, which will cause it to enter a confused state. Nightsoul-aligned elemental attacks will break the Ward more effectively. |
| Wayward Hermetic Spiritspeaker - New Entry |
Main article: Wayward Hermetic Spiritspeaker 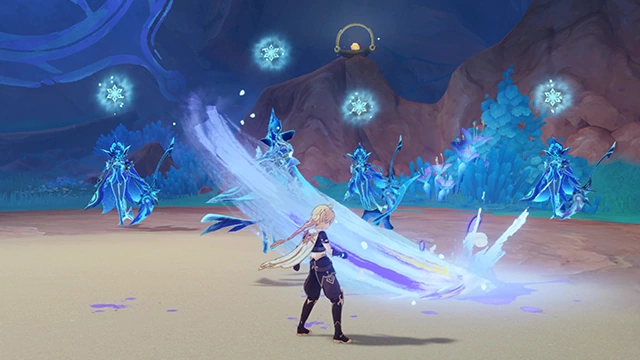 The Wayward Hermetic Spiritspeaker will summon identical Radiant Reflections and hide amongst them. Destroy all the Radiant Reflections' Elemental Wards during this time to reveal and weaken the real body. Additionally, Iktomisaurs and Masters of the Night-Wind characters can Hold their Aim over Radiant Reflections to pause their movement for a short time... |
| Furnace Shell Mountain Weasel - New Entry |
Main article: Furnace Shell Mountain Weasel 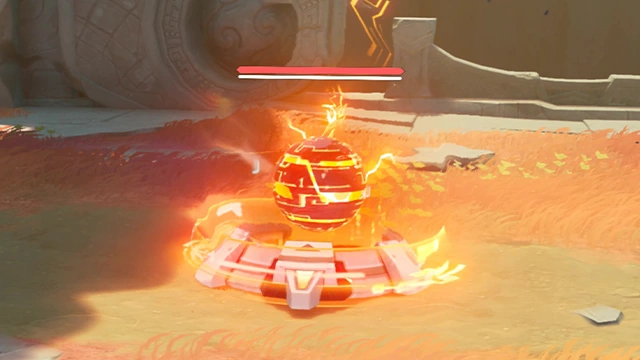 A unique ancient species of mountain beast that has long lived in the Sacred Mountain Ruins and has formed an interdependent relationship with the Source Mechanism. During battle, the Furnace Shell Mountain Weasel will burrow underground and activate its "Secret Source Core" to periodically attack surrounding enemies. At this time, dealing enough damage to the "Secret Source Core" will force it to emerge from underground. However, since it is hiding underground, using a Plunging Attack might prove more effective... |
| Lava Dragon Statue - New Entry |
Main article: Lava Dragon Statue 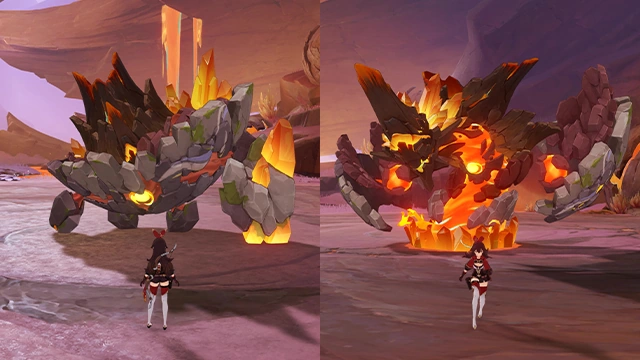 A creature with two forms that is capable of continuously generating heat. When in its "Geohuman" form, you can use Pyro attacks to cause it to enter its "Molten Dragon" form. At this point, if you continue to use Pyro attacks, it will enter an Overburn state... However, if you manage to cool it down, it will revert back to its "Geohuman" form... |
| Thundering Wayob Manifestation - New Entry |
Main article: Thundering Wayob Manifestation 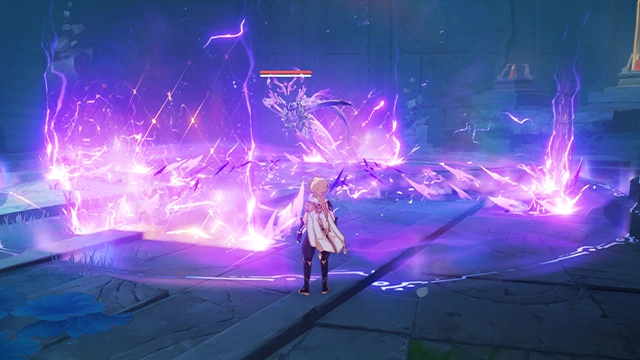 The Wayob worshipped by the various tribes of Natlan manifest themselves in the form of these obsidian totems. In battle, the Wayob Manifestation will deploy its Arena: Moment of Trial, creating a Shield for itself and absorbing the Elemental Energy of all characters in the Arena. Characters in the Arena deal greatly increased DMG. If the Shield is broken before the Arena expires, they will also regain a large amount of Energy. However, if they fail to break the Shield, the Manifestation will generate an Elemental Ward based on the value of the remaining Shield. |
| Secret Source Automaton: Overseer Device - New Entry |
Main article: Secret Source Automaton: Overseer Device 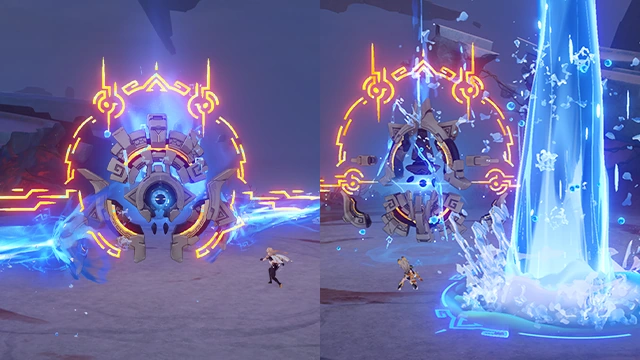 A civilization whose magnificence once marked distant eons built this overseer device to control multiple Secret Source machines. After it enters Sweeper Mode, it will start attacking while generating Flow Momentum. The higher its Flow Momentum, the greater the DMG it will inflict. During this time, you might be able to obstruct the buildup of Flow Momentum by using consecutive Cryo attacks...
It is said that after characters enter and maintain the Nightsoul's Blessing state for some time when fighting against it, the Secret Source Automaton: Overseer Device will enter a special "Counterstrike Mode" and change its offensive strategy... |
| Frostnight Scion - New Entry |
Main article: Frostnight Scion 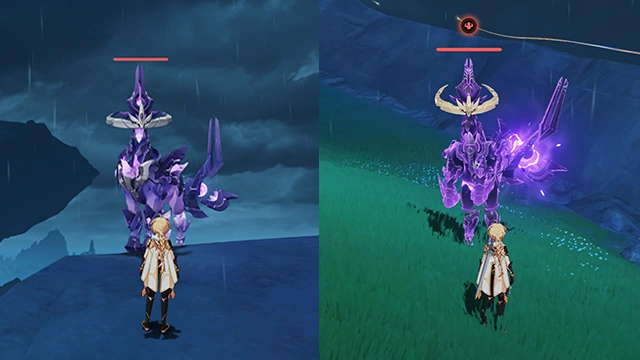 An elemental lifeform that has gained an extremely high elemental affinity over long years of exposure to the moonlight. In battle, Frostnight Scions can convert themselves to enter a Gloomveiled state. While in this state, Frostnight Scions become more powerful. Deal DMG to Frostnight Scions using elemental attacks of the same elemental type as them or by using Lunar Reactions to illuminate them and force them to leave their Gloomveiled state. |
| Wilderness Ghoul... - New Entry |
Main article: Wilderness Ghoul 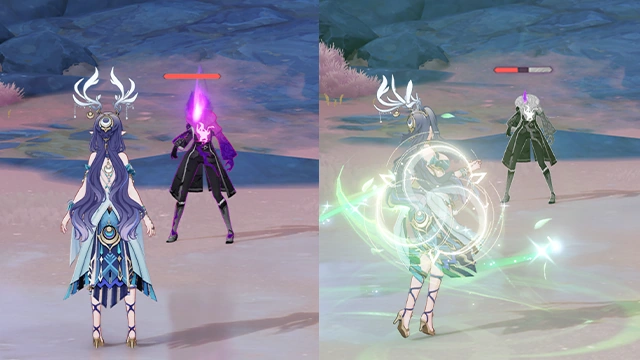 A ghoul corrupted by the taint of the Abyss, doomed to stalk the frozen wilderness for all eternity... Those who march beneath the banner of the Wild Hunt can only be truly defeated by reducing their Max HP to zero. Drain its HP completely or use Skills enhanced by Moonsign: Ascendant Gleam to send it into a brief Grief-Stricken state, during which, you can deal DMG to reduce its Max HP and suppress it completely! |
| Fatui Oprichnik - New Entry |
Main article: Fatui Oprichniki 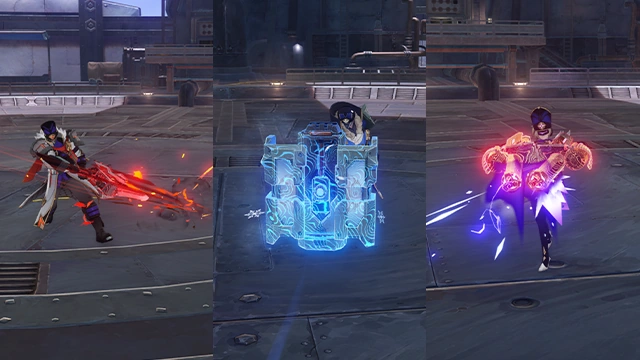 A member of the Fatui's elite Oprichniki forces tasked with maintaining the line of battle. They wield powerful, modified weapons that harness the power of kuuvahki. Because of this, you might be able to effectively target them with kuuvahki-based attacks while they're charging up their weapons to unleash powerful attacks... |
| Landcruiser - New Entry |
Main article: Landcruiser 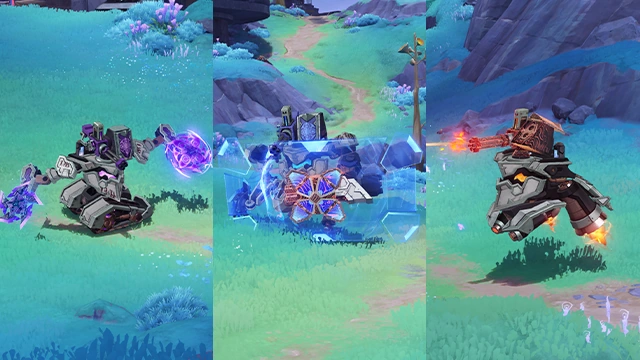 A heavily armed ship that cruises on land and, thanks to certain modifications, can harness the power of kuuvahki to deploy special functions. Attack it a certain number of times with Electro-Charged or Lunar-Charged reactions while it's using kuuvahki to stop it in its tracks. Because of its reliance on kuuvahki, you might be able to make use of the properties of kuuvahki to more effectively attack. |
| Radiant Beast... - New Entry |
Main article: Radiant Beast  A monster that has undergone a unique evolution due to being drenched in the ancient moon's power for long periods of time. Radiant beasts can wield their innate powers to capture their enemies in a Radiant Cocoon... Once captured, both the amount of DMG taken and the strength of healing received will be affected. However, you can escape from a Radiant Cocoon by being healed to your Max HP, granting you the Disentangled effect which boosts your abilities for a short period of time. Use this opportunity to attack... |
| Knuckle Duckle - New Entry |
Main article: Knuckle Duckle  A duck-shaped combat machine built from scrap metal and powered by kuuvahki. It is programmed with a variety of strategies. Once combat progresses to a certain point, it will enter Duckstruction Mode, becoming more aggressive, generating a Ward for itself, and summoning floating Stamping Devices to harass you. When this happens, you must first deal with the Stamping Devices. Deal DMG with Electro-Charged or Lunar-Charged reactions, or destroy them directly, to fry their circuits and cause them to attack Knuckle Duckle's Ward instead... |
| Radiant Moonfly - New Entry |
Main article: Radiant Moonfly 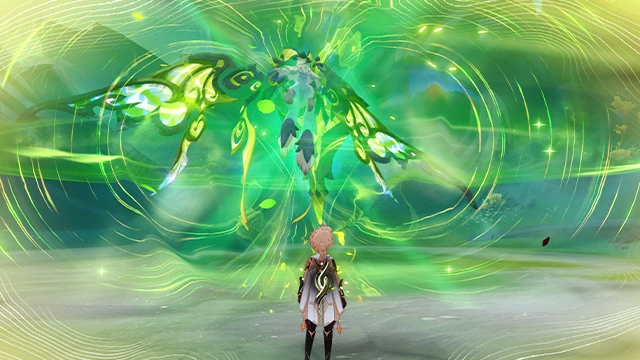 The strongest species of radiant beasts, whose "Radiant Cocoon" display more obvious effects. Quickly heal your HP to its maximum to escape from a Radiant Cocoon. Radiant beasts possess many mysterious characteristics — rumors even circle that they can change their Elemental Type under the right conditions... |
| Frostnight Herra - New Entry |
Main article: Frostnight Herra 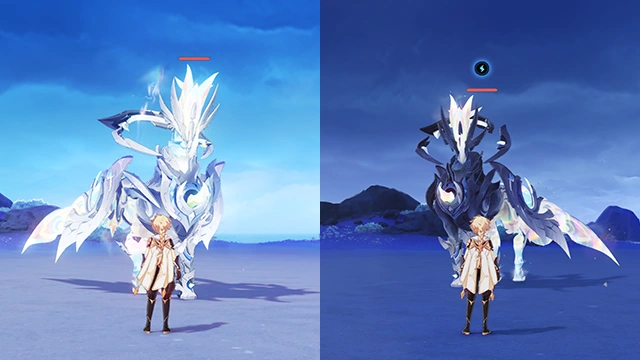 An entity deeply affected by the power of the moon, and one of the most exceptional of all the scions. After it changes its form to enter a Gloomveiled state during combat, deal DMG to it to bathe it in light. This will force it to exit this Gloomveiled state and change its Elemental Type to the element whose DMG it received the most during the time it was Gloomveiled. If this was Lunar Reaction DMG, it will change its Elemental Type to Elementless. |
| Super-Heavy Landrover: Mechanized Fortress - New Entry |
Main article: Super-Heavy Landrover: Mechanized Fortress 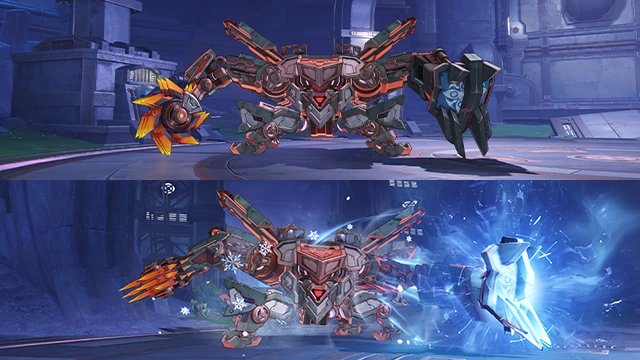 A super-heavy war machine capable of regulating its own temperature. After receiving Pyro attacks, the Mechanized Fortress will continuously accumulate heat and enter an Overheating state. At this point, if it continues to heat up, the Mechanized Fortress will automatically activate a Cryo Ward to cool itself down. Interrupting the cooling process could significantly disrupt its operations... |
| Fisher of Hidden Depths - New Entry |
Main article: Fisher of Hidden Depths  A swarm of monsters that surged through the Rift of Hidden Depths. When several Fishers of Hidden Depths are present on-field, their connections to one another will form Deepdark Shield(s). The shield(s) can only be broken by Elemental Attacks or reaction DMG. Lunar Reaction DMG is especially effective at breaking the shield(s). 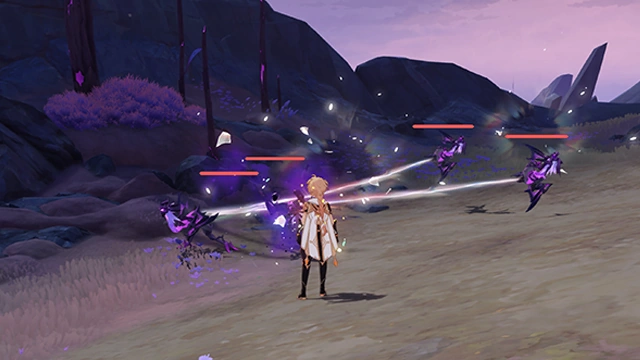 When the Deepdark Shield of one of the Fisher of Hidden Depths is broken, the monsters' shared connection causes all Deepdark Shields within the swarm to shatter. The entire swarm will then be grouped around the Fisher whose shield was broken. |
| Lord of the Hidden Depths: Whisperer of Nightmares - New Entry |
Main article: Lord of the Hidden Depths: Whisperer of Nightmares 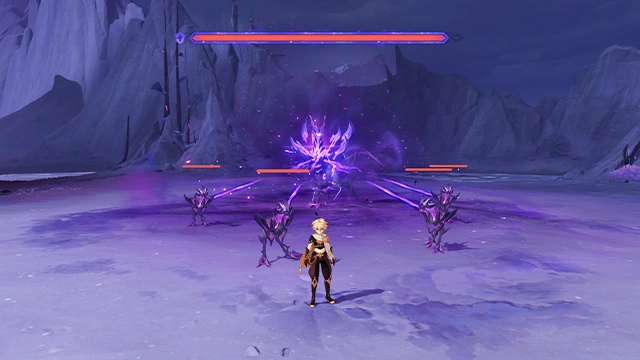 Lord of the swarm of monsters that surged through the Rift of Hidden Depths. Lord of the Hidden Depths: Whisperer of Nightmares will deploy the Deepdark Shield in combat, summoning several Fishers of Hidden Depths. The shield(s) can only be broken by Elemental Attacks or reaction DMG. Lunar Reaction DMG is especially effective at breaking the shield(s). Additionally, defeating a summoned Fisher of Hidden Depths will also deal damage to its shield. |
| Radiant Moongecko - New Entry |
Main article: Radiant Moongecko 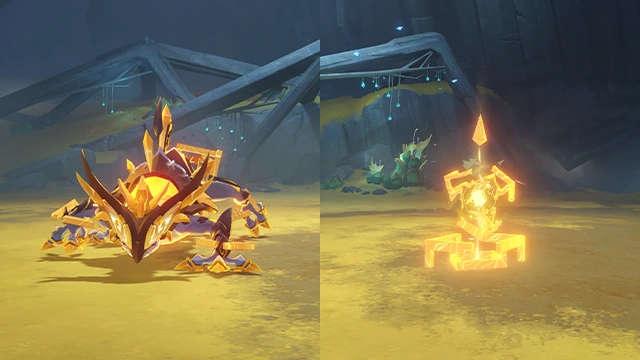 A highly unique species among Radiant creatures, it can trap its enemies in a Radiant Cocoon during combat. Quickly heal your HP to its maximum to escape from a Radiant Cocoon. Doing so will also reduce its Geo RES. When it prepares to unleash Voidstep Reverberation, destroy the Moonstone Anchor it leaves behind to terminate the preparation of this Skill and deal massive DMG to it. |
| Domain Keeper - New Entry |
Main article: Domain Keeper 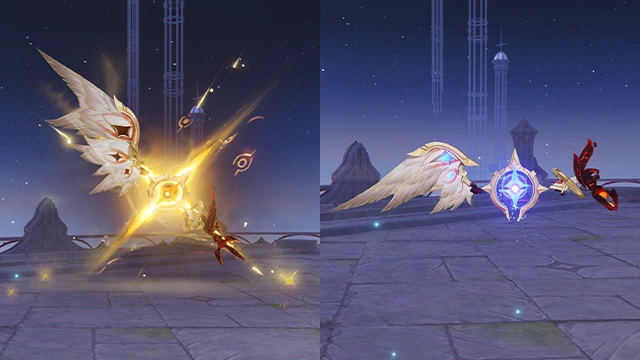 A shadow construct born from the overflow of the mighty primordial being, it can monitor and counter elemental attacks. In combat, the Domain Keeper will enter the Deluded Eye state. While in this state, the Domain Keeper will track the number of Pyro/Hydro/Electro/Cryo DMG instances it takes, respectively. When it has taken 3 instances of DMG from any of these elements, the Domain Keeper will exit this state and transform into the corresponding elemental form, applying that element to itself and gaining a RES increase in the corresponding element. |
| Watcher: Fallen Vigil - New Entry |
Main article: Watcher: Fallen Vigil 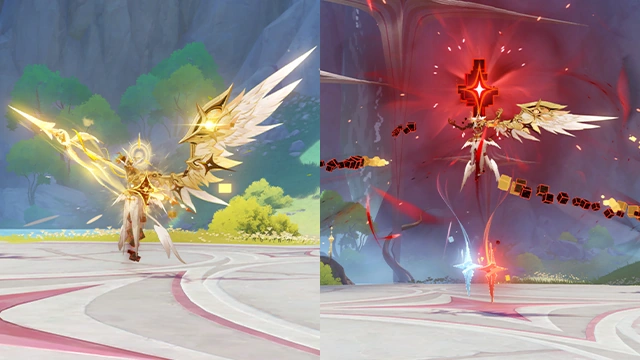 Once a Watcher dwelling in the heavens, it can monitor and counter elemental attacks. In combat, Watcher: Fallen Vigil will enter the Supreme Overseer state. While in this state, Watcher: Fallen Vigil will track the number of Pyro/Hydro/Electro/Cryo DMG instances it takes, respectively. When it has taken 3 instances of DMG from any of these elements, it will exit this state and record this element as a monitored target. If no element is monitored successfully, the record stays empty. For elements that are already being monitored, more instances of that elemental DMG must be dealt before it can be monitored again. After completing 2 instances of elemental monitoring, the Watcher: Fallen Vigil will prepare to unleash Phenomena's Delirium, releasing the previously monitored elements and summoning two corresponding Active Elemental Stars. If the element record is empty, it will instead summon Inert Elemental Stars, which are difficult to destroy. Break all Elemental Stars to interrupt the preparation of Phenomena's Delirium. |
| Precursor's Secret Source Matrix of Overseer Network - New Entry |
Main article: Precursor's Secret Source Matrix of Overseer Network  A Secret Source mechanism that can operate amidst the starry sea, far away from the Ley Lines. In combat, the Precursor's Secret Source Matrix of Overseer Network uses Archaeolune Energy to initiate a Convergence Field and gathers Hydro to enhance its workings. Freeze it at this time and then use Shatter, Melt, and other Elemental Reactions to break up the ice and halt the Convergence Field's operation. |
| Leshy - New Entry |
Main article: Leshy  One of the fae peoples of Snezhnaya. The exceptionally resilient ancient Leshy can root themselves into recovery and enhancement. However, when they are rooted, their hearts will be exposed.Attack the Leshy's heart to disrupt its rooting. Additionally, when the Leshy's rooting is disrupted, any Pyro affecting it will also deal a small amount of damage. When affected by the Stellar Glimmer reaction while it's rooted, the Leshy's heart will become more exposed and easier to attack. |
| Immortal Construct - New Entry |
Main article: Immortal Construct  A nigh-immortal life form created through bio-alchemy. The Immortal Construct burns its life to enter the "Lifeflare" state, in which it gains several HP shields at one time. Any DMG dealt by it while in this state will restore its HP. When the number of HP-restoring shields goes below a certain number or after Lifeflare lasts for a set time, the Immortal Construct will attempt to unleash "Scorching Radiance." To stop it, you must break all of its HP shields. The Immortal Construct will be unable to recover any HP when affected by Stellar Glimmer reactions, no matter what it does... |
| Chimeric Winged Lion - New Entry |
Main article: Chimeric Winged Lion  The Chimeric Winged Lion will oscillate between two enhanced states: "Thundercall" and "Galeforce." When it is in the Thundercall state, it will become weakened when its Elemental Ward is broken. Additionally, any attempts by it to spread its thunder blades can be disrupted by the Stellar Glimmer reaction. When it is in the Galeforce state, it will attempt to absorb any Anemo Orbs that are on the field to charge its attack. At this time, destroying the orbs or using the Stellar Glimmer reaction can stop its charging and weaken it. |